Block Editor introduced 26 Aug 2021
27 Aug 2025 the block editor has matured and been upgraded since we activated it on Glow Blogs. We would advise activating the new editor. If you are very familiar with the classic editor it is quite different so it would be a good idea to try it out.
This is a very different editor from the Classic Editor we have been using in Glow Blogs.
- Classic Editor : Traditional interface with basic formatting options.
- Block Editor: Modular design for flexible content creation.
In the Block Editor, content is arranged in blocks. Each paragraph, image, or video is presented as a distinct “block” of content.
Each block comes with its own controls for changing colour, alignment and other features.
We have more information on the Blocks Editor site.
There is more information on WordPress.org: WordPress Editor. Remember Glow Blogs may be running a slightly older version of WordPress.
Choosing the Block Editor
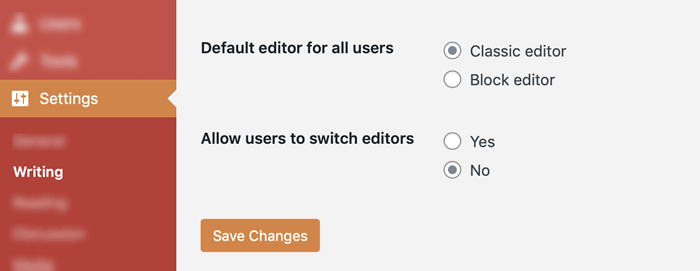
Currently the default editor in Glow Blogs is still the Classic Editor. Site Admins can change this. They can set the default editor to either Classic or Block editor and allow other users of the blog to change editor or not.
They do this by visiting Settings-> Writing in the dashboard:

You can also set the editor when creating a New Site, there is now an option to choose between editors on the New Site page. This also chooses the them for the site. Both editor and them can be changed at any time.
Creating a post or page with Block Editor
Glow Blog e-portfolios profiles do not display the Tiled Galleries from the Block editor. We advise either sticking with the classic editor or using the Classic Block to add Tiled Galleries in e-Portfolios. See the Block Blog for more details. There a few other issues listed on that page too.
Three ways to add a block
There are 3 main ways to add a block
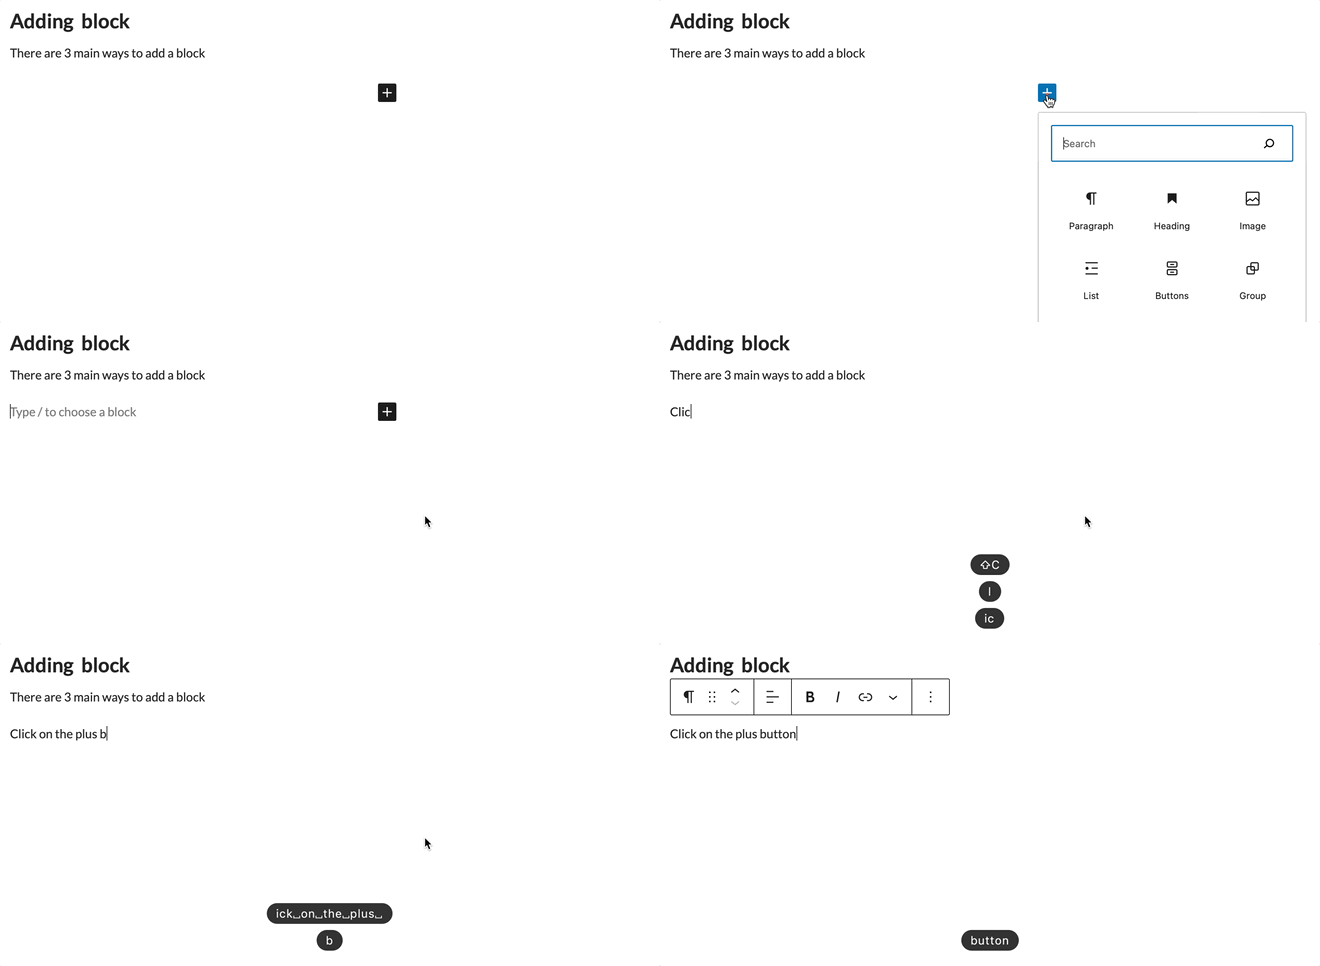
The Plus Button

- Click on the area where you want to add a block.
- You’ll see a small plus (+) button appear.
- Click on the plus button, and a menu with various block options will appear.
- Select the type of block you want to add from the menu.
This method is very straightforward and is probably the most common way to add a block.
You can also see a plus button appear between blocks when you move the mouse over that area.
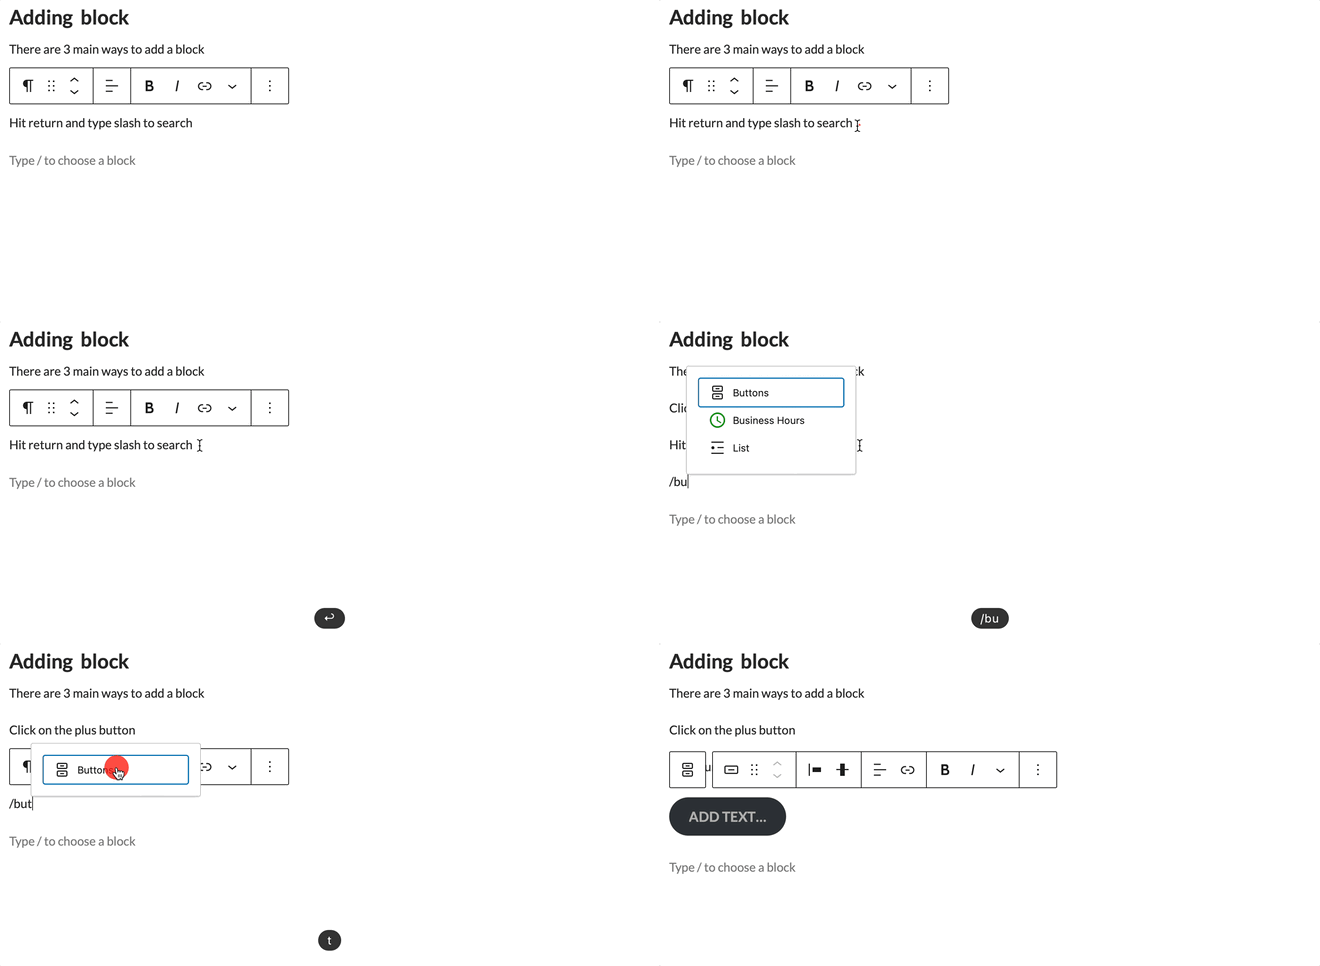
The Slash command

- Click on the area where you want to add a block.
- Start typing a forward slash (/) on your keyboard.
- This will bring up a search bar and a list of available blocks.
- As you type, the list will filter based on what you’re typing. Select the block you want from the list.
The slash command is handy for users who prefer keyboard shortcuts and don’t want to use the mouse as much.
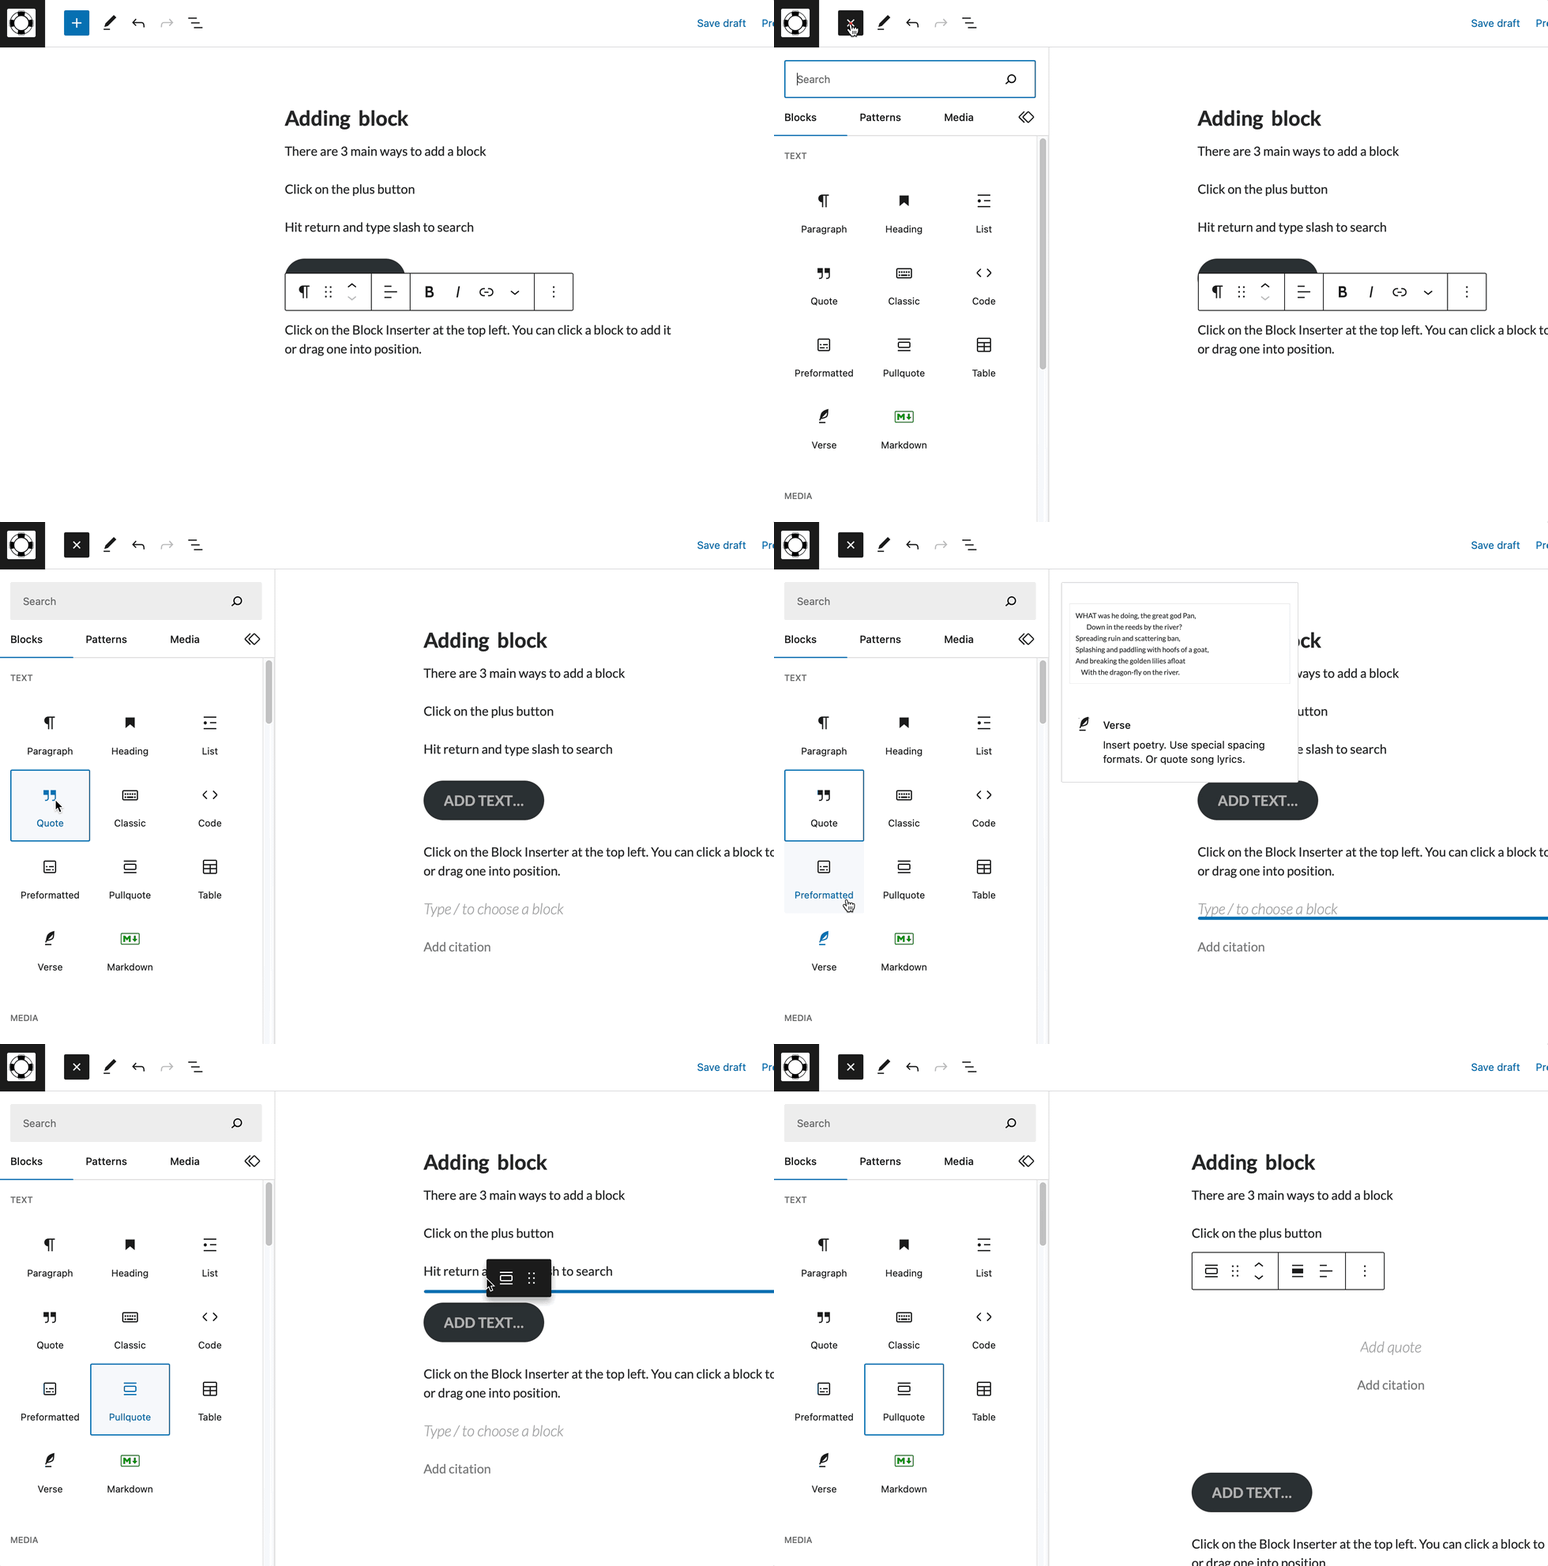
The Block Inserter

- When you hover over an existing block, you’ll see a toolbar that appears above it.
- At the top-left corner of the main toolbar, you’ll find a small plus (+) icon.
- Clicking on this plus icon will add a new block directly below the block you’re hovering over.
- You can also drag a block onto the post or page to place it between other blocks.

