Classic Editor
Video: Galleries and Featured Images on Blogging Bootcamp
Image Galleries allow you to display a grid of photo thumbnails that link to fullsized versions. If used with the lightbox plugin the larger images will be displayed without leaving the webpage and can be browsed through easily with mouse or arrow keys.
Galleries Examples show some of the different classic gallery possibilities.
Create a post
You start by creating a post in the usual way.
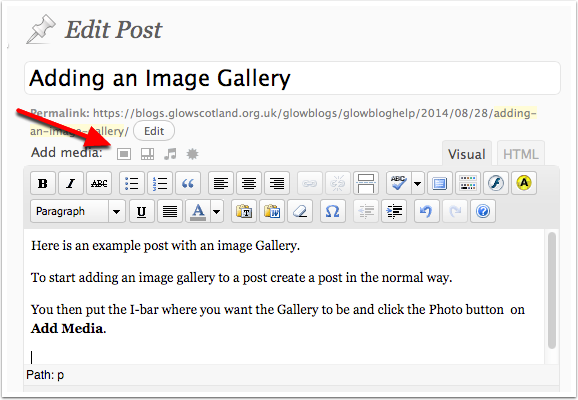
Put the cursor where you want the gallery to appear and click the Add Media button. This will open the Insert Media Screen.
Select Files
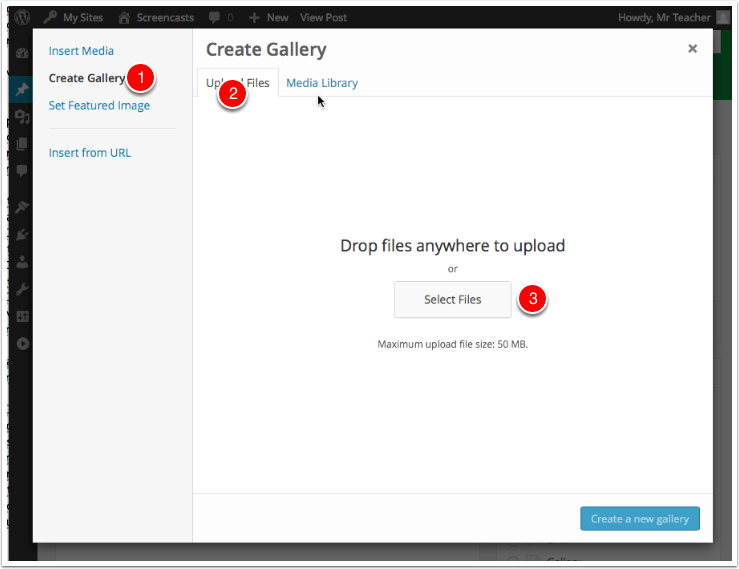
Switch to Create Gallery [1] and Upload Files [2] then click Select Files [3]. Or you can drag and drop files to upload.
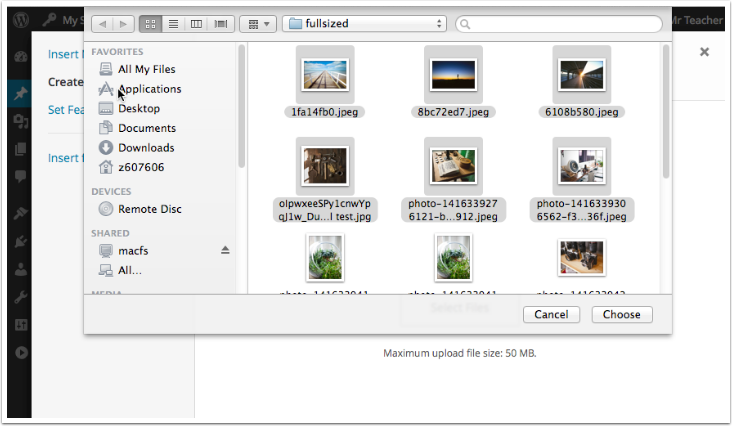
Select files in the standard file browser
Clicking Select Files in the file browser will open the system file dialog. You can choose multiple images to upload. (Click once on the first image then shift click on another to select all the ones in between too).
After selecting files click Choose or Open (browser dependent).
Create a New Gallery
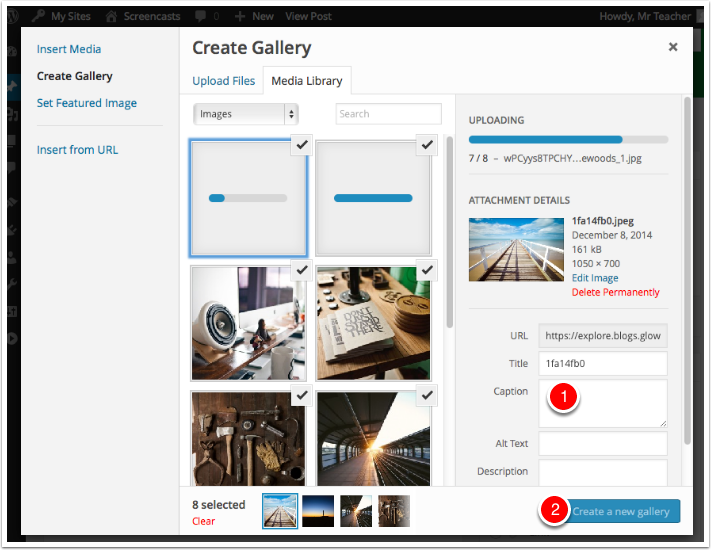
You will see progress bars on image thumbnails as they upload.
Once they have finished you could add captions [1] to the text, or remove images for the set. Then Click Create a new gallery [2] to make the gallery.
Edit Gallery
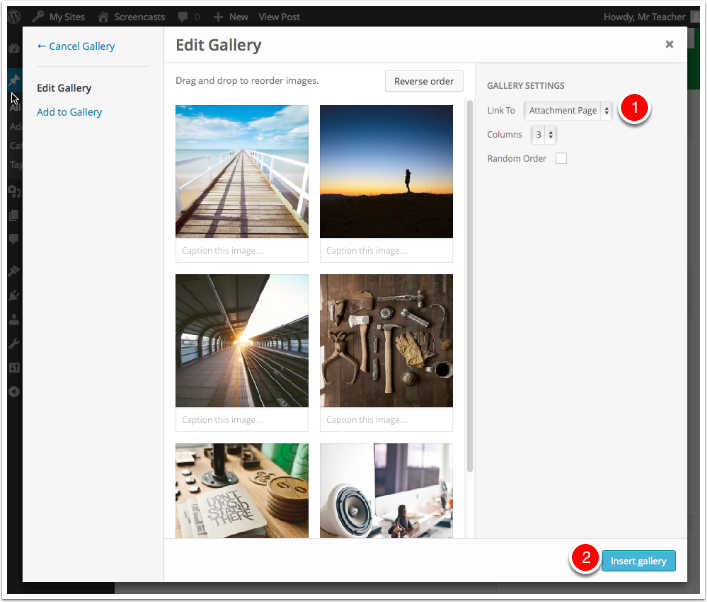
Once you have created the gallery you can adjust the settings before inserting it in your post.
When you are happy with the settings click Insert gallery [2]
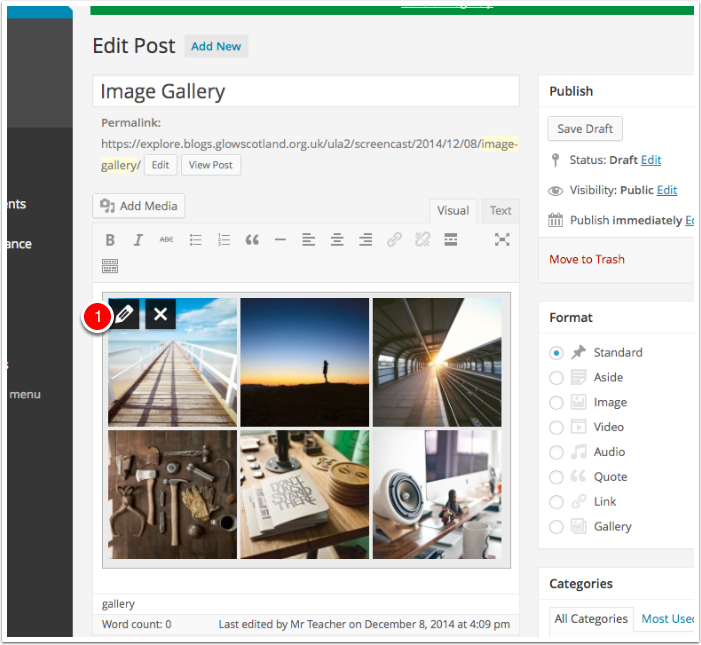
Gallery is inserted into a post.
If you select the gallery with the mouse you will see a pencil icon [1] and an x. Clicking the pencil icon will open the Gallery editor again, allowing you to change the settings and add images.
The post can be finished and published in the usual way.


I found this post very helpful, it just took me a wee while to find how to create a gallery in black sidebar theme (it might be 2014?), I found the gallery option on the format menu on the right.