
Block – Classic Editors more information
At the moment, January 2023, the Classic editor is turned on by default. You can set the blog to use the block editor instead or set it up to have one or other as the default with the choice to switch. More details on the blocks page.
In the future WordPress will be transitioning to the Blocks Editor, we hope to transition to defaulting to the Blocks editor but suport the classic editor while we can.
Brief instructions to using the classic editor and the blocks editor follow.
We have some general Image Tips on using images on your blog.
Images and other media take up space on your site,. You might want to know: How much space do I have on my Blog.
Blocks Editor
Images are easily added to a post or page by adding the Image Block.
Below is a video, no sound, that shows inserting an image, changing it’s type to a Cover block and back.
Clicking on the verticle elipses on the toolbar or the settings cog on the top toolbar will open more settings.
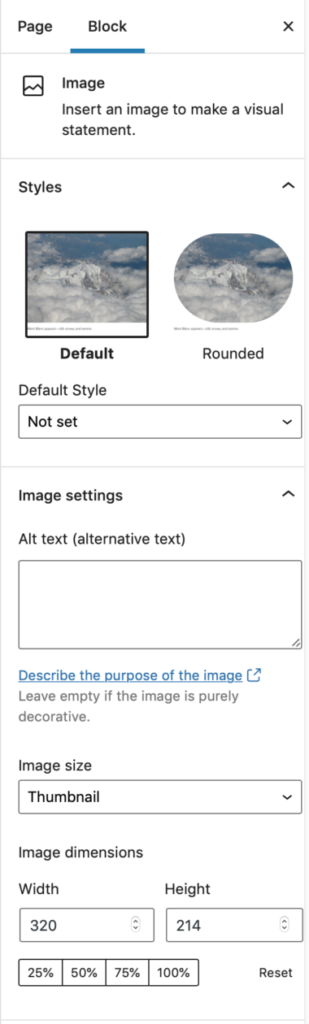
This is where you can set a style for the image, add alt text and control the image size.
(This block is the media and text block)
Image blocks can also be converted to Media & Text Blocks or groupd. Here is a tip for adding a colour background to an image by converting to a group: Tip – Group to add background – Blocks Blog.

Why is my image clipped?
When I upload the file the full image is shown. When it appears on the blog page it is clipped.
Hi,
There are a couple of possibilities. If you are posting the image as a Featured Image themes sometime crop the image to fit their layout. If you are posting in the body of a post, it may be you have set Thumbnail in the choices which will crop the photo square. Hard to say if it is either of these things without seeing the image on your site. I’ll drop you an email to get more details.