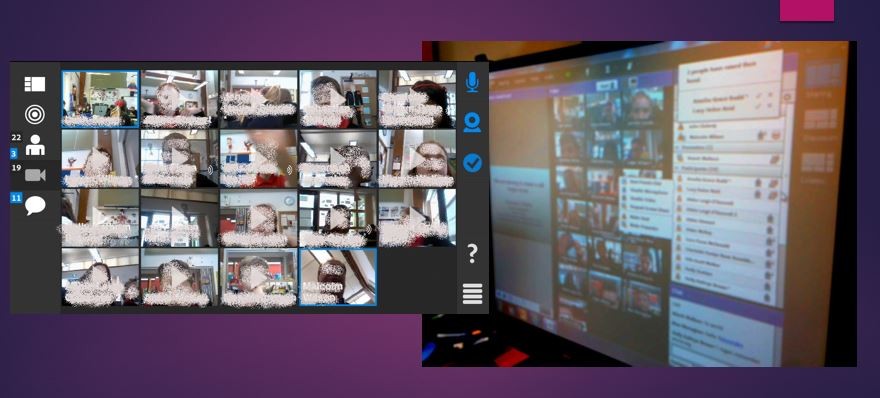
 Malcolm Wilson, ICT Curriculum Development Officer in the Curriculum Support team of the Service and School Improvement division of Falkirk Council Education Services has been providing support to schools on making use of the video-conferencing tool Adobe Connect to connect classrooms. Adobe Connect is one of the suite of tools included to Glow users, referred to as Glow Meet within Glow.
How to set up a Glow Meet video-conferencing session using Adobe Connect through Glow:
 1. You will require to have a Glow username and password to access this tool. Log into Glow at https://glow.rmunify.com. Scroll through the tiles on RM Unify until you find the tile called Glow Meet (for Hosts). Click on the tile called Glow meet (for Hosts). Note that you may see prompts to update software on your PC if updates or add-ins are required – accept these prompts.
 2. You will require to have been granted host rights to be able to create a new meeting. Click here for details of how to request this if, having clicked on the Glow meet for Hosts tile, you do not see “Create New Meeting” button at the top left of the Glow broadcasting window which opens. Click on “Create New Meeting” button if you are setting up a meeting. If you are accessing a previously set up meeting then you click on the “open” button beside the name of the meeting previously created).
 3. Enter a name for the video-conferencing session beside the title “Name*” e.g. Falkirk PS Glow Meet. Enter a short version of this in the box marked “Custom URL” – this will be the web link you share with others. This will require to be unique so be aware the system may prompt you with an alternative URL. Leave all other settings as they appear without adding or making changes. Click the “Next>” button at the foot of the page.
 4. This will display the “Select Participants” screen. At the bottom left click on the “Search” button. In the search box which will then appear above the Search button enter the Glow username of others to whom you wish to assign access to this meeting. Since you can also grant access during a meeting to people who have the link this can be left to be only for those with whom you may share administration of the video-conferencing session, or presenter during the session. You can find usernames of others by going back to the RM Unify tiles webpage and finding them by searching on via the RM People Directory tile. When the sought username appears on the “Select Participants” page then click on the “Add” button at the foot of the page. Your new user will now appear on the right-hand panel “Current Participants” for the meeting you are creating. You can assign the appropriate role level of permissions to each user by clicking on the username on the right-hand panel, then clicking on the “Permissions” button. Once complete then click the “Next” button.
5. On the “Meeting Information” page which then appears, highlight the URL which is displayed (such as the example https://meet.glowscotland.org.uk/falkglowmeet/), right-click and copy your meeting URL. This will mean you will require to share the link to the Glow Meet with other users by sending it via email or adding it to a page others will be able to access.
Using Glow Meet Adobe Connect
1. Click on the link to the Glow Meet which you previously created (or which you shared by email with others, or shared on an online space elsewhere which others can access). First time you may need to allow any plugin as required or updates to software.
2. If you are the host of the meeting you will be able to accept the prompts which will pop up as guests to the meeting request access. You can assign different roles to participants by clicking on their name and choosing to enable their webcam, or microphone, or to increase their rights to be presenter (or joint host). You can change these rights again in the same way.
3. To broadcast your webcam click on “Start my webcam” and “Start sharing”
4. To be heard by others you will need to ensure you have clicked on the microphone icon along the top of the screen (you can mute it by clicking on the same icon – this will then show a diagonal line across the microphone icon. Note that other users will not automatically have this option unless you have enabled their microphone, or they are presenter or host.
5. To check audio settings (always worthwhile doing this in advance of a meeting) then click on “Meeting” on the top-left menu and then “Audio Setup wizard” and follow through the steps.
6. Click on the video camera icon to broadcast video (or leave off if you are simply watching a presenter).
7. Click on the microphone icon to control whether audio is broadcast or muted. Note that participants will not automatically have the option to switch on their microphone. All participants will be able to send text messages using the “Chat” window.
8. At the end of a meeting, to finish the meeting, and to disable future access to participants without a host opening the meeting, then click on Meeting – End Meeting
To Record a Glow meet in Adobe Connect
1. To record a Glow Meet in Adobe Connect click on “Meeting” – “Record Meeting”
2. This will display a message to all participants that the meeting is being recorded, and a red circle at the top-right of the screen, until the recording is stopped.
To View a recorded Meeting
1. Go to the Glow Meet (for Hosts) tile on the RM Unify tiled screen.
2. Click on “Meetings along the top of the screen. Note that only hosts will be able to view this.
3. Click on the link to the Meeting you created
4. Click on “Recordings” along the top of the screen
5. Click on the link to the recording of your meeting. The page which is then displayed will show a “URL for Viewing” – this will be the link you should copy and share with others, wither by email or by adding to an online space accessible by others to whom you wish to share the link.
Tips
1. Don’t try to share video which is hosted elsewhere by sharing your desktop – instead share the link to that video in the chat box so that others can watch it straight from the link.
2. Try out your PC setup before a proper arranged video-conference session by ensuring your webcam has been plugged into the PC beforehand, that it is recognised as the webcam and the microphone. Check your speakers all work – going through the “Meeting” – “Audio Setup wizard” is essential for all taking part, in advance of the pre-arranged meeting.
Further information from Education Scotland to support the use of Glow Meet Adobe Connect can be found here: https://glowhelp.wikis.glowscotland.org.uk/Glow+Broadcasting
More than just video
 Adobe Connect is more than just conferencing by video – you can share uploaded files (such as a Powerpoint presentation, which a presenter can then guide viewers through); there’s a chat facility to get text message feedback throughout a presentation (and that includes the facility for messaging between individuals or to the whole group); there’s a polling tool to seek responses on specific questions (and this can include multiple choice, many choice responses and free text responses); there’s a facility for quick yes/no responses; and hosts of meetings can vary rights of participants as they enter the room or at any time in the meeting so that microphone and/or webcam can be enabled; there’s a “raise hand” tool to give the opportunity for participants to attract the attention of a presenter (it presents a pop-up box to the presenter); there’s a whiteboard tool to draw or share ideas in visual form; and there’s the option to share the desktop of a presenter to demonstrate something such as how a piece of software on the host PC works.
Available on Mobile Devices
There’s mobile device apps available to provide the facility for participants using mobile devices to access Adobe Connect meetings – this may open automatically when clicking on the shared meeting room web address (URL) or simply by copying that web address and pasting in the URL box within the app.
 Malcolm Wilson, ICT Curriculum Development Officer within the Curriculum Support team of Service and School Improvement, Falkirk Council Education Services, has been supporting many central staff and staff within educational establishments across Falkirk Council to set up shared online spaces for making available resources to colleagues working in Falkirk Council, and to provide them with tools to collaborate.


