Here you’ll find everything you need to revisit information from our @FalkirkLiteracy and DigiLearnFalk session ‘How Digital Tools Can Help With Writing’. Read more

Pages: your digital publishing house. Create everything from simple essays to interactive e-books.
Pages is a flexible app that works in two ways: as a traditional word processor (like Word) and as a page layout tool (like Publisher). It allows pupils to combine text, photos, videos, and even audio recordings into a single document. Because it can export as an EPUB, it is the primary tool for pupils to become published authors of their own digital books.
Interactive Media: Unlike a printed sheet, a Pages document can “talk.” Pupils can record their own voice explaining a concept and embed that audio button directly next to their writing.
Smart Templates: Pages includes beautiful, education-specific templates for posters, research journals, and books, giving pupils a professional starting point.
Accessibility: It features a “Reading Mode” that hides all the editing tools, allowing pupils to focus entirely on the content without distractions.
Launch: Open the Pages app (Orange icon with a white pen).
Choose a Mode: When you start a new document, you can choose to ‘Start Writing’ to enter a simple word processing layout (for essays) or you can ‘Choose a Template’ to make posters and books.
Add Content: Tap the icons at the top to add Photos, Videos, Web Links, or Audio Recordings.
Format with the Brush: To change fonts, colors, or how text wraps around an image, tap the object with your finger and then tap the Format (Paintbrush) icon.
Publishing: Tap the ‘Share’ button and select ‘Export’ to save your work as a PDF or an EPUB (e-book) that can be read in the Books app built into iPad.
Talking Books: Pupils can write a story and then use the ‘Record Audio’ feature to add sound effects or read their story aloud. This is a fantastic way for pupils to practice fluency and expression.
Digital Field Journals: Take the iPad outside. Pupils can snap photos of plants or insects and drop them straight into a Pages journal, adding text boxes with their fingers to label what they see.
Vocabulary Posters: Pupils can create a poster with images of common objects. They can then embed audio clips of them saying the word in another language, creating a “soundboard” for their peers.
Interactive Newsletters: Use a newsletter template to report on a historical event. Pupils can embed a YouTube link or a video of a mock “interview” with a historical figure to bring the report to life.
Image Descriptions: Teachers can show pupils how to add “Alt Text” to images within Pages. This ensures that if a visually impaired student uses a screen reader, the iPad will describe the image to them.


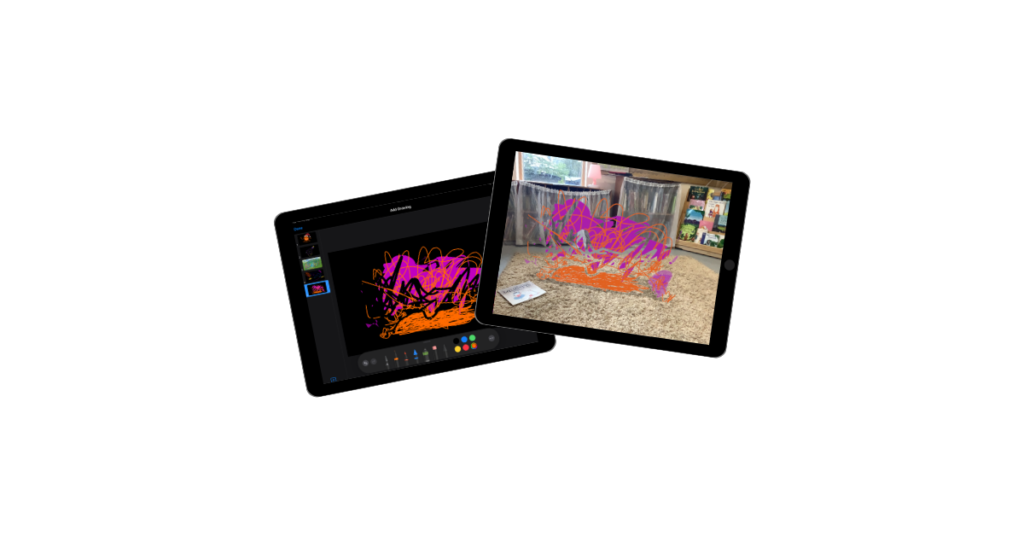
This guide shows you how to bring learner’s digital drawings into the playroom or classroom using augmented reality technology. Boost your learner’s creativity, storytelling and digital skills with this activity that is just magic!
AR Makr, the creative toolbox for Augmented Reality. Bring your drawings and photos to life in the real world.
AR Makr is an app that lets learners create virtual objects and place them into the world around them using the iPad camera. Pupils can “scan” a 2D drawing they have made on paper or in another app and transform it into a 3D virtual object that they can walk around, resize, and even animate within their own classroom.
From 2D to 3D: It helps pupils understand spatial awareness by taking flat images and placing them in a 3D environment.
Storytelling in the Real World: Pupils can build “AR Scenes” for example placing characters from a story onto their school playing field to film a digital retelling of a story.
Interactive Models: It allows for the creation of virtual museums or science models (like the solar system) that pupils can interact with without needing physical materials.
Built-in Recording: The app has a simple “Record” button, allowing pupils to film their AR creations and narrate their learning as they move around their virtual objects.
Launch: Open the AR Makr app and tap ‘Start’.
Surface Scan: Move the iPad slowly to let the camera “find” a flat surface (like a desk or the floor). You will see a grid appear when it’s ready.
Create an Object: Tap ‘New’ to either draw something directly with your finger, or tap the folder icon to import a photo or a drawing from your Photos library.
Place: Once your object is ready, aim the circle at the grid on your desk and tap ‘Place’. You can now use your fingers to pinch and zoom to resize it.
Record: Tap the camera icon on the side to take a photo of your scene, or hold the record button to capture a video of your virtual world in action.
Retelling Fairy Tales: Pupils can draw the “Three Little Pigs” on paper. They use the camera to “scan” the pigs and their houses into AR Makr, then place them on the classroom floor to film a puppet show where they provide the voices.
Shape & Measure: Use the built-in 3D shapes in AR Makr to build a virtual tower. Pupils can use their fingers to stack cubes and spheres, discussing the properties of the shapes as they build.
The Solar System: Pupils can create or import images of the planets. They can place the “Sun” in the centre of the classroom and position the planets at relative distances, walking between them to understand the scale of space.
Virtual Timelines: Create a “Walking Timeline.” Place images of historical events in a line across the hall. As the pupil walks along the line, they film themselves explaining each event in chronological order.
Digital Galleries: Pupils can take photos of their physical paintings or drawings and “hang” them on the virtual walls of the classroom, creating a digital art gallery that parents or peers can walk through using the iPad.
Create your own Augmented Reality Snowstorm in AR Makr | iPad

Some people find finding their downloads tricky. This is a quick guide on how to download to your iPad.


A free Pages workbook download from Connected Falkirk and DigiLearnFalk, designed to help pupils explore their iPad and some of the core apps including Pages, Notes, Maps and GarageBand.
Go directly to the OneDrive download. Once you have it downloaded to your iPad open it with Pages (you may have to tap Edit in the top right hand corner). You can then share it with students via Airdrop or uploading the file to your Virtual Learning Environment.