Category Archives: Science

Well Done on Your Work! – Science

Hello!

Boys and Girls, to finish our term and year I am going to show you some of the work you did during this time at home. Don’t worry if you don’t see your work here, this are the ones I received via email. Going through all of them again made me smile, hope it makes you smile too!

Well done on your big effort and thank you for sharing them with us.

Let’s see!


Ir a este Sway


Have wonderful summer holidays!

Virtual Trip Part 2 – Aberdeenshire and Aberdeen #PeterheadPrison #MacDuffAquarium #DayatPittodrie

Hey Everyone!

I hope you have enjoyed the first two days of our Virtual Trip around Aberdeenshire and Aberdeen please find below the original sway with NEW DAYs added.

As always let us know how you get on!

Puffins in Scotland – Amazing Fauna

Hello Boys and Girls!

Today we are going to learn about a breed of birds that gather every spring and summer in the coasts of Scotland, Puffins. They nest in cliffs at scattered locations around the coast of Scotland, northern England, south-west England and Wales. They are a very special type of birds that live in the sea most of their lives and only go to land for breeding. Here in Scotland are several viewpoints to see them, one of them is at the RSPB Scotland Fowlsheugh Nature Reserve. Last year I decided to go and see them, it was an amazing experience! It took me a while to spot them because they  were not the only birds there and they are very small.

Let’s learn more about them.

Puffins’ Features

Read the questions below and look at the Puffin picture.

  1. What colour are its feathers?
  2. What colour are its wings?
  3. What colour and shape are its claws?
  4. What colours are its beak?
  5. What colour are its eyes?

Information about Puffins

Click on the Sway below to get to know Puffins more.

Go to this Sway

Making a Puffin

Now that you know more about Puffins, that you have seen photos and videos of them, let’s make one.

Materials

You will use any materials you have at home like colour pencils, colour paints, markers or anything you can find. Here are two options of what you can do:

  1. You learnt about some artists during our Art fortnight, you can choose a style and make a Puffin.
  2. By using cardboard from shoe boxes or cereals you can make a real life size Puffin. If you researched the information you will know they are from 26 to 29 cm.

Steps

  1. Choose one of the options from above.
  2. Find the materials you need.
  3. Design your own Puffin.
  4. Send a photo of your work to your teachers and add what you learnt to your learning journal.

How to draw a Puffin step by step

If you feel unsure of how to draw a Puffin, then this might help.

Enjoy!

Camouflage – Science

Good Morning Boys and Girls!

I have been looking at all your artwork from last week and this week and it looks fantastic! After seen so many activities related to nature, it made me think of something super fun that you could try at home. It is going to be a big challenge because you will need to be very careful and detailed. Also, it is going to be such a fun challenge, I am already smiling thinking of all the great ideas you might have.

Let’s Begin!


What do you think these 3 animals have in common?

Leaf Tailed Gecko

Mountain Hare

Cameleon


Well done! All of them use their skin to protect themselves from predators, this is called Camouflage. The Mountain Hare changes its fur to white for winter season and brown for the other seasons.

Now, quick challenge, click below and see how fast you can spot the camouflaged animals.

BBC – Earth: How quickly can you spot these camouflaged animals?

Camouflage

Many animals try to hide or blend in with the background to protect themselves from predators, even big animals do it. Even though, some animals can not change the colour of their skin they use other strategies  and high skills to hide. Click on the following video to learn more.

BBC Bitesize – Camouflage

Your Challenge

Click on the sway to see your challenge.

Go to this Sway


Have fun!

Miss Maturana

Rainbow Experiment – Art Week – Science

Hello Everyone,

What a weekend we had last week! Such a lovely sun out just for us. Since it has been so beautiful and it is art week we will try a simple experiment, you might have tried it  before. If not, this is  a great opportunity to explore and have some fun.

So, we will be doing a magical rainbow. There are a few materials you can use so feel free to try things you might find at home.

Let’s start with the materials.

Materials

  • Paper Towel
  • Washable markers
  • Water
  • 2 Small Glasses


Step 1

Fold a piece of paper towel (like if it was a book). Cut the paper to be 7.5 inches or 19 cm (any longer and the rainbow may not connect fully).

Step 2

Draw rectangles of the rainbow colours on each end. Make sure you colour them really well and that they have lots of ink so it can travel easily later on.


Step 3

Place 2 cups with water filled 3/4 full. You only want the bottom of the paper towel in so, leave some space from the top of the cup.

Then place the edges in each cup, wait patiently and you will see what happens.

Step 4

Observe and wait patiently and you will see this happening. Leave it for 10 to 15 mnts.

What do you think it is going to happen at the end?

Comments your thoughts and ideas. Send a photo to your teachers of your rainbow.  🙂

Happy Art Week!

Breathe In, Breathe Out – Science Activity

Boys and Girls,

It has been health week in our blog for the last 2 weeks and what amazing activities we’ve had to explore different ways to keep healthy. Have you thought what our body does while you are doing all the challenges from the grid? Well, there is an important organ that keeps your body receiving oxygen so you can keep moving around.

 Can you guess which organ I am talking about? Well done, the lungs.

Every time you do a physical activity your muscles and organs need oxygen so they can keep moving. When you breathe in, air flows through the blood going all around your body and then when you breathe out, you release it as carbon dioxide (something our body does not need). Do you know what organ pumps the blood all around our body? The heart. So every time you are running fast you will breathe fast and you will feel your heart pumping fast too, that is because they both need to keep up at the same level so you can do any activity you want.

Click the green link if you want to know more about this process, there are some activities you can do too: BBC Bitesize: How do humans breathe?


Do you want to see how lungs work inside us when we breathe? Let’s make our lungs then!


Materials

  1. 2 straws
  2. Scissors
  3. 2 plastic bags
  4. Sellotape
  5. Drawings of the lungs, mouth and nose.


Step 1

Tape the straws at the top and at the bottom as shown in the photo.

Step 2

Glue or double stick tape your nose and lips to the straws.

Step 3

Tape your bag to each lung, tightly so no air escapes.

Step 4

Tape your lung printable to the back of the straws. Like on the photo, now your lungs are ready!

Activities

Explore how your just made lungs work, you have to be very gentle. After you have tried them, can you explain:

  1. What happens when you breathe in (put your hand on your chest) and now try with the lungs you made.
  2. What happens when you breathe out (put your hand on your chest) and now try with the lungs you made.
  3. How do you know your body needs more air?
  4. Describe what happens to your breathing and your  lungs when doing different exercises from the grid.
  5. Comment your thoughts, write them on your learning journal or add them to your sway.

Ms Maturana

My Safe Place – Health Week- Science Stem Activity

Good Morning Everyone,

This week is Health week, you have been doing different nice activities and I thought we could link some of them with our activity for today. As you can read from the title and see in the photo you will build a safe place inside your house, a place where you can go when you feel sad, mad, scared or happy.

You can use this place to do things that will help to take those feelings that are sometimes not very nice and transform them into happiness. Some things you can do here can be: read your book for the Book Club, have a healthy snack, sing songs, listen to good music, tell a story, play with your toys, use the paper phones you made last week and all others you might be thinking just now.

I am going to be using 6 designs that IKEA posted as part of a quarantine campaign encouraging people to stay home. All of them have different materials that you will have at home from blankets to books, if you don’t you can always replace them for something else.  Instructions are simple, consisting only of images. Choose 1 and with your family build your perfect safe place.

Make sure you have an adult supervision and the structure is safe to be inside.

Let’s see!


Design 1: You’ll just need a table, 2 sheets, a few books, and laundry pins.


Design 2: You will need a clothes rack, sheets, LED lighting chain (battery), books, pins and a hanging drier.


Design 3: You will need your sofa, a sheet, LED lighting chain (battery), books,  and cushions.


Design 4: You will need a hanger,  sheets, LED lighting chain (battery), books, clips and cushions.


Design 5: You will need your sofa,  sheets, a blanket, pins and cushions.


Design 6: You will need a hanger,  4 chairs, sheets, a blanket/rug, LED lighting chain (battery), pins and cushions.


Don’t forget to post your comments and send a photo of your tents!

Ms. Maturana

Ring Ring! – Science Stem Activity


Hello Methlick Primary

Our challenge for today is related to this picture and the title of the activity, can you guess what it might be?

.

.

.

Good try! We might be spending more time on phones or computers these days so let’s find a fun way to communicate. We will be making a paper cup phone that you can use with anyone at home 🙂 Do you think this will be even possible? If you have tried before and already know the answer, make sure you don’t give it away! Let’s begin.

P.S: This is one of my favourite experiments when I was young, I did it with my brother and we couldn’t stop laughing, we had lots of fun. Hope you do too!

With this activity you will be developing your Scientific skills, such as critical thinking, planning, problem-solving,  persevering, following steps.

Questions:

  1. What do you think is going to happen? 
  2. How do you think our voices travel from one cup to the other?
  3. Do you think you will hear better if the string is tight or lose? Why?
  4. Do you think using different strings will make a difference in how you hear things?
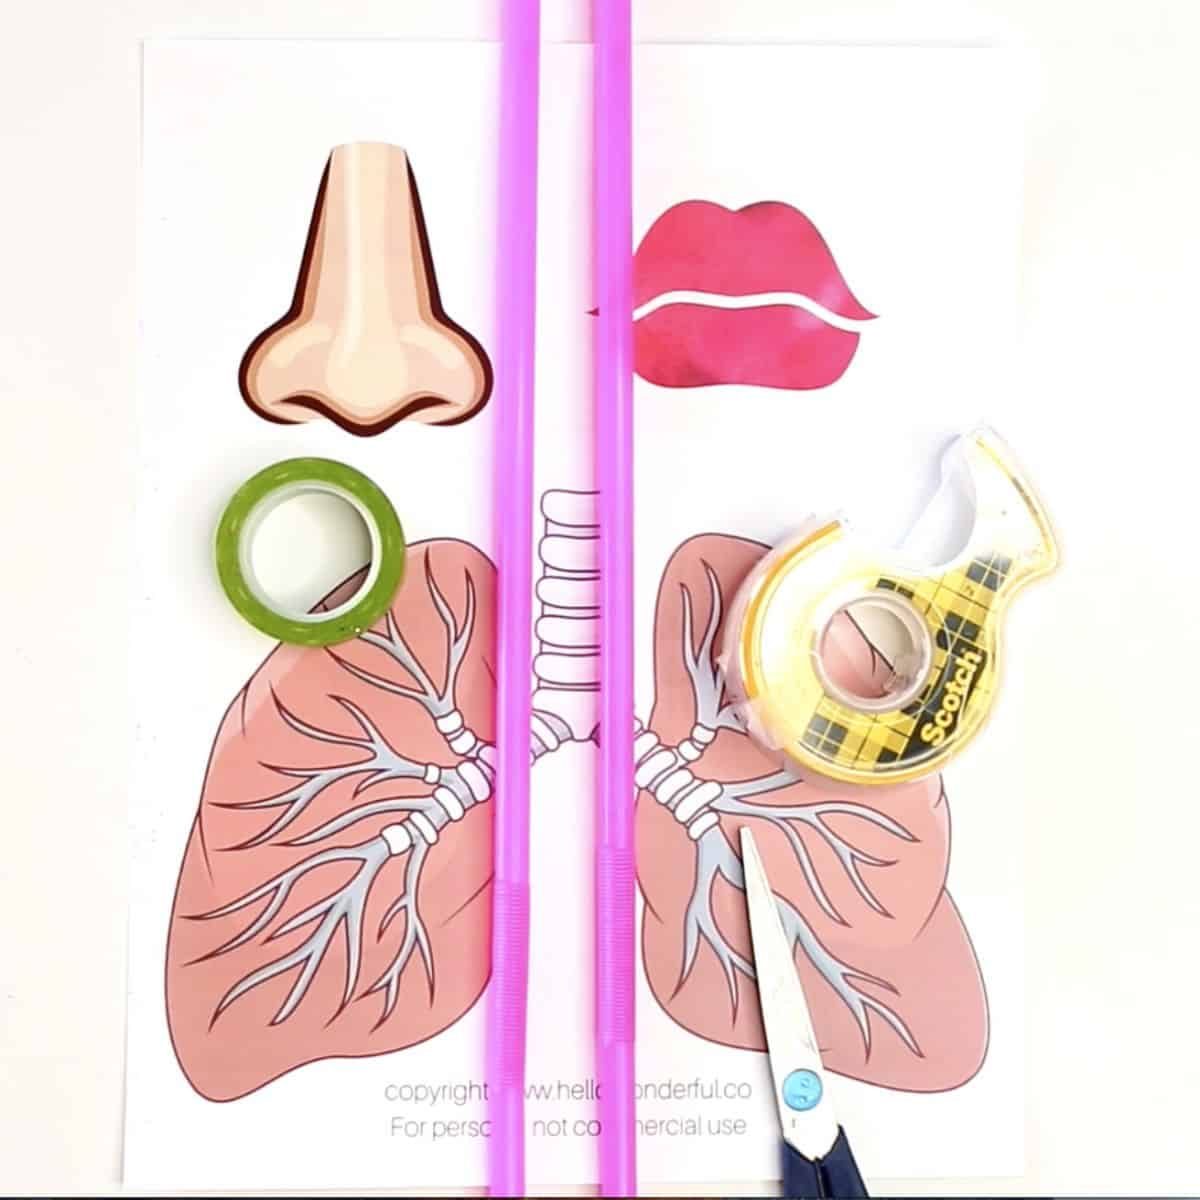
Materials

-Two paper or plastic cups (even yogurt ones will do)

-Pencil/ colouring markers

-String (Make sure it is at least 2 mts)

-You and someone else
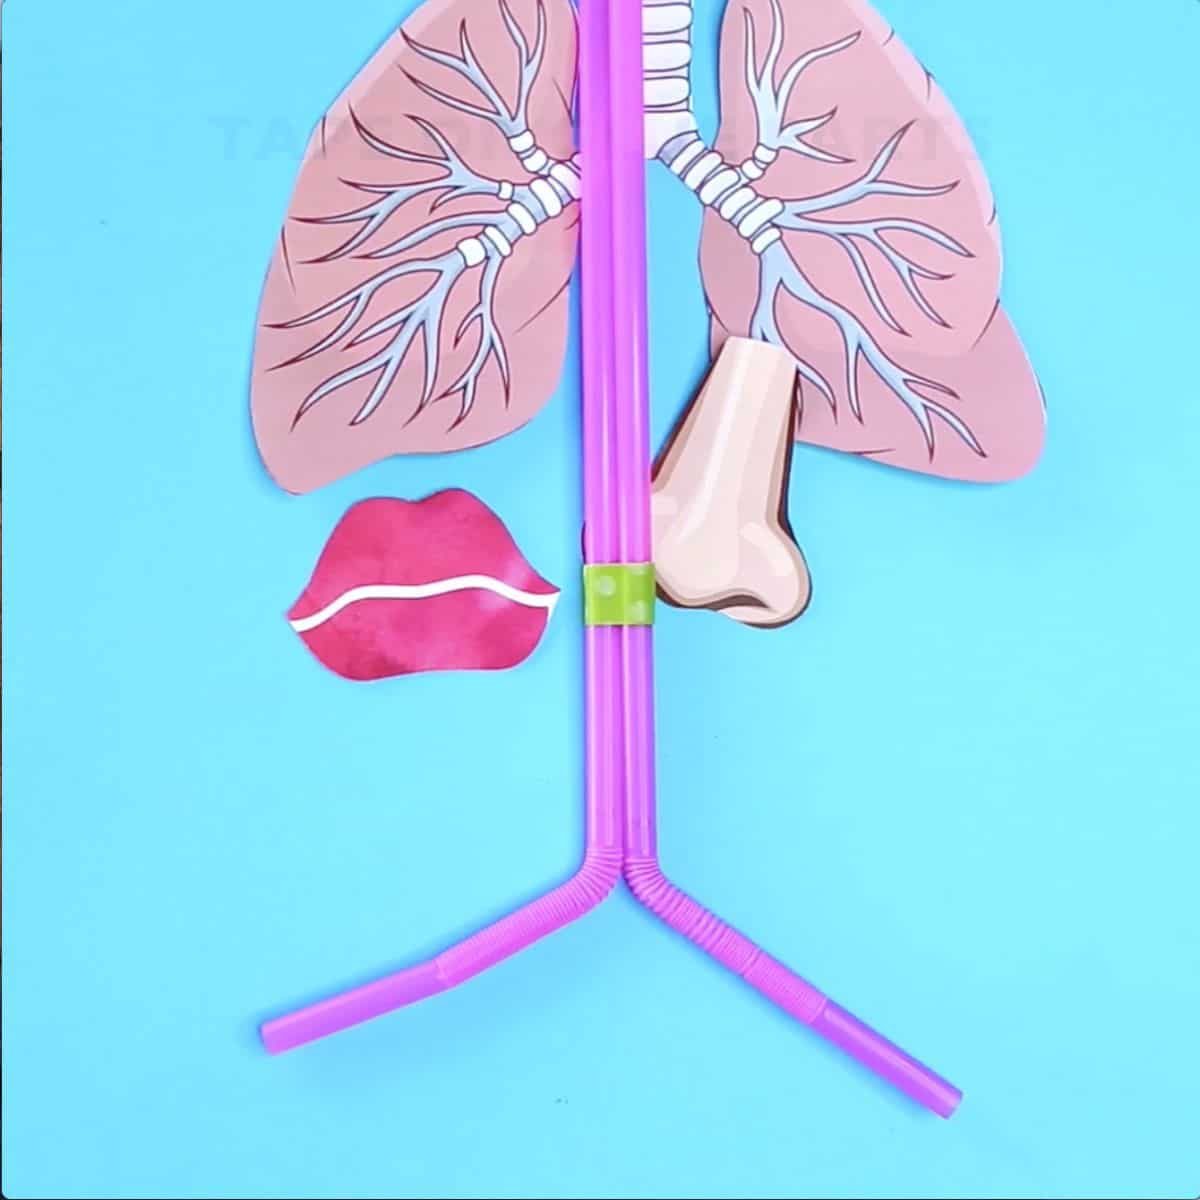
Steps

  1. Very careful with the pencil poke the bottom of the cup to make a small hole. If you need help from a grown up, ask for help.
  2. Pass the string through and make a small knot at each end.

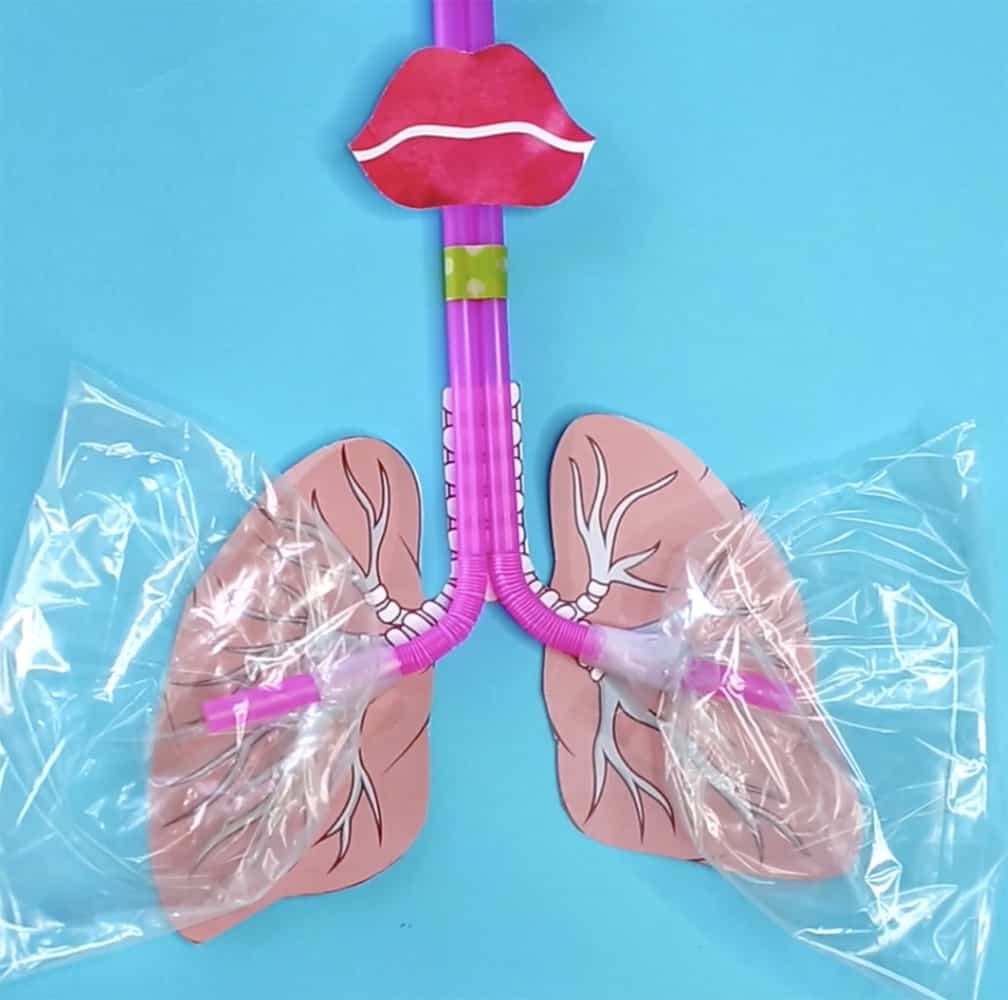
3. If your cups are white like in the photo you can use the markers to decorate them. If you have a yogurt one or something with a design already you can always find a way to cover that and decorate it.

Your cup telephone is now ready! Well done!

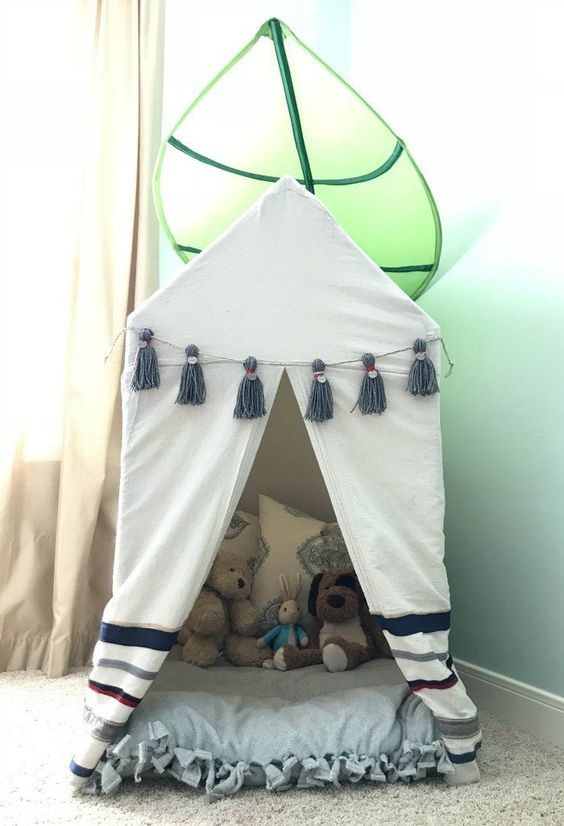
Now, choose somebody at home to try this with. Make sure you are distant enough so you can’t hear the voices clearly.

Questions

  1. Did it happen what you thought it would happen? Explain.
  2. Go back to questions 2-4 and think again. 


Did you know? 

Old landline phones were created using the same principle as a string telephone. The sound waves are turned into an electrical signal that can travel much farther than a simple string.

Science Behind

Sounds are a vibration in the air, we can’t see it but we can hear it. What happened in this experiment is that your voice vibrated inside the cup allowing that vibration to travel through the string into the other person’s cup. If the string is not tight enough the vibration will go all around making it difficult to get properly to the other side, so you might not hear well.

Let me know how you did by commenting below, if you want to share a photo with me you can always email me: amanda.maturana@aberdeenshire.gov.uk


Mild HWB and Numeracy – The Pollinator Promise Area

The BEE CAUSE – Let’s help to protect pollinators.

Thank you so much again to Evie and Finlay and their family for helping us to learn about their bees and the importance of pollinators, I learned so much. It was just fantastic.

Bee Identification

They spoke about the different types and variety of bees.

The Friends of the Earth website has a useful bee identification guide.

To find out more about pollination visit The Eden Project website.

I hope you enjoy learning about how to measure area while creating a special outdoor space to protect creatures who help to pollinate our plants.

Keep hunting for those dandelions!

The competition is open until next Friday 15th May.

Thank you to everyone who has shared their information.

Area and Measurement – Outdoor Learning

In keeping with our Eco theme, I have thought of some maths-related outdoor activities which I hope you’ll enjoy.  The first is on the topic of Area, while the second is on Measuring.

Explanations for both activities can be found in the Sway below.

Remember – there are links on the Spicy grid which provide help with calculating area and measurements.  Check them out if you’re unsure about anything.

Don’t forget to record your findings in your Home Learning Journal or Sway.  You can also send them to myself or your teacher in an email to let us see your results.

Good luck!