Sharing video content with learners can be tricky for a number of reasons – first, the files are often so big that they take up a lot of storage on your online learning platform (website/app/teams etc). Moreover, if you are staring a recording of you reading a story, there are copyright issues that may affect it. Also, you just might not want your video visible to the whole world.
The below video tutorial looks at the best way of hosting your videos privately and posing them to a specified group of people (e.g. your class)
I really hope it’s helpful.
I am starting to build and grow my YouTube channel with more regular content and would really appreciate a subscribe on the channel. If you could ‘like’ any videos that you find helpful, it will help me tailor my videos to things that will help you.
Glow is a really powerful platform for connected learning, however we still often don’t engage as well as we could – I myself am guilty of that.
With COVID-19, suddenly we have been forced to reconsider everything we know about delivering learning experiences and are turning to online platforms.
Many schools are considering using Teams (who aren’t already) after the holidays, but not all staff and pupils feel confident in using it. I have, therefore, created tutorial videos for teachers and pupils on Twitter, and will share below so that they are all in one place.
Please take care and stay safe.
Donald
For Teachers
Setting up Teams for your class on Glow
You will need a glow account in order to do this.
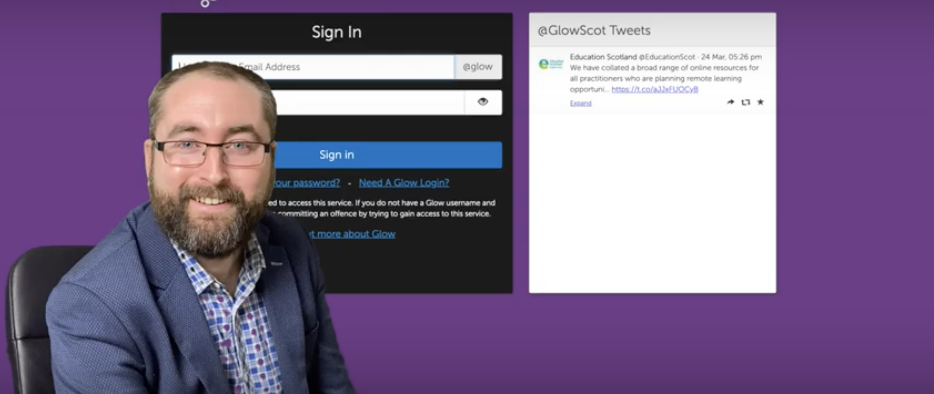
Sign into Glow at glow.rmunify.com and follow the below tutorial to add ‘Microsoft Teams’ to your launchpad, find your class’ login details (you will need to find a way to send these out to pupils) and set up your team.
The video also shows some of the features of Teams that you will be able to use to support children with their learning.
When changing passwords for the children, I would recommend using one password for everyone and ticking the box which allows them to change their password. This is an excellent way to start a conversation about the importance of keeping passwords safe and secure.
If you forget to tick the box allowing pupils to change their password, don’t worry as I will cover how pupils can change their own password in my tutorial for them.
The official Glow quick-start guide can be found here
If any of your pupils do not have a Glow account, this needs to be set up on SEEMIS Click and Go. Your school admin or SLT should be able to do this.
This video is an in-depth look into using Teams. I have tried to keep it as simple as possible, so for more advanced features please check out some other readily available tutorials on Teams. This looks at an overview of what the Teams experience will be like for you and your class, with a demonstration video meeting as well.
Use the timecodes below to skip to the relevant sections.
Video Timecodes.
1. Join or Create a Team (1min 18s) – find out how to create your own class team or join a team.
2. Activity and Chat (3 mins 02s) – Take a look at the ‘Activity’ and ‘Chat’ options in the left-hand menu.
3. Assignments and Quizzes (3 mins 55s) – Learn how to set assignments and create quizzes for your class team all within the application in the left- hand menu.
4. Calendar and Meetings (4 mins 43s) – Learn how to create meetings for your class (video lessons) using the calendar option on the left-hand menu.
5. Calls, Files, and Other Options (6 mins 31s) – Find out about the final left-hand menu options.
6. Inside Your Team (7 mins 15s) – Learn about all of the options you have inside your team page, such as hosting quick video meetings, text conversation, team files, applications, and giving out reward points.
7. Channels (11 mins 44s) – Learn about channels and how they are used.
8. Hosting a Meeting (12 mins 27s) – Take a look at what it is like to host a meeting with an on-screen mock meeting, and see the options that you have including sharing your desktop for the class to see PowerPoints etc while you’re talking.
9. How to Mute and Use Chat (16 mins 50s) – This is really underrated but so important in teams meetings in order to prevent glitching audio and nonsensical dialogue.
10. Pupils Sharing (18 mins 21s) – See how pupils are able to share their screen and examples of their work during a meeting (they can also upload to the files/conversation)
Using the Teams App – common troubleshooting
A common troubleshooting issue when signing in to the mobile & desktop app is using the full glow email extension. This quick video will talk you through using the Microsoft Teams app on any device.
Ideas for using Teams
For ideas about ways to get started using Teams, check out Malcolm Wilson’s blog post here and follow him on Twitter @claganach.
For Children
Please feel free to send the video links via your communication platforms to children that you want to support in accessing Glow and Teams.
Video 1 – How To Set Up Your Glow Account
URL to share with pupils: https://youtu.be/FCnTV0sBtn8
Video 2 – How To Set Up and Use Teams
(Make sure to set up your Glow account before watching this video; video 1 will help you with that)
URL to share with pupils: https://youtu.be/EoRLC6xjyeQ
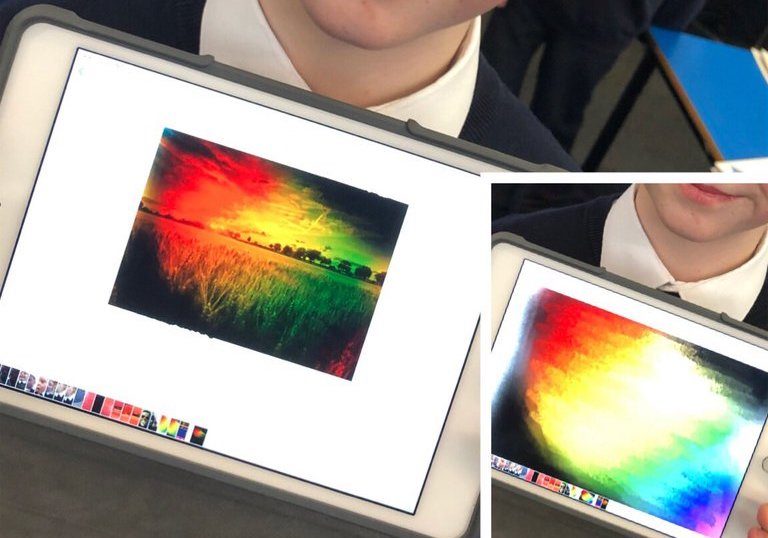
Truthfully, I didn’t know what I was going to post about until Friday, during GoldenTime, when one of our P7 Marvels (below) wanted to show the fantastic art work that he created on the iPads, and imported it into Photoshop Mix to blend it over a stock image as an overlay (we have been learning to blend overlays in Camera Club). I want to show you how to do this so that you can teach your learners!
Mr F was so proud of this #MossparkP7 Marvel, who used his Goldentime today to create his own overlay in sketches and blended it on top of a stock image (independently I might add!)@DL_for_Allpic.twitter.com/hNPKDAfFTO
He was so proud of his work – and, so he should have been. It was super.
The truth is that using technology, creativity can be tapped into and explored to a much greater degree than without. I don’t think there’s really any debate about that. Of course, more tactile arts and many different art forms will always require us not to use technology, the power that technology gives our young learners to explore and create is unparalleled – and what’s better is that it doesn’t have the cost of purchasing all of the resources for each individual project.
Once again, I will be focussing on using iPads, as this is the main teaching tool that I use for creativity in technology; however, most of the below applications are available on all devices – I will note which of these do.
Tayasui Sketches School
The first app that our Marvel used for his work was Tayasui Sketches School.
Once again, I would like to refer you to the Apple Books entitled “Everyone Can Create“. The book that I’m now on to, following on from “Music” and “Photography” is their guide on using the iPad for drawing. Most interestingly though, they highlight a non-apple app as the best drawing app available, although also show you how to use Keynote, Pages, Camera and Photos for drawing too. It should also be noted that ‘notes’ is a very good application for younger learners to create simple drawings.
The application that apple refers you to is the one that we are looking at today: “Tayasui Sketches School”. It is pressure sensitive and has a huge array of tools, allowing you to create really detailed, intricate work. Whilst it works best with an apple pencil, a cheap stylus or even finger will do the job! Even better; it’s free (although a paid, pro version is available)! Heres a link for iOS devices and a link for android (it should be noted, I have never used it on android, so don’t know if it is free or has the same features as on iOS).
Here’s a tutorial on using Sketches by Sylvia Duckworth, available on YouTube.
The thing that sells drawing on iPads for me, more than anything, is the amount of paper that you will save. Children love to draw and create – fact – but a LOT of paper gets used up in their quest to develop their skills. Yes, a device has an initial price tag, but it really does save money in the long run!
Photoshop Mix
The second app that our Marvel used was Photoshop Mix. Photoshop comes in many forms – most notably as a paid professional product that photographers use on an daily basis. It has also released some free apps (including Fix and Mix) which are all fab. Photoshop Mix allows you to create some really impressive composite drawings – or, in this case, blend overlays to create dramatic and creative pieces of work.
A link for Photoshop Mix for iOS is here and for android is here – note, to use it, you have to have an adobe ID. This is free and can be created the first time that you log in.
Here is a tutorial for using Adobe Photoshop Mix by Adobe Creative Cloud, however, I should note that the video is 2 years old at the time of writing this blog, and some of the features have changed quite a bit since then. This being said, it is still very relevant and will give you a flavour of how to use the application.
The Project
With the overview of both apps covered, I’m going to demonstrate how this pupil managed to create such a beautiful piece of art work using the above apps. I won’t use the same images, however, you should get a very good idea of how it works from the below.
I hope the video helps, and would be great to see some of the digital art work that your learners are doing, so make sure to tag me in tweets @mrfeistsclass as I love to share great work from across the country!
Today, we are tackling something that I’m asked a lot – how do I create a school website on GlowScot blogs. It is free and lots of schools are doing it. For an example of a school website created for free using GlowScot blogs, look no further than my own school’s website.
This week is more of a vlog than blog, as I have created 9 short videos to help you learn how to create your own school website. Each video is annotated so that you don’t have to listen to my voice!
I do hope that they’re helpful.
Have a great week, and as always please tweet me any feedback/suggestions to @mrfeistsclass
I had an amusing experience at a recent digital-themed meeting. A colleague from another establishment sat down beside me before we started and said “You watch, there’s going to be at least one geek here who opens up their MacBook, takes notes on their iPad with their apple pencil, sets a reminder on their Apple watch and just talks about the importance of code. You wait. I didn’t wait – I took out my MacBook, opened up Good Notes on the iPad Pro with my apple pencil at the ready (and for good measure set a reminder on the apple watch). Sure enough, my role in the meeting was also to talk about what progression in ‘coding’ looks like in Early years and primary. I just loved that the colleagued just sighed and had a good chuckle about it.
Sure, I’m a geek and proud – and following on from that, today, I’m looking at another Apple product – Keynote – and why I use it over PowerPoint each and every time. I am not, however, saying it is better than PowerPoint. PowerPoint is a phenomenal and powerful tool, and many of the things that I describe below can be done using PowerPoint – however, as Glasgow is undergoing a digital transformation where learners will be working with iPads on a 1-1 basis I feel that its an important tool to really get to grips with. Hopefully, by the end of this blog post, you will have found new, creative ways to use Keynote (and perhaps PowerPoint) not just to create presentations, but as a tool for learning across the curriculum.
I will be focussing on the iPad (app version) of Keynote. The Mac version has additional features and a slightly different layout, but it is less likely that your learners will have macs instead of iPads…
Here is a breakdown of what I aim to cover in this post:
An overview of Keynote
Presenting from Keynote in the classroom
Creating a ‘links only’ presentation
Photo editing and making creative montages using ‘Instant Alpha’
1. An Overview of Keynote
What is Keynote?
Simply stated, like Microsoft PowerPoint, Keynote is presentation software. Apple says this about Keynote: “With its powerful tools and dazzling effects, Keynote makes it easy to create stunning and memorable presentations. You can even use Apple Pencil on your iPad to create diagrams or illustrations that bring your slides to life. And with real-time collaboration, your team can work together, whether they’re on Mac, iPad or iPhone, or using a PC. (view source)”
Getting started
Instead of using picture guides, there are lots of great YouTube videos available on using Keynote. Here is a series of videos that are very clear and just focus on ‘getting started’. Please note that the content is not created by me, but is publicly available on YouTube. If you like the videos, please support the creator, WCPS, by giving their videos a ‘like’, sharing their content and/or subscribing to their channel.
Creating a Keynote Presentation
One edit from the above video: to delete a slide or select options, tap on the slide icon (instead of hold) so that it highlights in blue and then tap again – this is easier than first holding.
You will notice that it still feels very much like a ‘PowerPoint’ at this stage, and it is fantastic to use. Keynote and PowerPoint are also interchangeable – you can open your previously made PowerPoints in Keynote, and you can save Keynote presentations as PowerPoints if you wanted to use it on a school computer.
Adding Content
Modifying Content in Keynote
2. Presenting from Keynote in the classroom
Linking to the projector
There are different ways that you can link to a projector in class. The easiest is if you are lucky enough to have ‘Apple TV’ set up in your classroom and Wi-Fi – however, this is unlikely so I will skip over this.
Alternatively, you can purchase an iPad (lightning) to VGA adapter which will allow you to plug your device into the wire that normally connects your laptop to the projector. Apple’s own lightning to VGA adapter is very good, but unnecessarily expensive. There are much cheaper versions available on Amazon or similar. *Please note that I am not affiliated with any products I mention, and am only doing so to note examples, but am not recommending any of these products as better than any others.* A search on amazon for lightning to VGA brings up some good results – make sure that you do select one that has a lightning (not thunderbolt) connector and is compatible with VGA (it may also have an additional HDMI or other post – that is okay).
I do have my own adapter, but the school have also purchased some as they are well used not only for presentations, but for modelling how to do different things on the iPad that we are teaching the children (e.g. using Garageband, Book creator, Pages etc.)
Presenter mode
With the iPad connected to the projector with a wire, it takes away from the ‘portability’ of the iPad. Fortunately, Keynote has presenter mode through which you can not only control the Keynote from your phone/another iPad, but you can read your presenter notes on your second device while the students only see the presentation.
Using presenter mode is easy once you’ve done it once. The very first time that you connect the devices, you need to be using WiFi or cellular, but thereafter you don’t need to be connected to WiFi or cellular (I don’t know if this is true for two iPads though – I use my phone and my own iPad for this – my iPad is not connected to WiFi when I use it and does not have cellular.)
To use presenter mode, open the presentation on the iPad that you wish to display your presentation and also open Keynote on the device that you want to control the presentation from. I normally use my iPhone for this.
If you have previously paired your two devices, then follow these steps to remotely control your presentation.
If you can’t find the iPad that you wish to control (it won’t say ‘play’ if this is the case) click on ‘devices’ as below and then choose ‘add a device’. To add a device for the first time, you should make sure that they are both connected to the same WiFi or cellular connection – thereafter they do not need to be connected (at least, I’ve not had them connected after this point).
Once you’ve used presenter mode, I can guarantee you won’t want to present in any other way, especially if you use all of the extra features like presenter notes and the laser-pen simulator / drawing tools!
3. Creating a ‘Links Only’ presentation.
I did this as a workshop in Strathclyde University for student teachers as it is a fab tool. For older children, they could create interactive textbooks and study guides. In the past I’ve used it to create ‘branching narrative’ style interactive stories. There are lots of ways to use ‘links only’ and create links to external sources and also internal slides.
Here are some of the tweets prior to and from our #MPTechTeam trip to Strathclyde University:
Two of our #MPTechTeam wanted to share their ‘practice’ interactive branching narrative stories, created in Keynote, in preparation for their visit to Strathclyde Uni to work with student teachers! pic.twitter.com/NDUpYgZjPX
4. Photo Editing and Making Creative Montages using ‘Instant Alpha’
For years, I’ve been using photoshop for this very thing, but it is available on our iPads for free and is surprisingly powerful!
Truthfully, until ‘Everyone Can Create: Photo‘ came out, and I read through the chapter on using Keynote for photography – making scrapbooks and montages etc, I hadn’t even realised that this was a feature or just how amazing it was.
Instead of trying to describe the process, in the below tweet is a video of a simple creative montage in action on Keynote – whilst watching, just think about the ways that children could use it creatively for art & design, or advertising a product, or for bringing stories to life in literacy etc.
*Images used in this video are stock images purchased through Adobe Stock*
Nearly finished putting together this evening’s blog, but here’s a wee video that I’m using for part 4 about ‘instant alpha’ in Keynote. Just think about all of the amazing uses that it can have. Other great ideas in the ‘Everyone Can Create: Photo’ publication on Apple Books! pic.twitter.com/AtXitsLebm
Hopefully this has been a helpful insight into using Keynote and why I now use it for everything!
Sorry this blog is late, I had hoped to finish it before performing in Edinburgh today, however, that wasn’t to be! A great day though, with an audience in the tens of thousands our boys did phenomenally well – you can see what we were up to on the choir twitter feed or facebook page.
As always, please get in touch via twitter with feedback / suggestions etc
Before we should begin, I should make one thing clear. I do not believe that technology is the only way to teach music. The National Youth Choir of Scotland (through which I gained most of my musical education – learning about music theory and singing through the Go For series that uses Kodaly methodologies) have done incredible work in promoting music education through singing. The only thing that I have always felt that it lacked was the creativity of composition. I loved creating music when I was young, but never really knew how to do it, as I didn’t have the skill to compose or even understand musical notation. GarageBand changes that. Combined with other musical learning, GarageBand is a tool to bring creativity back into the heart of music education.
There are so many fears and concerns that music is being lost in the curriculum, and it’s true. Alongside digital literacy, it is an area that many colleagues feel unconfident in delivering effectively. Hopefully, this blogpost will give you the confidence to experiment with GarageBand and allow your learners to do the same. Many aspects of musical learning can be taught through GarageBand, and it also is one of the best ways to achieve the ‘musical technologies’ outcome in CfE.
Getting started
The biggest problem with GarageBand is, as it’s such a powerful program that can be used by beginners and professionals alike, its interface isn’t the easiest to navigate. Fortunately, there are many tutorials and guides online to help, the best of which is Apple’s own “Everyone Can Create: Music” available in the apple book store for free on iOS devices.
I have put together a few slides below to help you with the interface. I have used GarageBand with learners from P2 upwards, so it is very useable with a little bit of understanding about the main features.
Here is how to create a new piece, and a little about the main menu:
Learning through live loops
For this post, I am mainly ignoring the ‘instruments’ that you can play in GarageBand, as we can do this with real instruments anyway. Of course, children should be shown them and allowed to experiment and record with them, but this is not what makes GarageBand so fantastic and useable at a young age. The thing I will focus on is ‘Live Loops’. Again, I have put some slides below about how to use live loops but I’d strongly recommend looking at the Everyone Can Create: Music, which allows you to download a live-loop version of Can’t Stop the Feeling by Justin Timberlake, to demonstrate teaching points about structure etc. Everyone Can Create: Music is a fully comprehensive teaching and learning tool, and can be used as a script for lessons even!
Here is the basic overview of how to use live loops:
Important learning in this section is:
*Tempo
*Dynamics (using the mixer – drag the small bar beside the instruments to the right to access this)
*Key signature
*Time signature
*Beats and bars
Getting creative
This is more advances, and I’d only use it with upper primary – secondary. Children can create their own loops from scratch, or at least select pre-recorded loops from the vast expanse of GarageBand loops to create their own music that hasn’t been pre-arranged. Creativity at it’s best! They can use the instruments in GarageBand or even their own voice to record loops if they like – but, even just selecting pre-recorded loops and thinking about structure is hugely valuable.
Here’s how to do it:
P6 and P7/6
This term, I am doing a music project with P6 and P7/6 in Mosspark PS every Wednesday using GarageBand (and the Everyone Can Create: Music resources). You can follow us on Twitter using #MossparkP6 and/or #MossparkP76, or by following @MossparkPS to see what we are doing.
I love GarageBand. No guide that can be made can ever be fully comprehensive in its use, as it is so powerful that its limitation is truly the imagination of the user. I hope that this blog has helped you to get the confidence to experiment with GarageBand. Even experimenting will show you just some of the potential of this incredible app in the classroom.
Please do send me a tweet if you have any specific questions about how to do certain things in GarageBand and I will get back to you ASAP!
Glow Blogs uses cookies to enhance your experience on our service. By using this service or
closing this message you consent to our use of those cookies. Please read our Cookie Policy.


 I had an amusing experience at a recent digital-themed meeting. A colleague from another establishment sat down beside me before we started and said “You watch, there’s going to be at least one geek here who opens up their MacBook, takes notes on their iPad with their apple pencil, sets a reminder on their Apple watch and just talks about the importance of code. You wait. I didn’t wait – I took out my MacBook, opened up Good Notes on the iPad Pro with my apple pencil at the ready (and for good measure set a reminder on the apple watch). Sure enough, my role in the meeting was also to talk about what progression in ‘coding’ looks like in Early years and primary. I just loved that the colleagued just sighed and had a good chuckle about it.