Category: Tool

Microsoft Sway

Microsoft Sway is a digital storytelling made simple: Professional presentations, newsletters, and portfolios in minutes.

๐Ÿ” What does it do?

Microsoft Sway is a web-based storytelling app that helps you create interactive reports, personal stories, and newsletters. Unlike PowerPoint, which is slide-based, Sway is a scrolling digital canvas. You provide the content (text, images, and videos), and Swayโ€™s built-in design engine handles the layout, ensuring it looks great on any screen- from a desktop to a smartphone.

ย 

๐ŸŽ“ Why is it useful?

  • No Design Skills Required: You focus on the story, Sway focuses on the design. With one click of the “Remix” button, you can instantly change the entire look and feel of your project.

  • Accessible by Design: Sways are easy to read. They include an “Accessibility View” that optimizes the screen for high contrast and screen readers, making it inclusive for all learners.

  • Modern Newsletters: It is an extremely useful tool for school newsletters in Falkirk. Parents can scroll through updates and watch embedded videos of school life directly on their phones.

  • Web-Based Sharing: You don’t “send” a Sway; you share a link. This means you can update the content even after you’ve sent the link, and everyone will see the latest version.

ย 

โš™๏ธ How does it work?

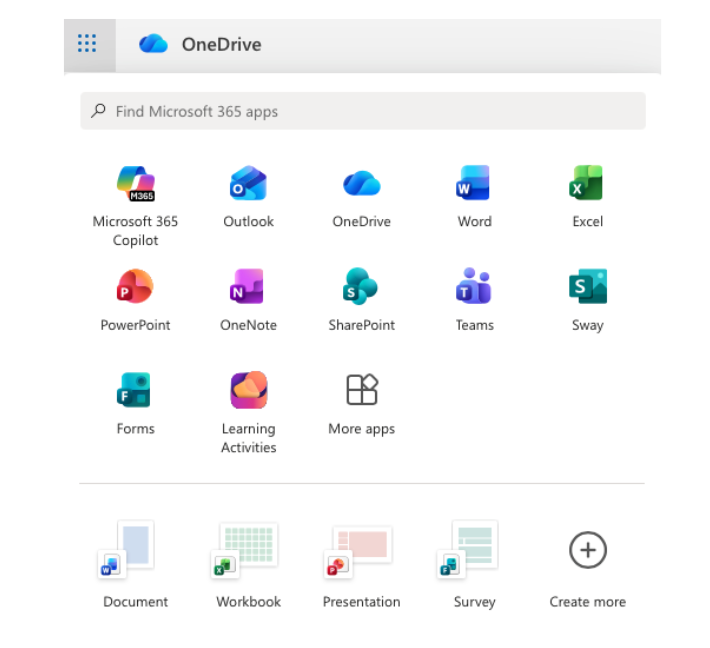
1. Launch: Access directly at sway.office.com using your Glow login details or via the waffle menu in OneDrive in Glow.

2. Start from Scratch or a Document: Click + New Blank to start fresh, or upload an existing Word or PDF document and watch Sway “transform” it into a web page automatically.

3. The Storyline: Use the “Storyline” to add “Cards.” There are cards for text, images, video, and even “Stacks” (groups of photos that you can tap to flip through).

4. Design & Remix: Switch to the Design tab to see your work. Click Styles and then Remix! to cycle through different fonts, colors, and scroll directions (Vertical or Horizontal).

5. Share: Click the Share button. For school newsletters, ensure you select “Anyone with a link” so parents can view it without needing a Glow login.

ย 

๐Ÿš€ Beyond the Basics

  • Digital Portfolios: Pupils can use Sway to curate their best work over a term. They can embed audio recordings of them reflecting on their writing alongside photos of their physical work.

  • Interactive Reports: Instead of a poster, pupils can create a scrolling report. Use the “Comparison” card to show “Before and After” photos of an experiment using a slider.

  • Virtual Trips: Create a Sway about a country or historical period. Embed Google Maps (using an embed code) and YouTube videos to create an immersive research hub for the class.

  • For Admin: Create a “Living Document” for staff or pupils. Because itโ€™s a web link, you can update the school calendar or policies in the Sway throughout the year without having to re-send emails.

Microsoft Forms

Microsoft Forms is an easy way to create surveys, quizzes, and polls with built-in Practice Mode and Data Insights.

๐Ÿ” What does it do?

Microsoft Forms is a web-based tool for gathering information and assessing learning. It allows you to create interactive quizzes and surveys that work on any device. In a Falkirk classroom, it can be used as a go-to tool for “check-ins” and low-stakes testing providing instant feedback to both the teacher and the pupil.

๐ŸŽ“ Why is it useful?

  • Instant Assessment: Create a “Check for Understanding” quiz at the end of a lesson to see exactly which pupils have grasped the concept.

  • Low-Stakes Learning (Practice Mode): This new feature allows pupils to try questions multiple times, see correct answers instantly, and receive encouraging feedback, turning a “test” into a learning activity.

  • Smart Data Insights: Forms doesn’t just show you “who got what”, it automatically identifies “Hard Questions” where a large percentage of the class struggled, helping you plan what to re-teach.

  • Self-Marking: Quizzes can be auto-graded, giving pupils immediate results and saving you hours of manual marking for certain types of assessment.

โš™๏ธ How does it work?

1. Launch: Access directly at forms.office.com using your Glow login details or via the waffle menu in OneDrive in Glow.

2. Create: Click + New Quiz (to add correct answers and points) or + New Form (for surveys).

3. Enable Practice Mode: Go to Settings (โ€ฆ) and toggle on Practice Mode. This allows pupils to see if they are right or wrong immediately after answering each question.

4. Present Mode: Use the Present button in class to show live, anonymous results (like a word cloud or bar chart) as pupils submit their answers in real-time.

5. Review: Click the Responses tab to see a summary of the data and open it in Excel for a detailed breakdown.

๐Ÿš€ Beyond the Basics

  • Practice Mode for self paced learning: Turn any quiz into a revision tool. Pupils get instant feedback and can “try again,” which helps build confidence and independence.

  • Branching Logic in Literacy: Use the “Branching” feature to create a digital “Choose Your Own Adventure” story. Depending on the choice a pupil makes, the form sends them to a different page of the narrative.

  • Live Data in Science: Open a Form in Present Mode during an experiment. As pupils enter their findings, the charts on your board update live, allowing for an immediate class discussion on the results.

  • Accessibility with Immersive Reader: Every Form has Immersive Reader built-in. Pupils can tap the icon next to any question to have it read aloud, translated, or broken into syllables.

ย 


Quick Links

Microsoft Forms for Education

Microsoft Forms Quick Start Guide

Pages

Pages: your digital publishing house. Create everything from simple essays to interactive e-books.

ย 

๐Ÿ” What does it do?

Pages is a flexible app that works in two ways: as a traditional word processor (like Word) and as a page layout tool (like Publisher). It allows pupils to combine text, photos, videos, and even audio recordings into a single document. Because it can export as an EPUB, it is the primary tool for pupils to become published authors of their own digital books.

ย 

๐ŸŽ“ Why is it useful?

  • Interactive Media: Unlike a printed sheet, a Pages document can “talk.” Pupils can record their own voice explaining a concept and embed that audio button directly next to their writing.

  • Smart Templates: Pages includes beautiful, education-specific templates for posters, research journals, and books, giving pupils a professional starting point.

  • Accessibility: It features a “Reading Mode” that hides all the editing tools, allowing pupils to focus entirely on the content without distractions.

ย 

โš™๏ธ How does it work?

  1. Launch: Open the Pages app (Orange icon with a white pen).

  2. Choose a Mode: When you start a new document, you can choose to ‘Start Writing’ to enter a simple word processing layout (for essays) or you can ‘Choose a Template’ to make posters and books.

  3. Add Content: Tap the icons at the top to add Photos, Videos, Web Links, or Audio Recordings.

  4. Format with the Brush: To change fonts, colors, or how text wraps around an image, tap the object with your finger and then tap the Format (Paintbrush) icon.

  5. Publishing: Tap the ‘Share’ button and select ‘Export’ to save your work as a PDF or an EPUB (e-book) that can be read in the Books app built into iPad.

ย 

๐Ÿš€ Beyond the Basics

  • Talking Books: Pupils can write a story and then use the ‘Record Audio’ feature to add sound effects or read their story aloud. This is a fantastic way for pupils to practice fluency and expression.

  • Digital Field Journals: Take the iPad outside. Pupils can snap photos of plants or insects and drop them straight into a Pages journal, adding text boxes with their fingers to label what they see.

  • Vocabulary Posters: Pupils can create a poster with images of common objects. They can then embed audio clips of them saying the word in another language, creating a “soundboard” for their peers.

  • Interactive Newsletters: Use a newsletter template to report on a historical event. Pupils can embed a YouTube link or a video of a mock “interview” with a historical figure to bring the report to life.

  • Image Descriptions: Teachers can show pupils how to add “Alt Text” to images within Pages. This ensures that if a visually impaired student uses a screen reader, the iPad will describe the image to them.


๐Ÿ”— Teacher Quick Links

Get Started with Pages for iPad

Pages User Guide for iPad

Jacob’s Quick Tips – Pages

AR Makr

AR Makr, the creative toolbox for Augmented Reality. Bring your drawings and photos to life in the real world.

๐Ÿ” What does it do?

AR Makr is an app that lets learners create virtual objects and place them into the world around them using the iPad camera. Pupils can “scan” a 2D drawing they have made on paper or in another app and transform it into a 3D virtual object that they can walk around, resize, and even animate within their own classroom.

๐ŸŽ“ Why is it useful?

  • From 2D to 3D: It helps pupils understand spatial awareness by taking flat images and placing them in a 3D environment.

  • Storytelling in the Real World: Pupils can build “AR Scenes” for example placing characters from a story onto their school playing field to film a digital retelling of a story.

  • Interactive Models: It allows for the creation of virtual museums or science models (like the solar system) that pupils can interact with without needing physical materials.

  • Built-in Recording: The app has a simple “Record” button, allowing pupils to film their AR creations and narrate their learning as they move around their virtual objects.

โš™๏ธ How does it work?

  1. Launch: Open the AR Makr app and tap ‘Start’.

  2. Surface Scan: Move the iPad slowly to let the camera “find” a flat surface (like a desk or the floor). You will see a grid appear when it’s ready.

  3. Create an Object: Tap ‘New’ to either draw something directly with your finger, or tap the folder icon to import a photo or a drawing from your Photos library.

  4. Place: Once your object is ready, aim the circle at the grid on your desk and tap ‘Place’. You can now use your fingers to pinch and zoom to resize it.

  5. Record: Tap the camera icon on the side to take a photo of your scene, or hold the record button to capture a video of your virtual world in action.

๐Ÿš€ Beyond the Basics

  • Retelling Fairy Tales: Pupils can draw the “Three Little Pigs” on paper. They use the camera to “scan” the pigs and their houses into AR Makr, then place them on the classroom floor to film a puppet show where they provide the voices.

  • Shape & Measure: Use the built-in 3D shapes in AR Makr to build a virtual tower. Pupils can use their fingers to stack cubes and spheres, discussing the properties of the shapes as they build.

  • The Solar System: Pupils can create or import images of the planets. They can place the “Sun” in the centre of the classroom and position the planets at relative distances, walking between them to understand the scale of space.

  • Virtual Timelines: Create a “Walking Timeline.” Place images of historical events in a line across the hall. As the pupil walks along the line, they film themselves explaining each event in chronological order.

  • Digital Galleries: Pupils can take photos of their physical paintings ย or drawings and “hang” them on the virtual walls of the classroom, creating a digital art gallery that parents or peers can walk through using the iPad.


๐Ÿ”— Teacher Quick Links

Create your own Augmented Reality Book Scene in AR Makr | iPad

Create your own Augmented Reality Snowstorm in AR Makr | iPad

Canva

Canva for Education is the all-in-one design platform for professional teaching resources and school communications.

๐Ÿ” What does it do?

Canva for Education is a premium version of Canva that is free for educators. It provides access to millions of stock images, fonts, and professional templates. While it can be used for simple posters, it is also a powerful tool for building interactive presentations, classroom newsletters, and even school websites.

ย 

๐ŸŽ“ Why is it useful for staff?

  • Instant Professionalism: You don’t need design skills to create high-quality work. Thousands of “Education” templates are ready-made for lesson plans, certificates, and worksheets.

  • Brand Consistency: You can set up a “Brand Kit” for your school, saving your schoolโ€™s specific colors and logos so every letter or poster you make is perfectly on-brand.

  • Multimedia Hub: You can embed videos from YouTube, live links to forms, or even record your own screen directly into a Canva presentation.

  • Collaboration with Colleagues: You can share folders with other staff members. This allows you to co-design a transition project or share a pack of classroom labels across a whole department.

โš™๏ธ How does it work?

1. Launch: Access via the Canva app on your iPad or through the web browser.

2. Verified Status: For teachers to access the “Education” version for free you need to get verified or added to an existing Canva Education ‘Team’ by an already verified member of your school staff team.

3. Choose a Template: Use the search bar for terms like “P7 Transition,” “Reading Newsletter,” or “Classroom Labels.”

4. Drag and Drop: Use your finger or mouse to move elements around. Add your own photos or choose from Canvaโ€™s library of millions of free graphics.

5. Share & Export: Tap the Share button (top right). You can “Download” as a PDF for printing, use ‘public view’ or ’embed’ to create a live viewable version of your design. You can also share custom templates with other uses and download your creations as videos.ย 

๐Ÿš€ Beyond the Basics

  • Professional Newsletters: Move away from plain Word documents. Use the Newsletter templates to create visual updates for parents. You can even embed “Live Links” that parents can click to open permission forms or school webpages.

  • Display Packs: Search for “Classroom Decor.” You can instantly create cohesive sets of labels, birthday charts, and learning walls that all share the same color scheme and font.

  • Embed Canva Designs: Use the ’embed link’ to add live Canva designs to your school website or class blog., giving access to a live document that changes automatically when you update or amend it.
  • Instructional Videos: Use the “Present and Record” feature. You can talk through your slides, and Canva will record a small “bubble” of you speaking in the corner. This is perfect for creating “flipped learning” videos or instruction guides for parents.

  • Canva Sheets: A visual way to track and display data. Use it to create colourful class seating plans or to track (publicly available) data in a way that is far more visual and readable than a standard spreadsheet.


๐Ÿ”— Teacher Quick Links

Design School – Learn Design With Canva

Canva Essentials

Freeform

Freeformย is an infinite digital canvas for visual brainstorming and project planning.

๐Ÿ” What does it do?

Freeform is an “infinite whiteboard” app that comes built into the iPad on models running iPad OS 16.2 and above. Unlike a document or a slide deck, there are no page breaks or borders. You can add text, photos, videos, PDFs, web links, and hand-drawn sketches anywhere on the canvas. As you add more content, the board simply expands in every direction.

๐ŸŽ“ Why is it useful?

  • Total Creative Freedom: Because the canvas is infinite, pupils don’t have to worry about running out of space or fitting their ideas into a specific layout.

  • Multimedia Hub: You can “drop” almost any file onto a board. This makes it perfect for gathering research, as pupils can keep their notes, photos, and YouTube videos all in one viewable space.

  • Real-Time Collaboration: Up to 100 people can work on the same board at once. You can see everyoneโ€™s cursors moving and see ideas grow in real-time – ideal for whole-class “thought-dumps.”

  • Built-in Tools: It uses the same familiar Apple markup tools as “Notes,” making it easy for pupils to sketch, annotate images, or highlight text.

โš™๏ธ How does it work?

  1. Launch: Find the Freeform app icon on your iPad home screen (White icon with a blue/orange squiggle).

  2. Start a Board: Tap the ‘New Board’ icon (square with a pencil) to begin.

  3. Add Content: Use the icons at the top to add Sticky Notes, Shapes, Text Boxes, or Photos/Files.

  4. Zoom and Pan: Use two fingers to pinch and zoom out to see the whole board, or drag to move to a different area of the canvas.

  5. Collaborate: Tap the Share button (box with an arrow) to invite others to edit the board with you via a link. There are two options for sharing, ‘Collaborate’ and ‘Send Copy’. ‘Send Copy’ will send a carbon copy to others which they can then use for themselves (you will not see changes). ‘Collaborate’ allows you to choose between users being able to make changes or view only. When you send using ‘Collaborate’ always use ‘Anyone with the Link’. We recommend that you use the Notes option to share Freeform boards, simply select your collaboration options then hit the Notes icon, this will automatically create a note with the link which you can Airdrop to learners – this method is generally found to be more reliable than directly airdropping from the share panel.ย 

๐Ÿš€ Beyond the Basics

  • Storyboarding: Use the “Shapes” tool to create comic-strip boxes. Pupils can draw their scenes, add text for dialogue, and even drop in sound recordings of their characters speaking.

  • Project Planning: Use the infinite space to map out a complex experiment. Pupils can take photos of each stage of their build and “connect” them with arrows to show the process.

  • Multimedia Revision: Create a revision board on a topic like “The Wars of Independence.” Embed links to BBC Bitesize, drop in PDFs of primary sources, and add sticky notes with key dates.

  • Mood Boards: Pupils can gather inspiration from the web, crop images directly on the board, and use the markup tools to sketch colour palettes or textures alongside their found images.

  • Visual Scaffolding: Teachers can create a “Pre-filled Board” with prompts, sentence starters, and images, then share it as a template for pupils to build upon.


๐Ÿ”— Teacher Quick Links

Where can you learn more about Freeform?

Get Started with Freeform on iPad

How to Use Freeform – Apple Support

Jacob’s Quick Tips – A Complete Guide to Freeform

ย 

Notes

Apple Notes – the versatile digital notebook for quick capture, sketching, and organisation.

๐Ÿ” What does it do?

Notes is a built-in app on iPad that allows you to combine typed text, handwriting, photos, and scanned documents in one place. It syncs across all your Apple devices and, thanks to the Quick Note feature, can be accessed instantly from any other app on your iPad.

๐ŸŽ“ Why is it useful?

  • Quick Access: You can swipe from the corner of the screen or use the Control Center to start a note in a second. It is the fastest way for pupils to record a thought before they forget it.

  • Smart Scanning: It has a high-quality document scanner built-in. It automatically detects edges and cleans up shadows,turning physical paper into a digital PDF within your note.

  • Touch-Friendly Drawing: The built-in markup tools allow pupils to use their fingers to draw diagrams, highlight text, or annotate photos with ease.

  • Seamless Collaboration: You can share a note or an entire folder with colleagues or pupils. Everyone can contribute, and youโ€™ll see “Activity” highlights showing exactly what has been added or changed.

โš™๏ธ How does it work?

  1. Launch: Find the Notes icon (yellow and white pad).

  2. Quick Note: Swipe up from the bottom-right corner of your screen at any time to open a small floating note – perfect for jotting down a thought while browsing Safari.

  3. Scan a Document: Tap the Camera icon in Notes and select Scan Documents. Point the camera at a worksheet or textbook page, and it will capture it automatically.

  4. Organise with Tags: Use hashtags (e.g., #LessonPlans or #Maths) anywhere in your note. This makes finding specific information across multiple folders much faster.

  5. Lock a Note: If you have sensitive information (like password reminders or meeting notes), you can “Lock” a note using your iPad passcode or FaceID.

๐Ÿš€ Beyond the Basics

  • Checklists: Pupils can create interactive to-do lists for their writing projects. As they complete a draft, peer-edit, or check spellings, they can “tick” the bubbles to track their progress.

  • Searchable Handwriting: The iPadโ€™s built-in “AI” (OCR) recognizes handwriting. If a pupil has handwritten notes, they can use the Search bar to find a specific word.

  • Maps & Links: While researching, pupils can “Add Link” to a note from Safari or Maps. It creates a rich visual thumbnail, making the note a visual “Research Hub.”

  • Smart Folders: Create a folder that automatically gathers every note containing a specific tag (like #P7Transitions). It saves you from manually moving files and keeps your admin organised.


๐Ÿ”— Teacher Quick Links

Use Notes on your iPhone, iPad and iPod touch

Getting Started with Notes

ย