
Author: Miss Abercrombie

Excel Online

Microsoft Excel Online is more than just numbers, it is a powerful tool for data handling, visualisation, and problem-solving.

🔍 What does it do?

Microsoft Excel is a spreadsheet application. While often seen as a tool for accountants, in the classroom it is a powerful canvas for organising information, performing calculations, and turning raw data into visual charts and graphs. As part of Glow, it is available online, allowing pupils to collaborate on the same spreadsheet in real-time.

🎓 Why is it useful?

  • Visualising Data: Instantly turn a table of survey results (like traffic surveys or favorite foods) into colorful bar charts or pie graphs to help pupils spot trends.

  • Real-Time Collaboration: Multiple pupils can enter data into a single shared spreadsheet simultaneously – perfect for whole-class experiments.

  • Maths in Action: It brings numeracy to life by using formulas to solve real-world problems, from managing a budget to tracking fitness results in PE.

  • Anywhere Access: Works on iPads, PCs, and through any web browser via Glow, so learning can continue at home.


⚙️ How does it work?

  1. Log In: Access Excel via the OneDrive or Teams tile on your Glow Launchpad.

  2. Create a Table: Enter your labels in the top row and your data in the cells below.

  3. Insert Chart: Highlight your data, go to the Insert tab, and choose a chart type (e.g., Column or Pie).

  4. Collaborate: Use the Share button (top right) to invite others to edit the document with you.

Check out this handy Sway with detailed instructions on how to set up and use an Excel document online:


🚀 Beyond the Basics

  • Automatic Graphs: After a class survey, have pupils use Excel to generate different types of graphs to see which one displays their data most clearly.

  • Data Types: Type a list of countries or cities, then use the “Geography” Data Type (under the Data tab) to automatically pull in facts like population, area, and capital cities.

  • Fitness Tracking: Record heart rates before and after exercise directly into a spreadsheet and use the “AutoSum” or “Average” formulas to analyse the class results instantly.

  • Budgeting: Give pupils a “Virtual Budget” for a class trip. They can use Excel to track costs and see how changing one item (like the bus price) affects their total spend.


Quick Links

Microsoft Excel support webpage 

Microsoft Basic Tasks in Excel

 

iPad Camera

iPad Camera is the window to your classroom. Capture evidence, scan documents, and support accessibility.


🔍 What does it do?

The Camera app is the primary way pupils capture their learning. It can take high-quality photos, record video, capture slow-motion clips, and even read text directly from a book or whiteboard. In a “1:1 iPad” classroom, it becomes a digital bridge between physical work in a jotter and digital work in the cloud.


🎓 Why is it useful?

  • Evidence of Learning: Not all work is digital. Pupils can take a photo of their physical models, posters, or written work and upload them instantly to Teams or Google Classroom.

  • Live Text: One of the most powerful features – if the camera sees text (on a whiteboard or in a book), a small icon appears that allows the pupil to copy and paste that text directly into a document or note or have it read aloud.

  • Scan QR Codes: No more typing in long web addresses. Pupils simply point the camera at a QR code to be taken directly to a website, a Form, or a video.

  • Magnifier: For pupils with visual impairments, the camera can act as a high-powered magnifying glass, allowing them to zoom in on small text or distant displays.


⚙️ How does it work?

  1. Launch: Tap the Camera icon (Gray icon with a black lens) or swipe left on the Lock Screen.

  2. Switch Modes: Swipe your finger up or down on the right side of the screen to switch between Photo, Video, Time-Lapse (great for long science experiments), and Slo-Mo.

  3. Focus and Exposure: Tap a specific part of the screen to tell the camera where to focus. If the image is too dark, tap the screen and slide your finger up or down next to the “Sun” icon to adjust the brightness.

  4. Zoom: Use two fingers to “pinch” or “spread” on the screen to zoom in or out.

  5. Review: Tap the small thumbnail in the corner to view your most recent photo and use the ‘Edit’ button to crop or rotate it.


🚀 Beyond the Basics

  • Time-Lapse & Slo-Mo: Use Time-Lapse to record a plant growing over a day or a chemical reaction. Use Slo-Mo to capture fast-moving events, like a ball being dropped, to analyse the physics of the movement.

  • Shape Hunts: Send pupils on a “Shape Hunt” around the school. They can use the Markup tool in the Photos app to draw over their photos with their fingers, highlighting the 2D and 3D shapes they find in the real world.

  • Visual Timetables: Use the camera to take photos of the equipment needed for a lesson. Display these on the board or in a shared Note or Keynote to provide a clear, visual checklist for pupils who struggle with multi-step instructions.

  • POV Storytelling: Have pupils film “Point of View” videos where they act as a character in a story, speaking directly into the camera to explain their feelings or motives.


🔗 Teacher Quick Links

Take Photos with Your iPad Camera

Explore escape rooms in OneNote

So what is a Digital Breakout or Escape Room or Cracking the Code activity anyway?

Cracking the Code to break out and escape in a classroom story scenario by solving the puzzles in a classroom activity – where learners have to solve puzzles in order to get a code for each step to reveal the next puzzle. Read more

MathsBot: online teaching resources

What is it?

MathsBot.com – a series of free online tools, created by Maths teacher Jonathan Hall, which can be used to support teaching mathematics. There are tools to support mathematics teaching at all stages whether primary school or high school. These are designed to be used in a teaching situation where a teacher is using the tools directly with learners to help explain concepts, or to provide interactive activities with a class, a group or individual learners.

Read more

ClassroomScreen

With the free version of Classroomscreen teachers can create instant teacher dashboards. Manage your classroom environment with the tools you need to help the flow of learning.

🔍 What does it do?

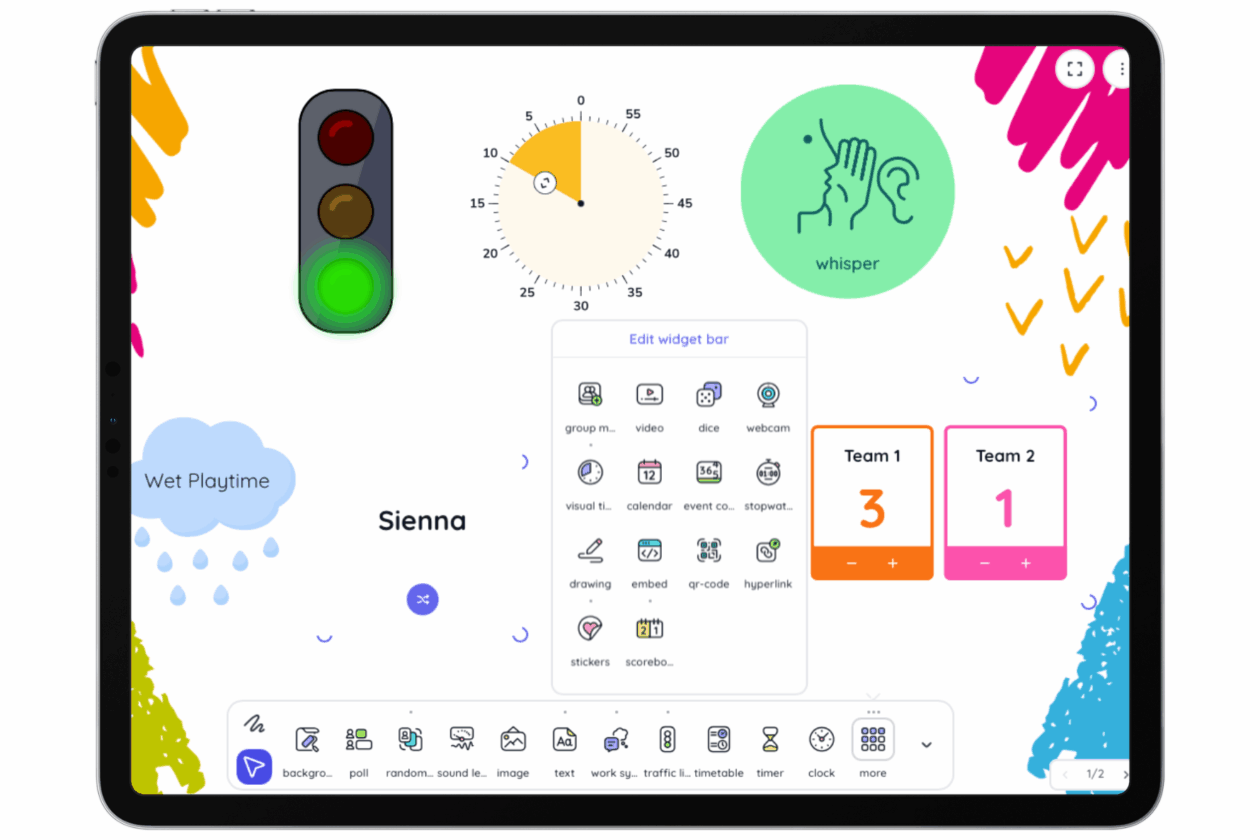
Classroomscreen is a web-based tool that puts all your essential classroom management widgets into one browser window. In the free version, you get access to the full library of 25 widgets to project on your whiteboard. While the free plan doesn’t save your screens for the next day, it is the perfect “launch and go” tool for daily routines.

🎓 Why is it useful?

  • Instant Classroom Cues: Use visual symbols (like ‘Silence’ or ‘Work Together’) to set the tone for an activity instantly.

  • Fair Participation: The Random Name Picker and Dice tools ensure every pupil has a fair chance to contribute, supporting the ‘no hands up’ approach to classroom questioning. 

  • Visual Time Tracking: The free Timer and Stopwatch help pupils build independence by managing their own time during tasks.

  • Quick Checks: Use the Poll widget for a quick “fists to five” or “smiley face” check-in at the end of a lesson to gauge pupil confidence using a join code.

⚙️ How does it work?

1. Launch: Open the web browser on your device and go to Classroomscreen.com. You can start immediately without even logging in.

2. Add Widgets: Tap the icons on the bar at the bottom to add tools. You can have multiple widgets on screen at once, just drag them with your finger to reposition.

3. Name Lists: In the free version, you can preload and save up to 3 different name lists (e.g., your three main classes). This saves you from re-typing names every lesson.

4. Annotation: Tap the Draw widget to turn part of your screen into a mini-whiteboard for quick scribbles or diagrams using your finger.

5. Refresh Warning: Be careful in the free version, if you refresh the page or close the tab, your widgets and layout will disappear. Keep the tab open throughout the lesson!


🚀 Beyond the Basics

  • Daily Focus: Use the Text Box widget to display the “Learning Intention” or “Success Criteria.” Since you can’t save screens, keep a document with your prompts ready to copy and paste in quickly.

  • Maths Starters: Open the Dice and Timer widgets. Challenge pupils to solve a mental maths problem based on the dice roll before the timer runs out.

  • Noise Monitoring: Use the Sound Level widget. It uses the iPad’s microphone to show a live bar graph of the volume in the room – perfect for keeping group work at a “whisper” level. Please note, this feature requires a microphone.

  • Visual Timetables: Use the Work Symbols alongside the Clock. Seeing the time next to a visual instruction helps pupils who struggle with transitions understand exactly what is happening and for how long.

  • Quick QR Codes: If you find a great stimulus or video, use the QR Code widget. Paste the link, and a code appears instantly on the board for pupils to scan with their own iPads.


Get Going with Green Screen film-making in the classroom

So what is green-screen?

Essentially it’s using software or an app to combine different images or video so that one appears as if part of the other. The green screen part makes use of chroma-key feature of the app so that anyone standing in front of a green screen will appear in the video with the green screen not seen at all, but replaced by another chosen background image or video. Wikipedia gives a much fuller explanation here: https://en.wikipedia.org/wiki/Chroma_key.

But how do I create a film in the classroom with green screen?

With an iPad, and a green screen app (such as the Doink green screen iPad app) and with anything in the background which is green (whether frieze paper on the wall or green sheeting, or specially made green screen fabric on a frame) you are ready to go.
Have a look at the Sway below for examples of videos created by pupils using the DoInk green screen iPad app, along with how-to guides to starting to use it yourself. And then it’s creativity on the part of your learners in the classroom – for further inspiration have a look at the DoInk green screen app blog  to see how others have shared about using green screen film-making in the classroom.