
1. Set the spoken language.
Tap on the Effects button (colourful star) on the right hand side and choose Live Text. Scroll to the bottom of the title options and tap on the language shown (you can see in this example the language is currently set to German).
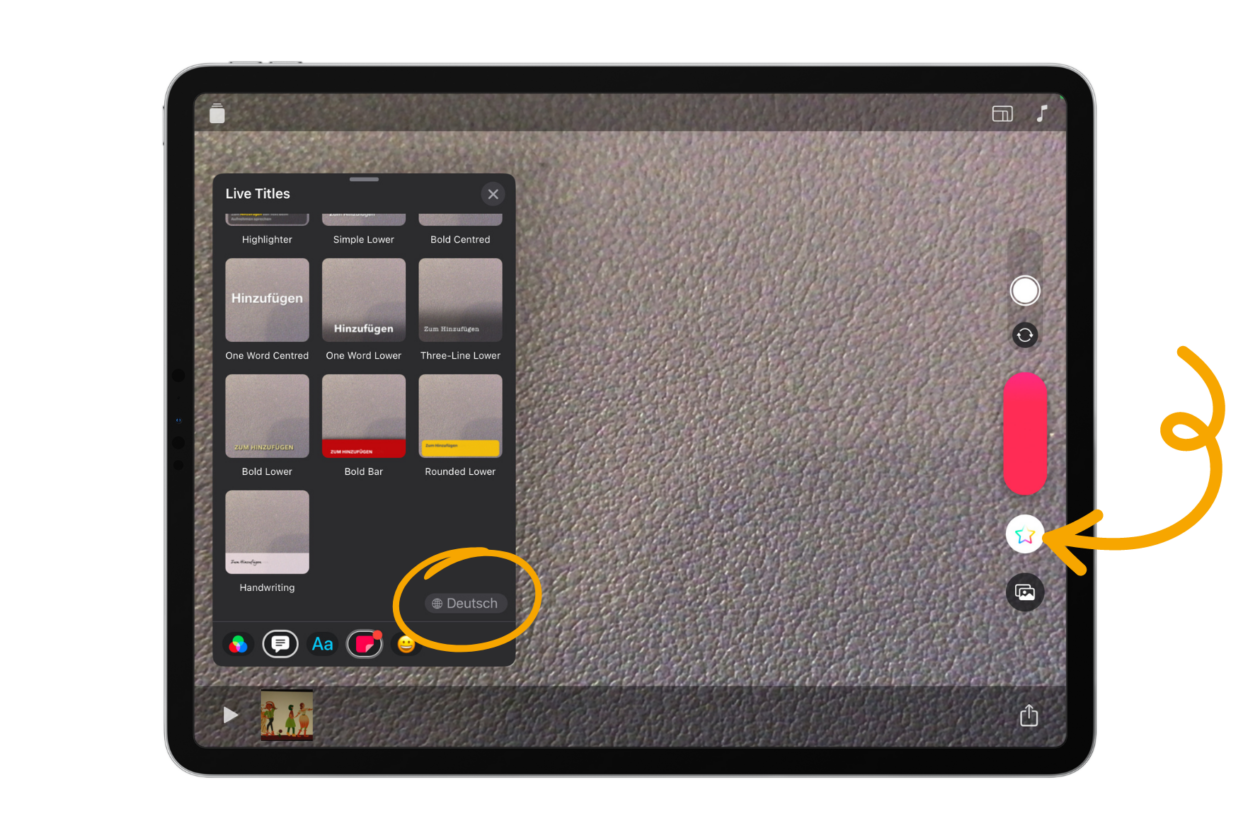
.
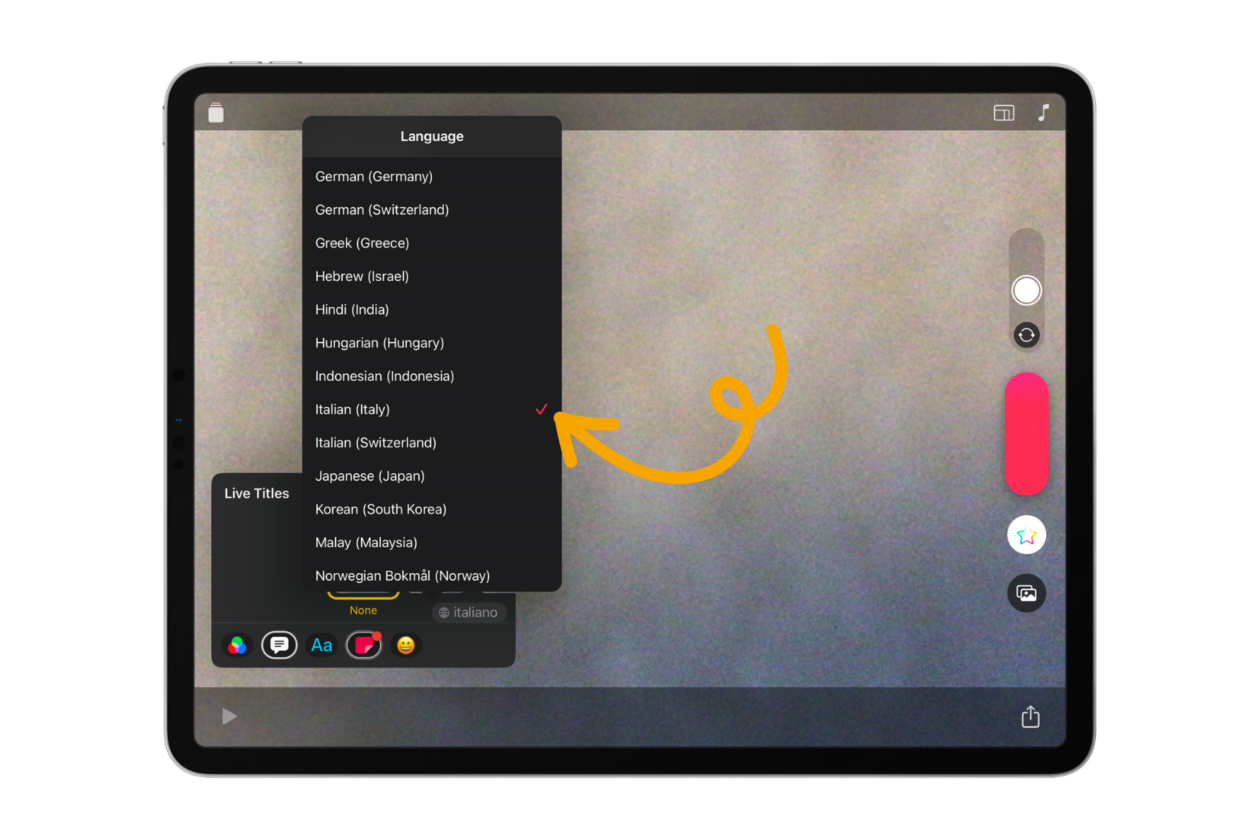
When you tap on the language a list will appear. Select the language that will be spoken during the video, in this case Italian. Make sure there is a pink tick which confirms the language is selected.
2. Record your video.
Press and hold the pink button on the main screen to record your video, it will stop when you let go of the button. Swipe it to lock it on record if needed. You can also add media and talk over it using the Media option and choosing Preview and Record when adding it. Here you can see our clip in Italian.
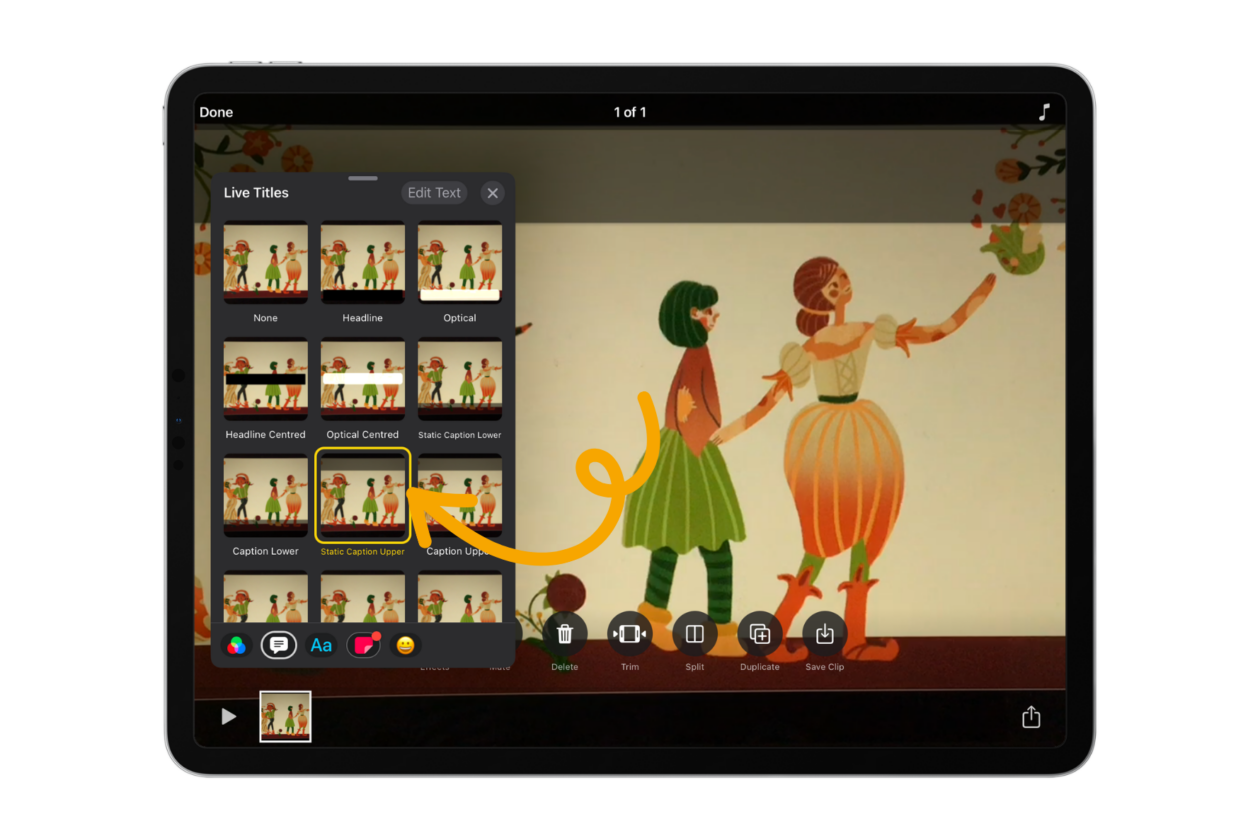
3. Add Live Titles
Tap on your clip at the bottom of the screen and tap the Effects button (colourful star) and choose Live Titles. Select which kind you want. When you watch your clip back it should now show live titles in the set language.
.
It is important to set the spoken language as it won’t recognise other languages (for example, if you’re speaking French but the language is set to English it will only listen for and transcribe English words). See our Live Text Italian video below.
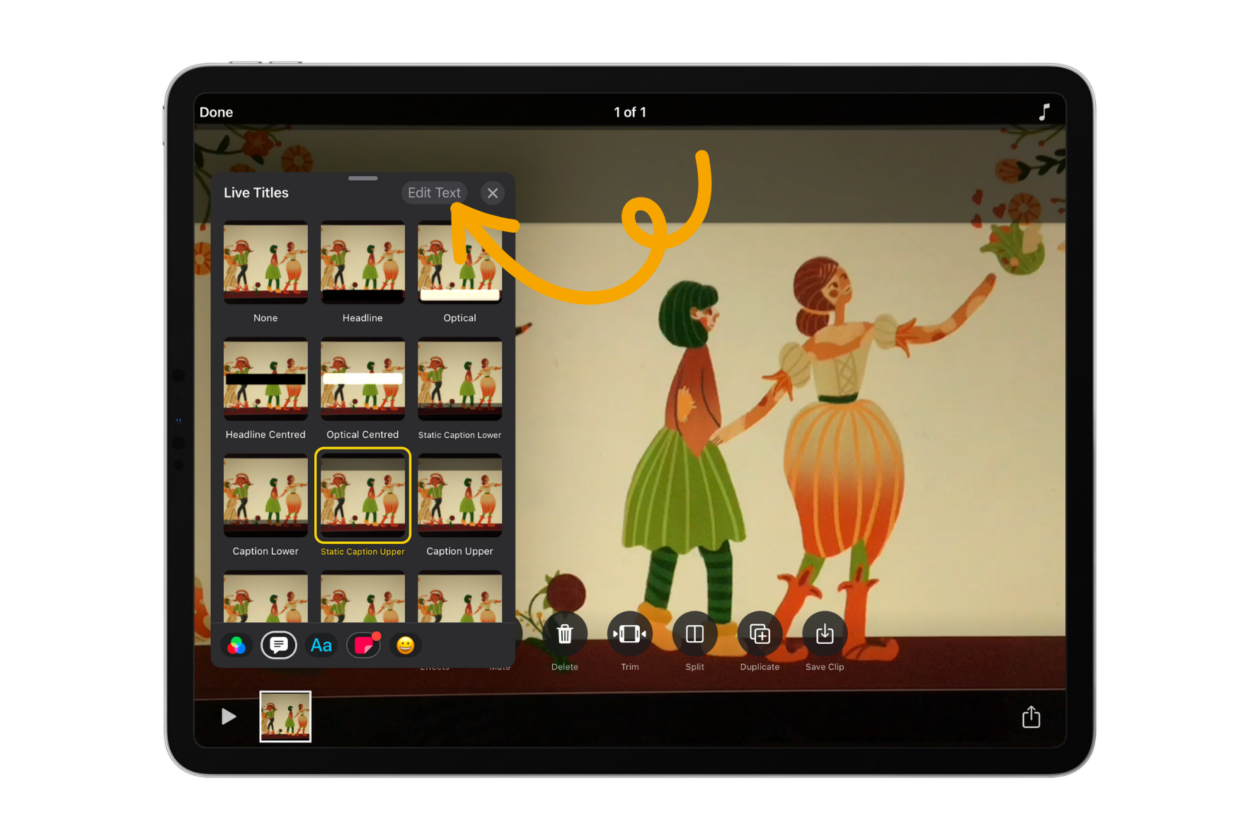
4. Translate your Live Text
Go back into Effects and Live Titles. At the top of the Live Text pane, tap on Edit Text. This will open a new pane showing the text that has been generated for your Live Text from the audio recording.
.
.
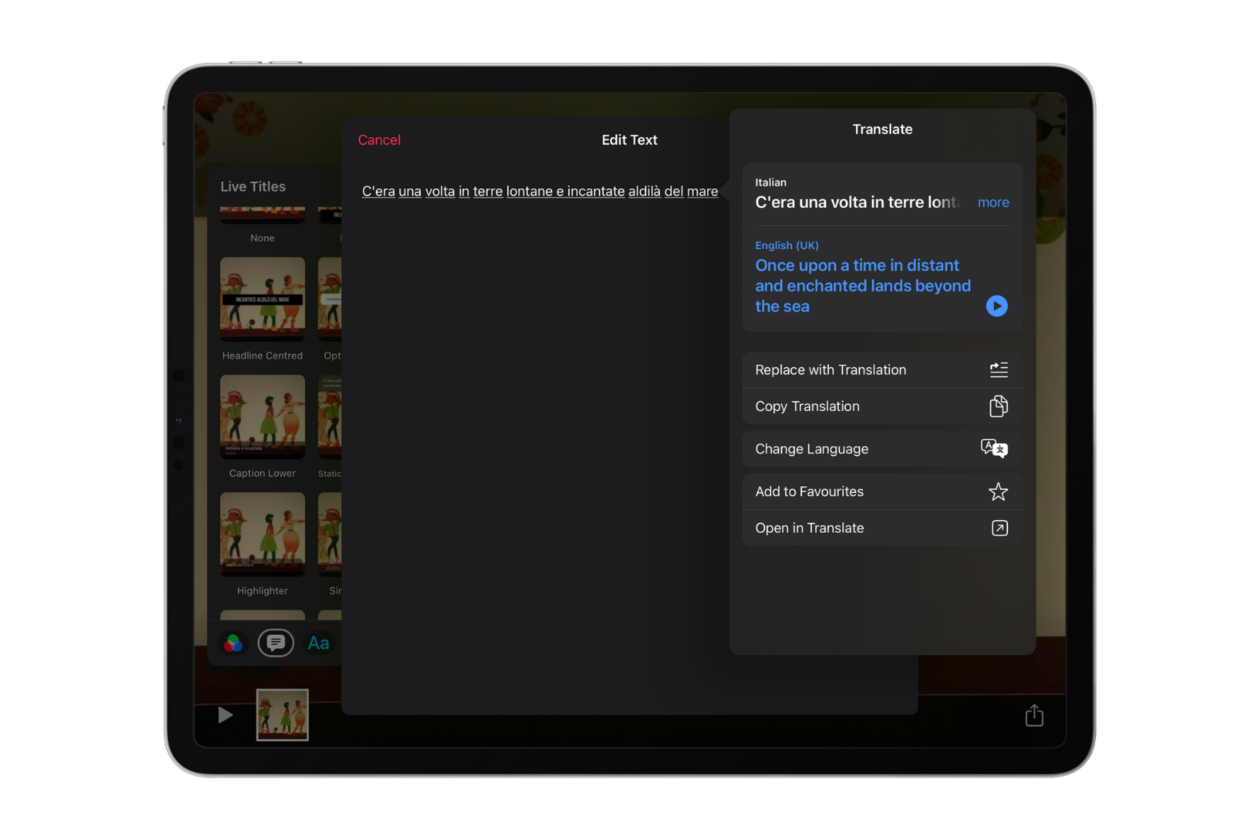
Highlight the text and tap on Translate on the black options ribbon.

Translate will show you the original text in the spoken language along with a translation. The translation language depends on what you have your iPad set to by default. If it’s not the language you are looking for you can select ‘Choose Language’ and find the right one. In this case we want English, so it is good to go. Tap on Replace with Translation.
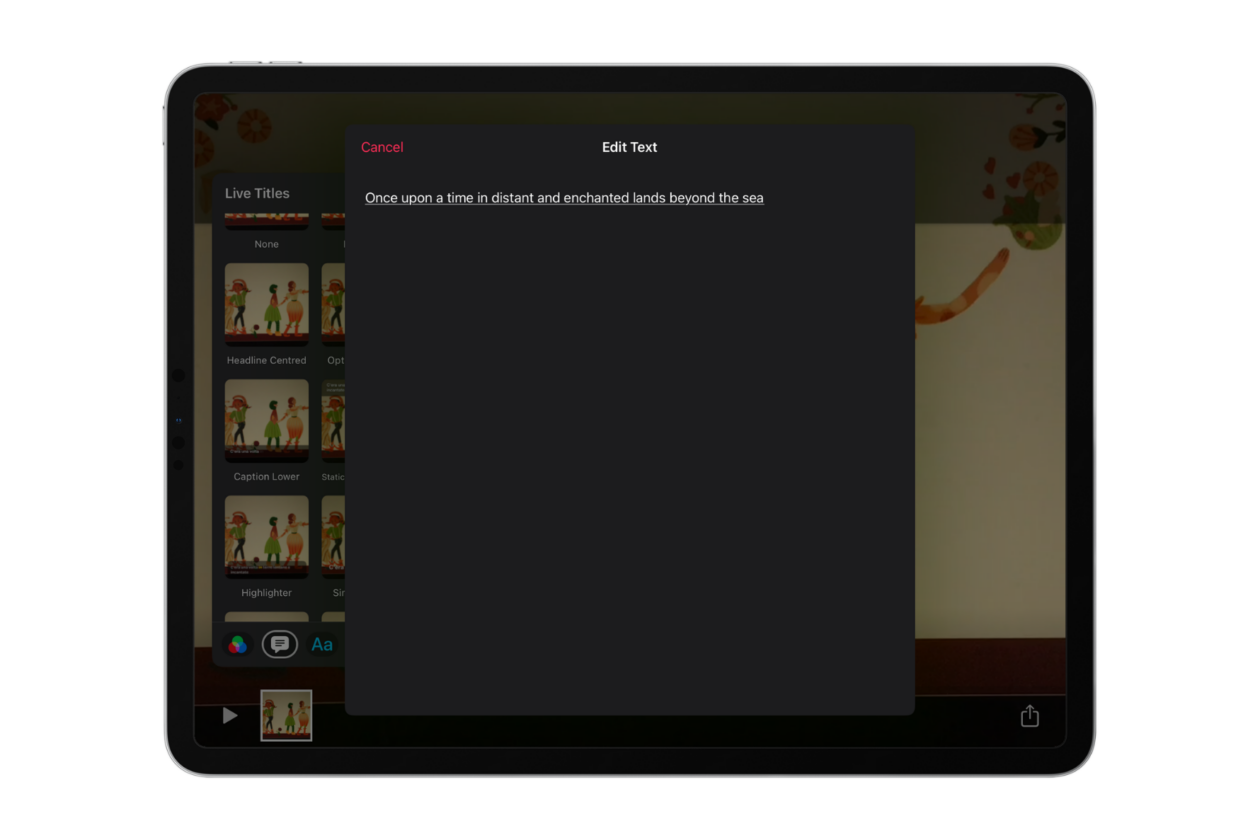
The original spoken language will now be replaced with your translation language, in our case English. On this screen you must tap at the end of the sentence as if you were going to type and hit enter for the new text to be registered. You’ll know it has worked if you go back to the Live Text pane and hit Edit Text again and you see the English words there.
4. Check your Live Titles
Now, when you play your clip, you should see the Live Text in your translated language (in this case English) while the spoken language on the video remains in the original recorded language (in this case Italian). Top tip: if the new subtitles don’t appear, try changing which Live Text style you have chosen.
