Tag: Microsoft

Microsoft OneDrive

Microsoft OneDrive in Glow: securely store, share, and collect files from anywhere.

🔍 What does it do?

OneDrive is the “storage heart” of Glow. Every Falkirk teacher and pupil has space to save documents, photos, and videos. Because it is cloud-based, you can start a file on your classroom PC and pick it up exactly where you left off on your iPad. It’s also the engine that allows for real-time collaboration in Word, Excel, and PowerPoint.


🎓 Why is it useful?

  • Version History: Accidents happen! If a pupil accidentally deletes their entire essay, you can use “Version History” to go back in time and restore a previous version of that document.

  • Files On-Demand: It doesn’t use up all the space on your iPad. You can see all your files, but they only download when you actually click to open them.

  • Seamless Sharing: No more emailing large attachments. Send a “view-only” or “edit” link to a colleague or pupil to work together on a single version of a file.


⚙️ How does it work?

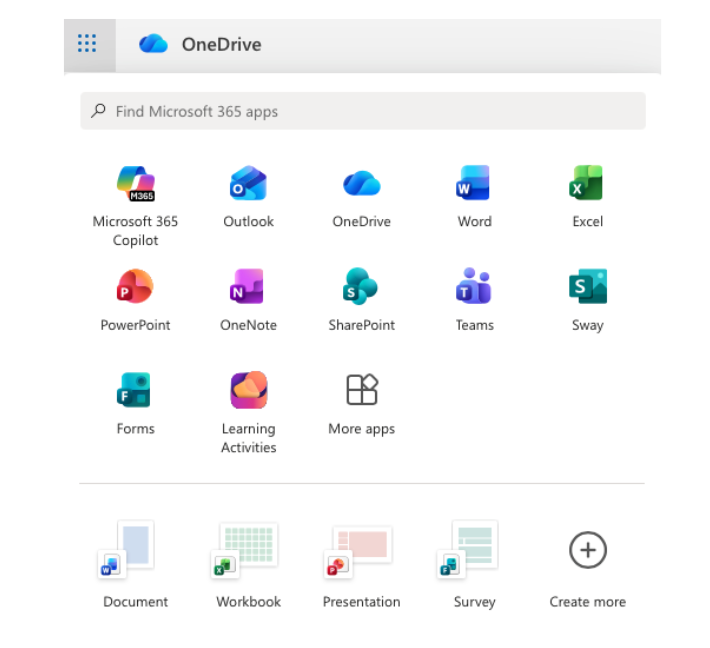
  1. Access: Find the OneDrive tile on your Glow Launchpad or open the app on your iPad.

  2. Organise: Create folders for different subjects or terms to keep your “My Files” area tidy.

  3. Share: Select a file and click the Share icon. You can decide if the person can “Edit” or just “View,” and even set an expiry date for the link.

  4. Sync: Ensure the OneDrive app is signed in on your iPad so that your “Camera Roll” can automatically back up your classroom photos. Find out how to do this here.


🚀 Beyond the Basics

  • Shared Folders: Create a folder for your department or stage. Share it with your colleagues with “Edit” access to build a shared library of lesson plans and resources that everyone can contribute to.

  • Data Analysis: If you collect survey data using a Microsoft Form, the results are stored in your OneDrive as an Excel file. You can share this file with pupils so they can practice “Live Data” analysis in class.

  • Live Peer Editing: Have two pupils share a Word document stored in OneDrive. They can use the “Comments” feature to give each other feedback in real-time without ever leaving the document.


🔗 Teacher Quick Links

Glow Connect – OneDrive Articles

Microsoft Sway

Microsoft Sway is a digital storytelling made simple: Professional presentations, newsletters, and portfolios in minutes.

🔍 What does it do?

Microsoft Sway is a web-based storytelling app that helps you create interactive reports, personal stories, and newsletters. Unlike PowerPoint, which is slide-based, Sway is a scrolling digital canvas. You provide the content (text, images, and videos), and Sway’s built-in design engine handles the layout, ensuring it looks great on any screen- from a desktop to a smartphone.


🎓 Why is it useful?

  • No Design Skills Required: You focus on the story, Sway focuses on the design. With one click of the “Remix” button, you can instantly change the entire look and feel of your project.

  • Accessible by Design: Sways are easy to read. They include an “Accessibility View” that optimizes the screen for high contrast and screen readers, making it inclusive for all learners.

  • Modern Newsletters: It is an extremely useful tool for school newsletters in Falkirk. Parents can scroll through updates and watch embedded videos of school life directly on their phones.

  • Web-Based Sharing: You don’t “send” a Sway; you share a link. This means you can update the content even after you’ve sent the link, and everyone will see the latest version.


⚙️ How does it work?

1. Launch: Access directly at sway.office.com using your Glow login details or via the waffle menu in OneDrive in Glow.

2. Start from Scratch or a Document: Click + New Blank to start fresh, or upload an existing Word or PDF document and watch Sway “transform” it into a web page automatically.

3. The Storyline: Use the “Storyline” to add “Cards.” There are cards for text, images, video, and even “Stacks” (groups of photos that you can tap to flip through).

4. Design & Remix: Switch to the Design tab to see your work. Click Styles and then Remix! to cycle through different fonts, colors, and scroll directions (Vertical or Horizontal).

5. Share: Click the Share button. For school newsletters, ensure you select “Anyone with a link” so parents can view it without needing a Glow login.


🚀 Beyond the Basics

  • Digital Portfolios: Pupils can use Sway to curate their best work over a term. They can embed audio recordings of them reflecting on their writing alongside photos of their physical work.

  • Interactive Reports: Instead of a poster, pupils can create a scrolling report. Use the “Comparison” card to show “Before and After” photos of an experiment using a slider.

  • Virtual Trips: Create a Sway about a country or historical period. Embed Google Maps (using an embed code) and YouTube videos to create an immersive research hub for the class.

  • For Admin: Create a “Living Document” for staff or pupils. Because it’s a web link, you can update the school calendar or policies in the Sway throughout the year without having to re-send emails.

Microsoft Forms

Microsoft Forms is an easy way to create surveys, quizzes, and polls with built-in Practice Mode and Data Insights.

🔍 What does it do?

Microsoft Forms is a web-based tool for gathering information and assessing learning. It allows you to create interactive quizzes and surveys that work on any device. In a Falkirk classroom, it can be used as a go-to tool for “check-ins” and low-stakes testing providing instant feedback to both the teacher and the pupil.

🎓 Why is it useful?

  • Instant Assessment: Create a “Check for Understanding” quiz at the end of a lesson to see exactly which pupils have grasped the concept.

  • Low-Stakes Learning (Practice Mode): This new feature allows pupils to try questions multiple times, see correct answers instantly, and receive encouraging feedback, turning a “test” into a learning activity.

  • Smart Data Insights: Forms doesn’t just show you “who got what”, it automatically identifies “Hard Questions” where a large percentage of the class struggled, helping you plan what to re-teach.

  • Self-Marking: Quizzes can be auto-graded, giving pupils immediate results and saving you hours of manual marking for certain types of assessment.

⚙️ How does it work?

1. Launch: Access directly at forms.office.com using your Glow login details or via the waffle menu in OneDrive in Glow.

2. Create: Click + New Quiz (to add correct answers and points) or + New Form (for surveys).

3. Enable Practice Mode: Go to Settings (…) and toggle on Practice Mode. This allows pupils to see if they are right or wrong immediately after answering each question.

4. Present Mode: Use the Present button in class to show live, anonymous results (like a word cloud or bar chart) as pupils submit their answers in real-time.

5. Review: Click the Responses tab to see a summary of the data and open it in Excel for a detailed breakdown.

🚀 Beyond the Basics

  • Practice Mode for self paced learning: Turn any quiz into a revision tool. Pupils get instant feedback and can “try again,” which helps build confidence and independence.

  • Branching Logic in Literacy: Use the “Branching” feature to create a digital “Choose Your Own Adventure” story. Depending on the choice a pupil makes, the form sends them to a different page of the narrative.

  • Live Data in Science: Open a Form in Present Mode during an experiment. As pupils enter their findings, the charts on your board update live, allowing for an immediate class discussion on the results.

  • Accessibility with Immersive Reader: Every Form has Immersive Reader built-in. Pupils can tap the icon next to any question to have it read aloud, translated, or broken into syllables.


Quick Links

Microsoft Forms for Education

Microsoft Forms Quick Start Guide

Microsoft Lens

Microsoft Lens, turn physical paper into accessible digital text in seconds.


🔍 What does it do?

Microsoft Lens is a scanning app that uses the iPad camera to “read” the world around it. It automatically crops and cleans up photos of whiteboards, worksheets, or book pages. More importantly, it uses Optical Character Recognition (OCR) to turn the text in those photos into digital content that can be read aloud, edited, or translated.

🎓 Why is it useful?

  • Instant Accessibility: Students who find reading difficult can take a photo of any page and have it read to them by saving their scan into OneNote and using Immersive Reader.

  • No More Manual Typing: If you have a physical worksheet but lost the digital file, Lens can scan it and “extract” the text to a Word document for you to edit.

  • High-Quality Scanning: It automatically fixes “wonky” angles and removes glare from whiteboards, making classroom notes clear and easy to read later.

  • Glow Integration: Scanned documents can be saved directly into your OneDrive, OneNote.


⚙️ How does it work?

  1. Open the App: Point your iPad camera at a document, whiteboard, or book.

  2. Select a Mode: Swipe between Document (for paper), Whiteboard (to remove glare), or Actions (to extract text or tables to a copy and passable piece of text). You can also extract text from previously taken images.

  3. Snap & Trim: Take the photo. Lens will automatically find the edges of the paper, but you can adjust them manually if needed.

  4. Choose a Destination: Tap Done and select where you want it to go. Please note that choosing Immersive Reader directly on the save screen does not work, please save to OneDrive and then tap the image once it has processed to access Immersive Reader in OneNote for audio support.

🚀 Beyond the Basics

  • Alongside OneNote: A pupil can take a photo of a textbook page and export it to OneNote. Once in OneNote they can select Immersive Reader, here they can change the font size, background colour, make use of picture dictionary and have the text read aloud – giving them independent access to the curriculum.

  • Jotter to OneNote: Pupils can take photos of their handwritten work in their jotters. Lens cleans up the image and saves it into their OneNote Class Notebook, creating a permanent digital record of their physical work


Excel Online

Microsoft Excel Online is more than just numbers, it is a powerful tool for data handling, visualisation, and problem-solving.

🔍 What does it do?

Microsoft Excel is a spreadsheet application. While often seen as a tool for accountants, in the classroom it is a powerful canvas for organising information, performing calculations, and turning raw data into visual charts and graphs. As part of Glow, it is available online, allowing pupils to collaborate on the same spreadsheet in real-time.

🎓 Why is it useful?

  • Visualising Data: Instantly turn a table of survey results (like traffic surveys or favorite foods) into colorful bar charts or pie graphs to help pupils spot trends.

  • Real-Time Collaboration: Multiple pupils can enter data into a single shared spreadsheet simultaneously – perfect for whole-class experiments.

  • Maths in Action: It brings numeracy to life by using formulas to solve real-world problems, from managing a budget to tracking fitness results in PE.

  • Anywhere Access: Works on iPads, PCs, and through any web browser via Glow, so learning can continue at home.


⚙️ How does it work?

  1. Log In: Access Excel via the OneDrive or Teams tile on your Glow Launchpad.

  2. Create a Table: Enter your labels in the top row and your data in the cells below.

  3. Insert Chart: Highlight your data, go to the Insert tab, and choose a chart type (e.g., Column or Pie).

  4. Collaborate: Use the Share button (top right) to invite others to edit the document with you.

Check out this handy Sway with detailed instructions on how to set up and use an Excel document online:


🚀 Beyond the Basics

  • Automatic Graphs: After a class survey, have pupils use Excel to generate different types of graphs to see which one displays their data most clearly.

  • Data Types: Type a list of countries or cities, then use the “Geography” Data Type (under the Data tab) to automatically pull in facts like population, area, and capital cities.

  • Fitness Tracking: Record heart rates before and after exercise directly into a spreadsheet and use the “AutoSum” or “Average” formulas to analyse the class results instantly.

  • Budgeting: Give pupils a “Virtual Budget” for a class trip. They can use Excel to track costs and see how changing one item (like the bus price) affects their total spend.


Quick Links

Microsoft Excel support webpage 

Microsoft Basic Tasks in Excel


PowerPoint Online

Microsoft PowerPoint Online presentations and digital storytelling, optimised for the web and accessibly any time, any where.


🔍 What does it do?

PowerPoint Online is the web-based version of Microsoft’s presentation software. It allows you to create, edit, and share slideshows directly in your browser. While it is simpler than the desktop app, it is built for the modern classroom offering real-time collaboration, automatic cloud saving to OneDrive, and unique web-only features like “Presenter Coach.”


🎓 Why is it useful?

  • Collaborative Creativity: Multiple pupils can work on a single deck at once, making it ideal for group projects or a “Whole Class Book” where every child gets one slide to showcase their work.

  • Auto-Design: The built-in Designer tool under the ‘Design’ tab on iPad uses smart technology to suggest professional layouts, icons, and themes based on your text.

  • Rehearse with Coach: Use Rehearse with Coach under the ‘Slide Show’ tab to practice your presentation and get instant feedback.

  • Always Saved: “AutoSave” is always on. If a device loses power or a browser tab is closed, the work is safe in the cloud.


⚙️ How does it work?

  1. Launch: Access via the PowerPoint tile on your Glow Launchpad, through your OneDrive or via the iPad app or directly at powerpoint.office.com using your Glow credentials.

  2. Choose a Theme: Start with a template or a blank slate.

  3. Insert Content: Use the Insert tab to add images, videos, or “Online Pictures” which are automatically filtered for Creative Commons (copyright-safe) use. On iPad you can also draw directly onto slides using the ‘Draw’ tab. Don’t forget ‘Animations’ and ‘Transitions’!

  4. Collaborate: Click the Share button (top right) to invite others using their Glow username. You can see their cursor moving and see exactly what they are adding in real-time.

  5. Present: Click Present to show your work or deliver your lesson (via Apple TV). You can use the pencil icon when presenting to make annotations which can be saved upon exiting the presentation.


🚀 Beyond the Basics

  • Presenter Coach: This is a game-changer for public speaking. Pupils can tap Rehearse with Coach. The iPad listens to them speak and gives private, real-time feedback on their pace, “filler words” (like um and ah), and even their body language.

  • Designer: Instead of searching for clip-art, just type your bullet points. Tap the Designer button, and PowerPoint will suggest high-end, visual layouts that match your topic.

  • For Quick Videos: Use the Export feature to turn your slideshow into an MP4 video. This is great for creating simple “Instructional Videos” or digital stories.


Word Online

Microsoft Word Online for document creation and real-time collaboration.

🔍 What does it do?

Microsoft Word Online is the browser-based version of the popular word processor. Word Online is optimised for speed, accessibility, and collaboration. It allows multiple people to work on the same report simultaneously, with all changes saved automatically to your OneDrive. Word Online is available anytime, anywhere with online access at home or at school.

🎓 Why is it useful?

  • Real-Time Co-authoring: Learners can work together on a single poem, story, or project at the same time, seeing each other’s changes instantly.
  • Built-in Accessibility: Every Word Online document includes Immersive Reader, providing instant support for students with dyslexia or EAL needs.
  • Zero Risk of Data Loss: “AutoSave” is always on. If a device loses power or a browser tab is closed, the work is safe in the cloud.
  • Simple Feedback Loop: Teachers can leave “Comments” to provide guidance directly on the page without needing to print a single sheet.


⚙️ How does it work?

1. Access: Access via the Word tile on your Glow Launchpad, through your OneDrive or via the iPad app or directly at word.office.com using your Glow credentials.

2. Create: Start a new blank document or use one of the education templates.

3. Share: Click the Share button (top right) to invite others to edit. You can control who can view vs. edit. Remember, you can also use the Teams assignment function which will allow you to see learner work in real time.

4. Edit vs. View: Easily switch between Editing mode (writing), Reviewing mode (suggesting changes), or Viewing mode (to see the final look).

5. Export: If you need a static copy, go to File > Save As > Download as PDF.


🚀 Beyond the Basics

  • Dictate: Students who struggle with typing can use the Dictate button to turn their speech into text. It even supports “Auto-punctuation” to help with sentence structure.
  • Writing Quality Editor: On PC the Microsoft Editor pane goes beyond simple spellcheck. It provides a “Readability Score” and suggests improvements for clarity, conciseness, and formal tone.
  • Immersive Reader: Go to View > Immersive Reader to change background colors, increase line spacing, or have the text read aloud. This is a game-changer for independent learning.
  • Comments & Stickers: Instead of red pen, use the Comments feature to leave feedback. You can even insert Emojis to provide quick, visual encouragement that resonates with younger learners.


Microsoft Teams

Microsoft Teams is a digital hub for your classroom: one place for communication, assignments, and learning insights.

🔍 What does it do?

Microsoft Teams is a digital workspace that brings together everything a class needs. It combines group chat (Posts), file storage, and a powerful assignment system. In Falkirk, it serves as a virtual learning environment which is an extension of the physical classroom pupils log in to see their tasks, complete assignments, and collaborate on shared documents.

🎓 Why is it useful?

  • Centralised Learning: No more hunting for files. With the Classwork tab, you can group assignments, links,and OneNote pages into organized modules (e.g., “Week 1: The Victorians”).

  • Learning Accelerators: Teams now includes specialised tools like Reading Progress and Search Progress that help pupils build core skills while giving you automated data on their performance.

  • Wellbeing Checks: Use the Reflect tool to quickly gauge how your pupils are feeling, helping you support their social and emotional needs alongside their academic learning.

  • Paperless Assignments: Set tasks, provide rubrics, and give feedback all within the app. You can even see the “Student View” to ensure your instructions are clear before you click ‘Assign’.


⚙️ How does it work?

  1. Launch: Find the Teams tile on your Glow Launchpad or log into the app version.

  2. Create a Class: Click ‘Join or create a team’ and ensure you select the ‘Class’ type (this gives you the Assignments and Class Notebook features).

  3. Organise with Classwork: Use the Classwork tab to create “Modules.” Drag and drop files and assignments into these folders so pupils have a clear path to follow.

  4. Set an Assignment: Go to the Assignments tab. You can attach any file (Word, PowerPoint, Whiteboard) and choose to give “Each student their own copy” to work on.

  5. Check Insights: Click the Insights tab to see at a glance who has been active, who has turned in work, and even how the class “mood” is trending via Reflect.

🚀 Beyond the Basics

  • Reading Progress: Assign a reading passage. Pupils record themselves reading it, and Teams automatically marks their fluency, accuracy, and “mispronunciations,” saving you hours of 1-to-1 assessment time.

  • Search Progress: Instead of just asking for a report, use Search Progress. It tracks how pupils search the web, showing you which sources they trusted and why, helping you teach information literacy.

  • Reflect: Schedule a weekly “check-in.” Pupils choose a “Feelings Monster” that represents their mood. It’s a private, safe way for them to tell you if they are struggling.

  • Channel Moderation: If the ‘Posts’ area gets too busy, you can change the settings so that only you can start new threads, while pupils can only reply. This keeps your announcements from being buried!

  • Live Captions: During a virtual meeting or lesson, pupils can turn on Live Captions to see what you are saying as text on the screen—essential for pupils with EAL or hearing impairments.


🔗 Teacher Quick Links

DigiLearnScot Finding and Using Teams in Glow

Microsoft Teams for Education

Glow Connect – Teams Articles

OneNote

Microsoft OneNote, the digital ring-binder that organises your entire classroom in one place.

🔍 What does it do?

OneNote is a powerful digital notebook that allows you to capture text, handwriting, audio, and images on an infinite canvas. While it works as a personal notebook, its real power in Falkirk is the Class Notebook – a shared version of OneNote used within Microsoft Teams where teachers can distribute digital resources, see pupil work in real-time, and provide instant feedback.

🎓 Why is it useful?

  • Organisation: Think of it as a physical folder with infinite dividers. You can have sections for different subjects, and pages for every lesson, all of which stay synced across iPads, PCs, and Glow.

  • Classroom Management: Within a Class Notebook, you have a “Teacher-Only” space to prep lessons, a “Content Library” where pupils can view resources, and “Private Notebooks” where each pupil does their work (which only you can see).

  • Live Feedback: You can open a pupil’s page while they are working and leave a digital sticker, a handwritten note, or a voice recording. This “over the shoulder” feedback is instant and impactful.

  • Multimedia Evidence: Pupils can take a photo of their physical work (like a poster or a maths jotter), “print” it onto a page, and then record their voice explaining their thinking.

⚙️ How does it work?

1. Access OneNote: Access directly at OneNote.office.com using your Glow login details or via the waffle menu in OneDrive in Glow.

2. Access Class Notebook: It is best to set this up through Microsoft Teams (by adding a ‘Class Notebook’ tab). This automatically creates folders for every pupil in your class.

3. Distribute Pages: Create a lesson in your Content Library, then use the ‘Class Notebook’ tab to “Distribute Page” to everyone. It appears in their notebooks instantly.

4. Review Student Work: Use the ‘Review Student Work’ button to quickly flip through every pupil’s response to a specific task without having to open individual files.


🚀 Beyond the Basics

  • Immersive Reader: Built directly into OneNote. Pupils can click ‘View’ > ‘Immersive Reader’ to have any text read aloud, translated, or changed to a high-contrast background. There is also a picture dictionary for dual coding.

  • Maths Assistant: Pupils can write an equation with their finger or stylus. OneNote can solve the equation and, more importantly, generate a Practice Quiz based on that specific problem type.

  • Dictation: Pupils can use the ‘Dictate’ button to “write” their stories using their voice helping remove the barrier of a blank page.

  • Feedback Audio Notes: Instead of typing, record a 30-second audio clip of your feedback. Research shows pupils find voice feedback more personal and easier to understand.

  • Formative Assessment – Reflect: You can now insert a Reflect poll directly onto a OneNote page to check how pupils are feeling about their learning that day.


Quick Links

Microsoft Getting Started with OneNote Class Notebook