Whittling with Mrs. Madden 4

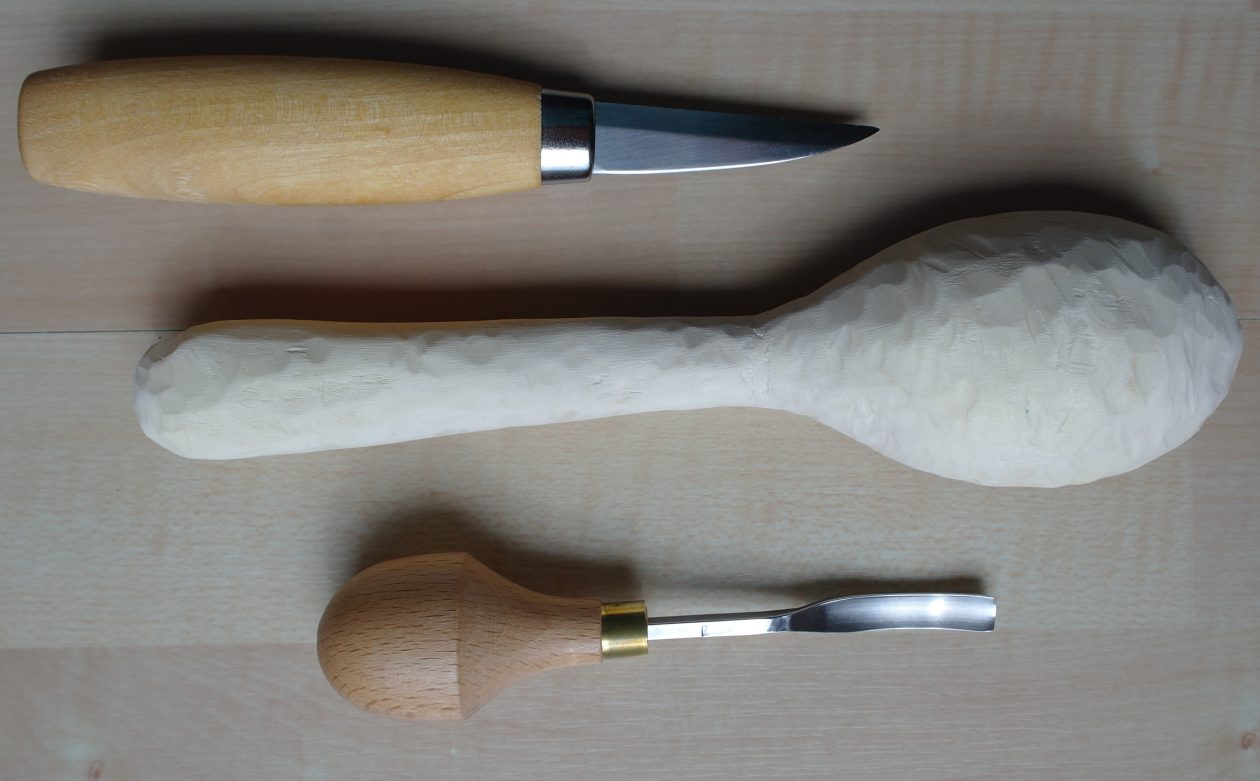
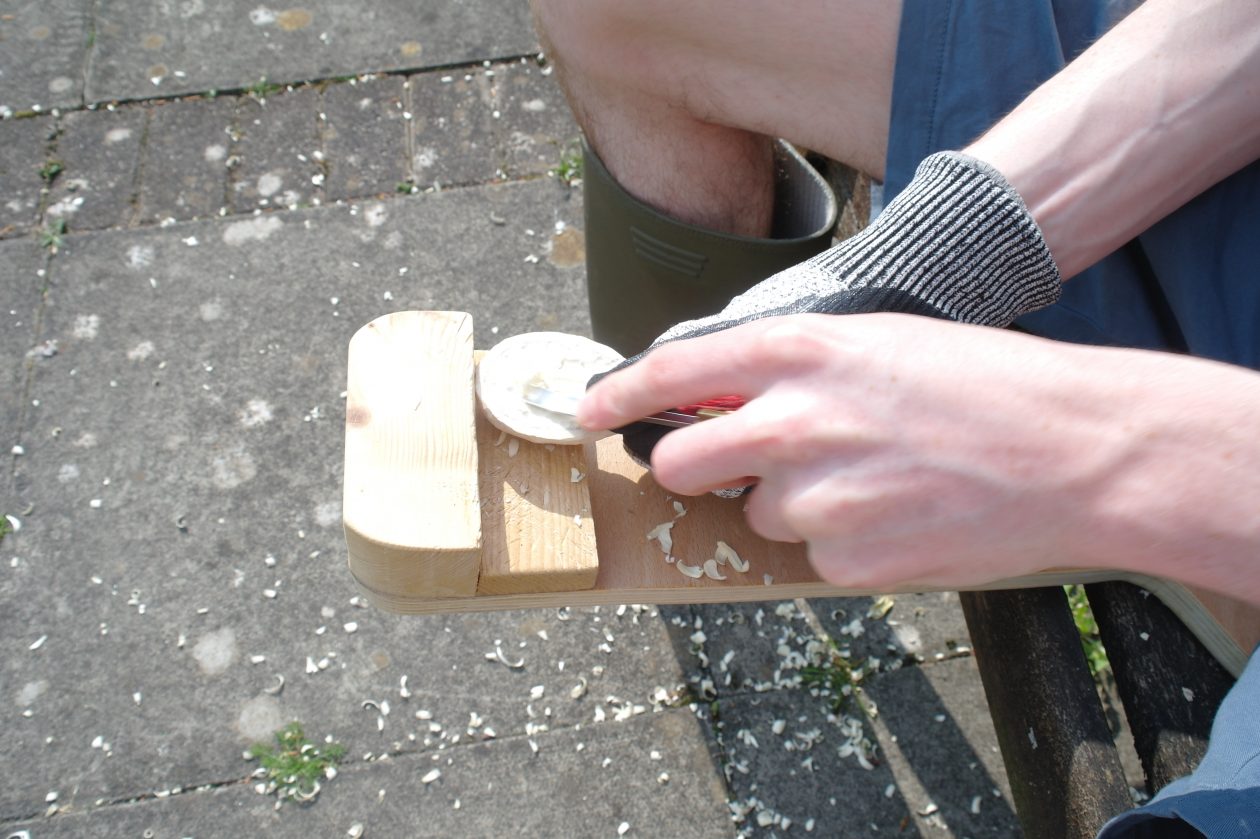
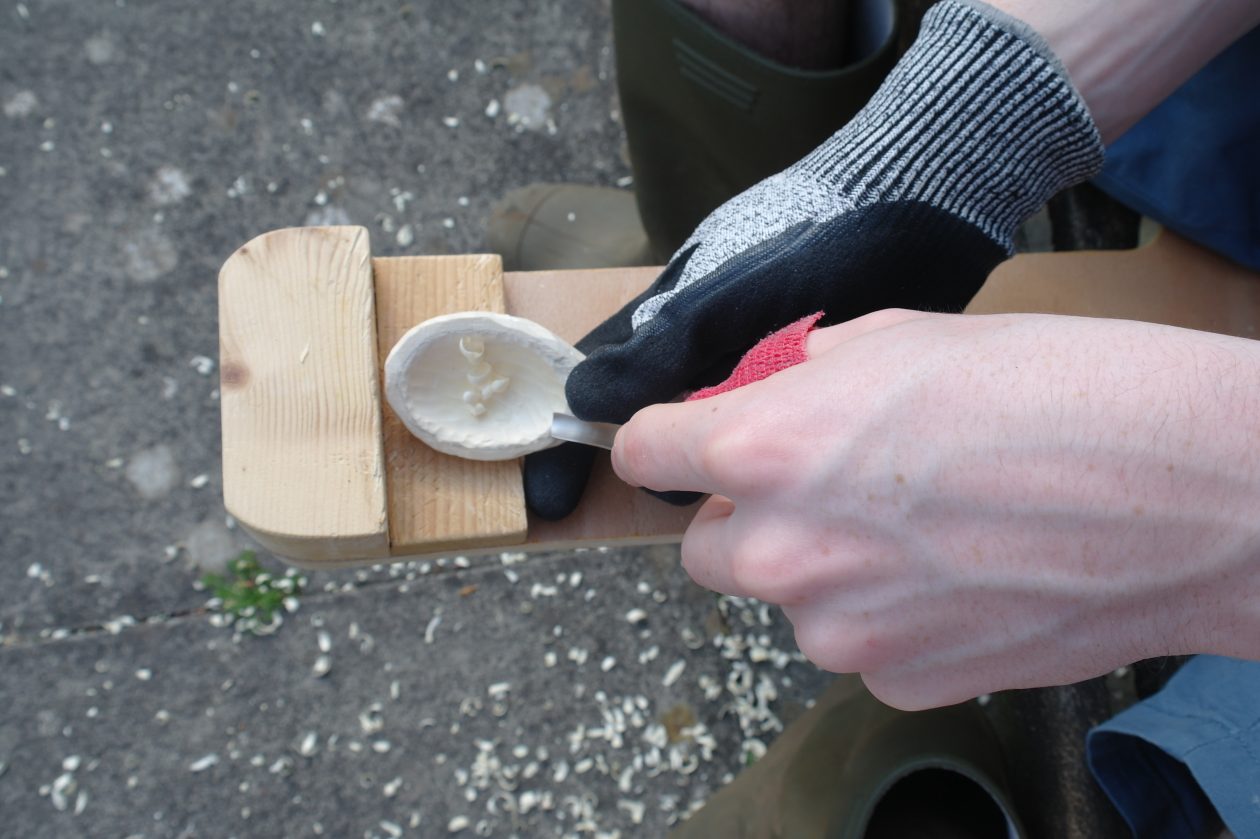
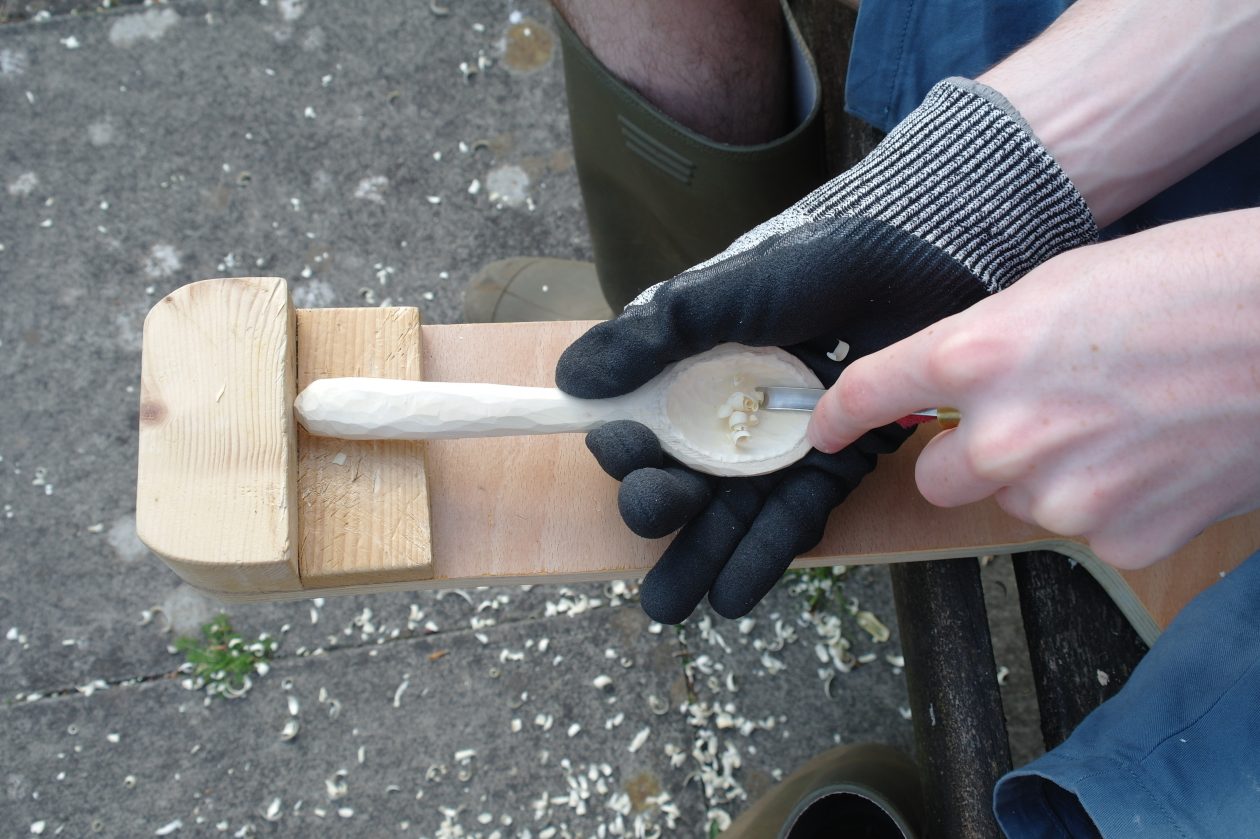
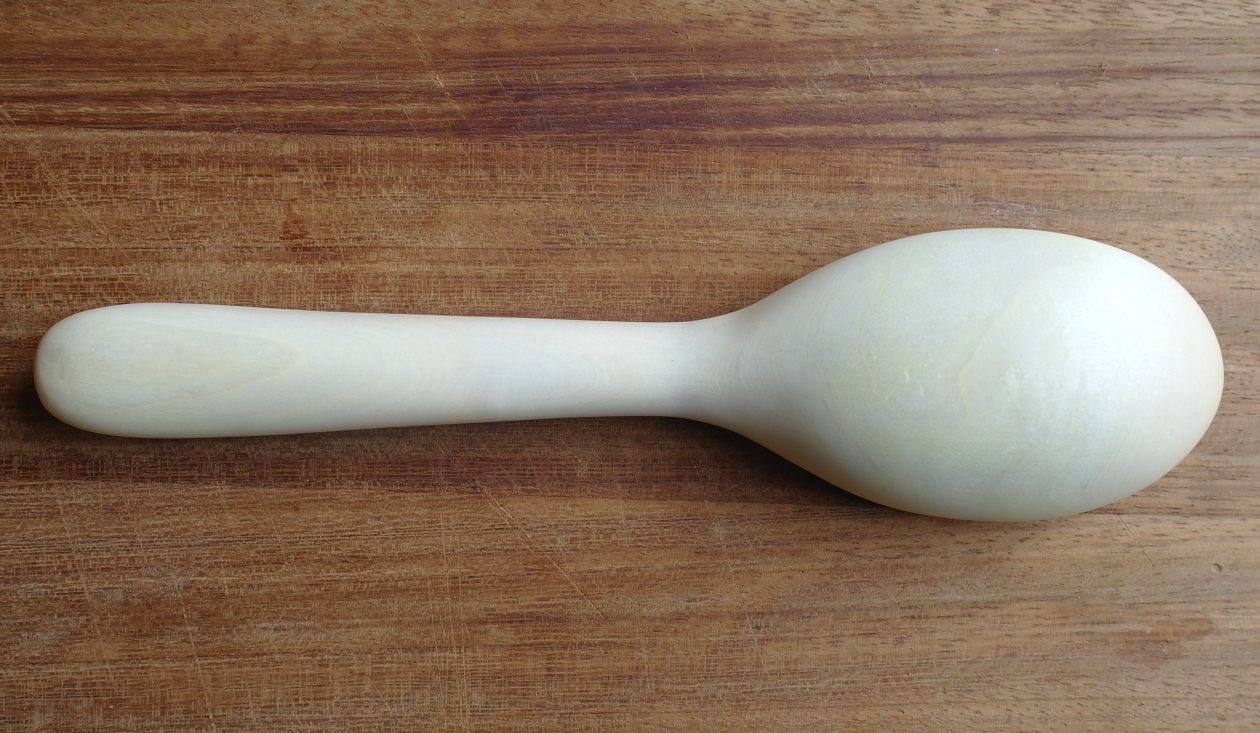
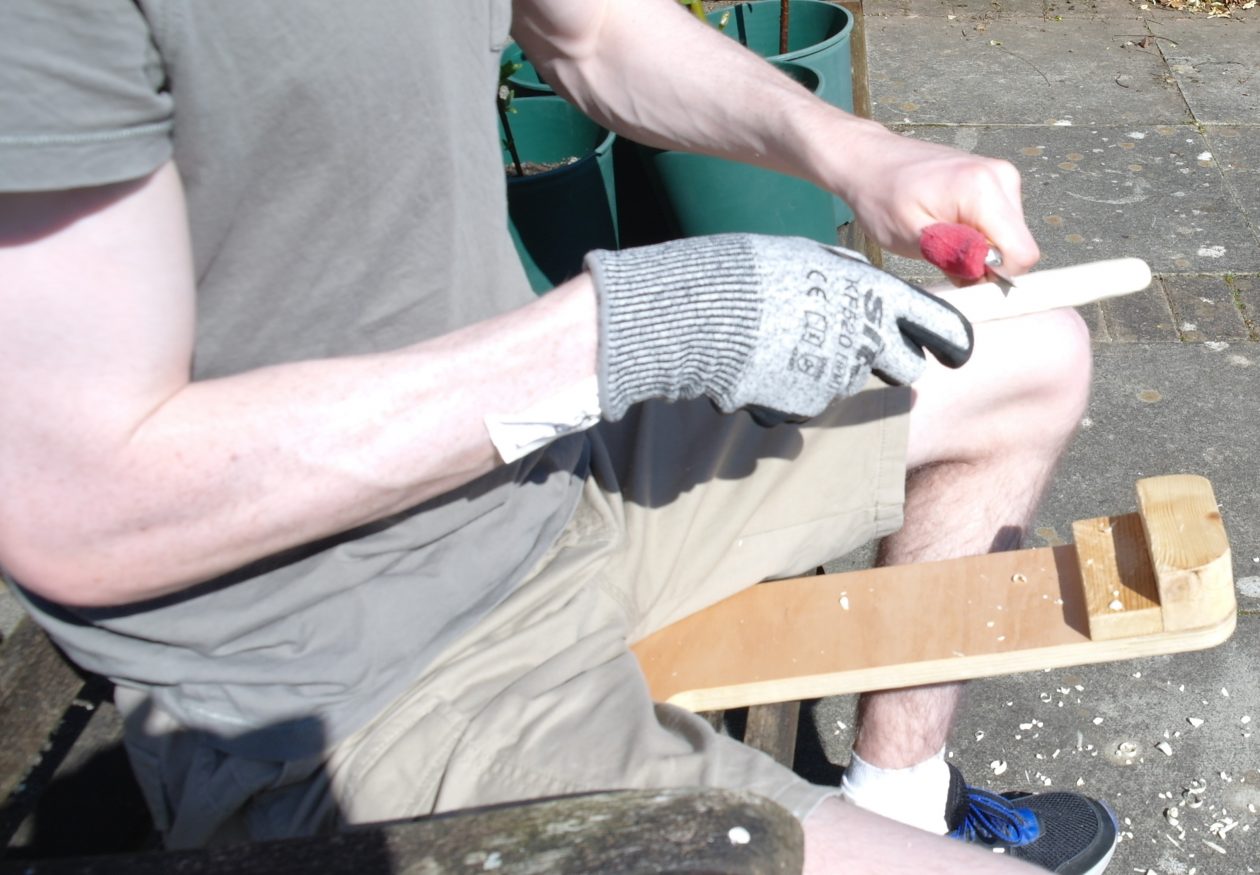
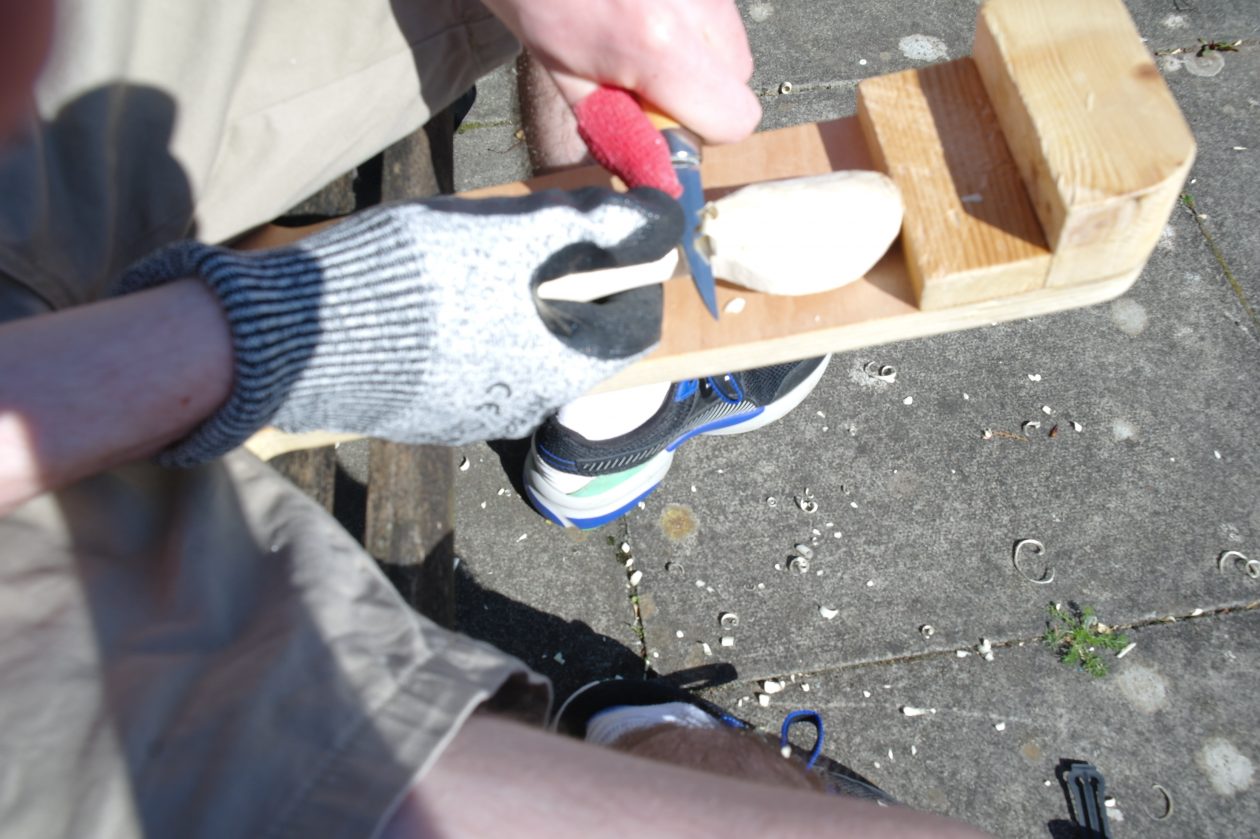
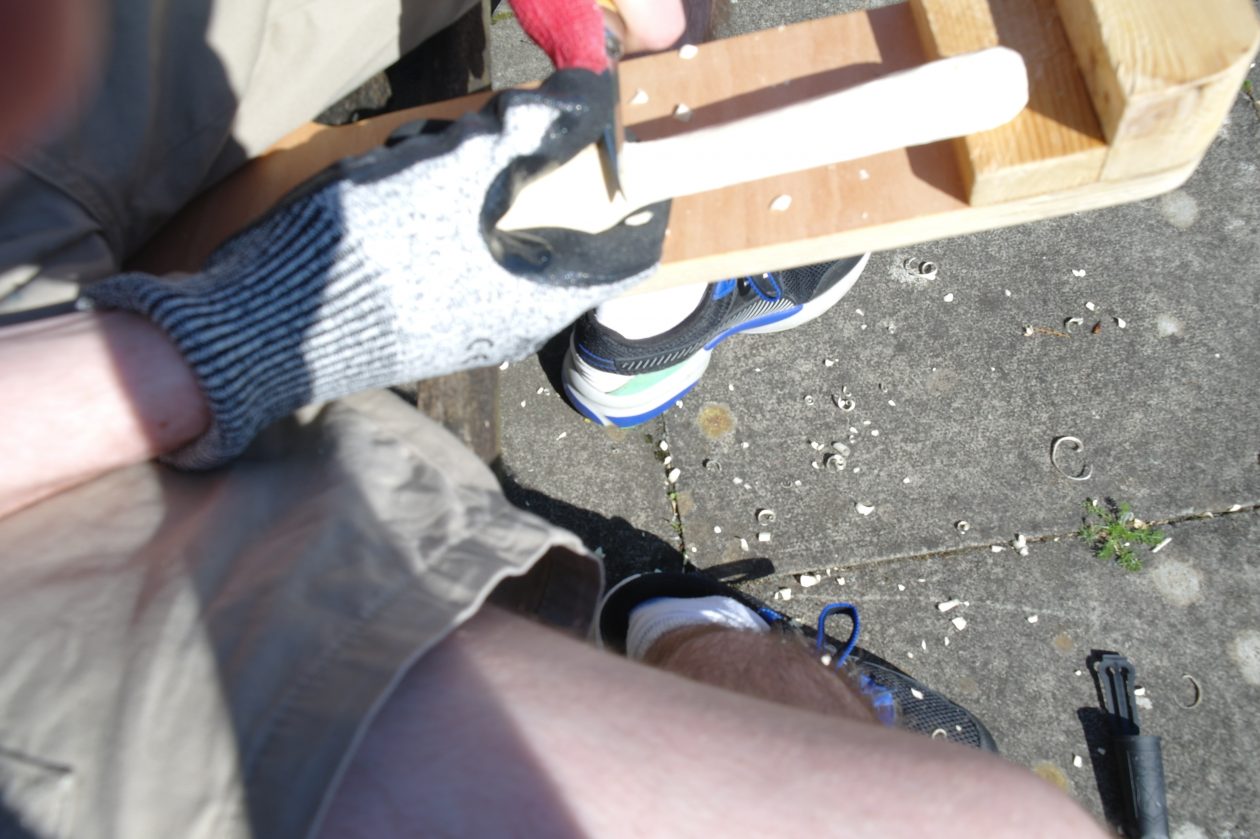
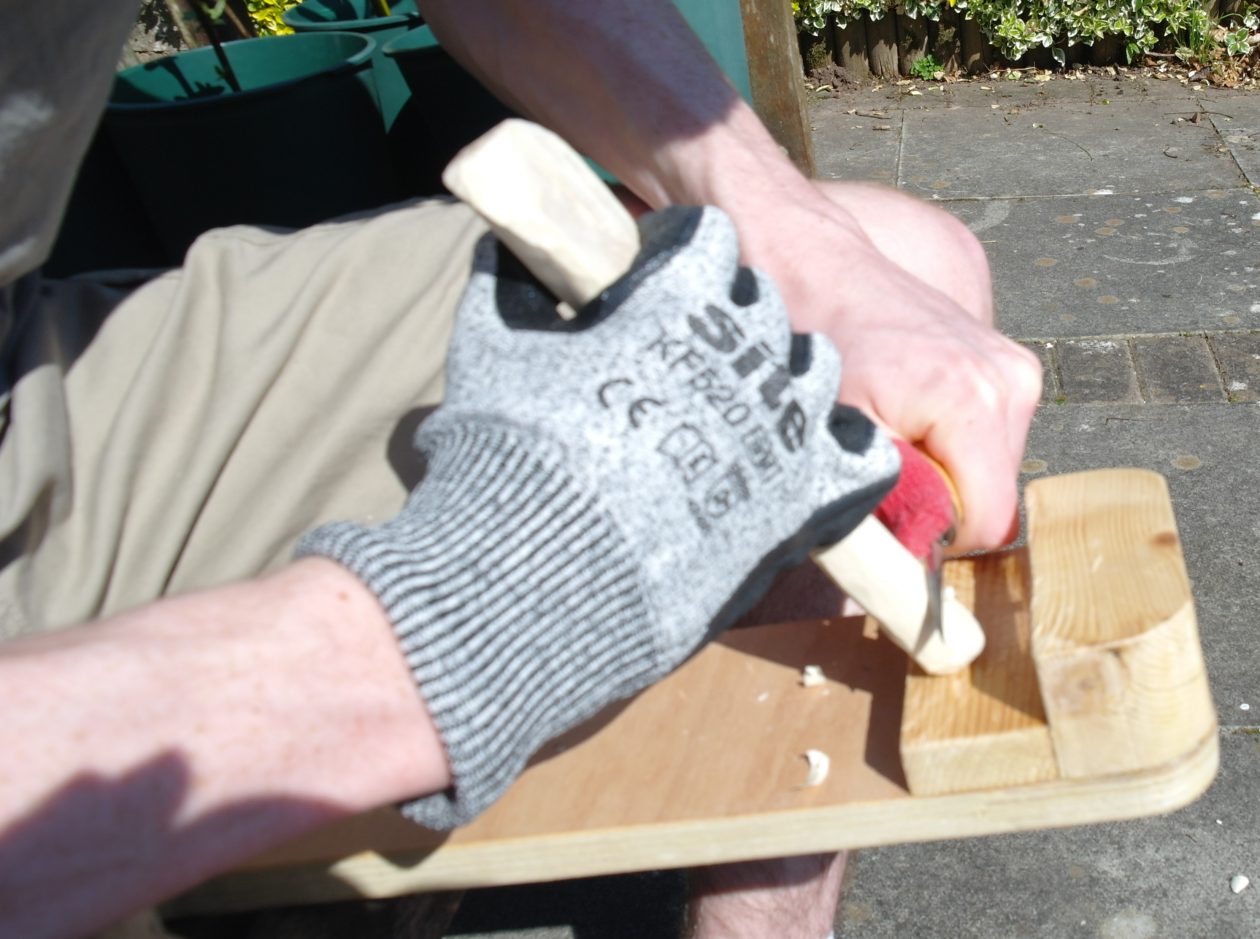
To create the bowl part of your wooden spoon, you need to gouge out the wood.  You can use your knife to do this, by making small ‘v’ shaped cuts but it takes a long time and leaves the ‘bowl’ quite rough and you will have to do quite a lot of sanding to get it smooth.  I use a small gouge (a wood carving tool).  


I like to draw a perimeter, with a pencil, around the area I am going to gouge before I start.  Rest the spoon against one of the blocks on the whittling seat and start to remove small areas of wood – make sure you do not dig too deeply as that could split and splinter the wood.


Gouge one way (this will create curls of wood in the centre of the spoon bowl).  Turn the spoon around, resting the end of the handle against the blocks on the seat and gouge the other way.


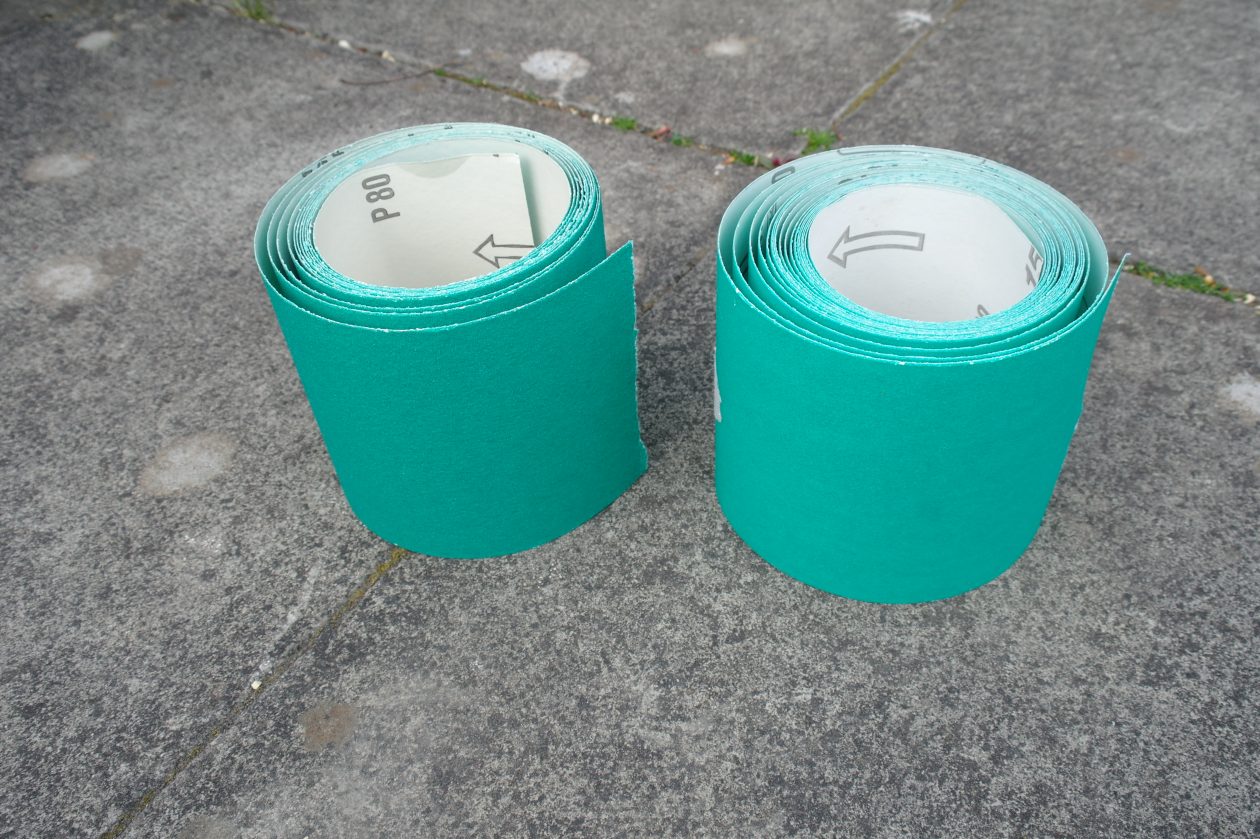
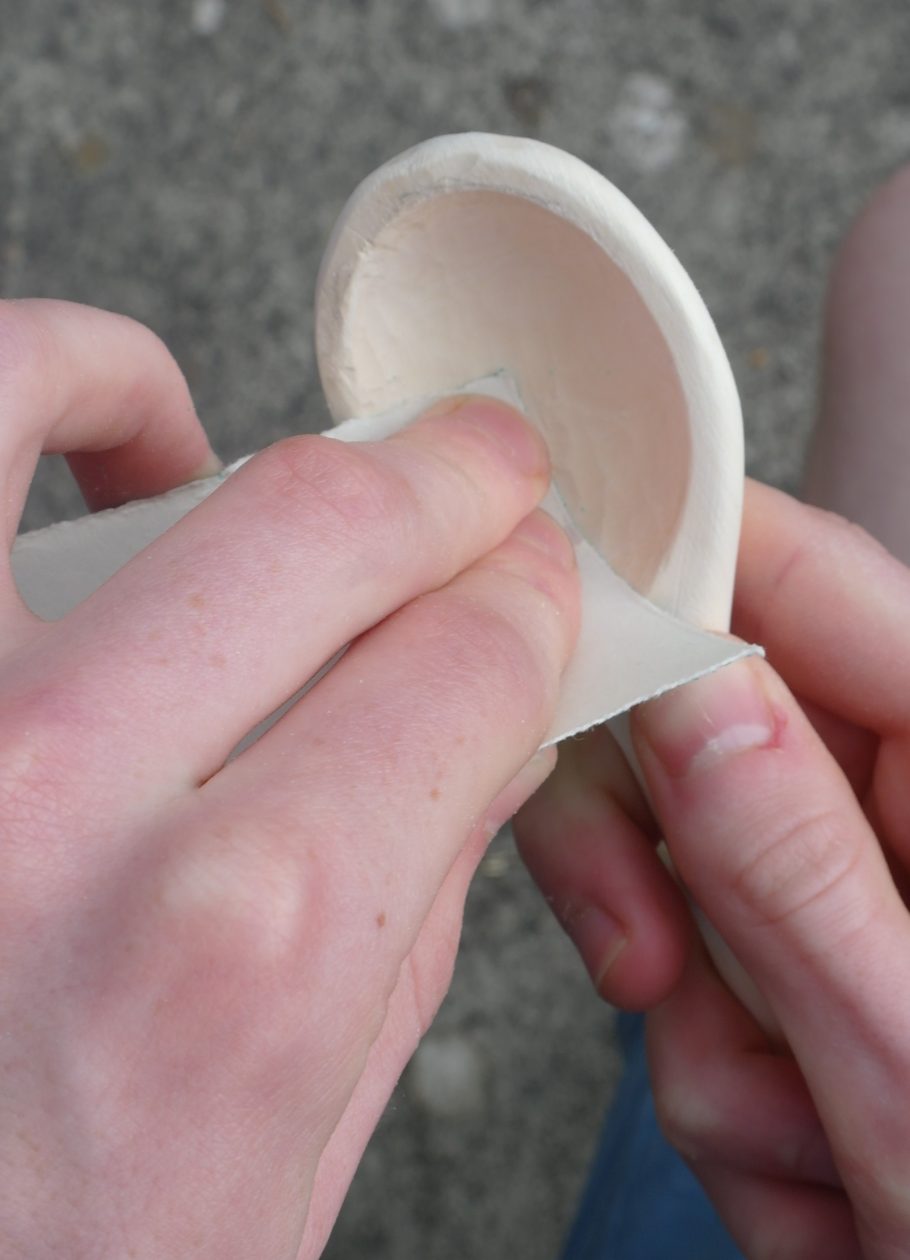
Once you are satisfied that you have removed enough wood from the spoon bowl and you are happy with the shape, you can sand your spoon.  I like to use Aluminium Oxide paper.  I have a rough P80 paper and a finer P120 paper (the higher the number on the paper, the finer the texture of the paper).  You can use whatever you have got though.


Sanding can be a slow process particularly the inside of the spoon bowl as it is a bit fiddly but it is worth it to get a nice smooth finish. 


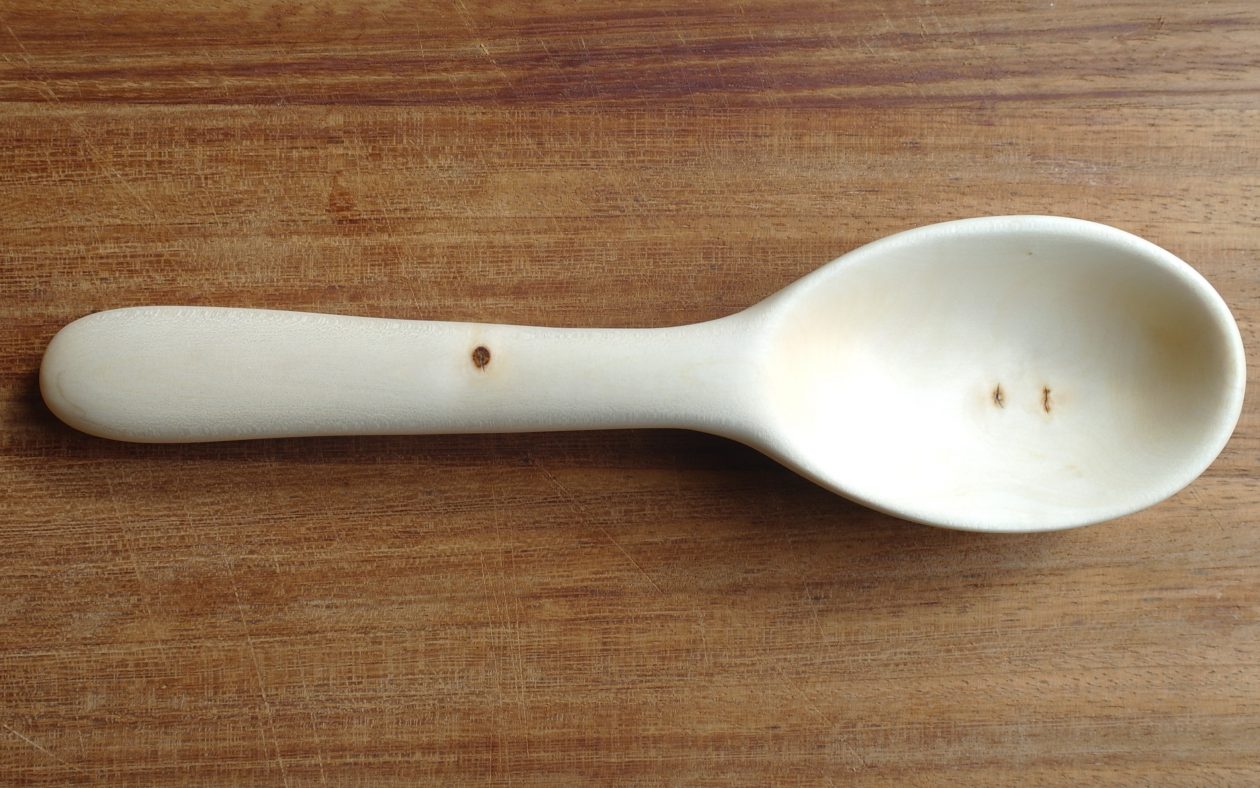
Finally, rub some olive oil all over your spoon.  Leave to dry and you are finished (this one is my spoon as my son hasn’t finished sanding yet).


Wildlife in my garden

I photographed some signs of wildlife in my garden today.  I have a bird box and there is a sparrow nesting in it – I have seen it fly in and out but I couldn’t get a photo of it doing that.


I also found the beginnings of a wasp nest in my pony’s stable – this is only about 3 cm long (I took it down because I don’t really want a wasp nest in the stable).  It’s quite beautiful to look at though and very delicate.  Wasps are predators and prey on other insects – they are important because they keep the numbers of other insects under control.  Mrs. Madden

Mrs. Madden’s easy-peasy Lemon Jelly Cheesecake!

Ingredients

  • 250g (9oz) digestive biscuits
  • 125g (4oz) butter
  • 135g packet of lemon jelly
  • 1 tablespoon of clear honey
  • 300ml of double cream
  • 200g (7oz) cream cheese (I use Philadelphia)

Method

  1. Put the biscuits into a clean plastic bag.  Seal the bag with an elastic band.  Roll a rolling pin over the biscuits to crush them (or put the biscuits in a mixing bowl and crush them with your clean hands – that’s what I do).
  2. Melt the butter in a saucepan over a low heat.  Pour the biscuit crumbs from the bag or bowl and mix them with the butter.
  3. Grease the inside of a circular cake tin, with a push out base, with some butter.  Spread the crumbs over the bottom.  Press them to make a firm base.
  4. Put the base into a fridge to chill.  Break the jelly into cubes.  Put them into a measuring jug.
  5. Warm a tablespoon under the hot tap and add one tablespoon of honey to the jelly cubes.
  6. Pour 300ml (1/2 pint) of boiling water into the jug.  Stir the mixture well, until the jelly dissolves.
  7. Meanwhile, put the cream cheese and cream into a large bowl.  Use a spoon to beat the mixture until it is smooth.
  8. Add the jelly mixture to the bowl and beat it hard with a whisk to mix it well.  If you use an electric whisk, put a tea towel around the bowl and whisk to prevent it ending up all over the kitchen.
  9. Pour the creamy mixture into the cake tin.  Put it carefully into the fridge and leave it for about four hours to set.
  10. When the cheesecake is firm, lift it onto a can.  Carefully press down on the sides of the cake tin to loosen the base.
  11. You can leave the cheesecake on the tin’s base or you can transfer it, carefully, onto a plate using a spatula to loosen the cake from the base.  Put the cheesecake into a fridge until you are ready to eat it. 

Whittling with Mrs. Madden

Yay, I have a new knife (I ordered it on the internet).  I wanted to show you some different cutting techniques so I persuaded my son to help me.

It is better to use a slight slicing action when whittling and making small shallow cuts, not digging too far into the wood.  As you can see from these photos, Andrew is left handed, so he wears the right cut resistant glove (I wear the left one because I am right handed).  He also wears a thumb protector (made from the horse bandage that I showed you in my first whittling post) on his knife holding hand.


Try to make most of your cuts away from your body and rest your spoon (or whatever you are making) against the blocks on the whittling seat. 


To make small, controlled cuts use both thumbs to push the blade. 


To round off the ends of your spoon, start by resting it against  one of the blocks on the whittling seat and make small cuts downwards. 


More Wildlife

I saw this heron when I went for a walk down by the river near me.


I saw this small tortoiseshell butterfly in my garden.


I found this tiny beetle in my house – I still haven’t found out what it is yet.   What wildlife have you seen near you?  Mrs. Madden.

Wildlife Facts

I posted a photo of woodlice and a millipede before the holidays but then I realised that I didn’t know much about these creatures, so I looked them up and this is what I discovered:

  • Woodlice are more closely related to crabs than insects.
  • Woodlice have 14 legs and they breath through ‘lungs’ on their hind legs.
  • Woodlice are nocturnal and live in dark, damp areas.
  • Woodlice feed mainly on rotted vegetation and are great for compost.
  • Woodlice do not damage wood in people’s homes.

Millipedes 

  • Millipedes are known as ‘thousand leggers’ but they usually have only a few hundred legs.
  • Millipedes have 2 pairs of legs on each body segment (first body segment lacks legs).
  • Millipedes have 6 body parts when born and increase number of segments and legs each time they moult.
  • Millipedes are decomposers – they eat plant remains and poo!
  • Millipedes have existed on planet earth for 428 million years.  They are the first organisms that managed to leave the water and start successful life on land.

I hope you like my facts about woodlice and millipedes.  Mrs. Madden.

Mrs. Madden’s Easter Holidays

My daughter and I made some hot cross buns.


We went for lots of walks down by the river.


My daughter made some knitted hearts and I made some crochet hearts.  What did you do in the Easter Holidays?

My Pony’s fence is fixed!

I am just putting this on here so that I can say a big thank you to Annaliese’s Mum for providing the wood so that I could fix Millie’s fence.  Mrs. Madden.

Naughty Pony!

My naughty pony, Millie, has broken her fence by rubbing her big bottom on it.  I can’t fix it right now as I don’t have a 2 metre (6 ft) square fence post or any rails and I can’t buy any at the moment.

Report a Glow concern
Cookie policy  Privacy policy

Glow Blogs uses cookies to enhance your experience on our service. By using this service or closing this message you consent to our use of those cookies. Please read our Cookie Policy.