Gypsy Flowers
To make some gypsy flowers, you will need:
- A stick (I used Ash) about 25cm long and 1.5cm in diameter
- some thin sticks to make stalks (I used willow)
- whittling knife
- cut resistant glove
- bradawl
- some paints and paint brushes if you decide to paint them.
Cut a stick – try to choose a straight one without knots.

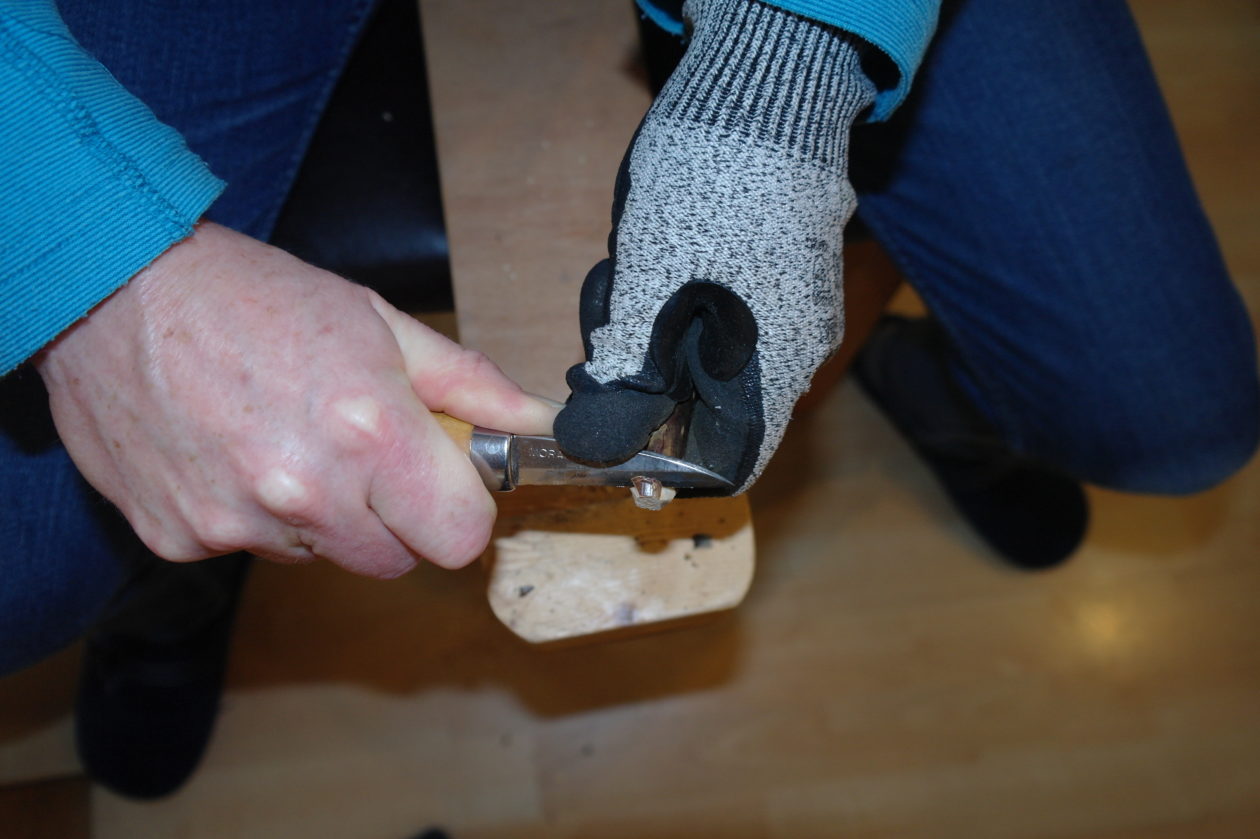
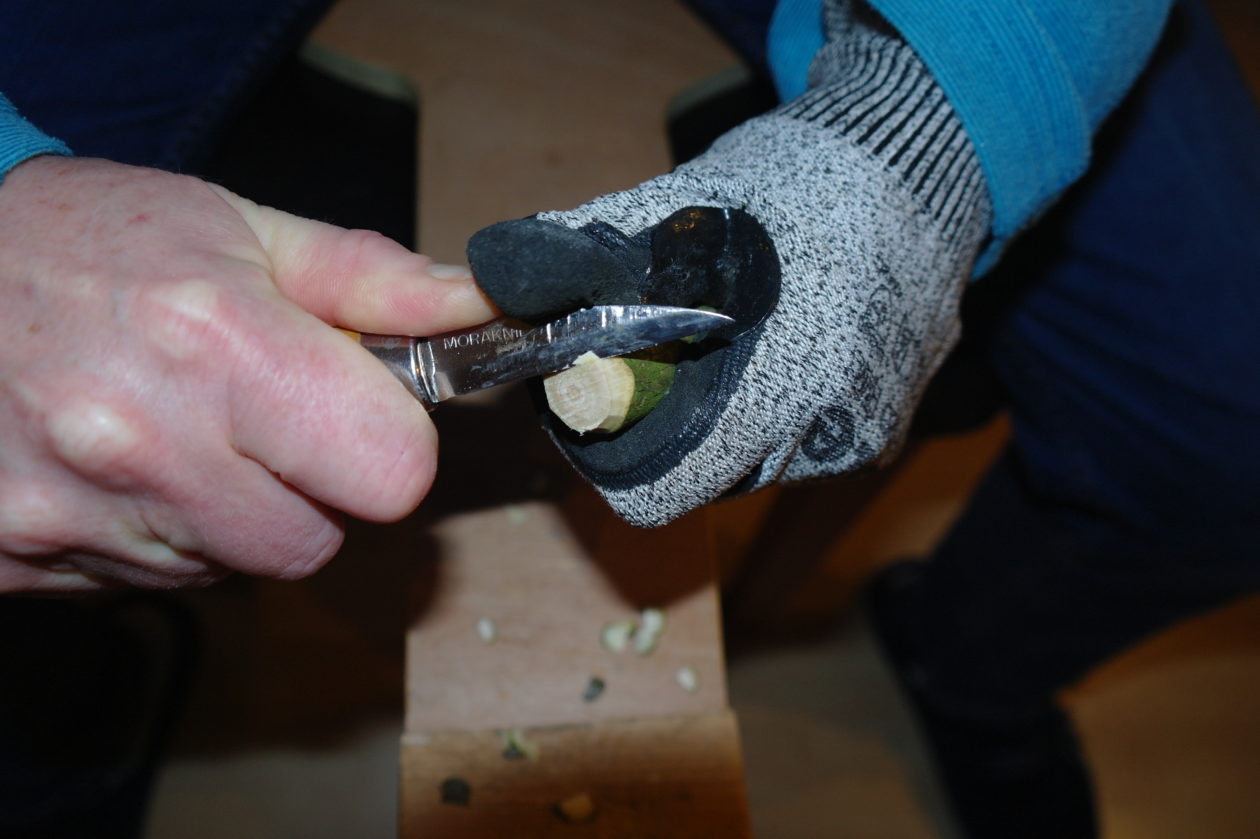
Use your whittling knife to strip off about 4cms of the bark at one end of the stick.
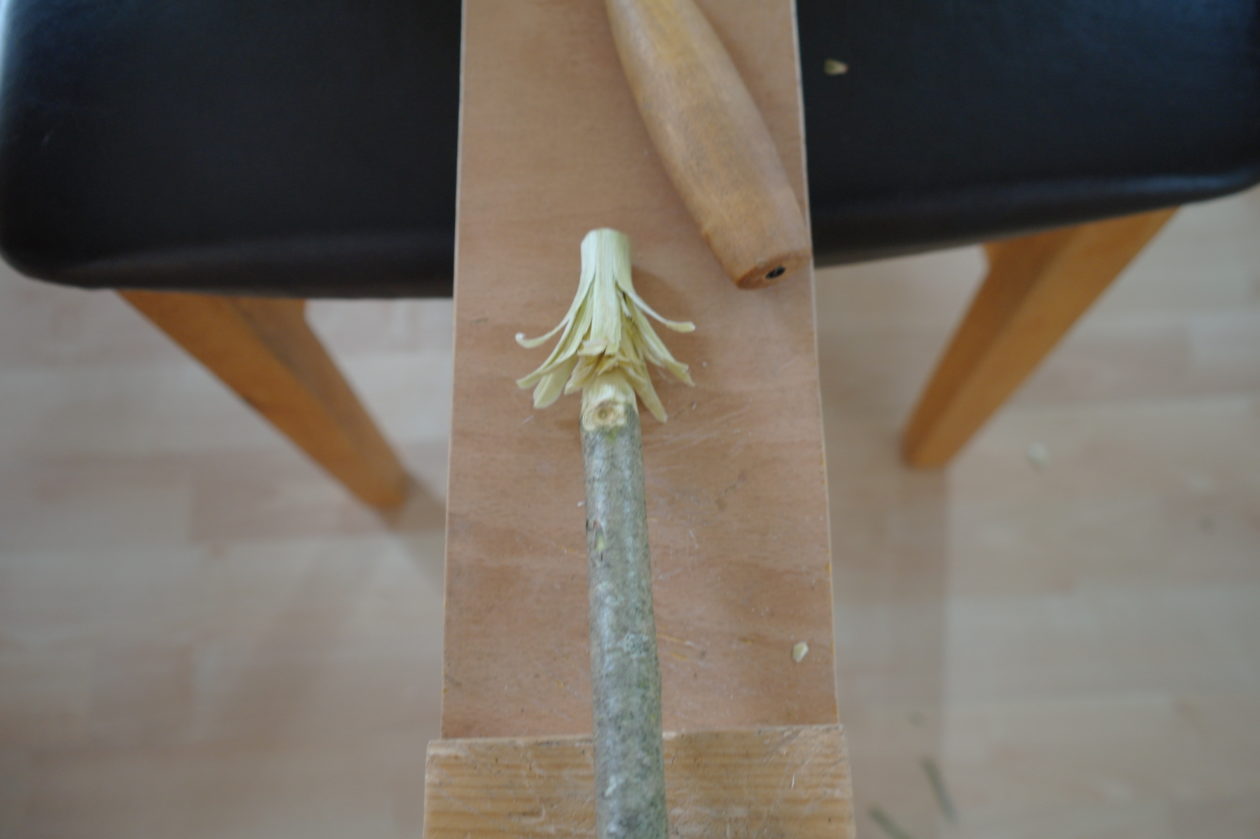
Slice into the wood, at the end you have just stripped off bark, to create a thin strip of wood – stop before you reach the end of the stick. You have to be careful not to slice it off. This takes a bit of practise and is an exercise in knife control. Slice more strips of wood, in the same way, around the stick.
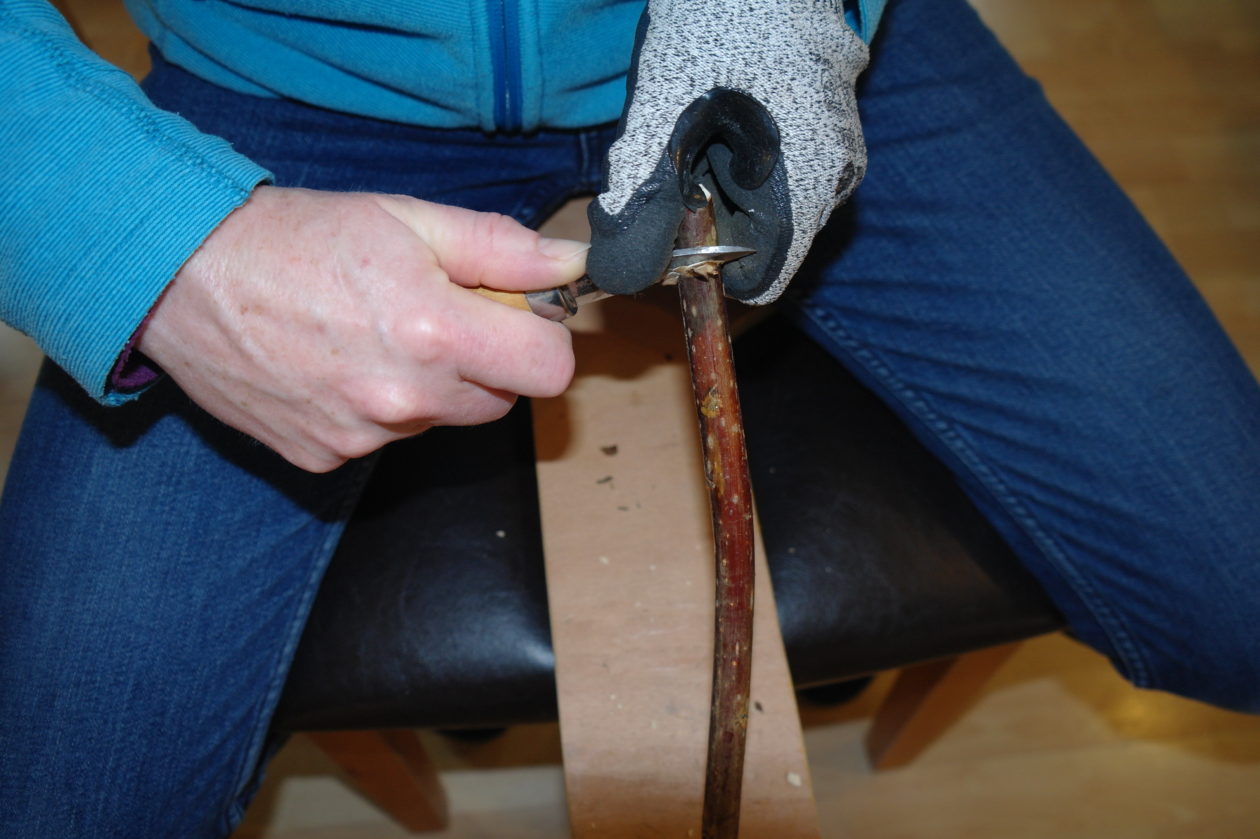
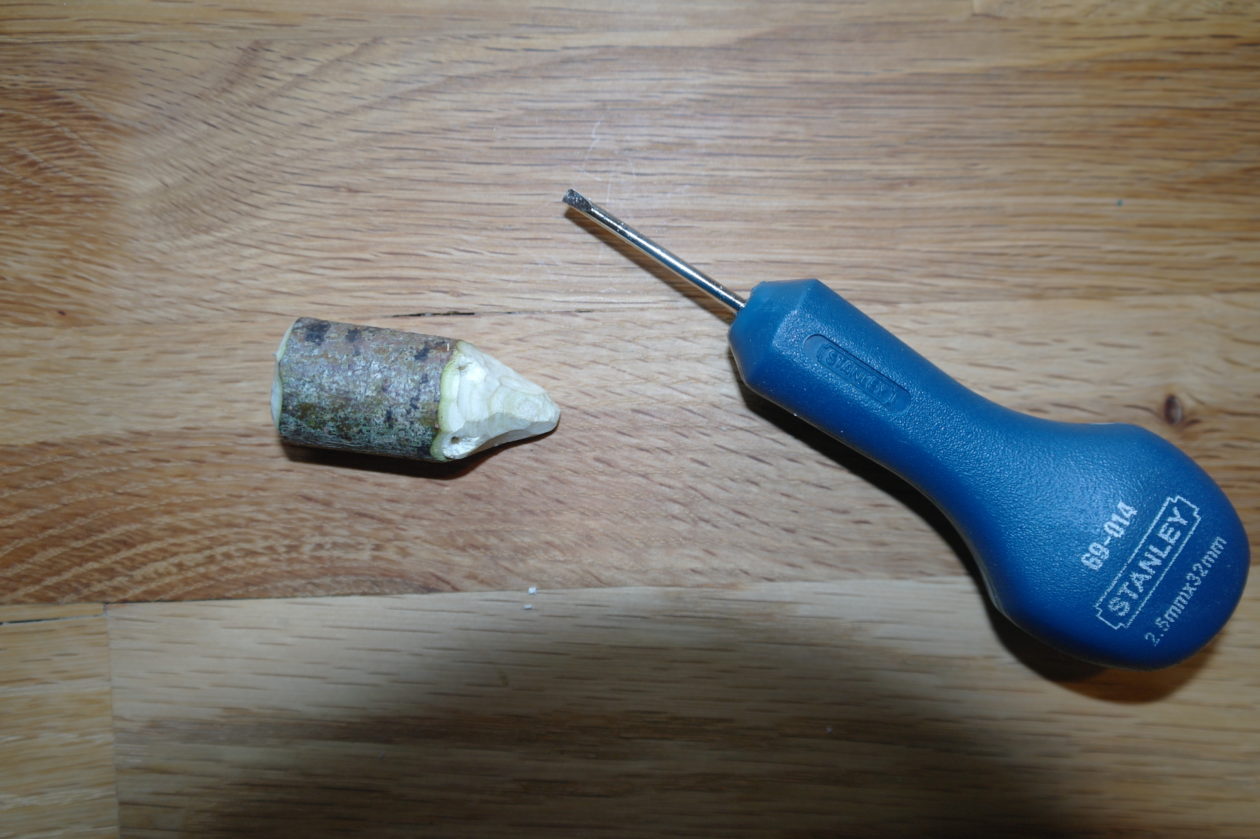
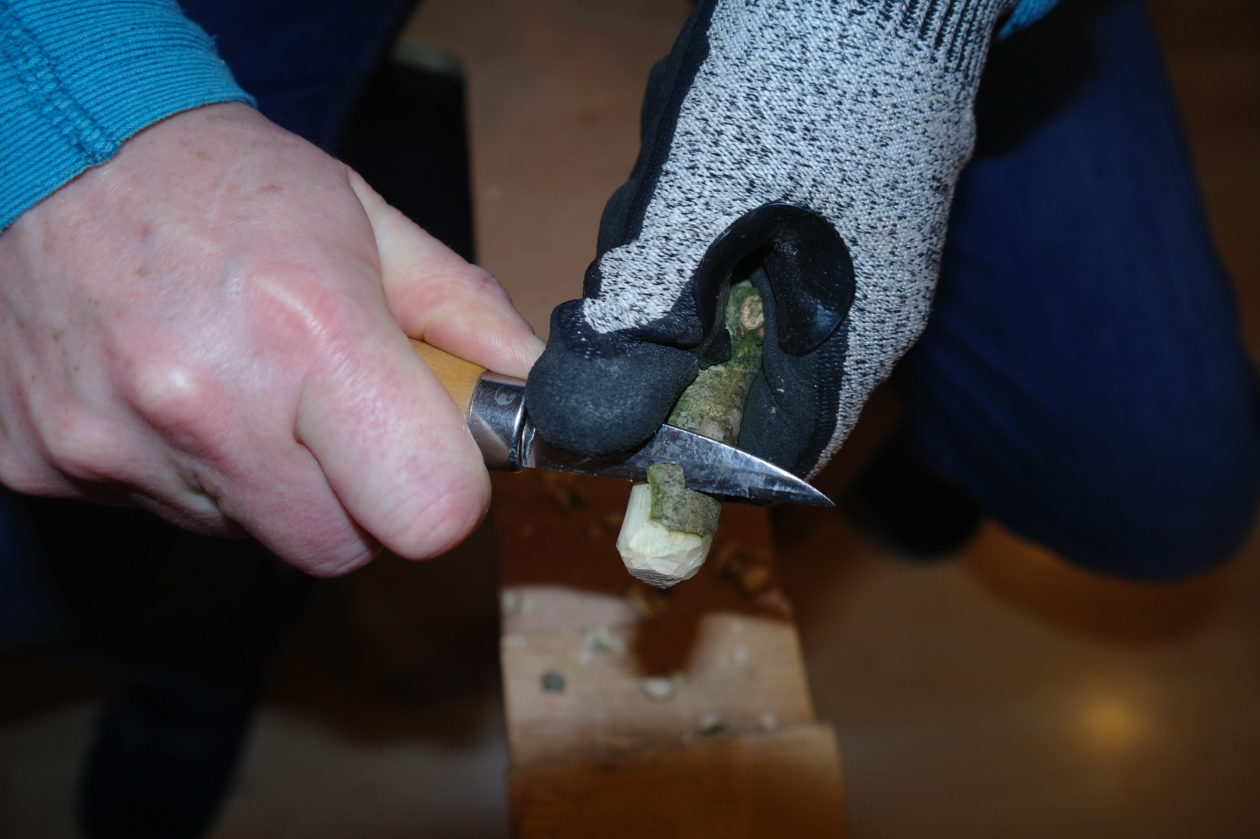
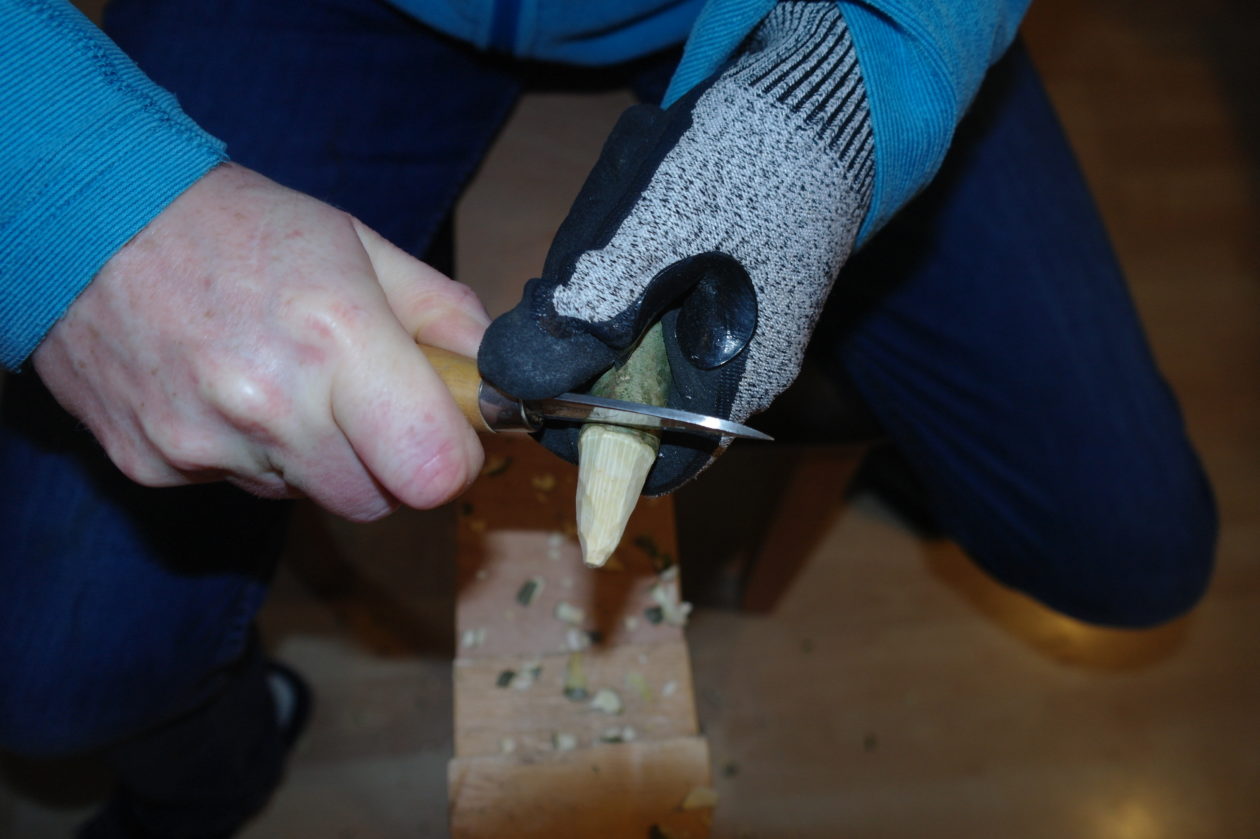
Continue making thin slices further up and into the stick, rotating the stick as you go, until you can’t cut any more and have sharpened the stick to a point.
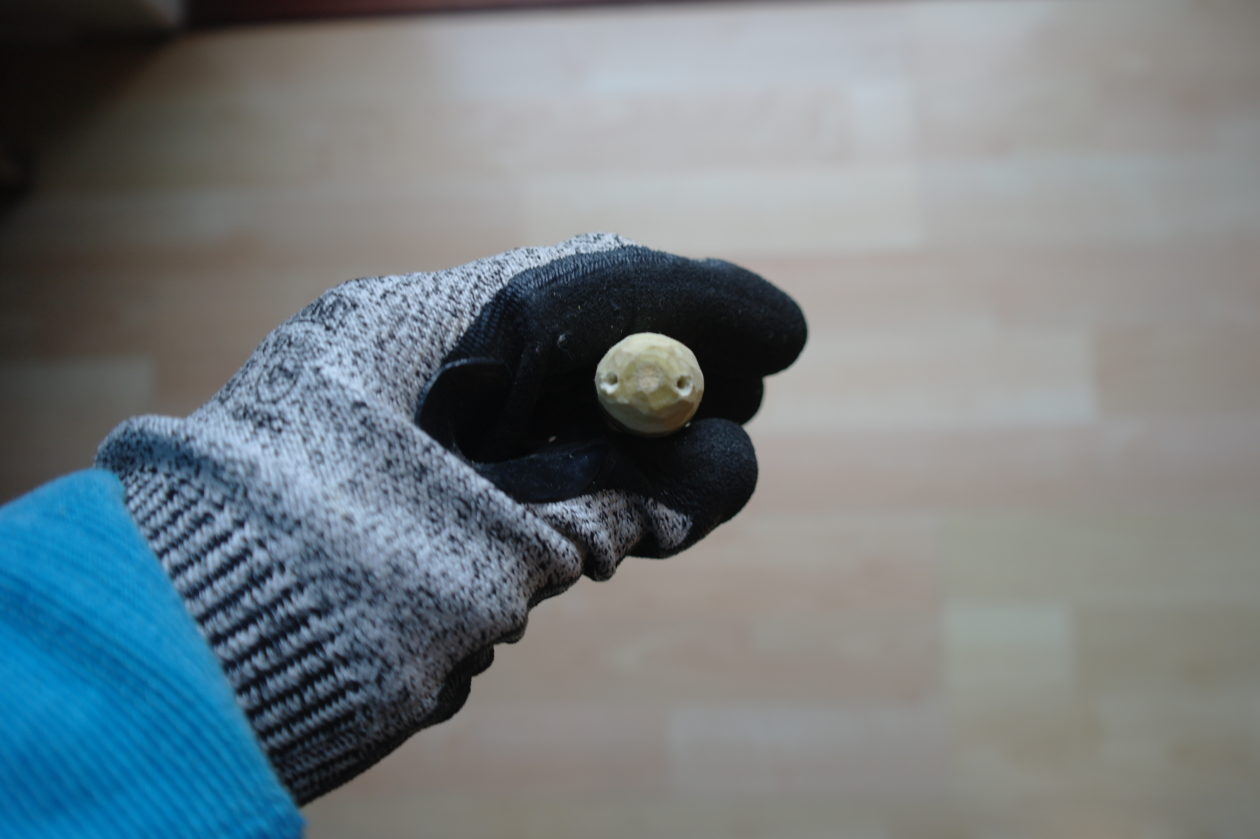
Twist the stick off the ‘flower’ – they should come apart quite easily.
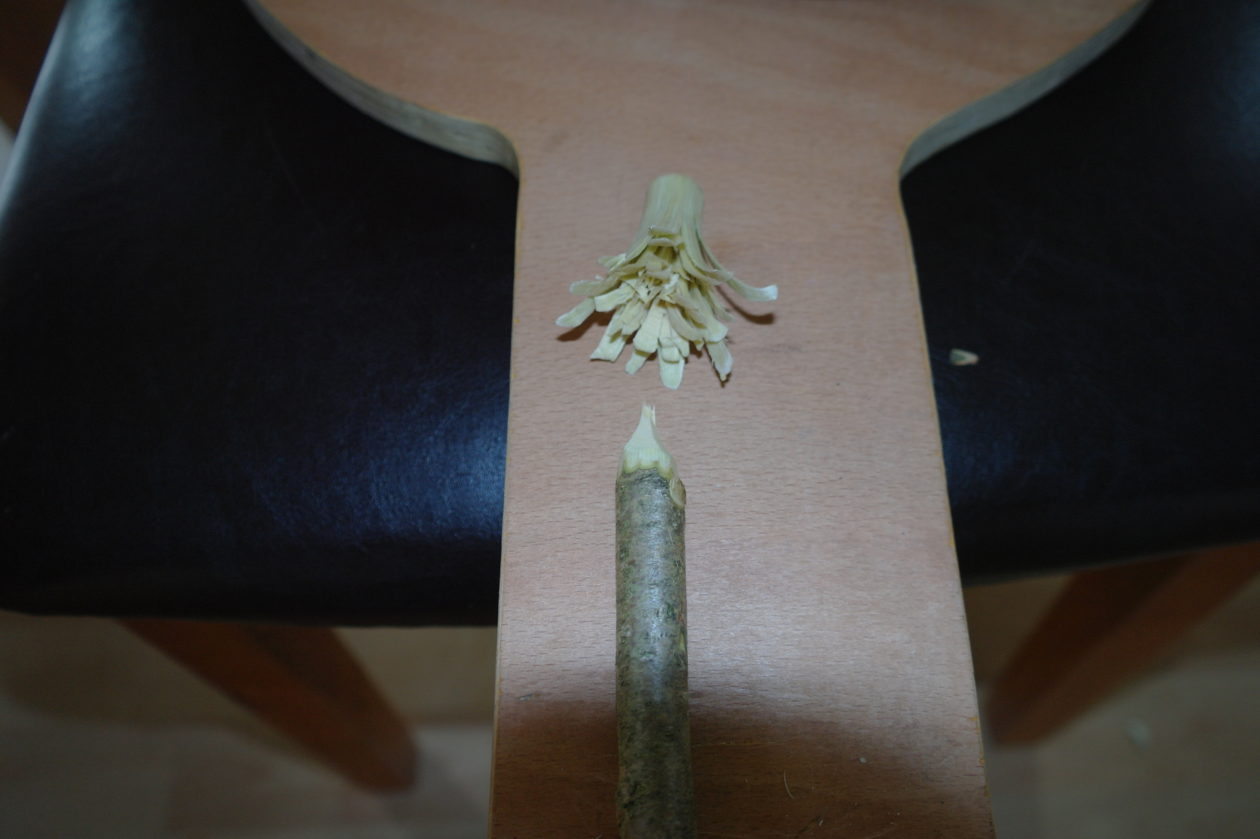
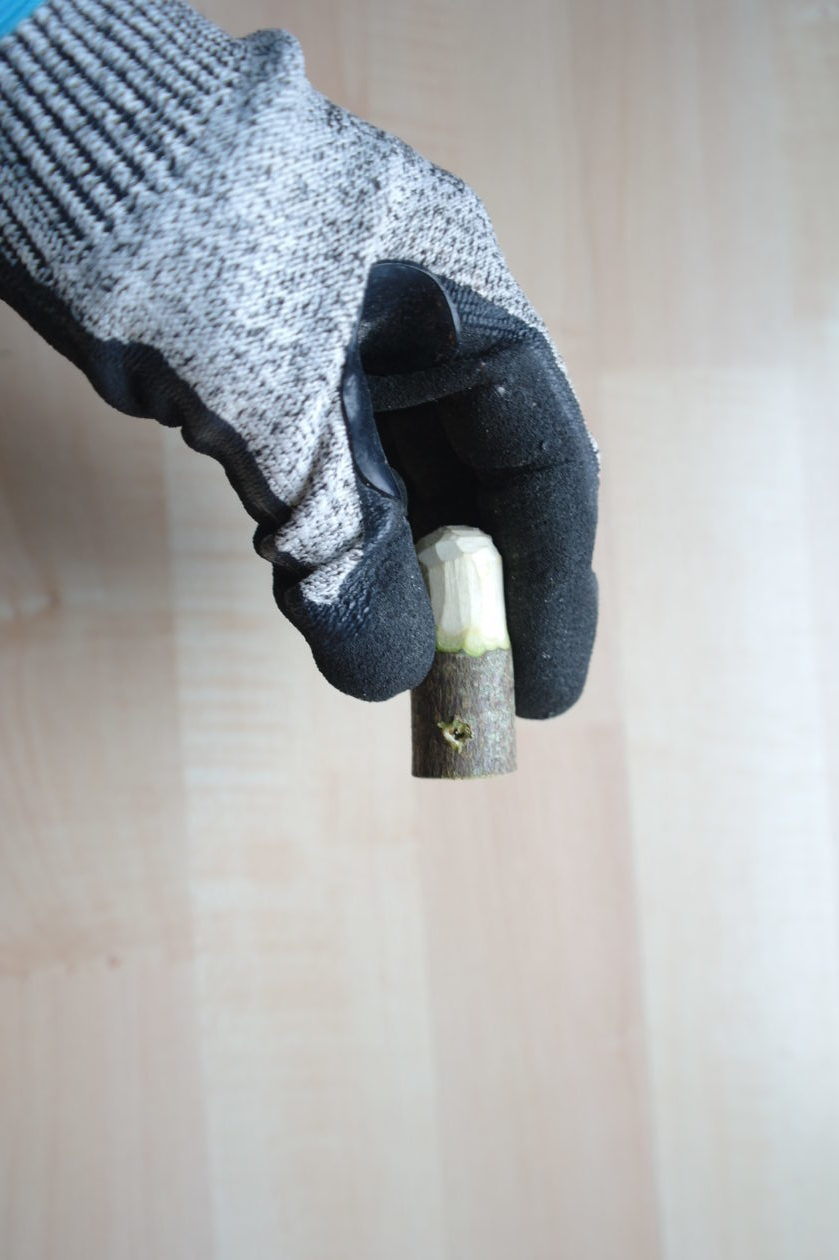
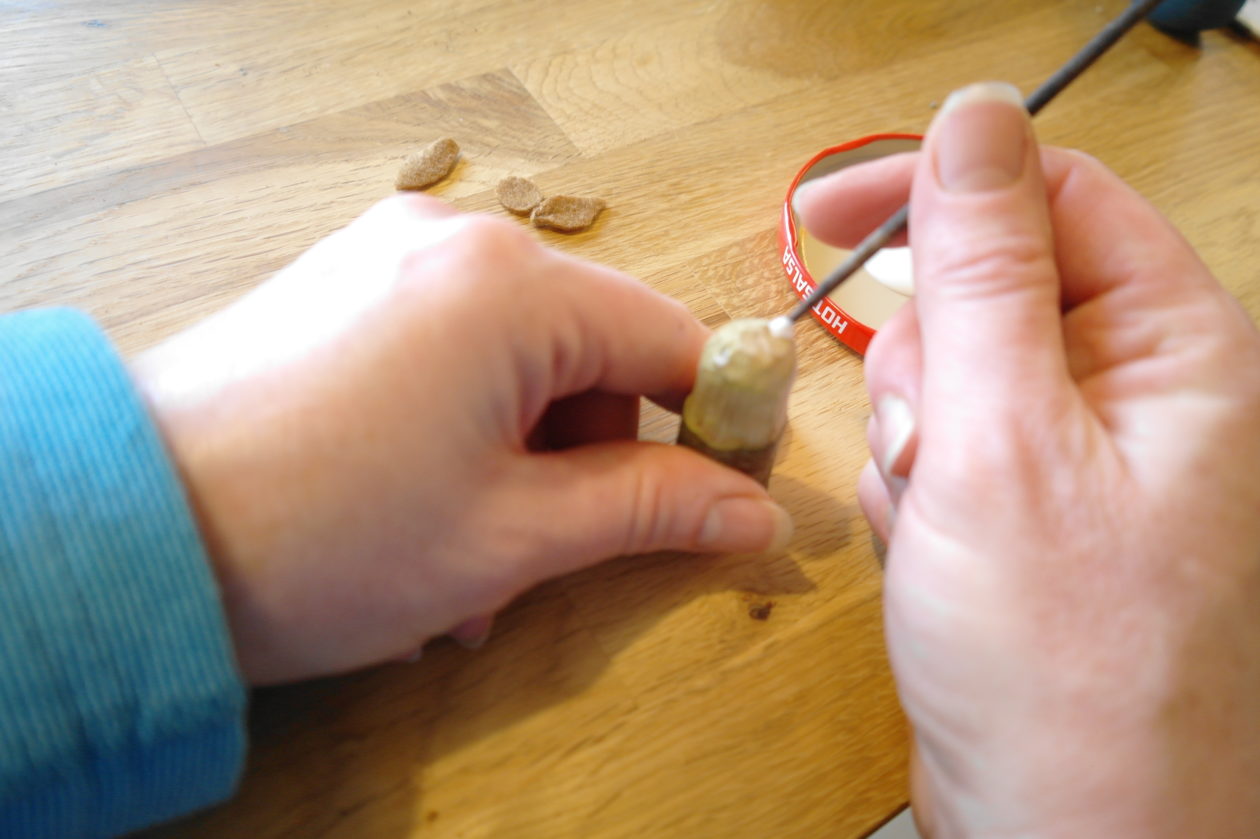
Use a bradawl (or small drill) to make a hole in the bottom of your ‘flower’- this is for the ‘stem’.
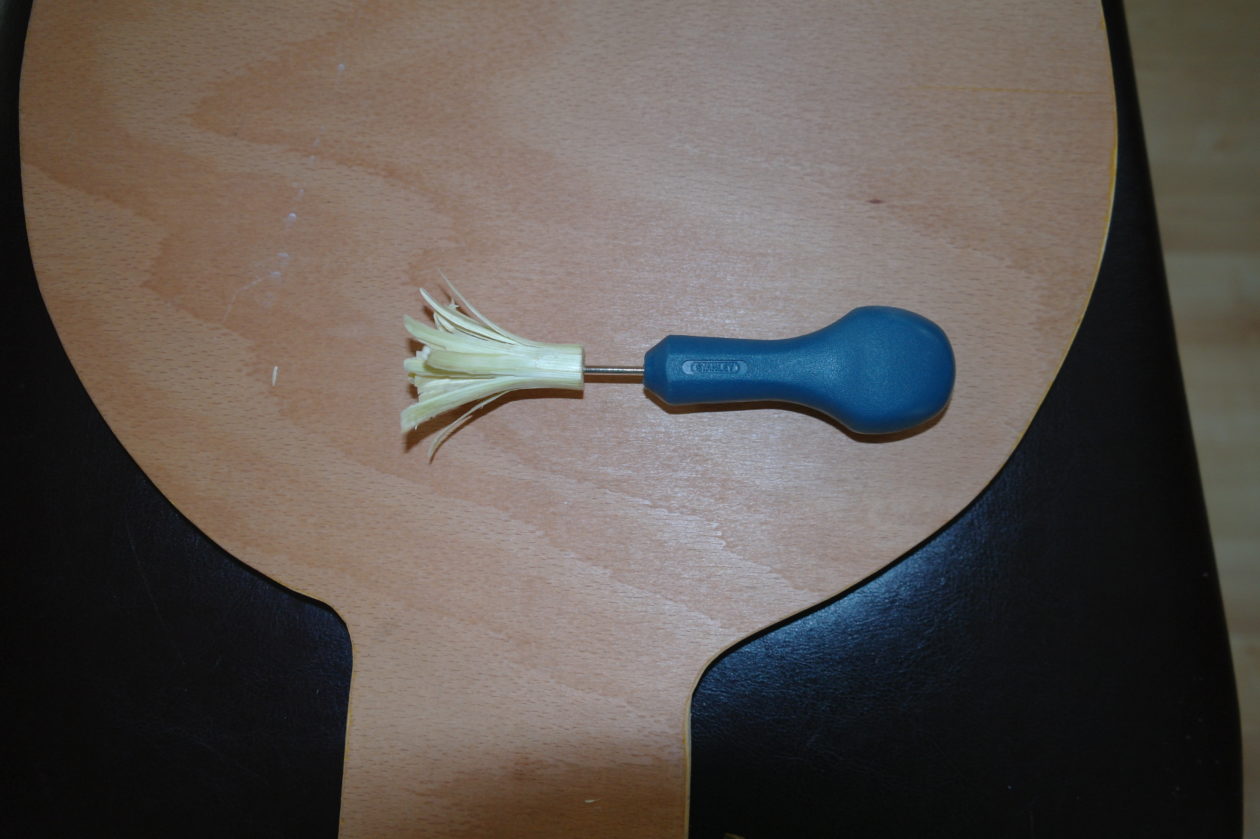
Insert a thin stick into the hole (you can glue it in place but if it is a snug fit, it shouldn’t need glue).
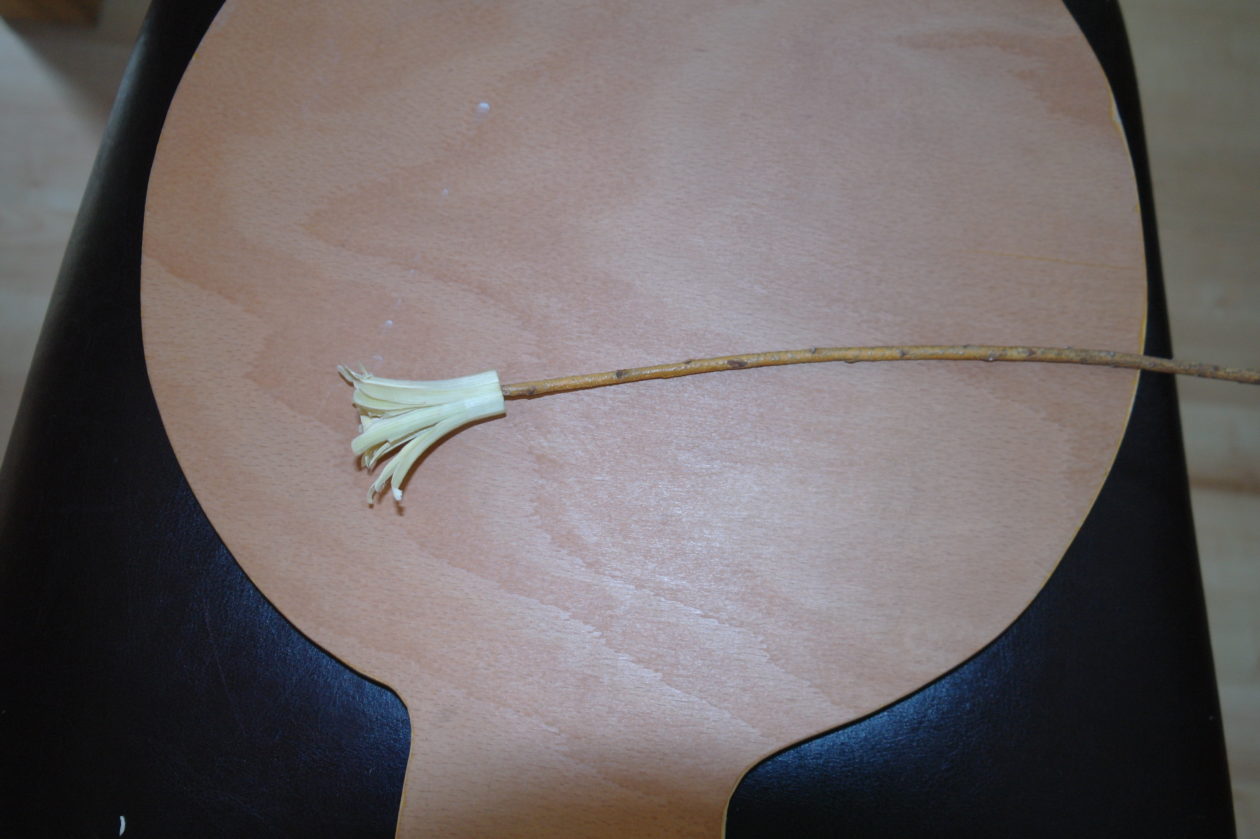
I made several other flowers from different types of wood, including Beech, Sycamore and Hazel as well as the Ash one I made here.
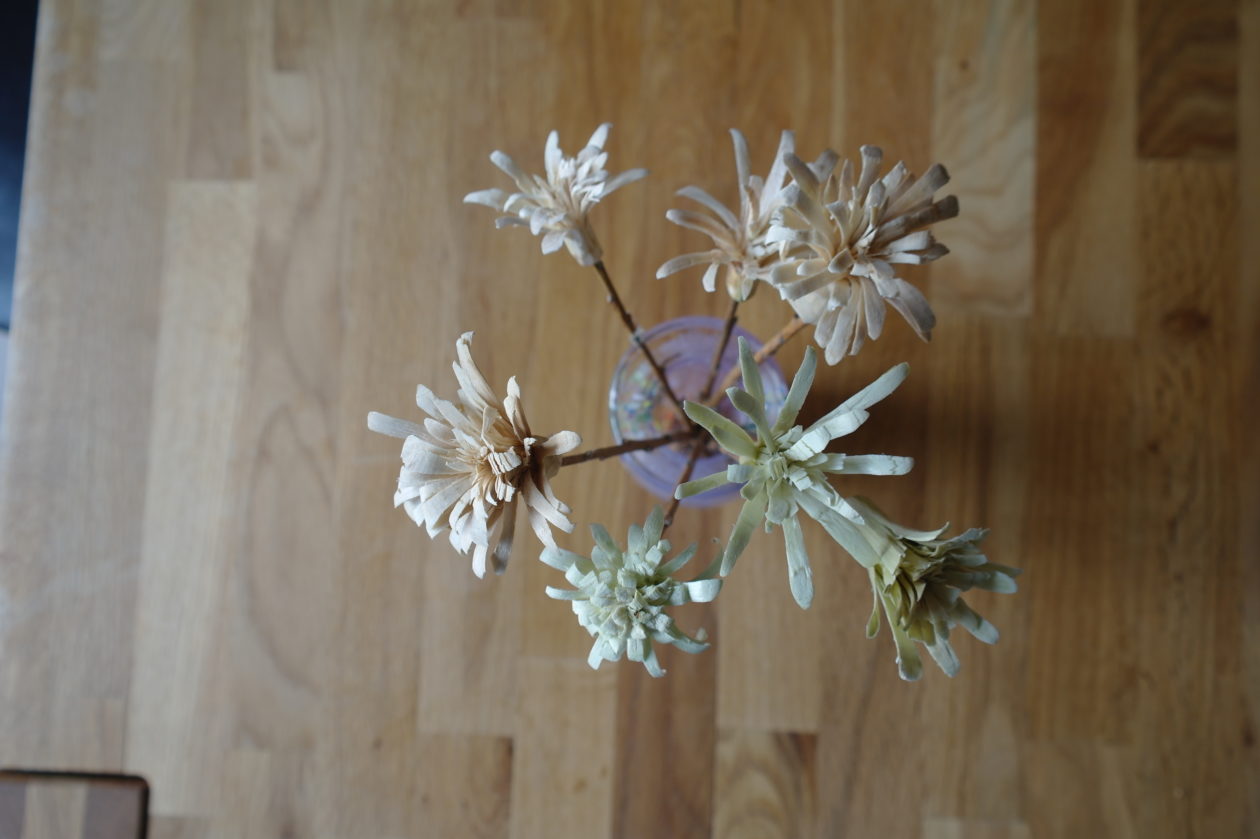
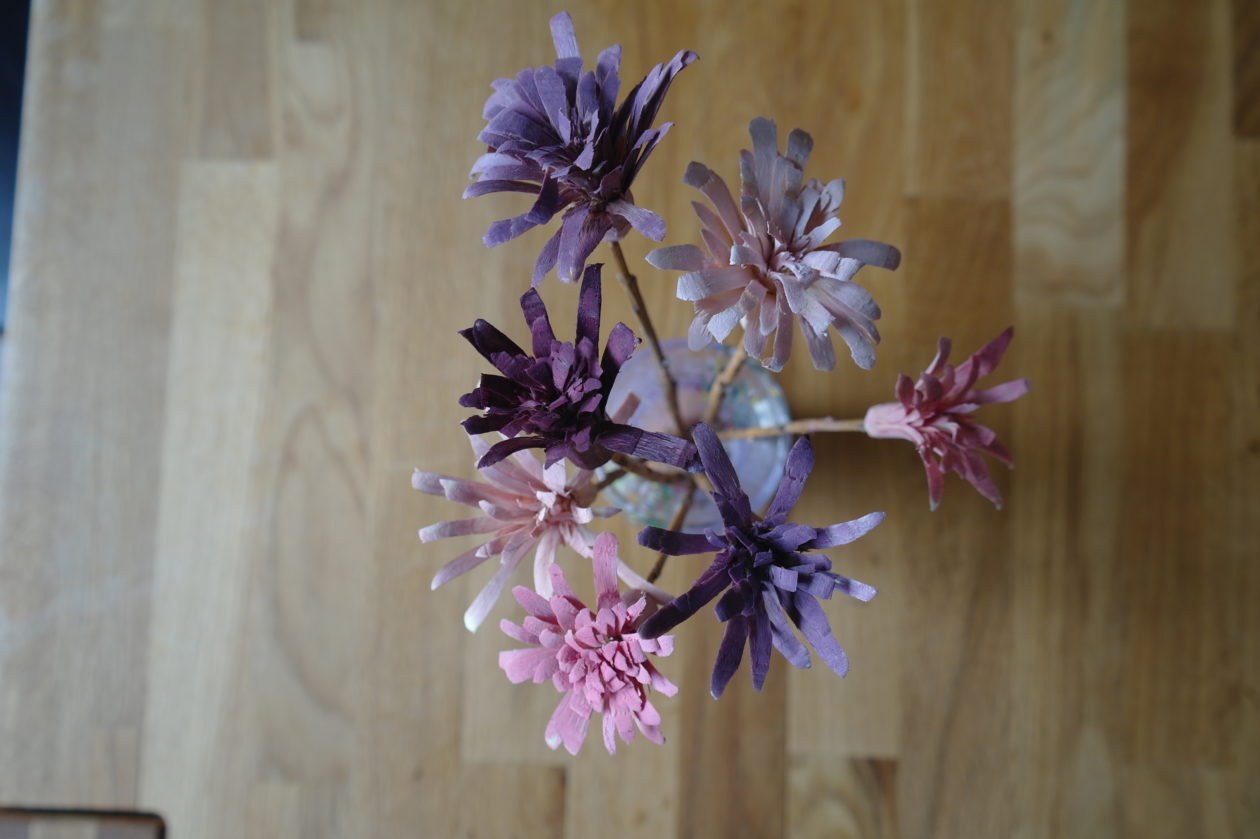
If you wish, you can paint them. I used different shades of pink and purple acrylic paint on mine.
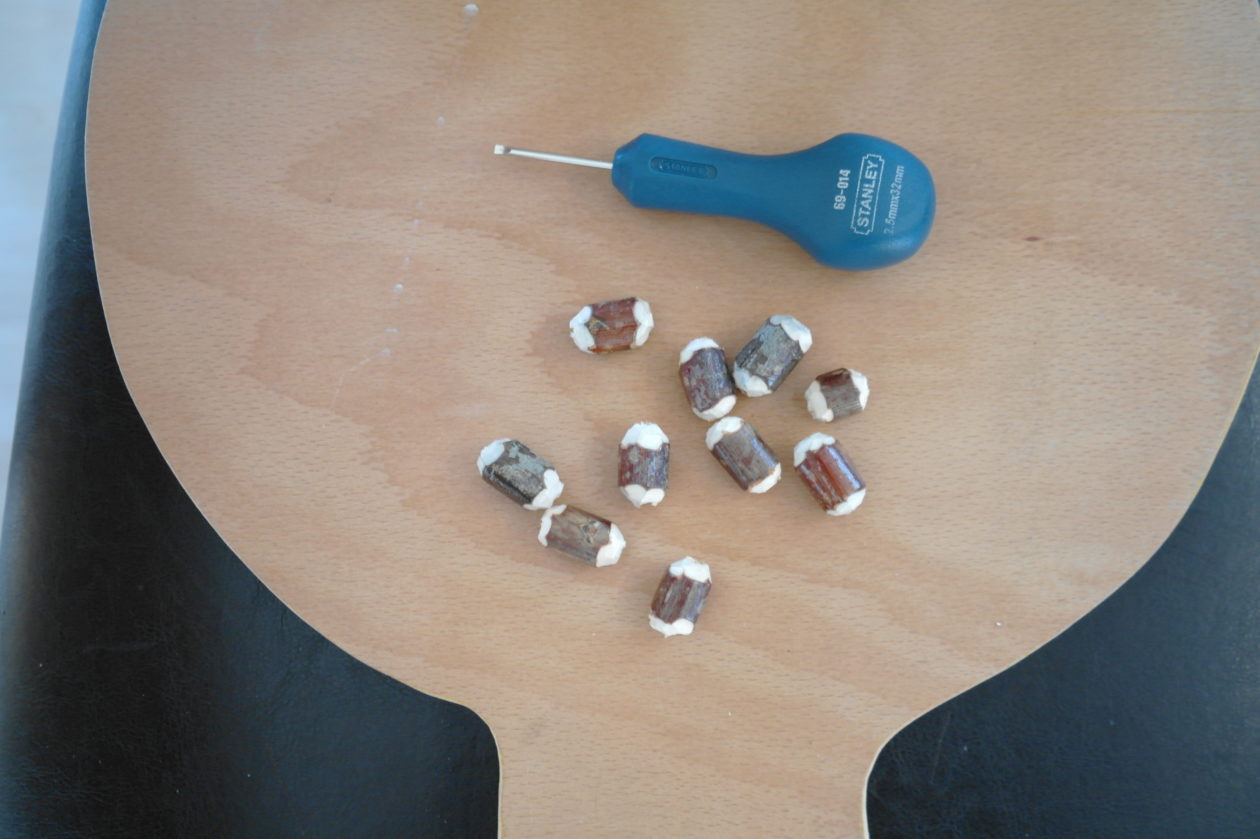
Willow Beads
To make some whittled willow beads, you will need:
- A willow stick (the length depends on how many beads you want to make)
- a whittling knife
- a bradawl
- cut resistant glove
- a large darning needle
- some string (I used cotton string)
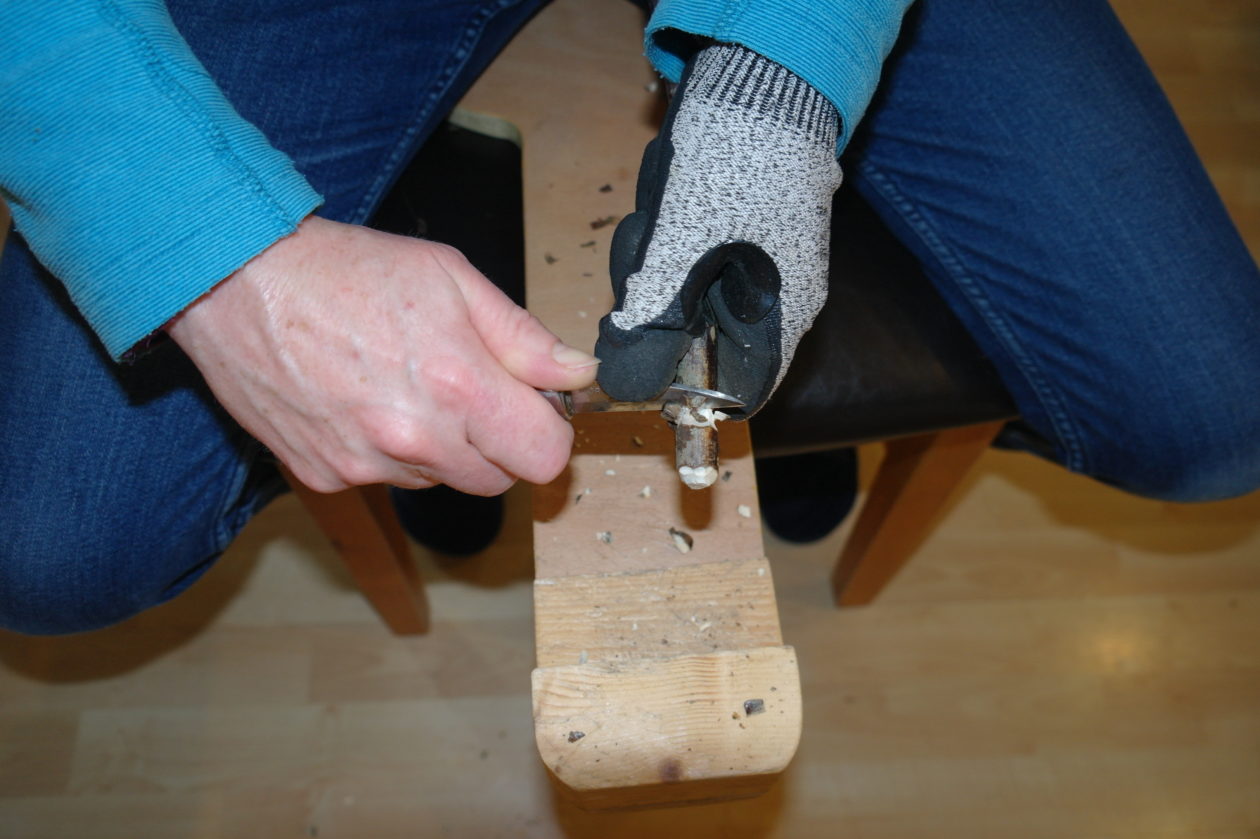
Round off one end of your stick by making small cuts all the way around.
Make a vertical cut into your stick about 1.5cms from the end of your stick.

Turn the stick around and make small cuts, into the stick, up to the vertical cut you have just made.
Turn the stick around again and make small cuts, in the opposite direction, towards your vertical cut.
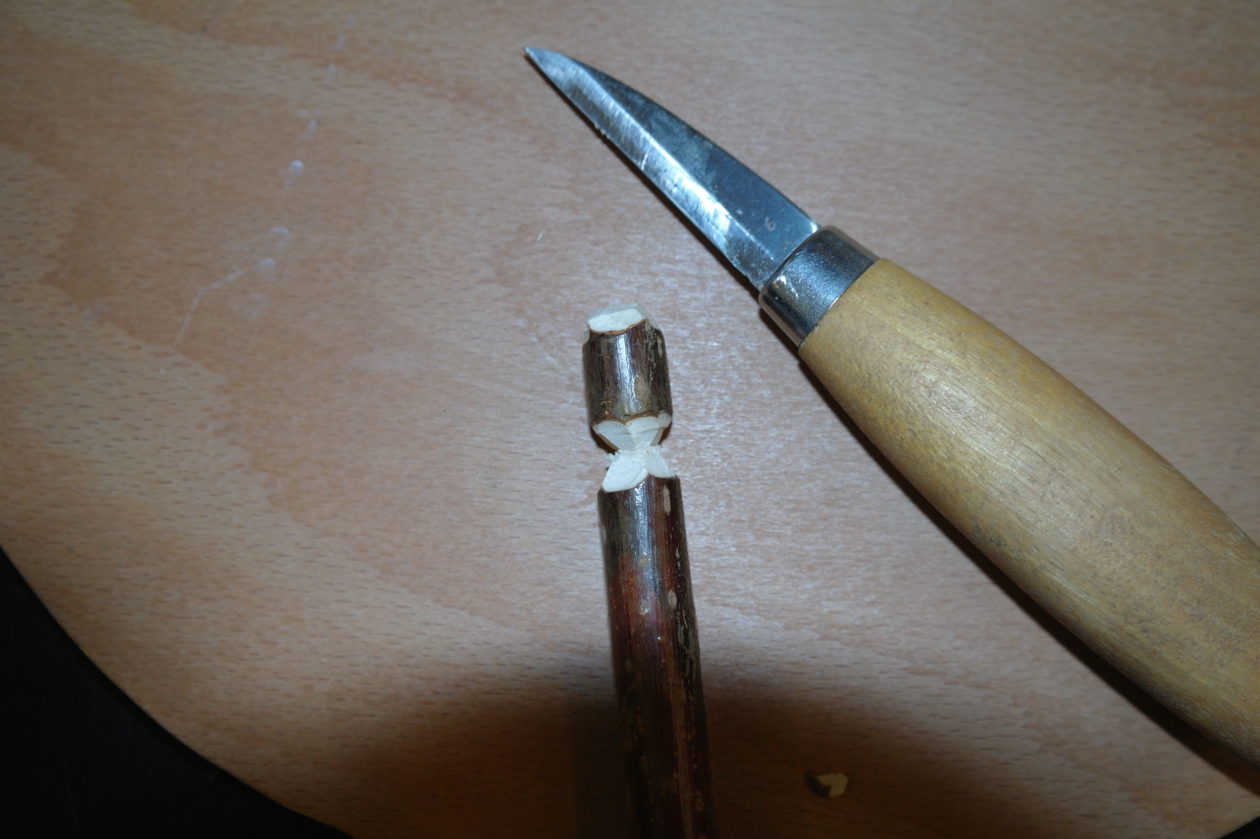
Your stick should look like this:
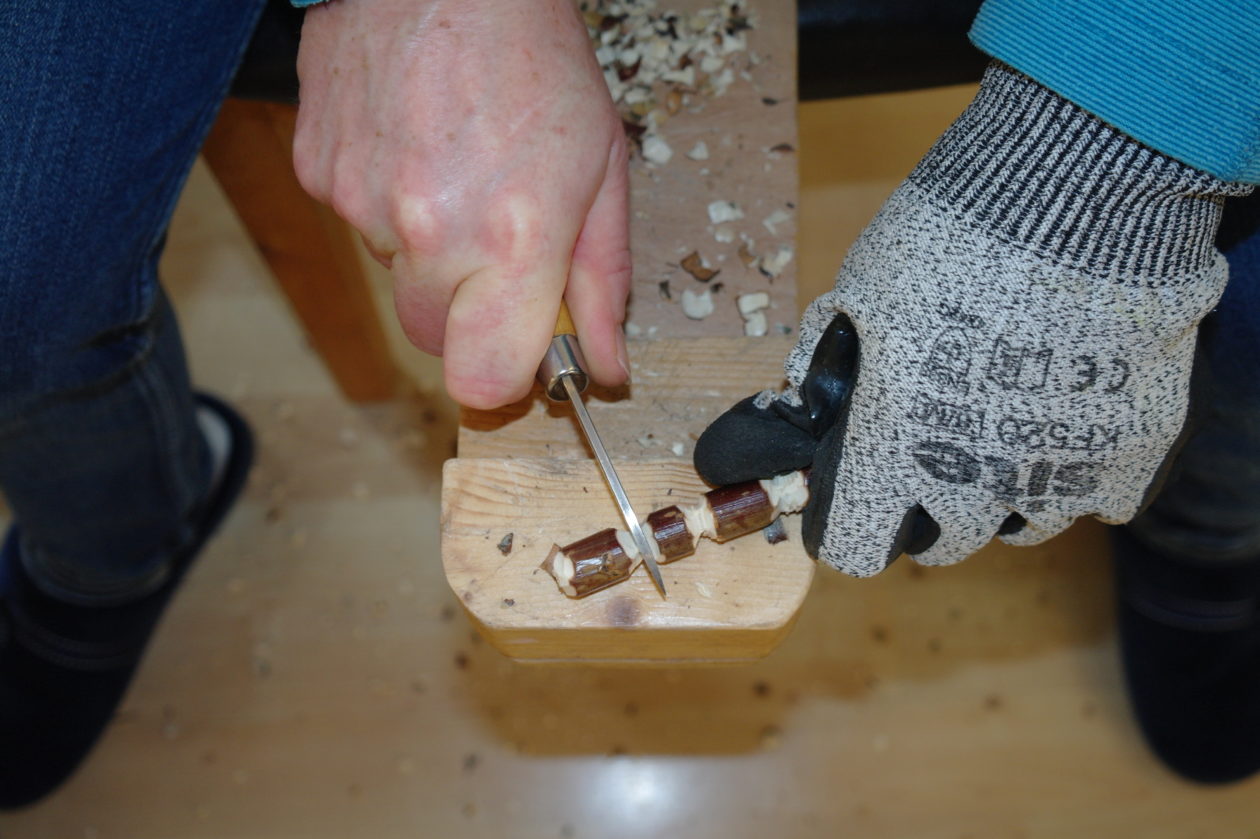
Repeat the above process to make more beads along your stick.

Use your whittling knife to cut off the beads (if you have cut far enough into the stick, this should be quite easy),
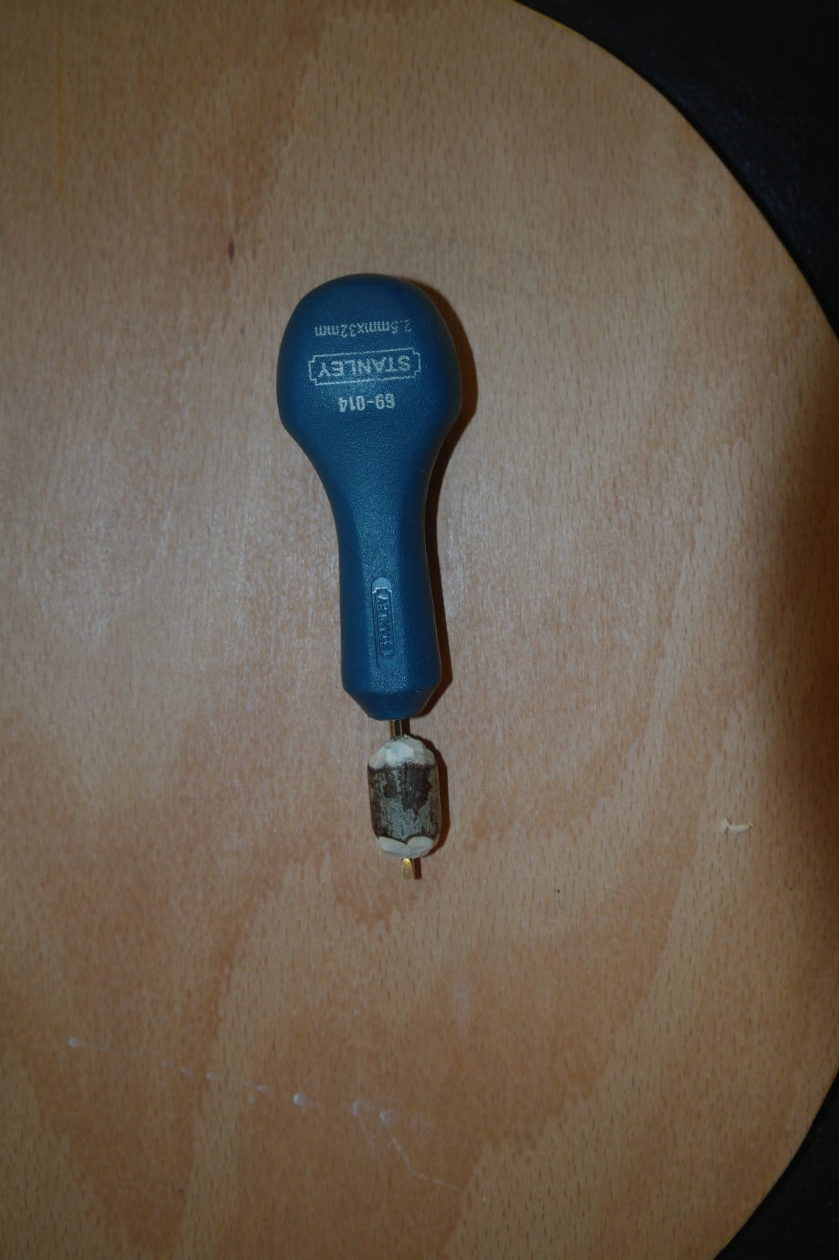
Use the bradawl to push though the soft, pithy part in the centre of your stick bead.
Repeat this process with the rest of your beads.
Cut a length of string, long enough to fit over your head and thread it through your darning needle.
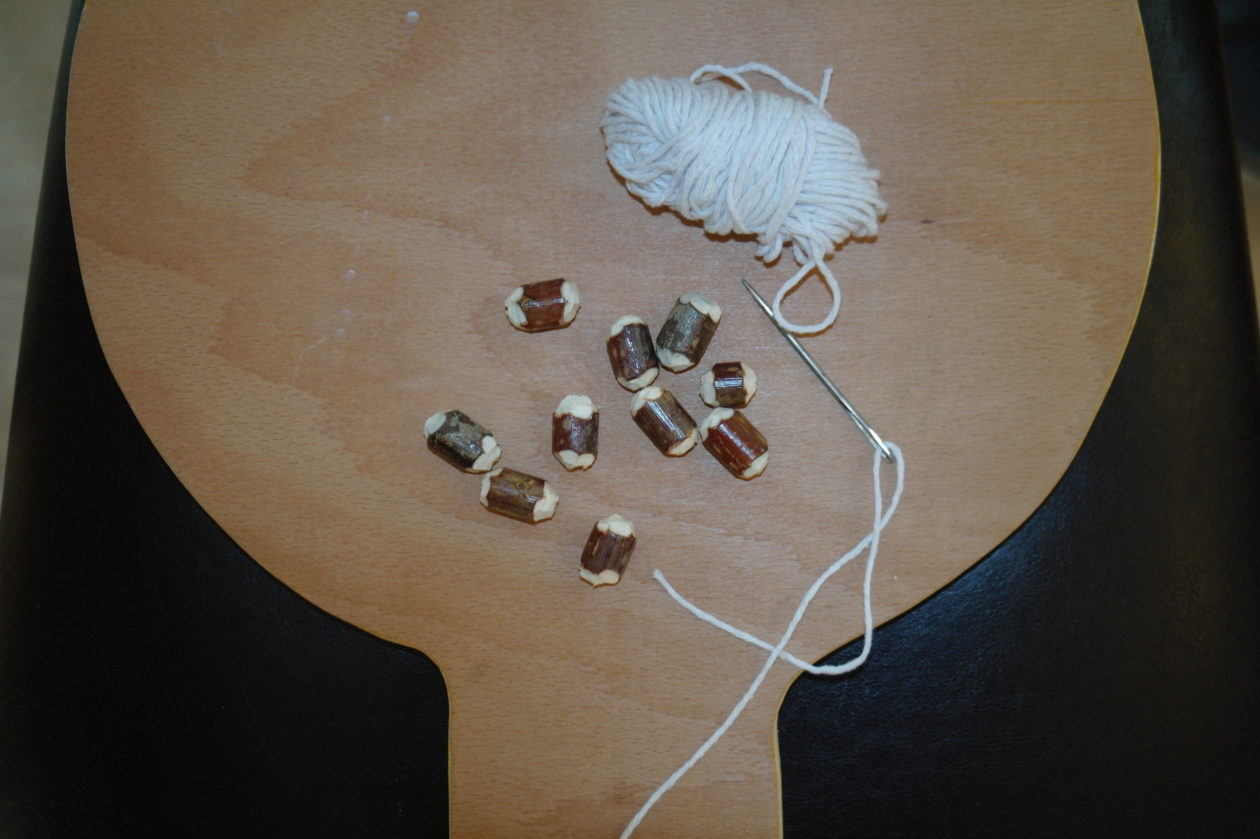
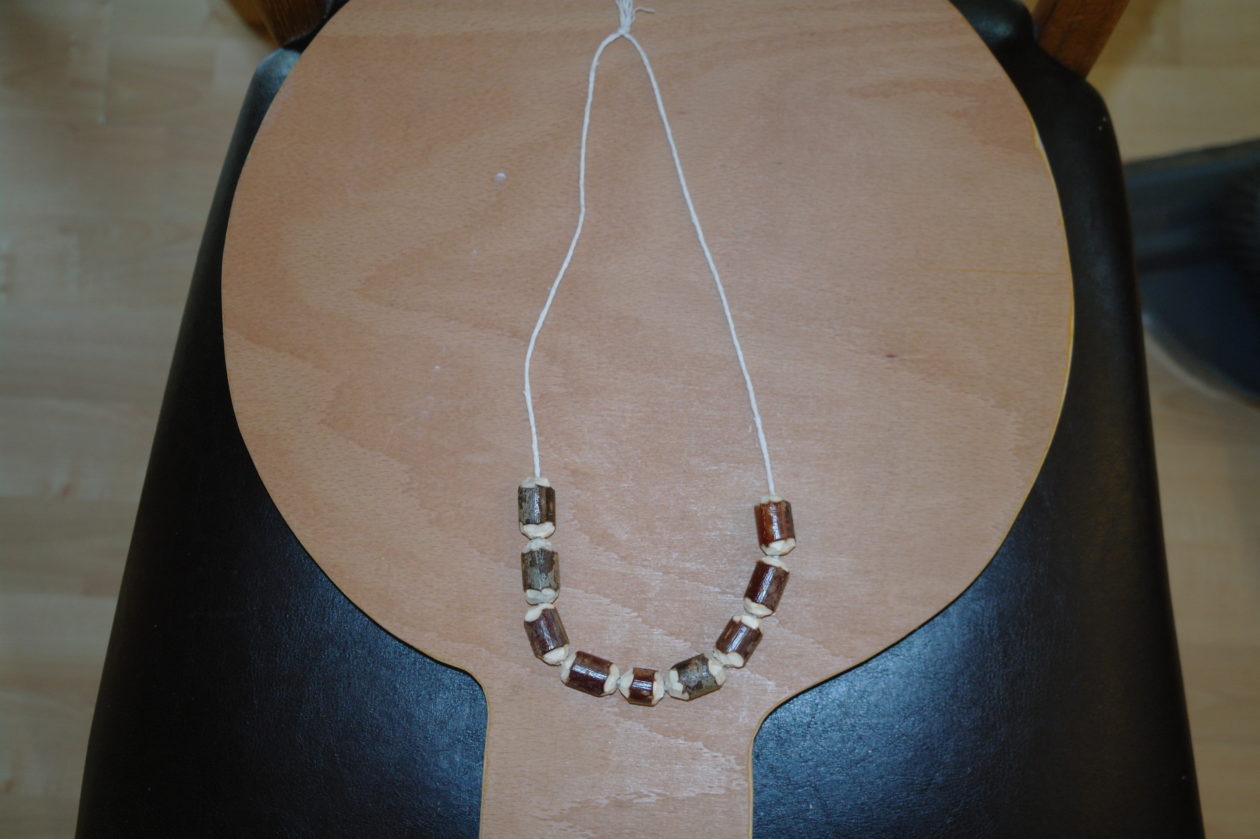
Push the needle through the holes in your beads and onto the string. Once you have threaded all the beads onto the string, tie the ends together. Your necklace is complete.
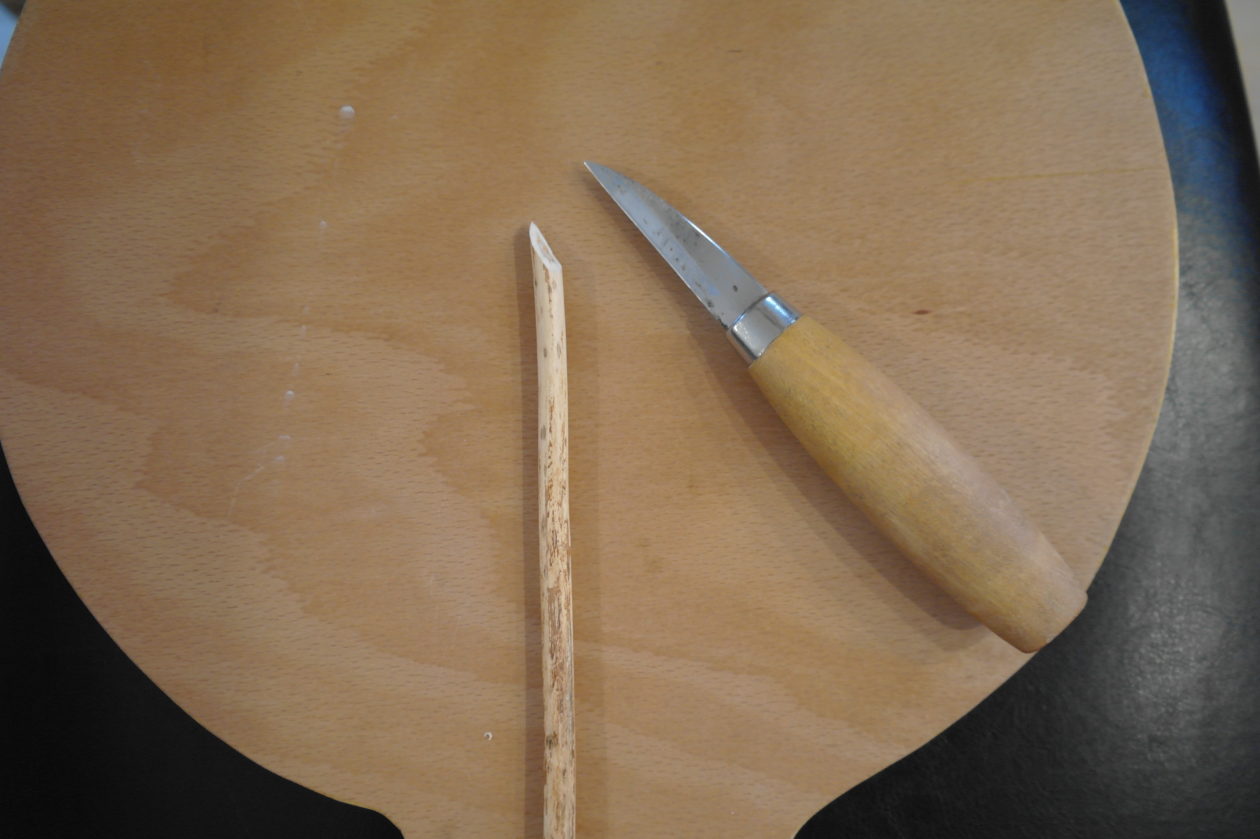
Whittled Willow Pen
To make a willow pen, you will need:
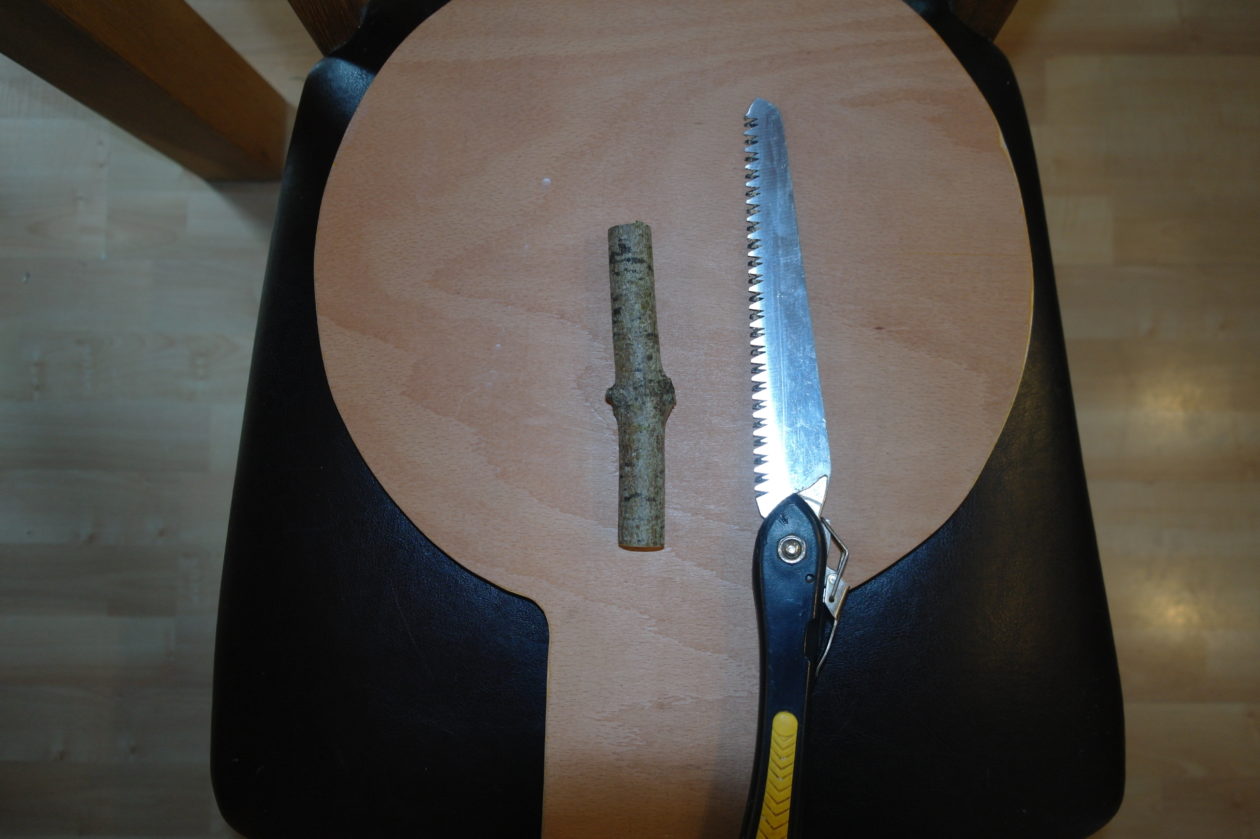
- A willow stick about 20cms long (not too thick – I used a dry stick rather than green one that had just been cut)
- a whittling knife
- a pruning saw
- a bradawl (you could use a small screwdriver)
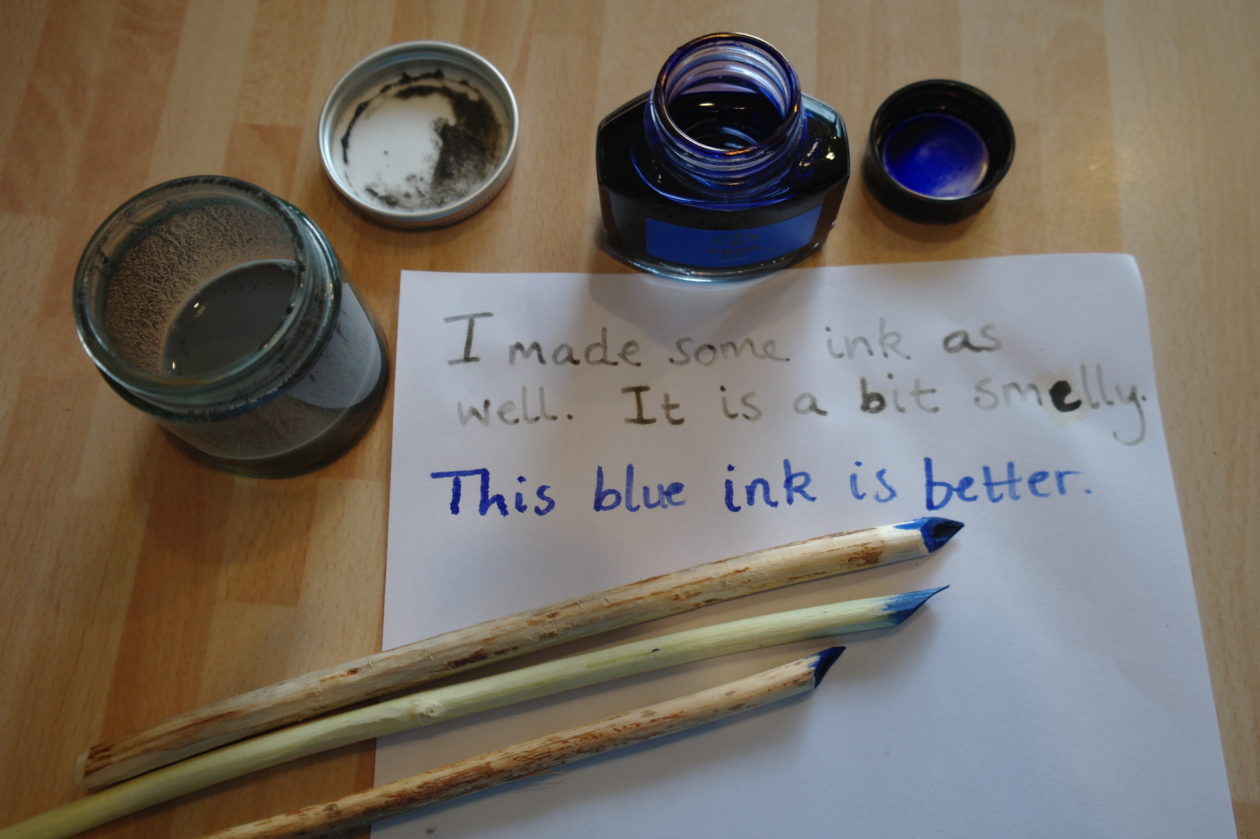
- some ink
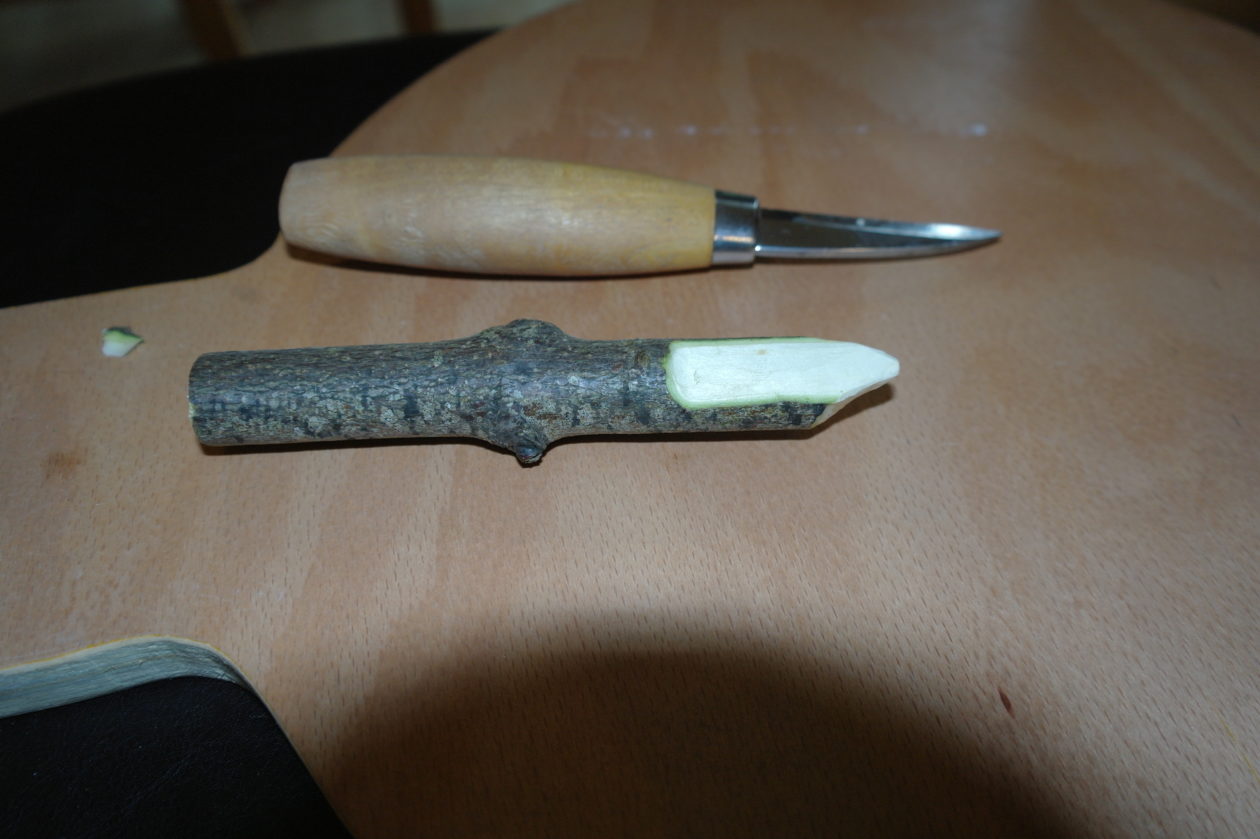
I cut my stick using my pruning saw and scraped off the bark using my whittling knife (I scraped off all the bark because it was a bit rough but if yours is smooth, you only need to scrape off a little at one end).

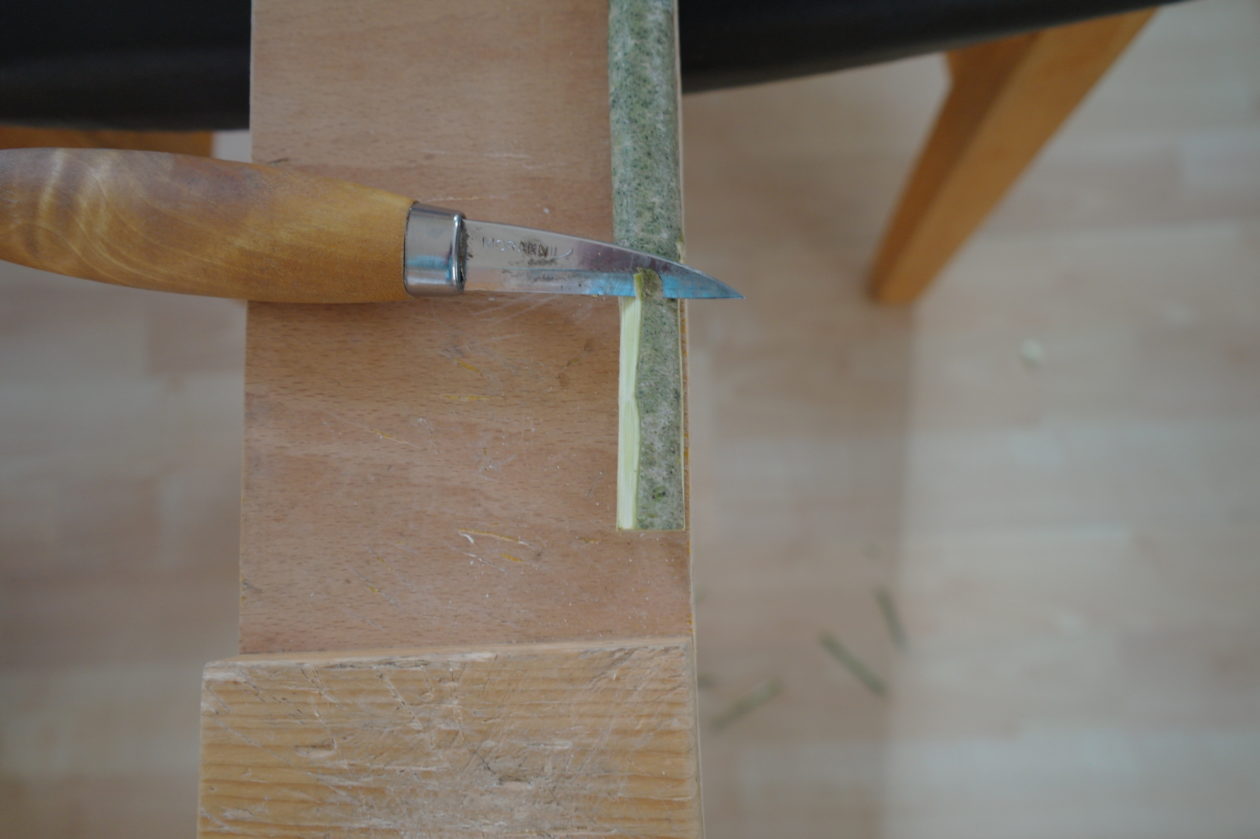
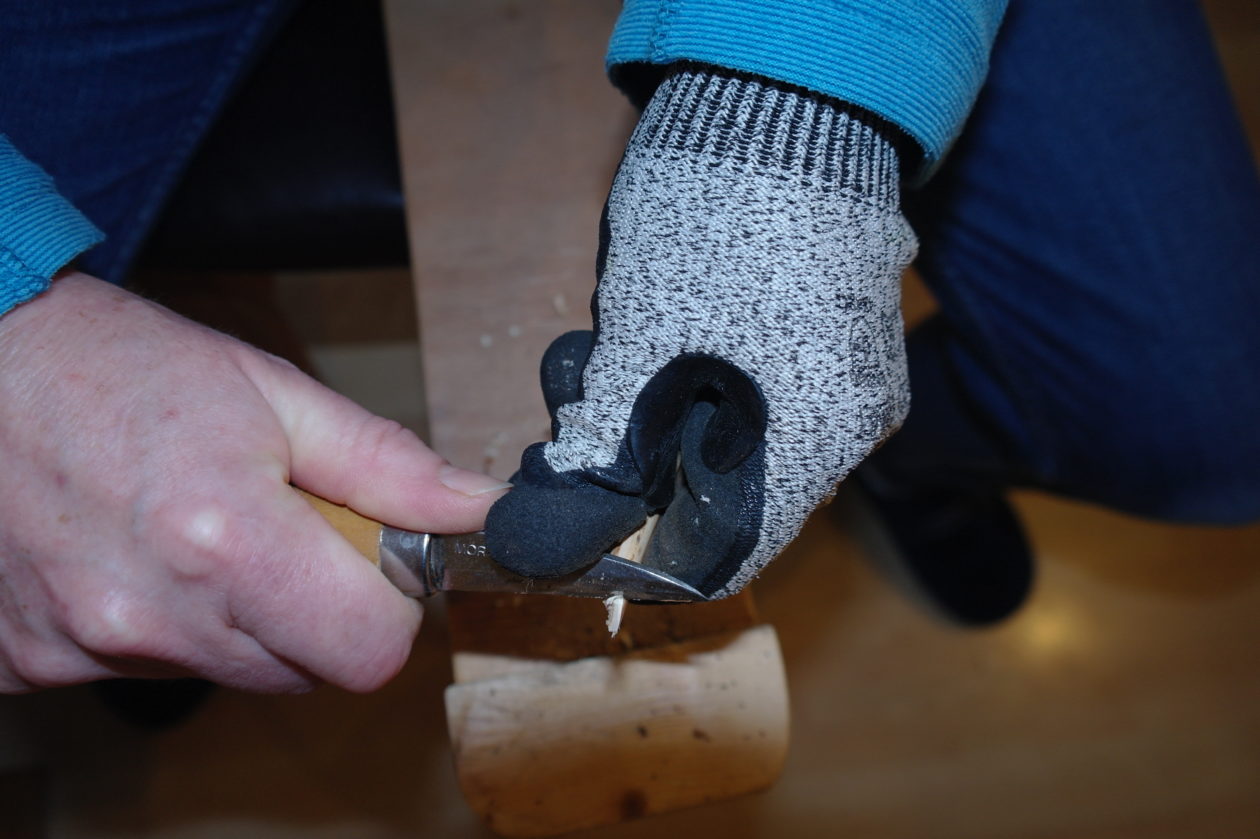
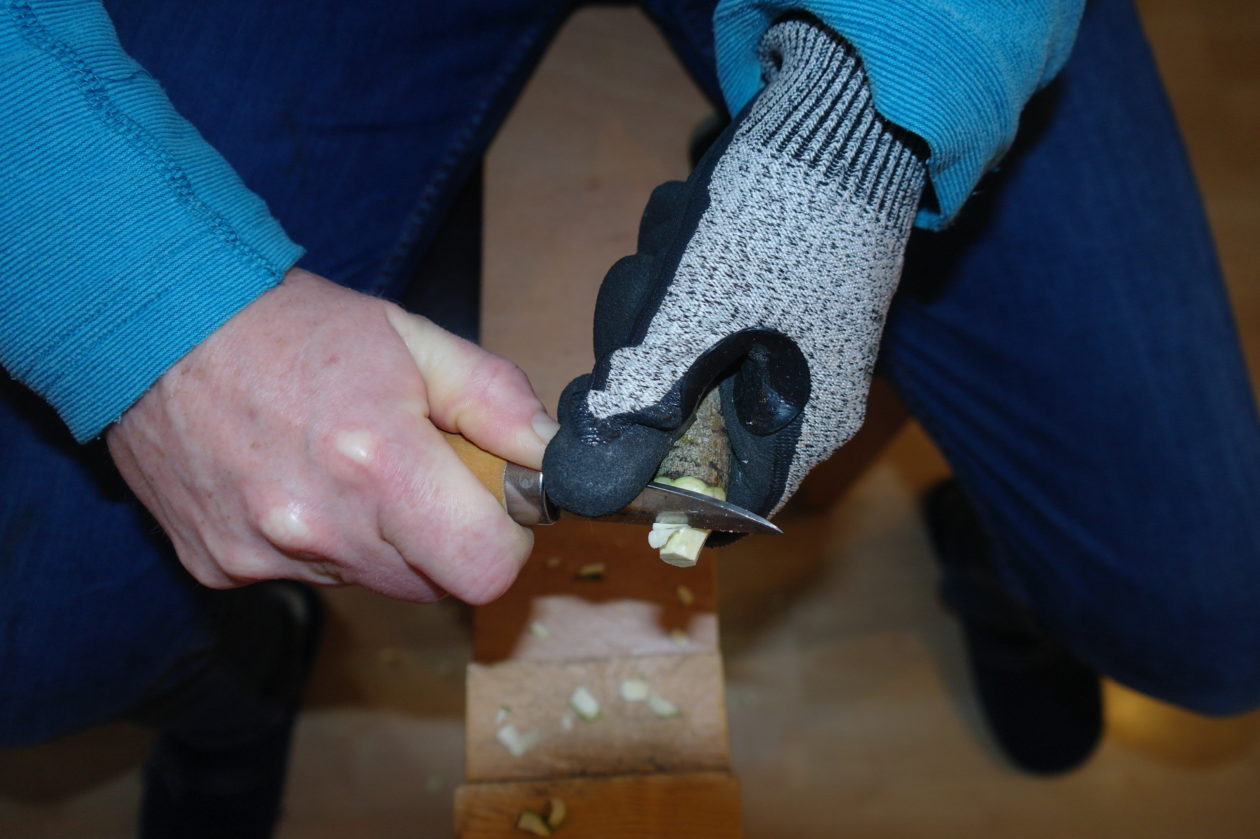
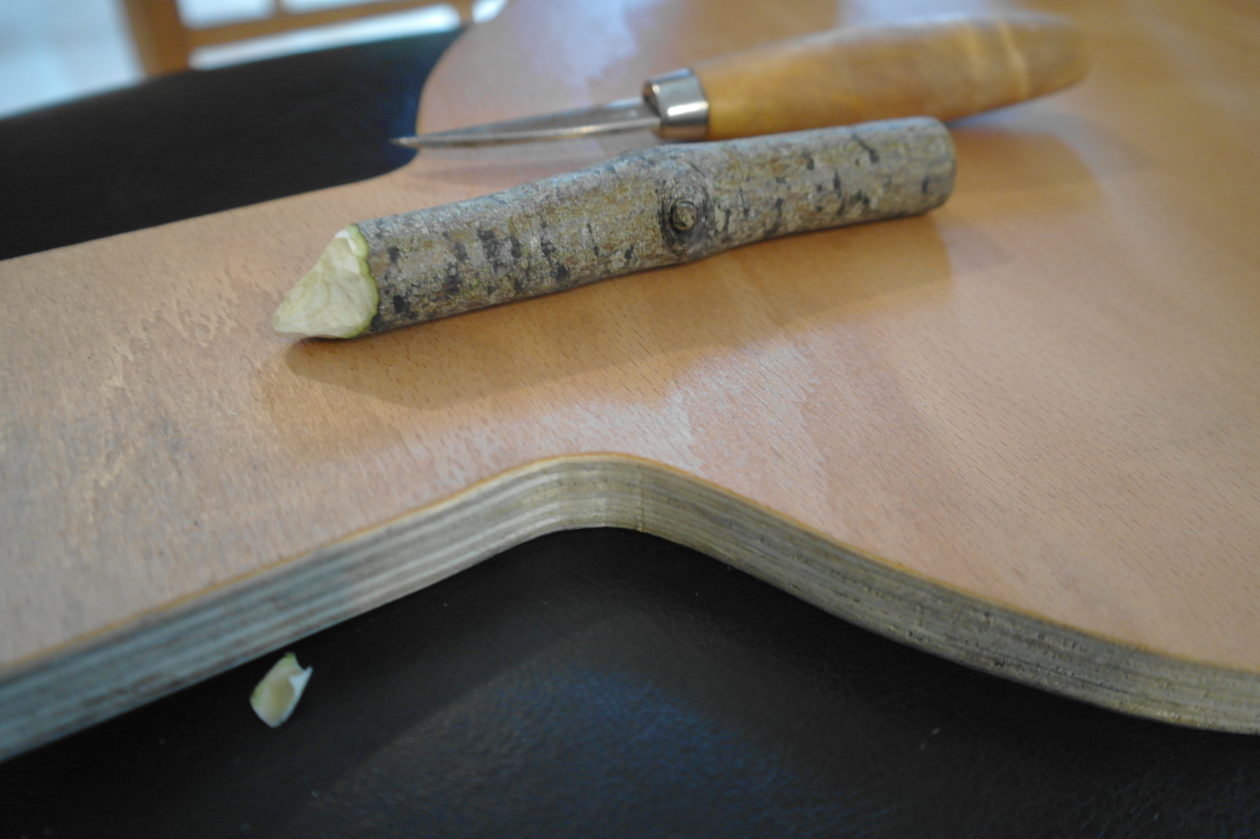
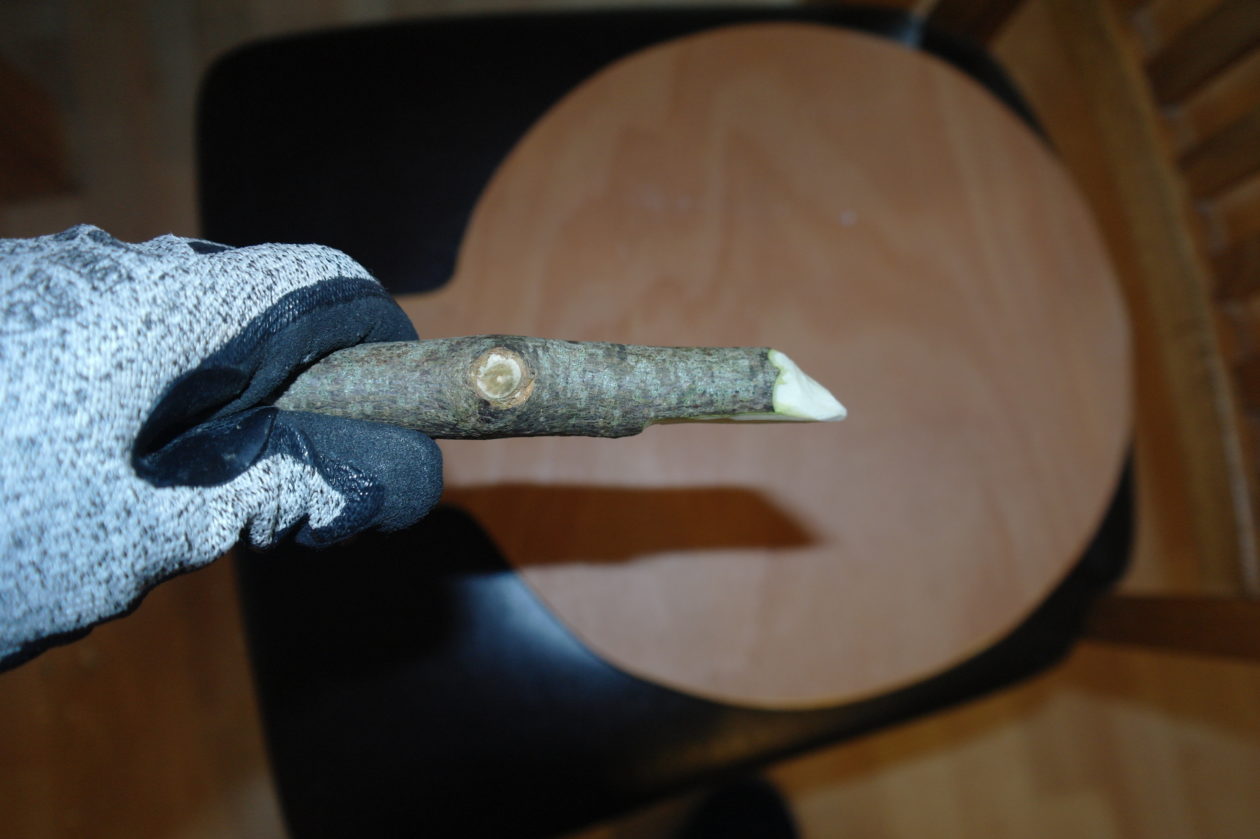
Slice off some wood at one side of your stick, at the end where you have scraped off the bark, to form an angle of about 45 degrees.
Your stick should look like this:
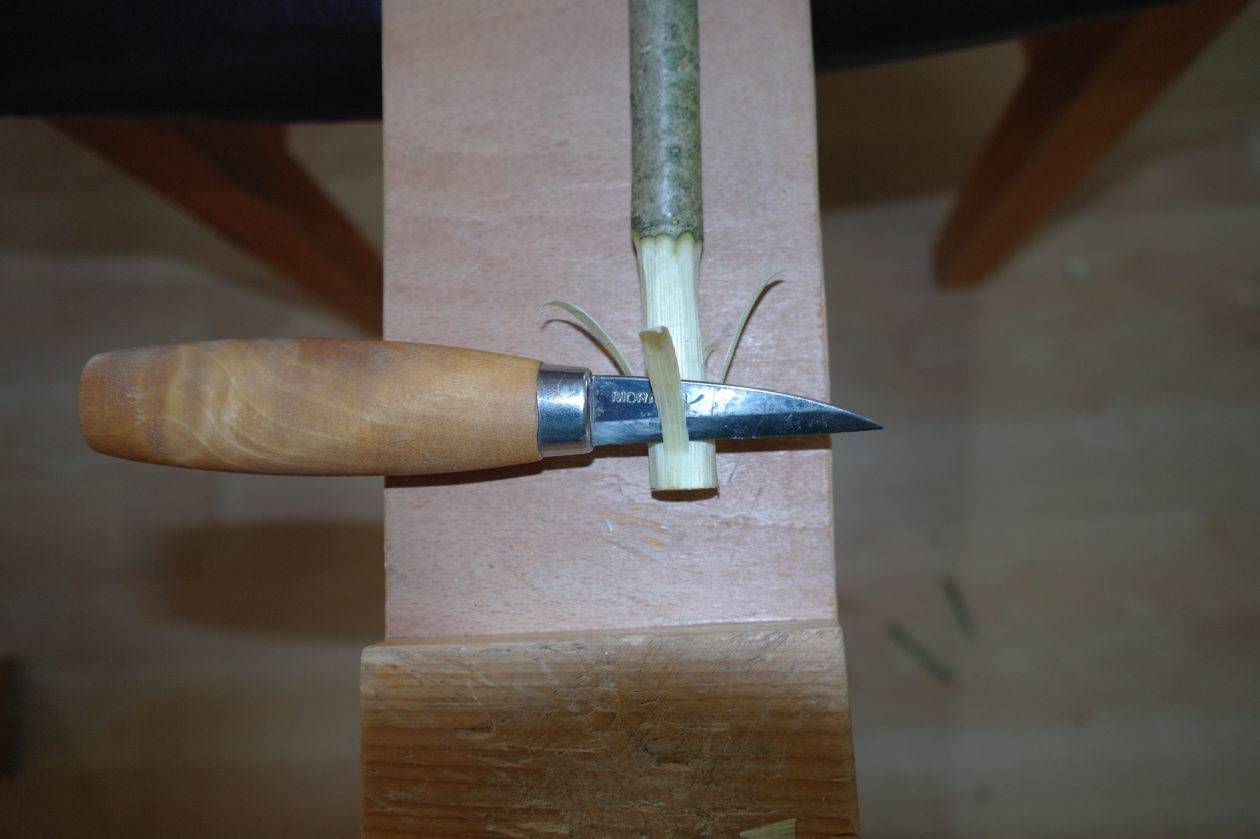
Sharpen the sides of your angled slice to form a point.
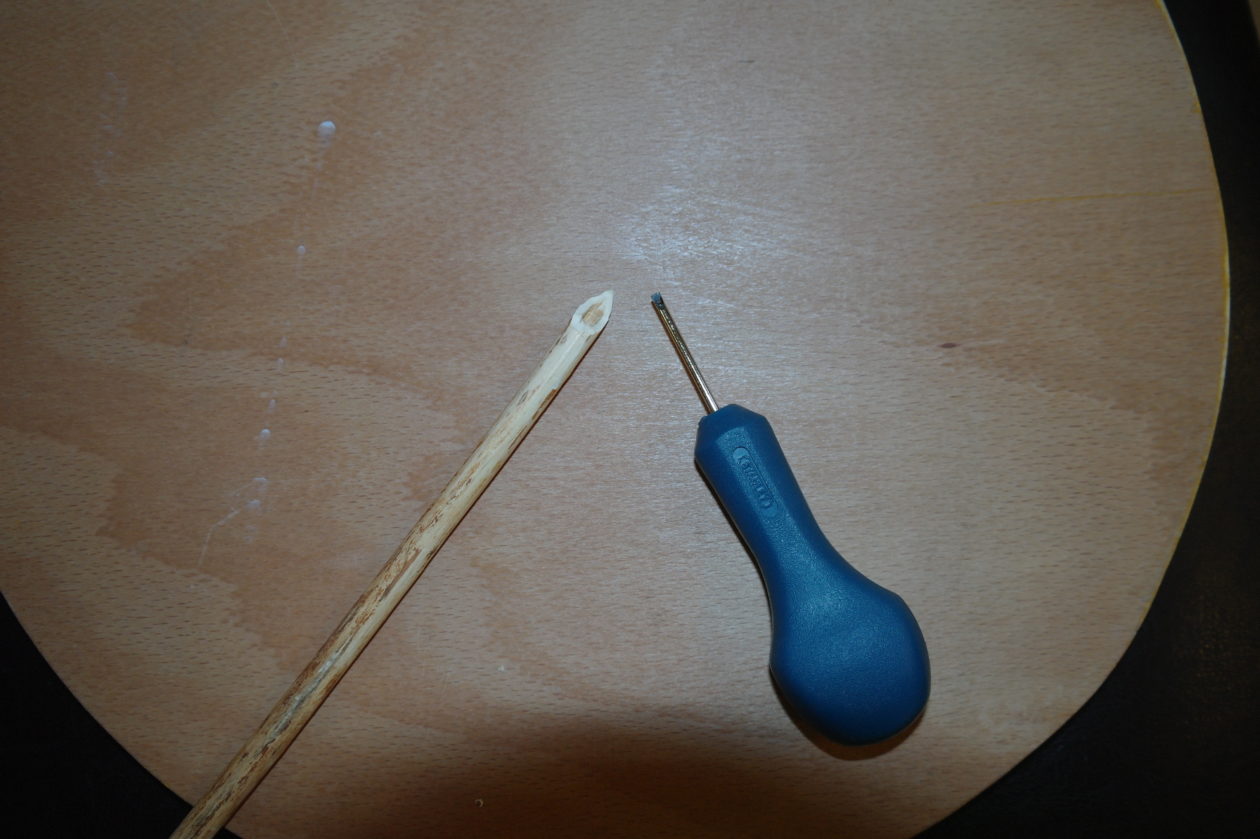
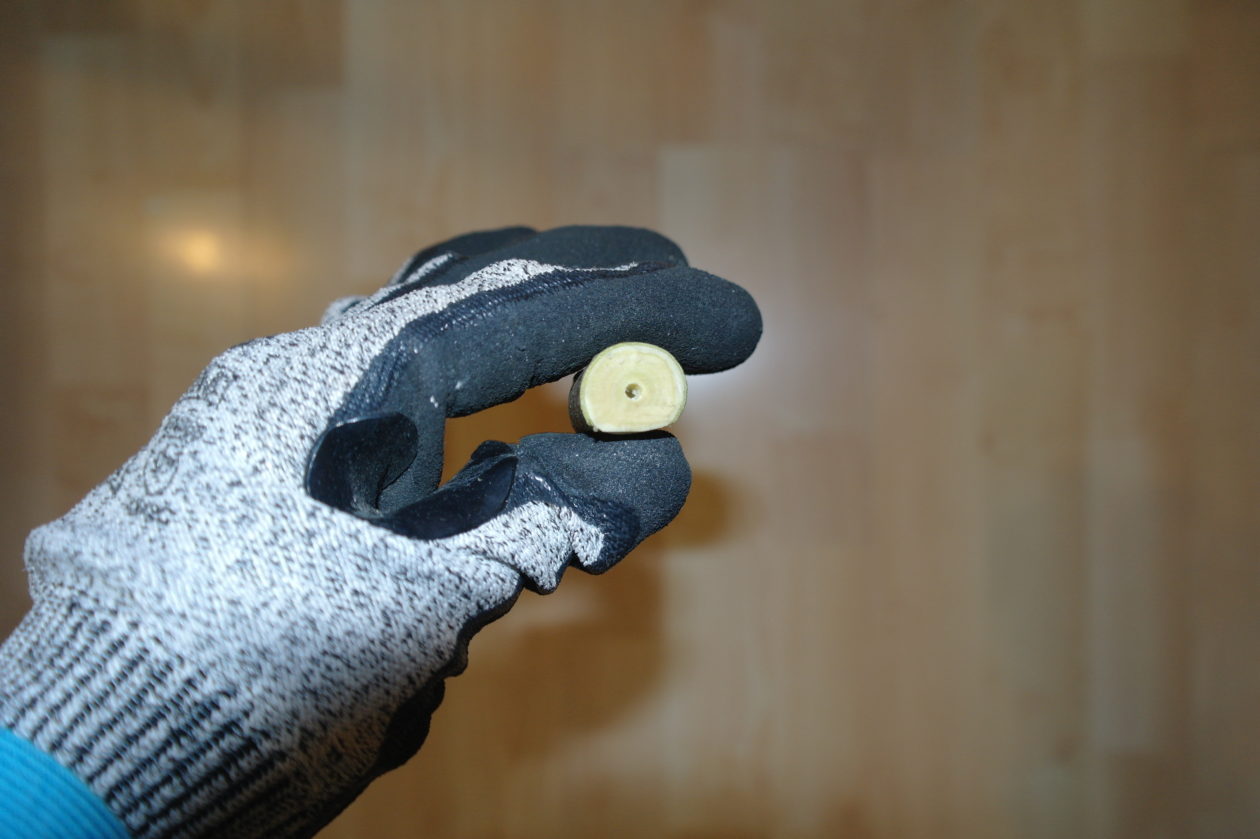
Use a bradawl (or small screwdriver) to make a hole it in the pithy part in the centre of your stick and scape a bit of the pith out.
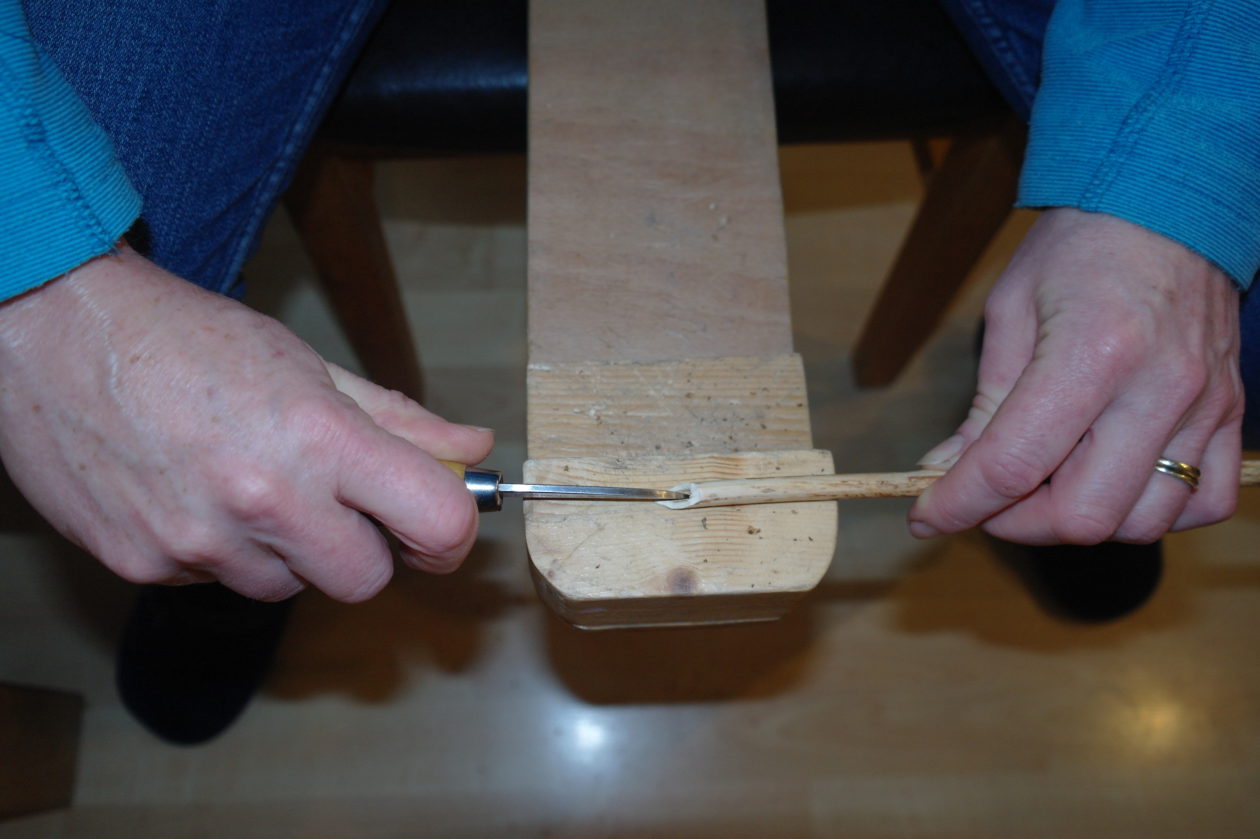
Place your stick onto a chopping block (this could be a chopping board or piece of wood) with the pointed side on the block and make a vertical cut to split the end of the point (try to ensure the spit is in the middle of the point).
You are now ready to try out your pen. I made some ink using a recipe I found on the internet – it did work, but it was a bit smelly. I also used some proper ink which was better. You can also use elder rather than willow to make a pen – the pen in the middle, on this photo, is made from elder.
Little Stick Animals
To make a mouse, you will need:
- A stick ( I used a hazel stick, about 1.5 – 2cms in diameter)
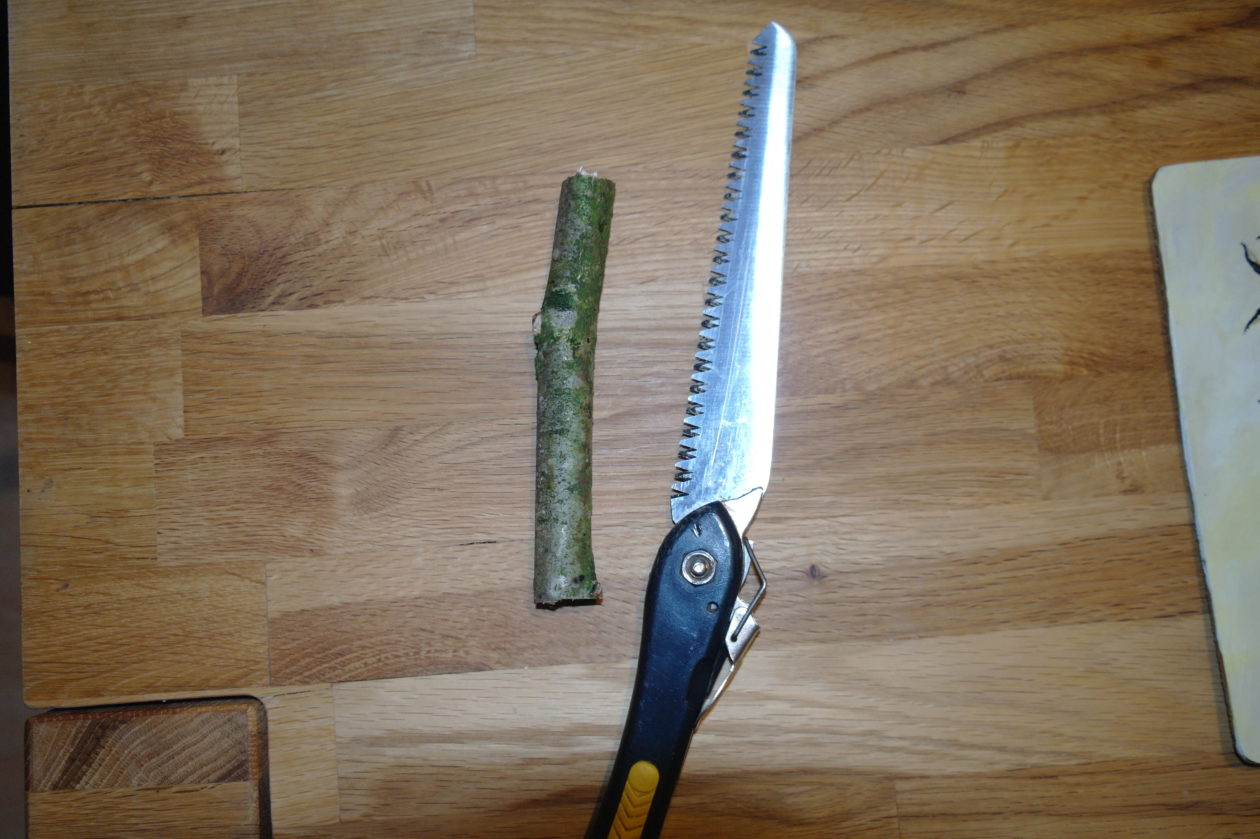
- a pruning saw
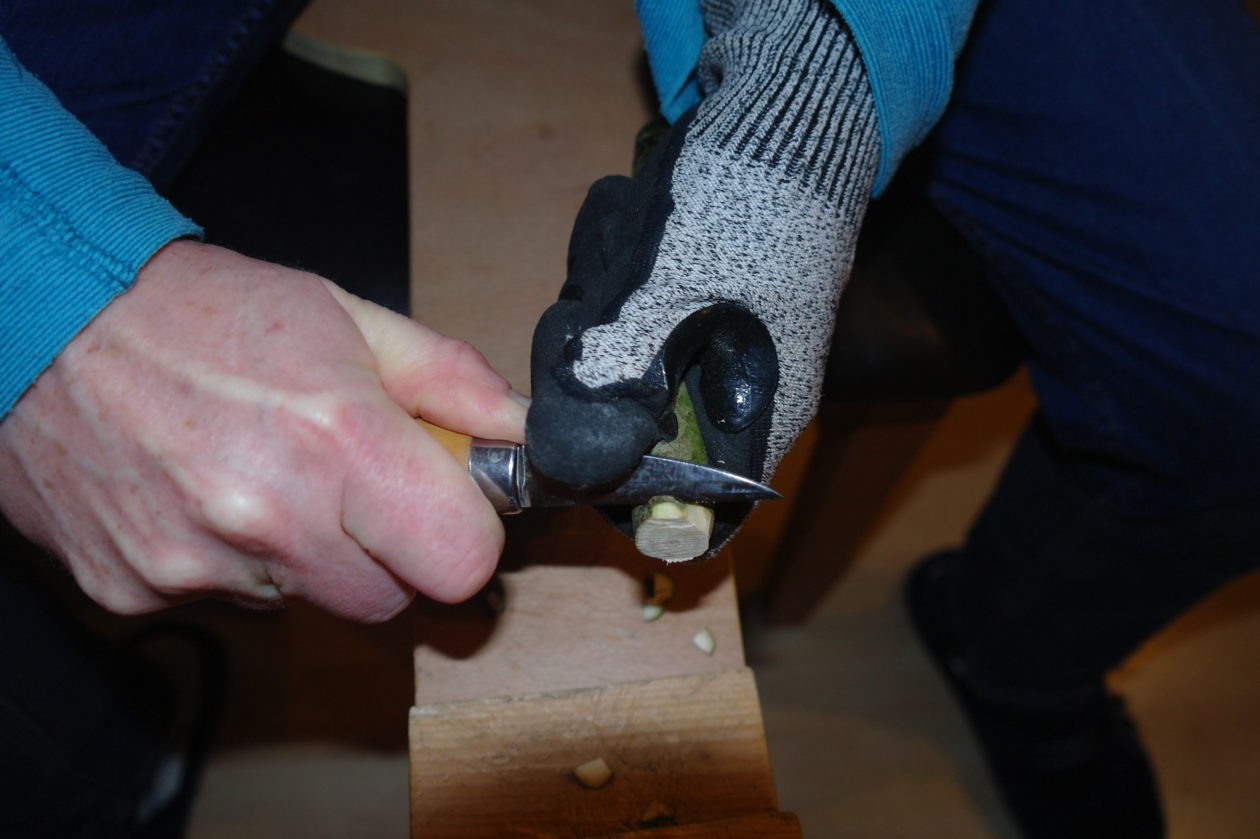
- a whittling knife
- a cut resistant glove
- a bradawl (to make some holes)
- some small pieces of felt
- P.V.A. glue (craft glue)
- scissors
- a thin stick or pencil
- some felt tipped pens
Use the pruning saw to cut a piece of stick just long enough to hold comfortably.
Use the whittling knife to sharpen one end of the stick at one side to create a sloping cut for the face of the mouse.
It should look like this:
At the other side of the stick, make a vertical cut about 4cms along the stick (from the pointed end) and slice off the bark and flatten that side. This will be the underside of your mouse and will help it to stand up.
It should look like this:
Use the pruning saw to cut the stick at the point where the flattened side begins. It should look like this:
Use the bradawl to make some holes – one in the middle of the flat end of the stick (for the tail) and two in the top side of the stick for the ears.
I also made some other animals using the method I posted last week for the little people. I used the bradawl to make some holes in the top of the head and one in the back of the stick.
Use a thin stick or pencil (clean it afterwards) to put a little P.V.A. glue into the holes you have made.
Cut some small pieces of felt to make ears and tail. Clean the glue off your stick or pencil and use that to push one end of your piece of felt into the appropriate holes (either for the ears or the tail).
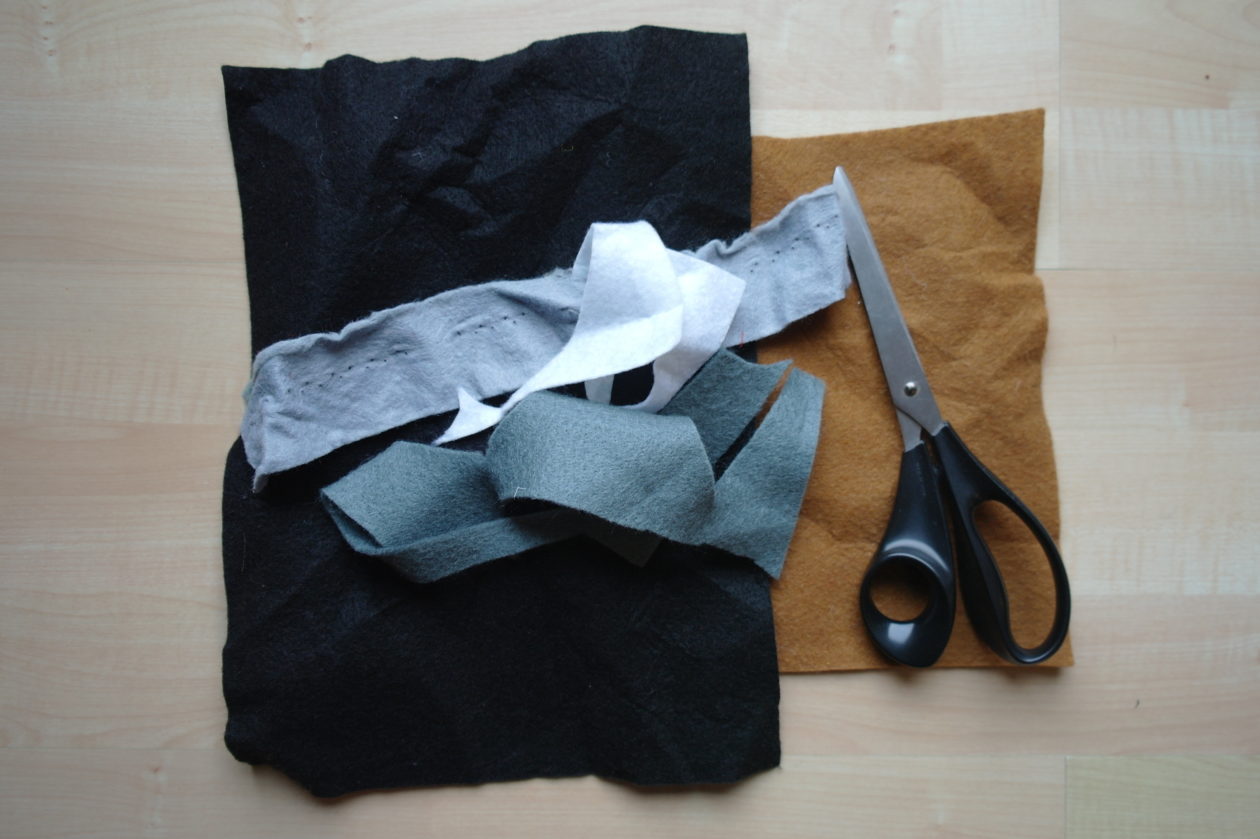
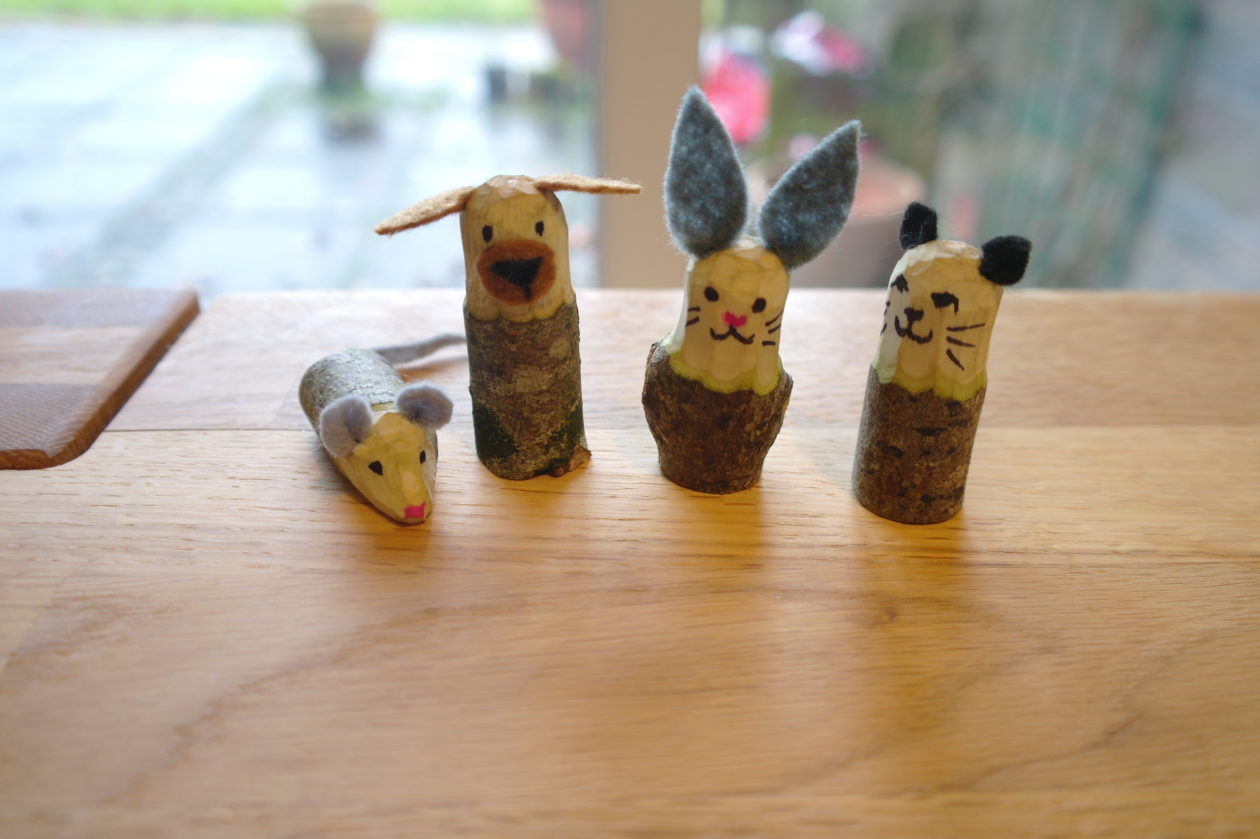
This is what my animals look like. I used felt tipped pen to draw on the faces and a I cut a small circle of brown felt and a tiny triangle of black felt to make the dog’s nose. I glued them on with P.V.A.
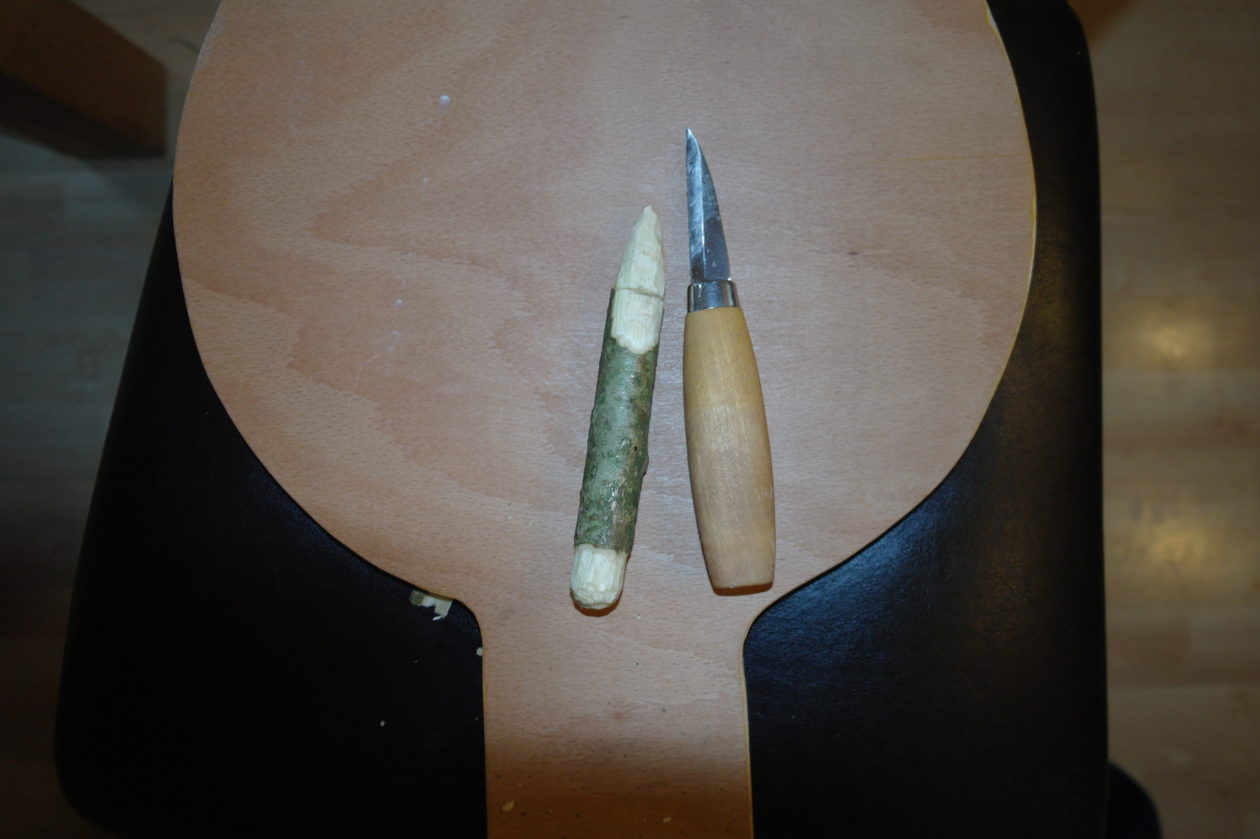
Little Stick People and Gnomes
To make a little stick person and a gnome, you will need:
- A stick – about 2cm in diameter and about 14cm long (I used Hazel and Sycamore but almost any stick will do).
- a pruning saw
- a whittling knife
- a cut resistant glove
- some felt tipped pens, paints and bits and bobs of material to decorate.
Use the pruning saw to cut a length of stick.
Wearing your cut resistant glove on the hand that is holding the stick, make some small cuts around one end of your stick with your whittling knife.
Make some small cuts, across the grain, at the end of your stick to round it off (this will be the top of the person’s head).
Remove about 2cm of bark all the way around the end of your stick.
Your stick should look like this: 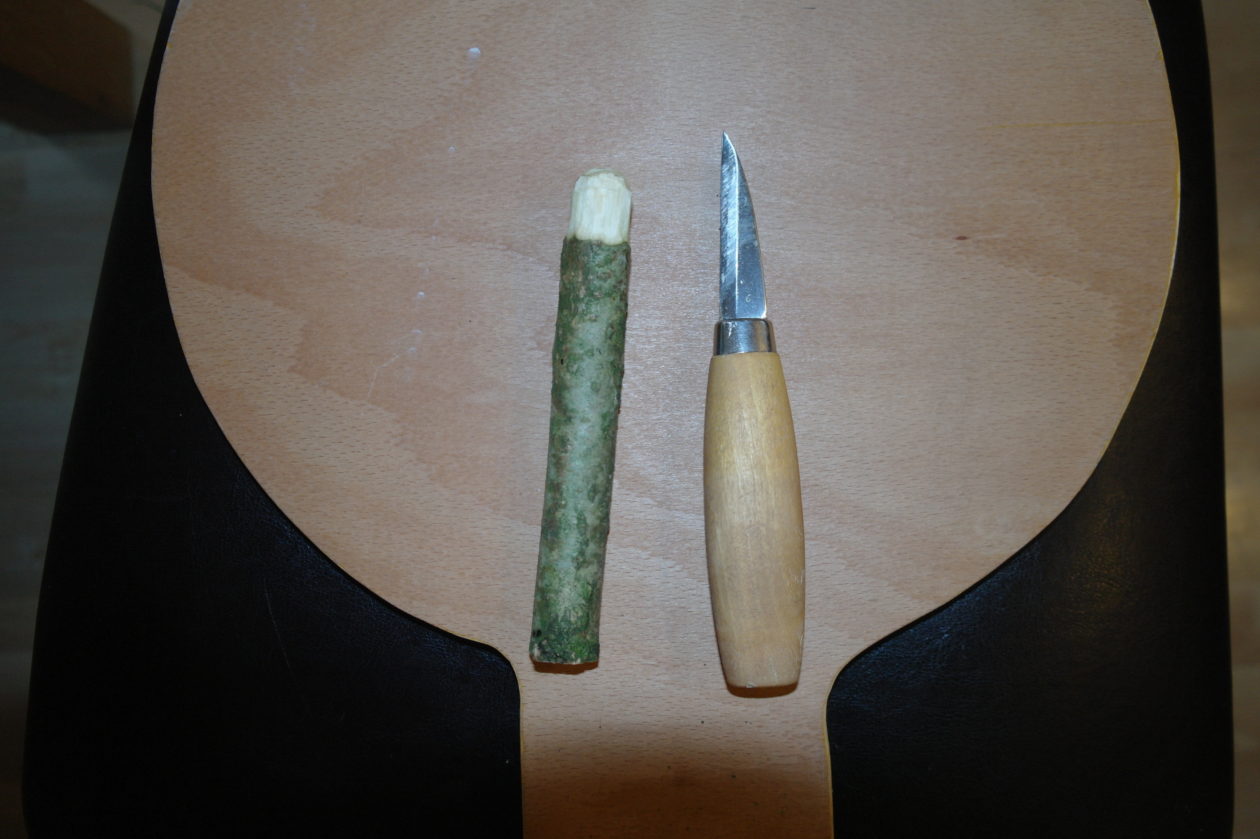
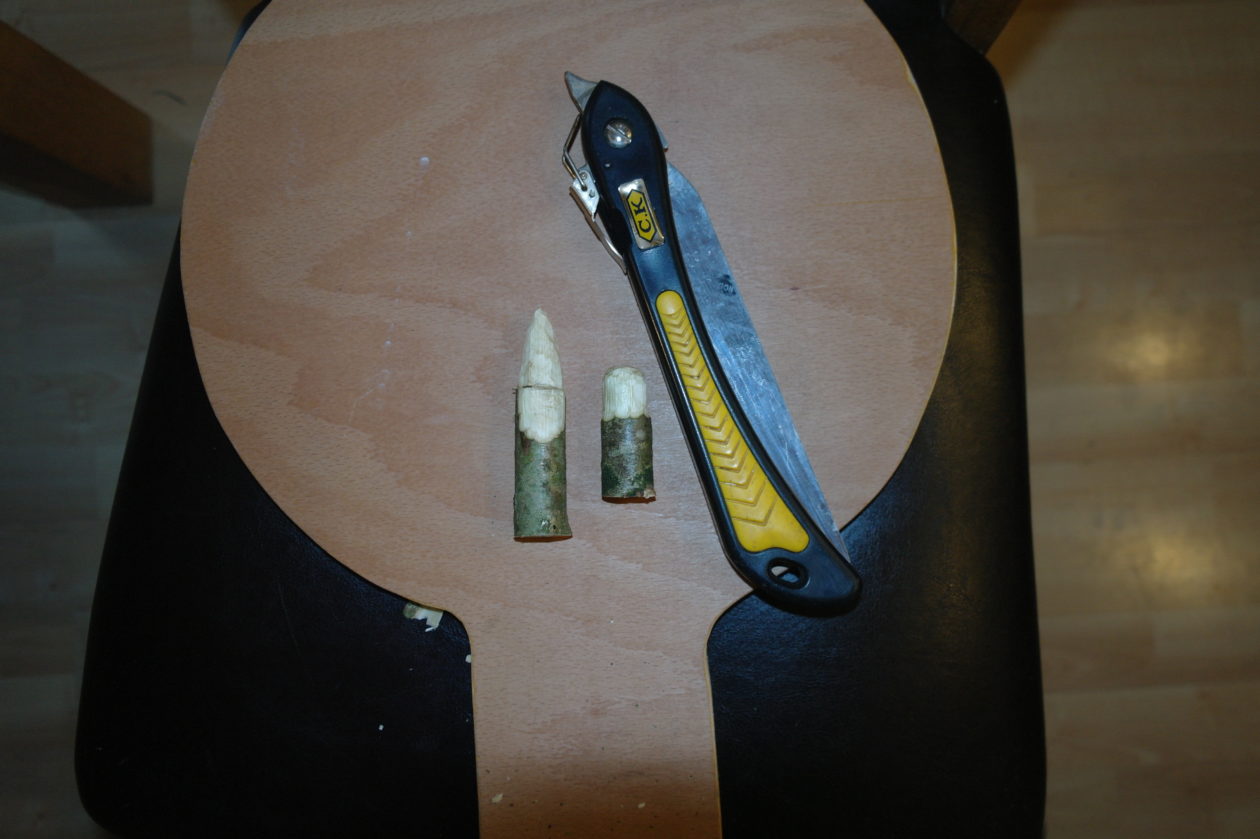
Turn your stick around and sharpen the other end. This will make the pointed hat of the gnome. Make a vertical cut all the way around the base of the hat.
Remove some bark, on one side of your stick, below the vertical cut (the vertical cut will stop your knife from cutting into the hat). Remove enough bark to make a face and beard for your gnome.
Use your pruning saw to cut the stick in two. I have made the gnome taller than the person but it is up to you what you do.
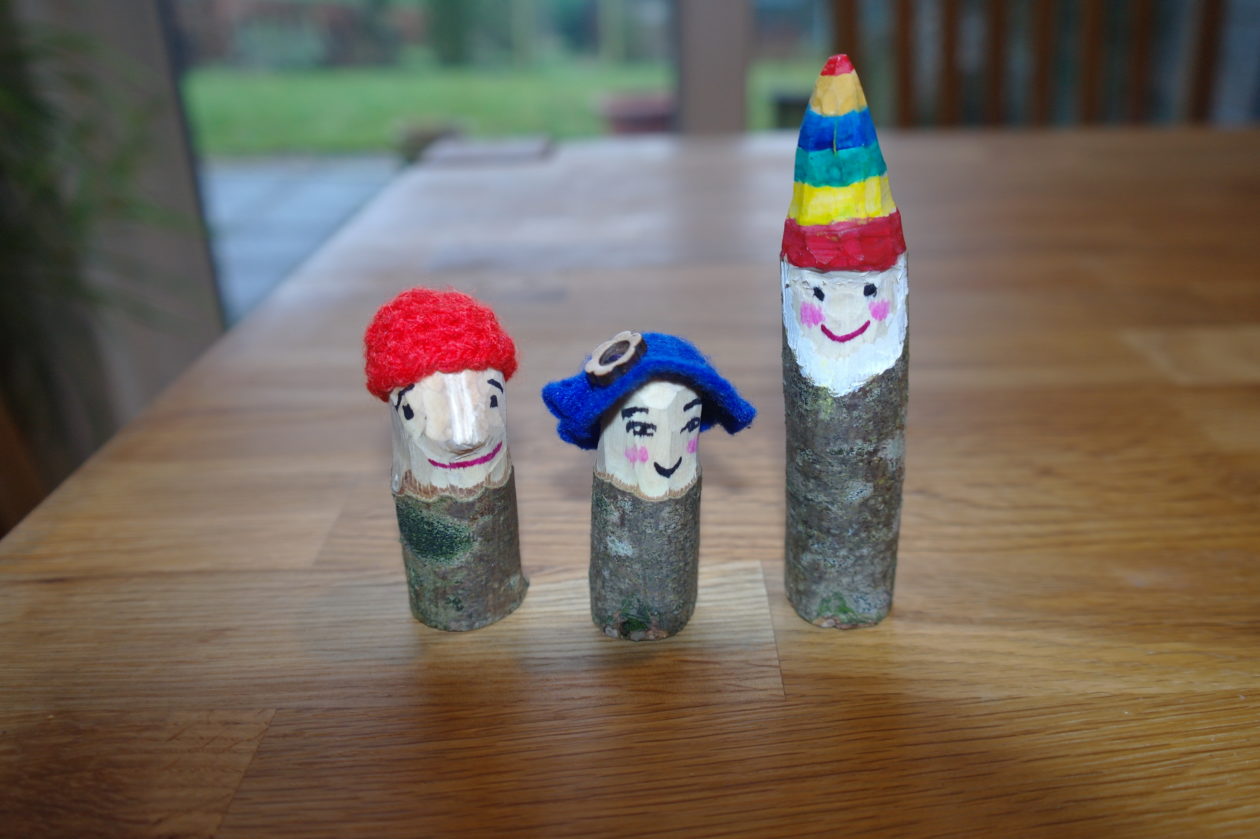
Decorate your little stick person and gnome. Mine looked like this:
‘Magic’ Wand
For my final whittling blog I am going to show you how to make a ‘magic’ wand (I’m sorry I didn’t post anything on here last week but I was busy drawing avatars for the P7s).
Cut a stick, approximately 32 centimetres long (I used sycamore but you can use almost any wood).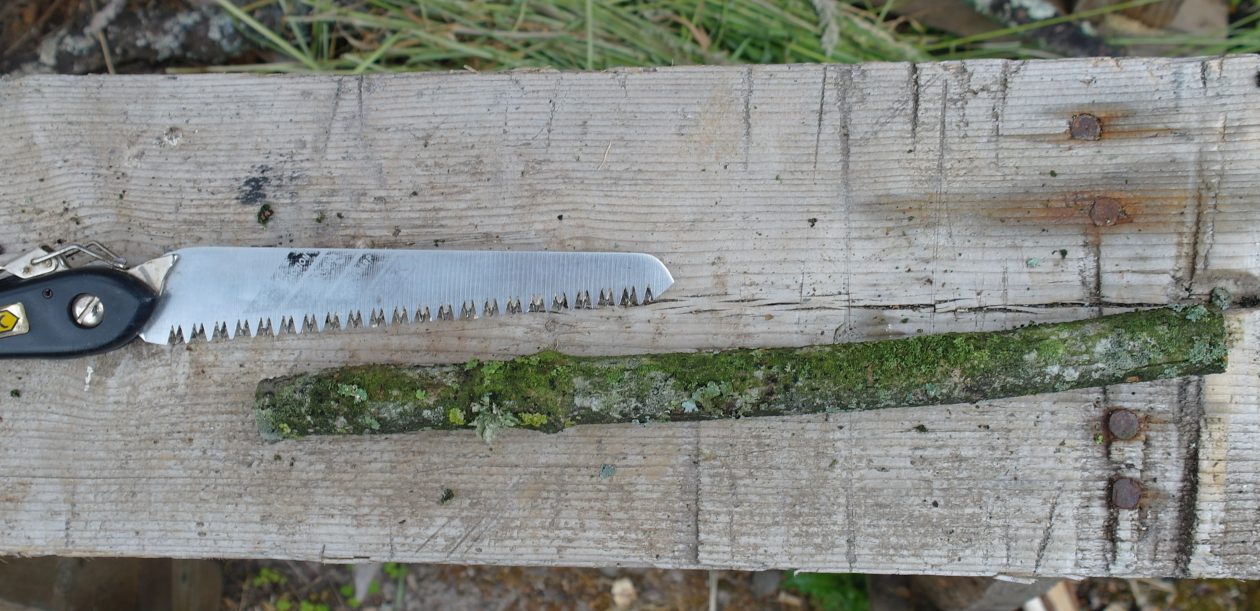
Use your whittling knife to remove the bark from the stick.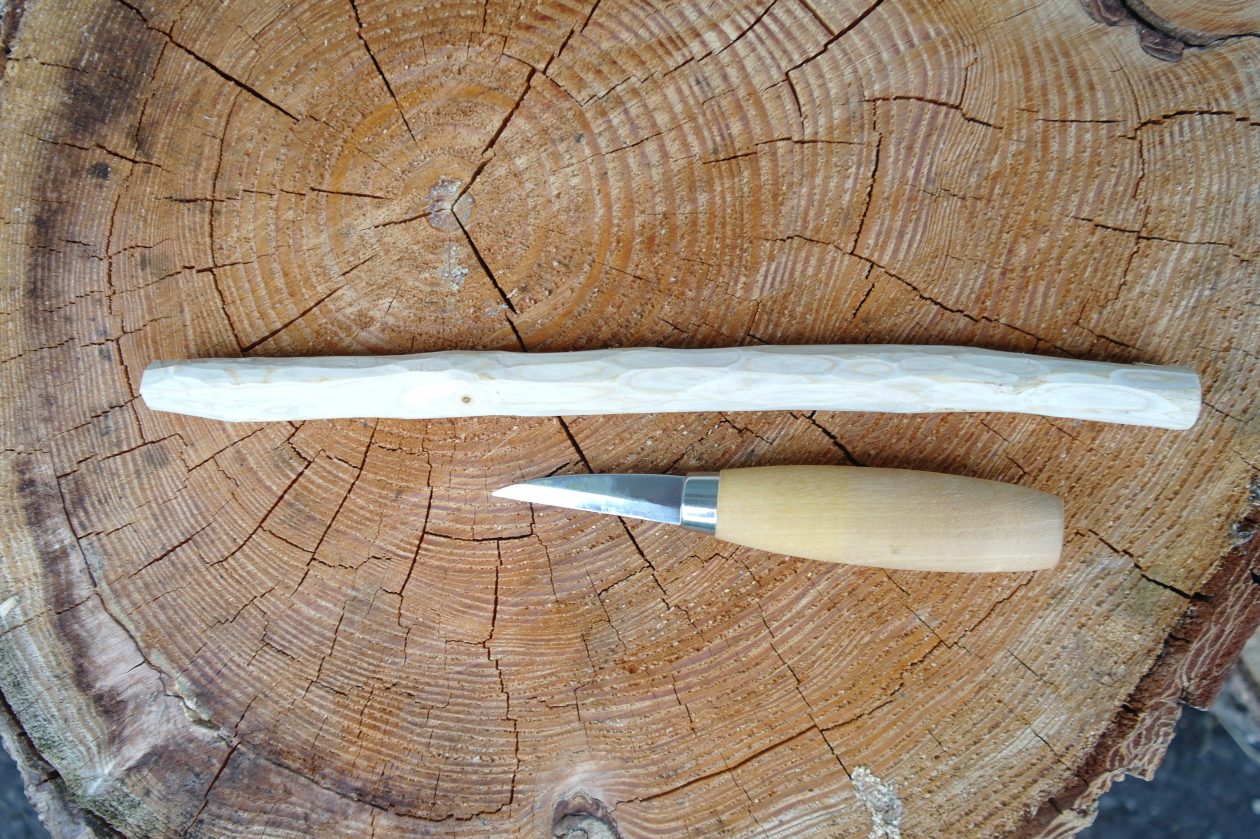
I cut a shallow notch near one end of my stick by making a vertical cut all the way around. I rounded off the end of my stick.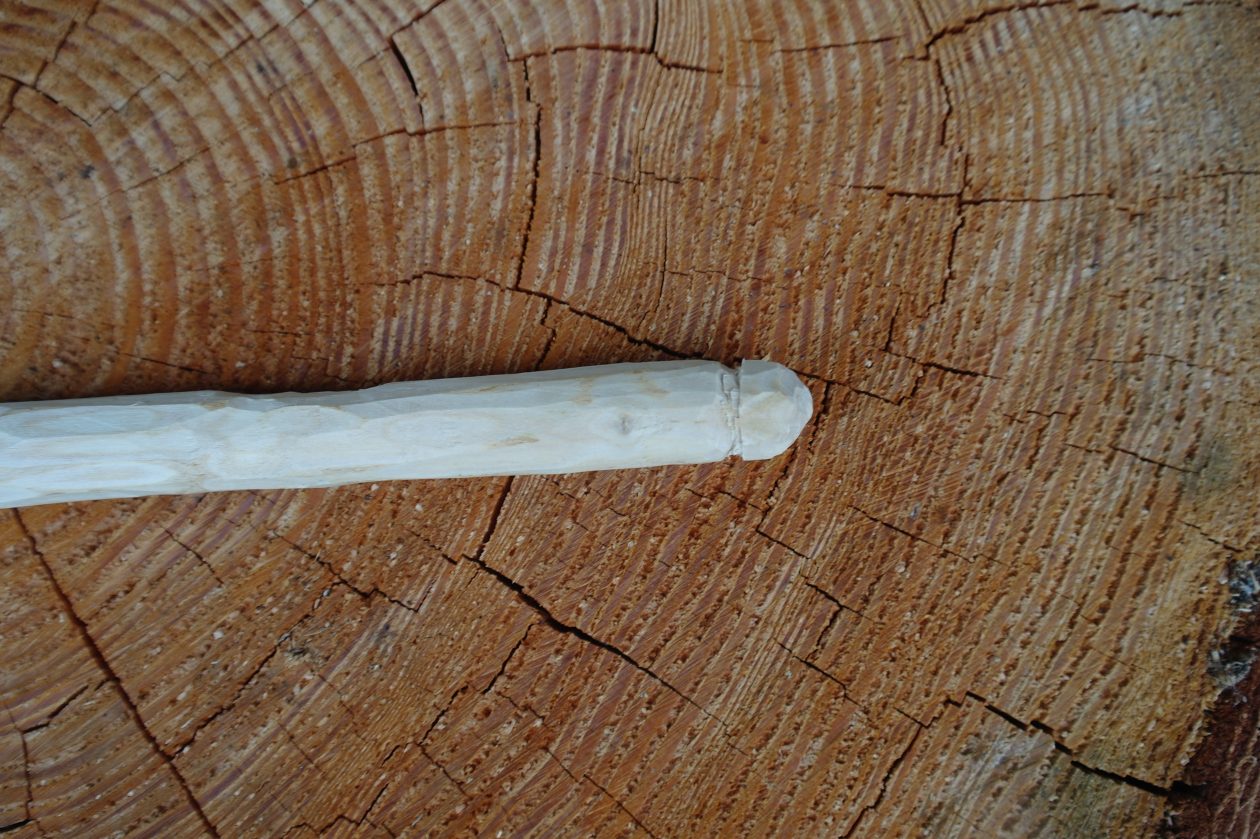
I sharpened the other end of my stick and rounded off the end.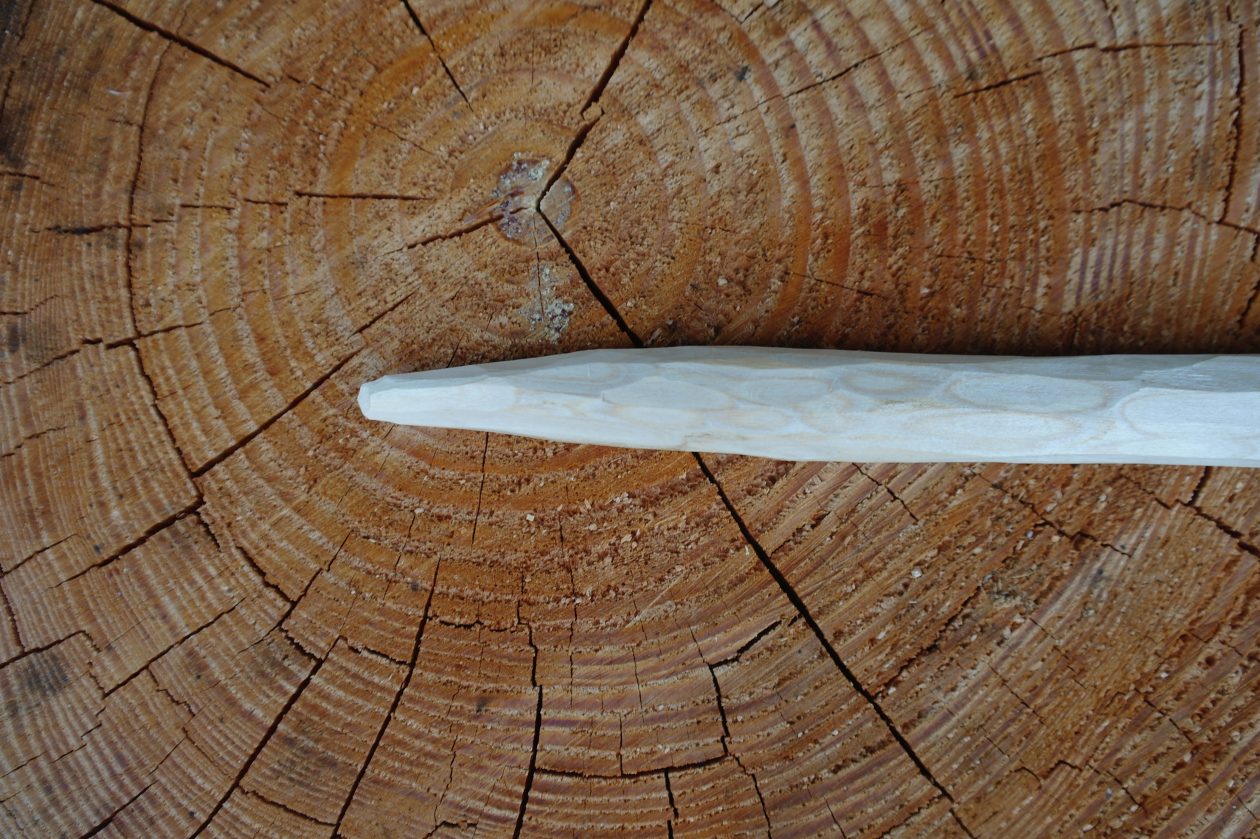
I made another vertical cut where I wanted the start of the handle to be. I wanted a spiral design on my wand so I made yet another vertical cut, at an angle this time, turning the stick as I went so that the cut spiralled around the stick, all the way to the top.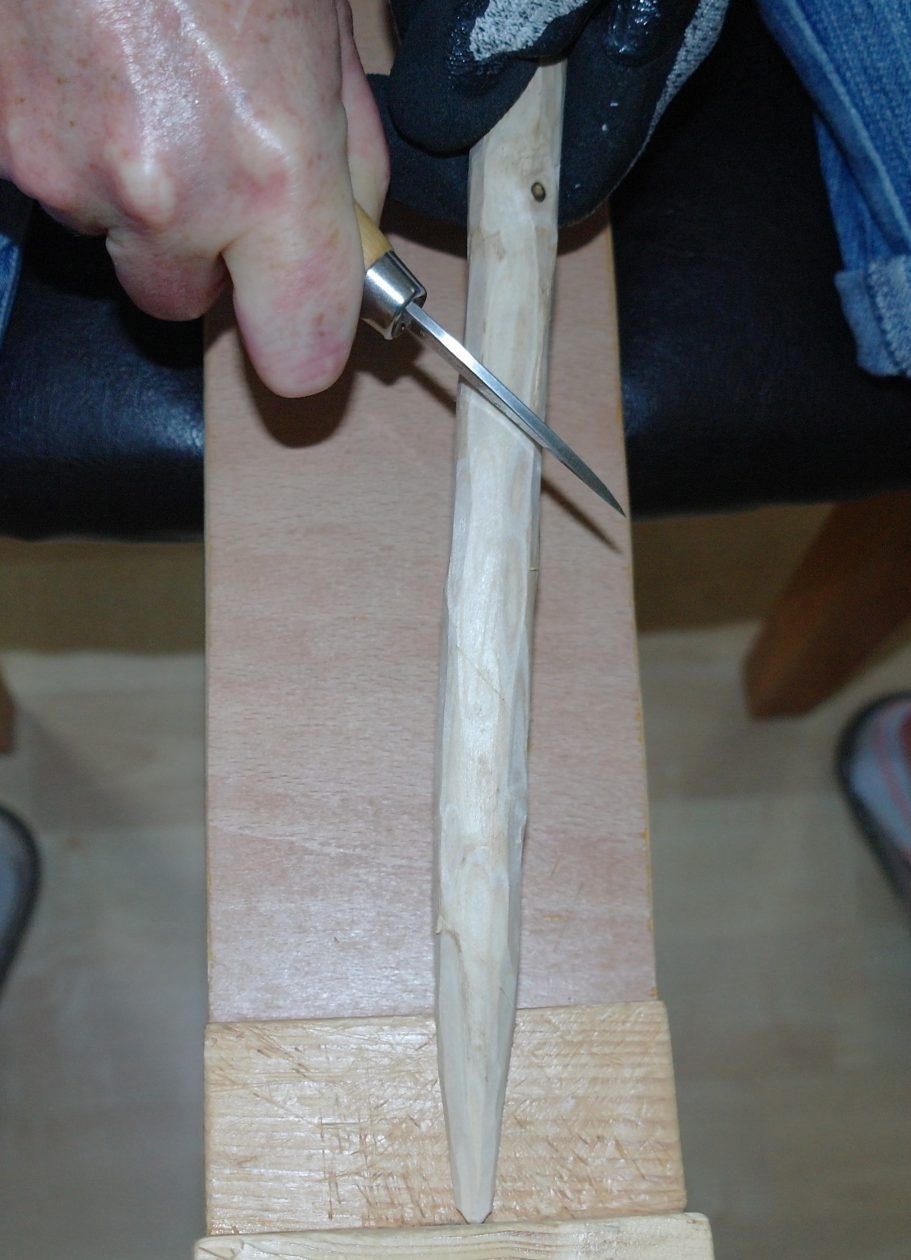
I began to cut into my stick, using my vertical cut as a guide. The vertical cut stops your horizontal cuts from going any further up the stick.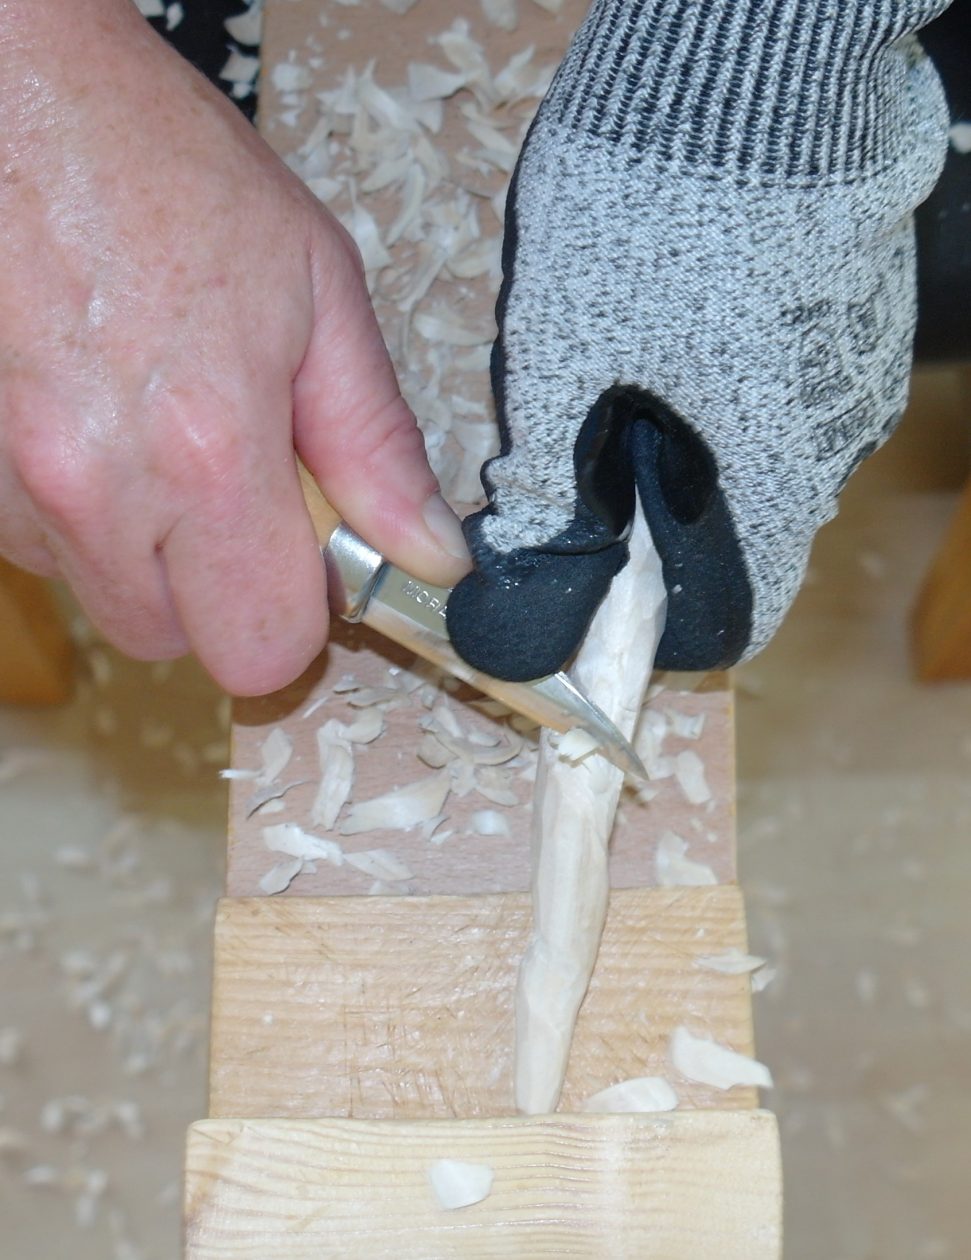
I worked my way around my stick, making small cuts and, gradually, creating my spiral design.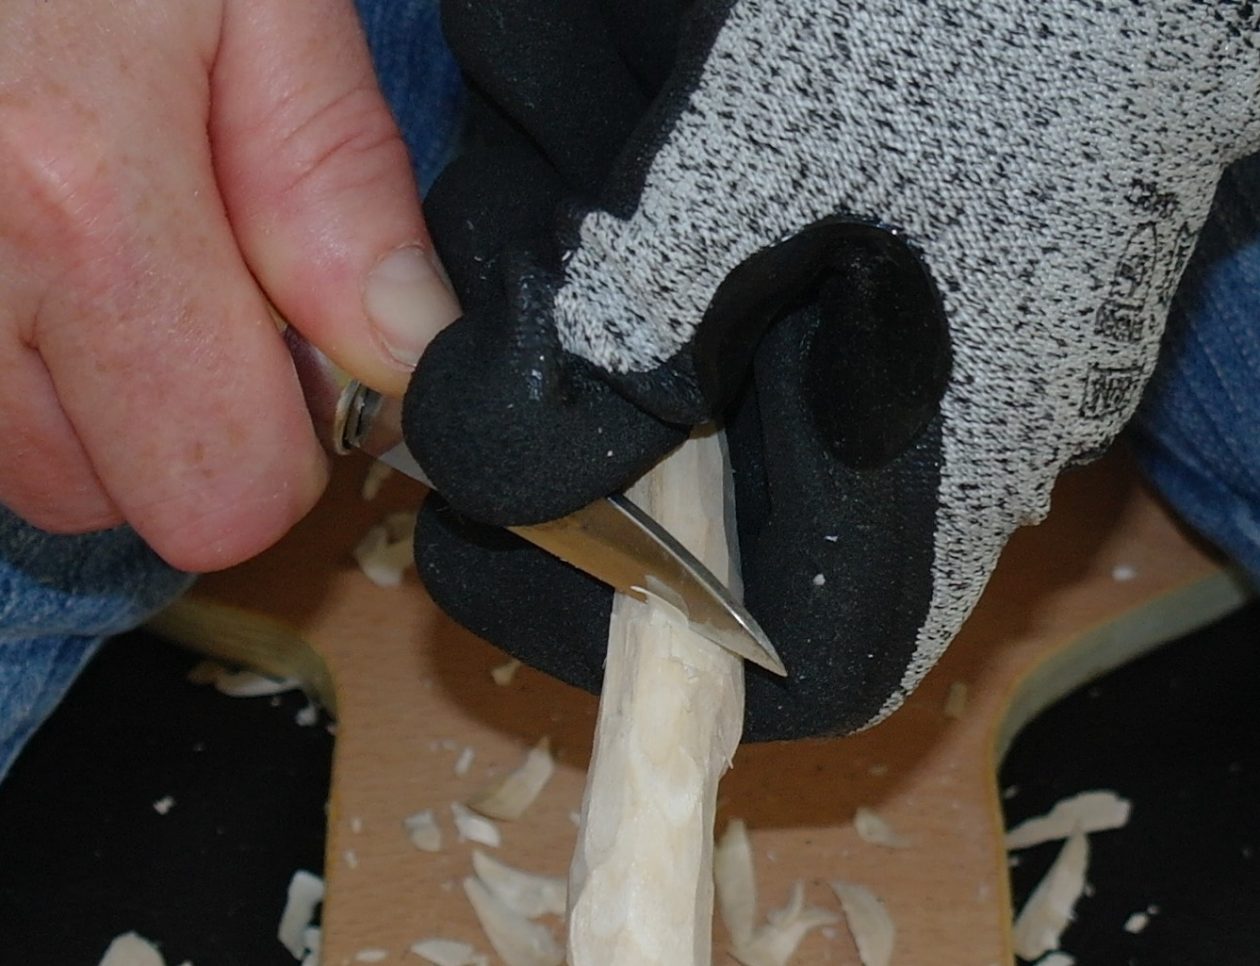
I shaped the handle at the bottom of the sick, rounding it off and making it slightly narrower in the middle.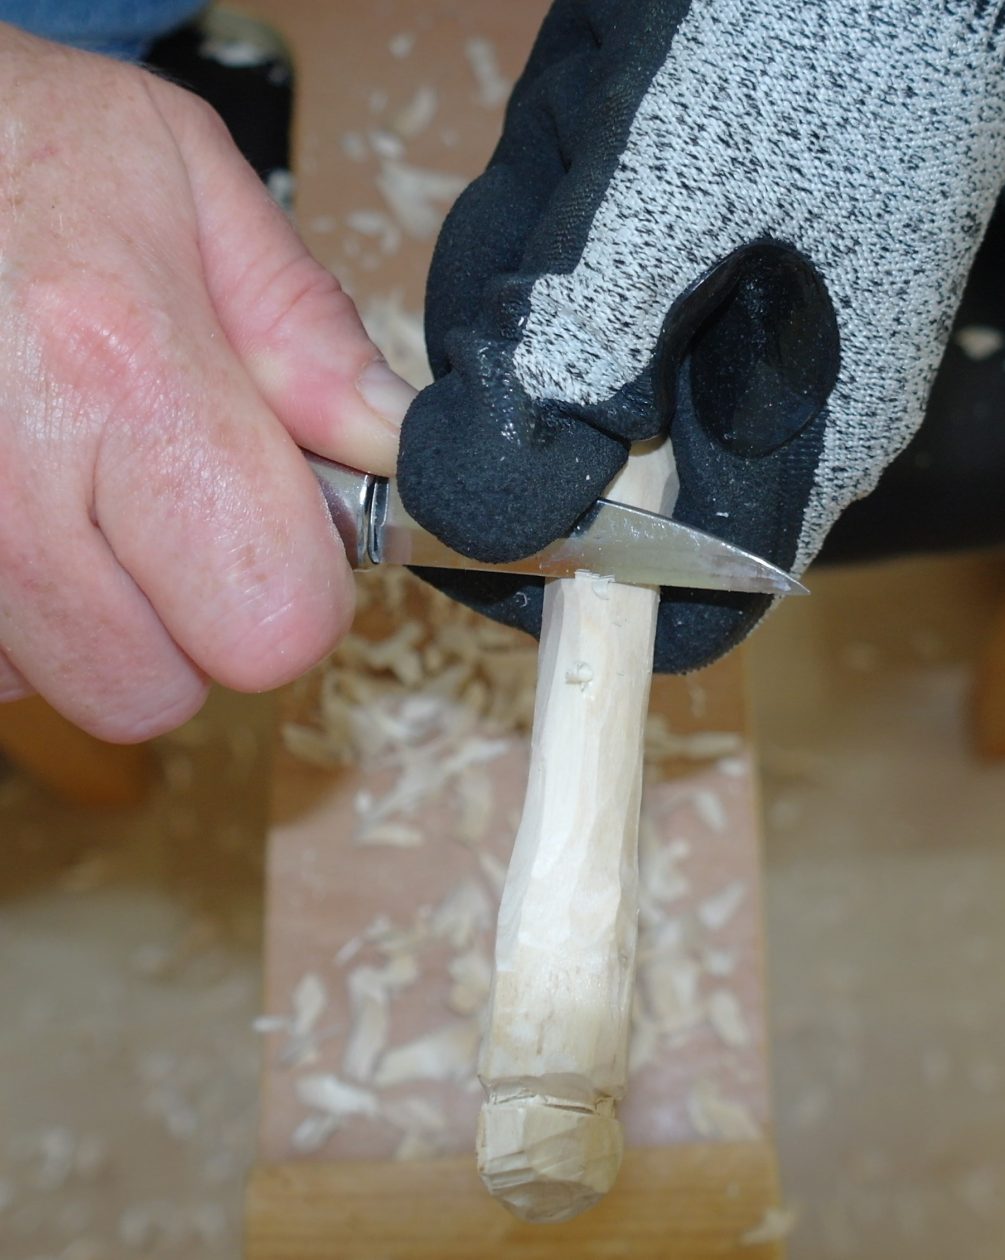
Once I was satisfied with my design, I sanded my wand using a coarse P80 aluminium oxide paper, to get rid of all the really rough bits and then a finer P120 paper to smooth it off.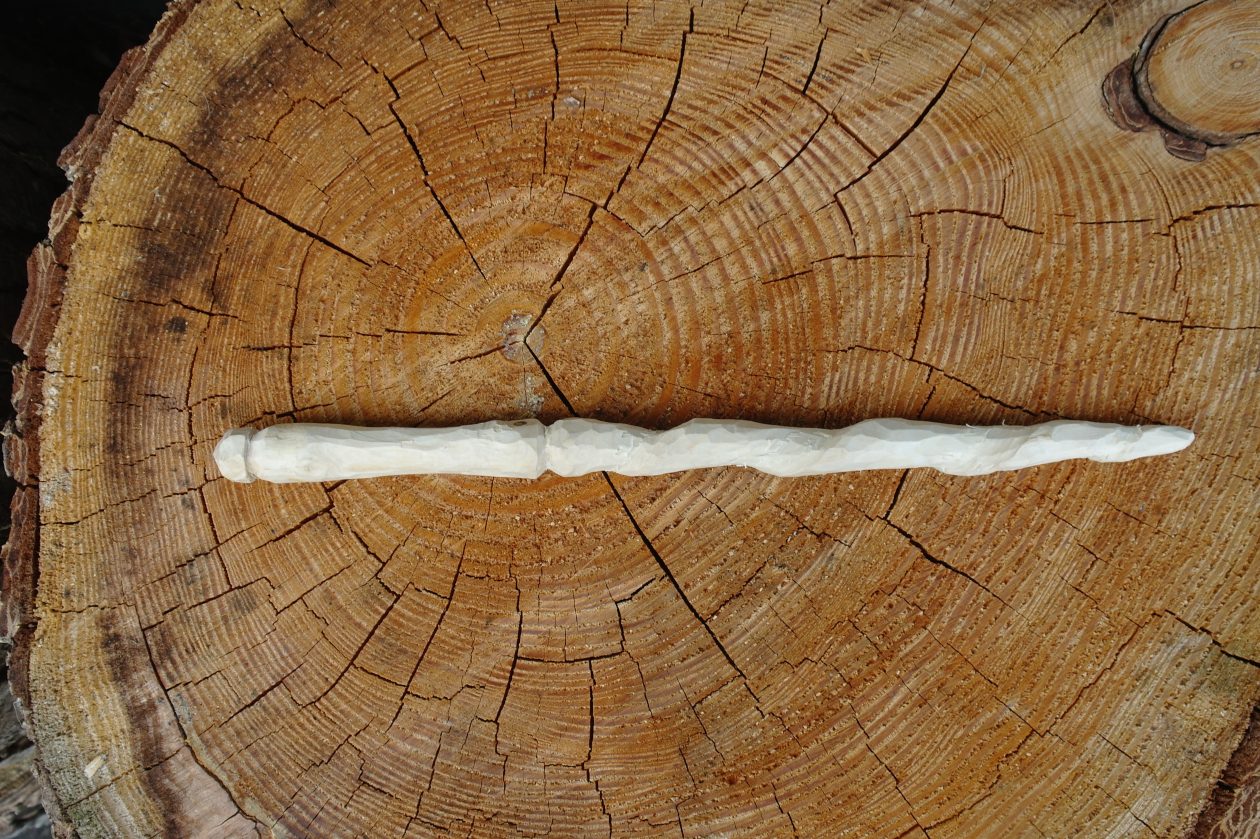
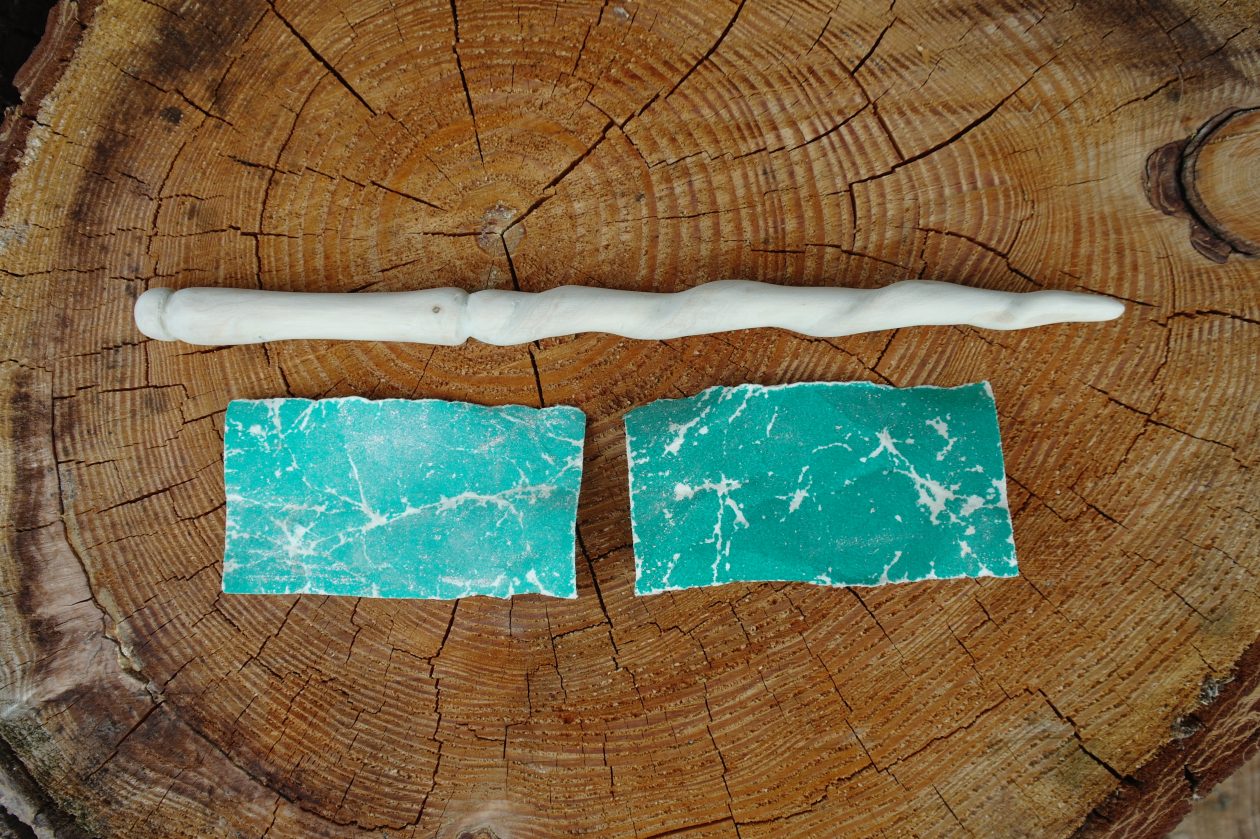
Once I was satisfied with my wand, I coated it in olive oil and left it to dry before polishing it.
I have made a much simpler wand using a thinner stick. All I did with this one was take off some of the bark to create a simple pattern. I also sharpened one end and slightly rounded off the top and bottom of the stick. The great thing about making a wand is that you can be as creative as you like – I really enjoyed it and I hope you do too.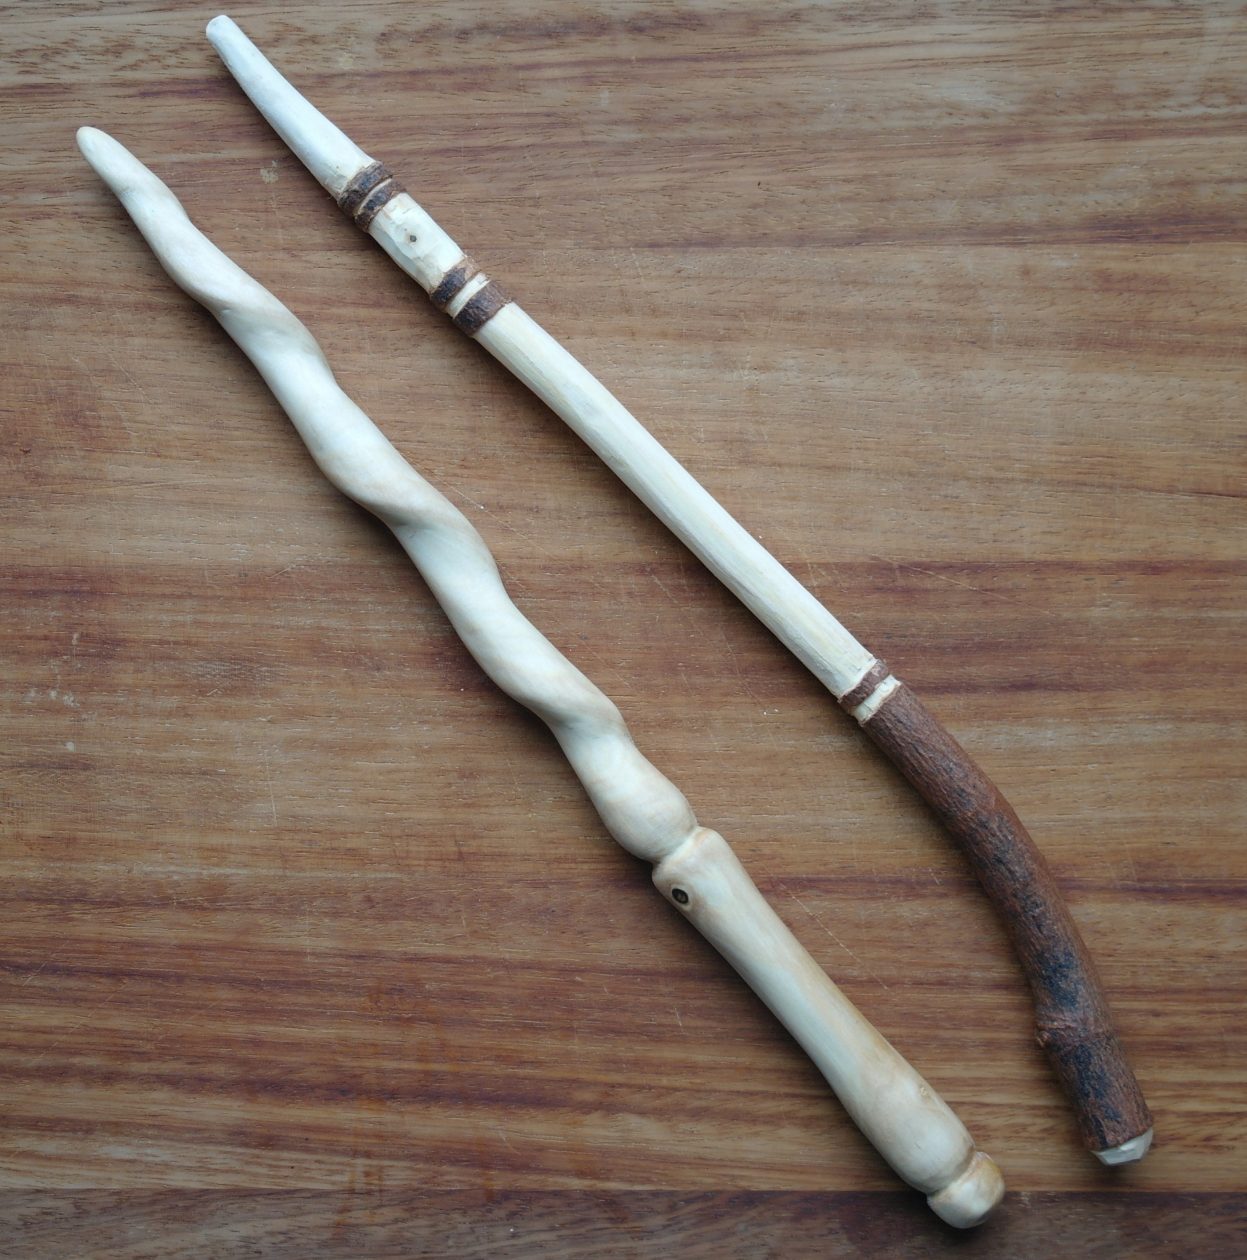
Slingshot or Catapult
Please remember that this is only to be used for target practice.
I cut a branch with a ‘Y’ shaped fork in it from the fallen sycamore tree in my field.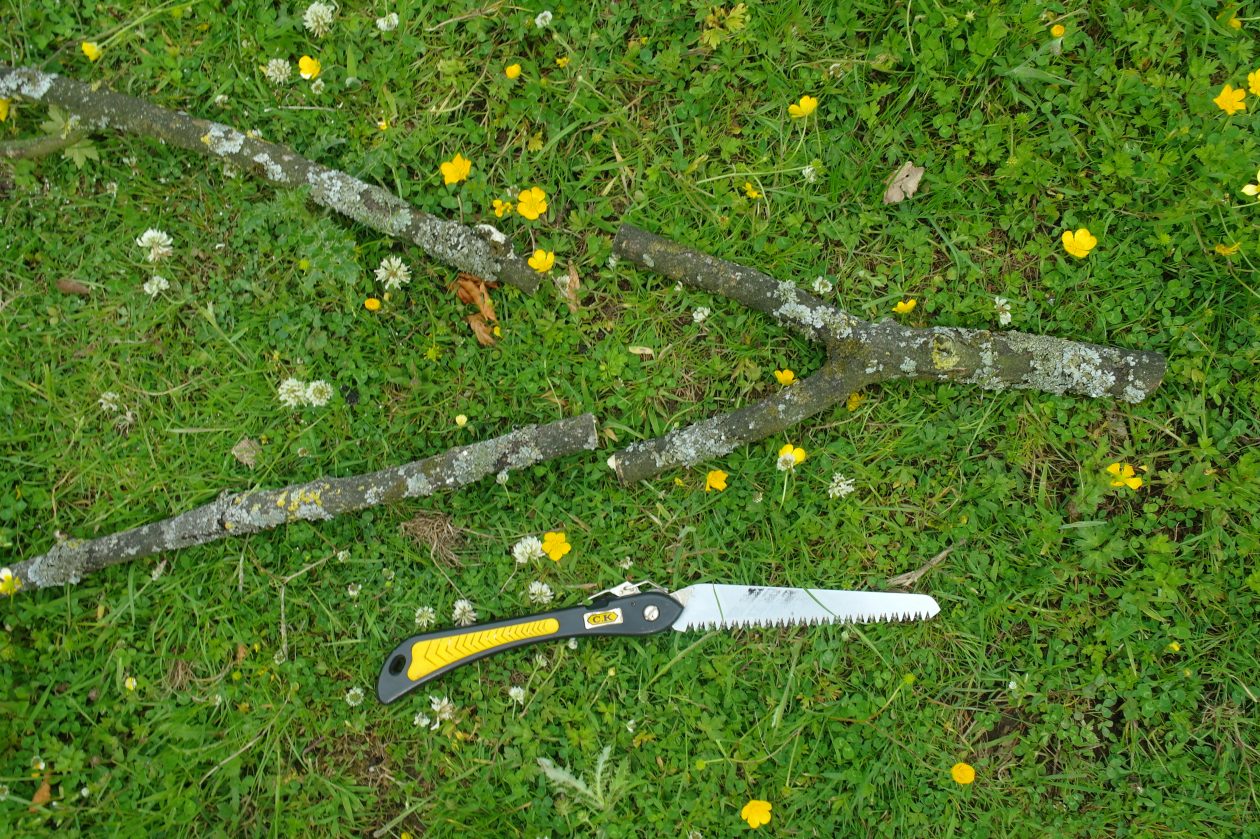
Use your whittling knife to strip off the bark. Remember to wear your cut resistant glove.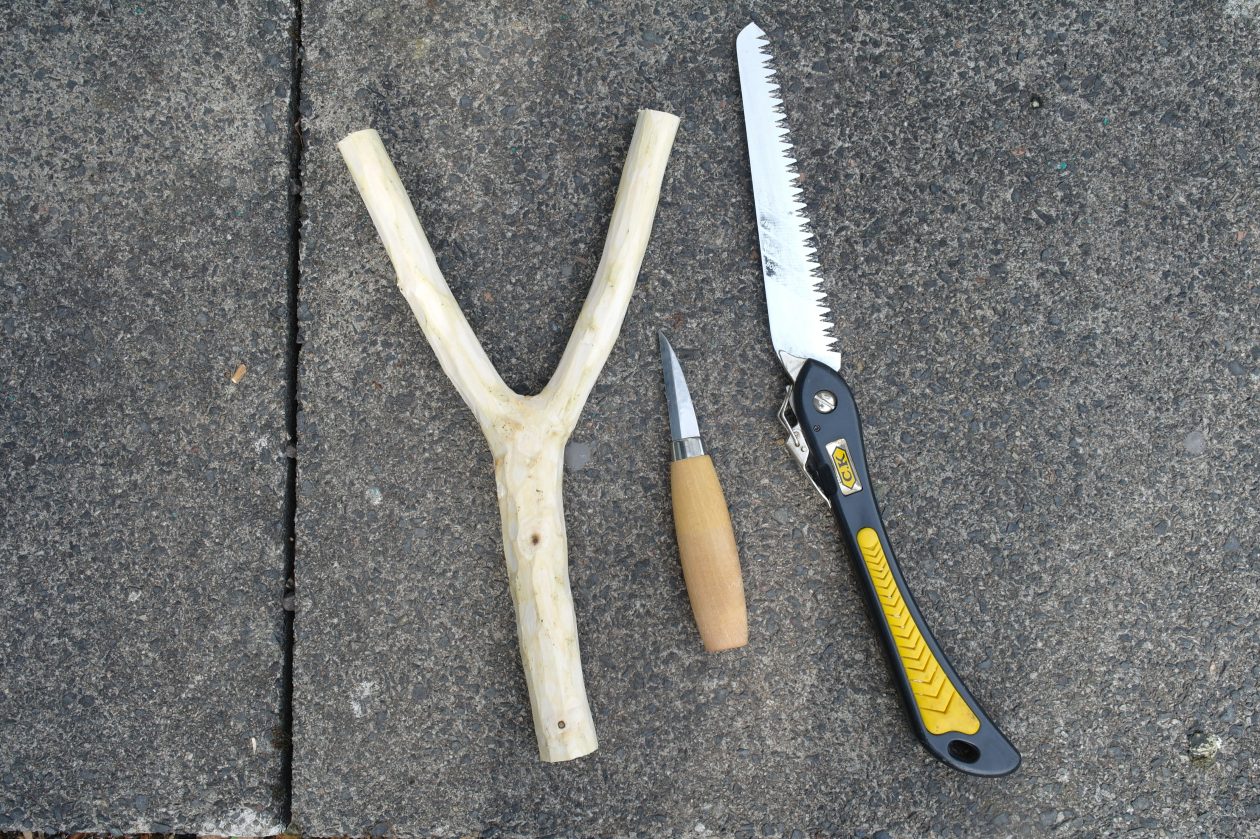
Round off the ends of your ‘Y’ shaped stick.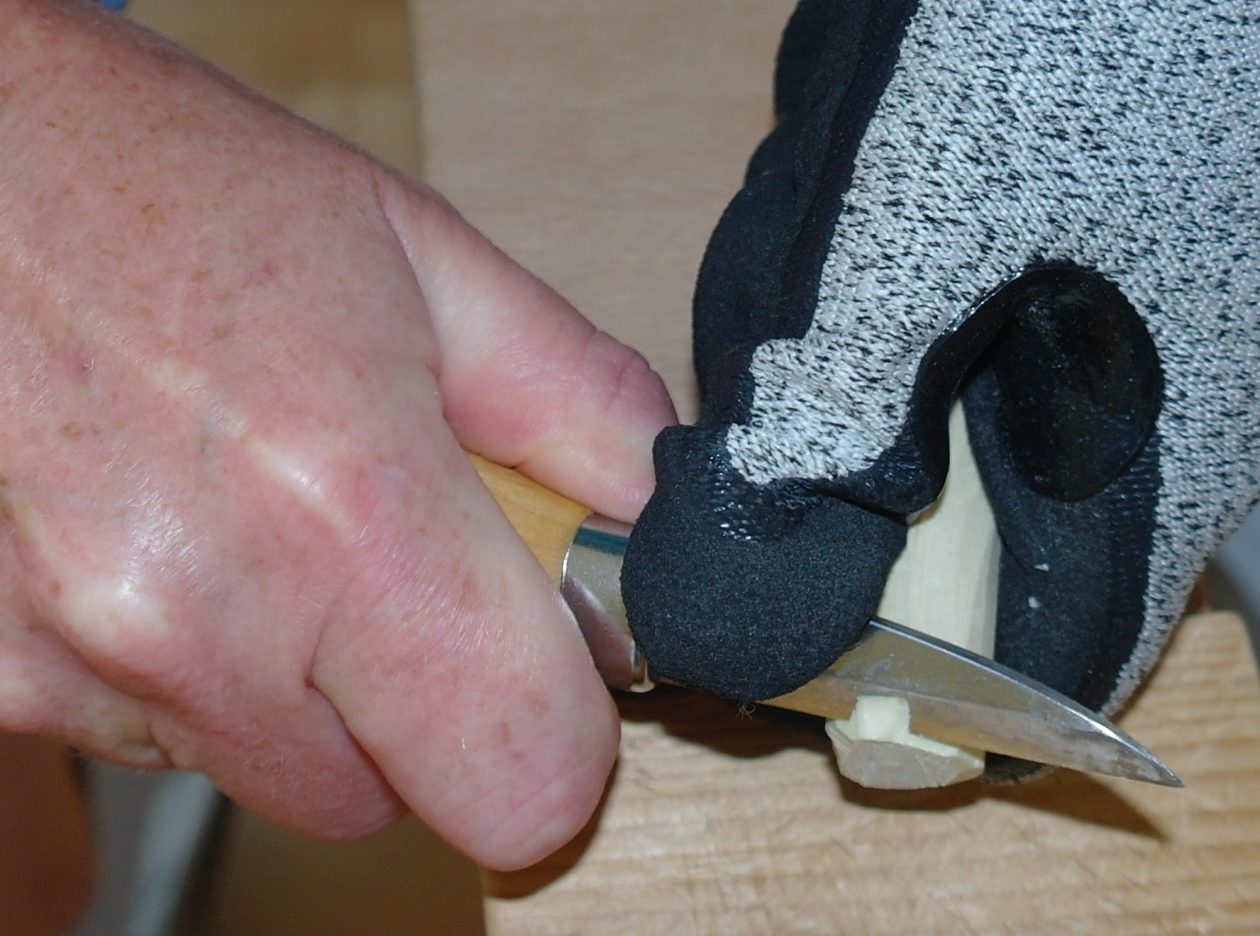
Make a shallow vertical cut, all the way around, near the top of each branch of the ‘Y’.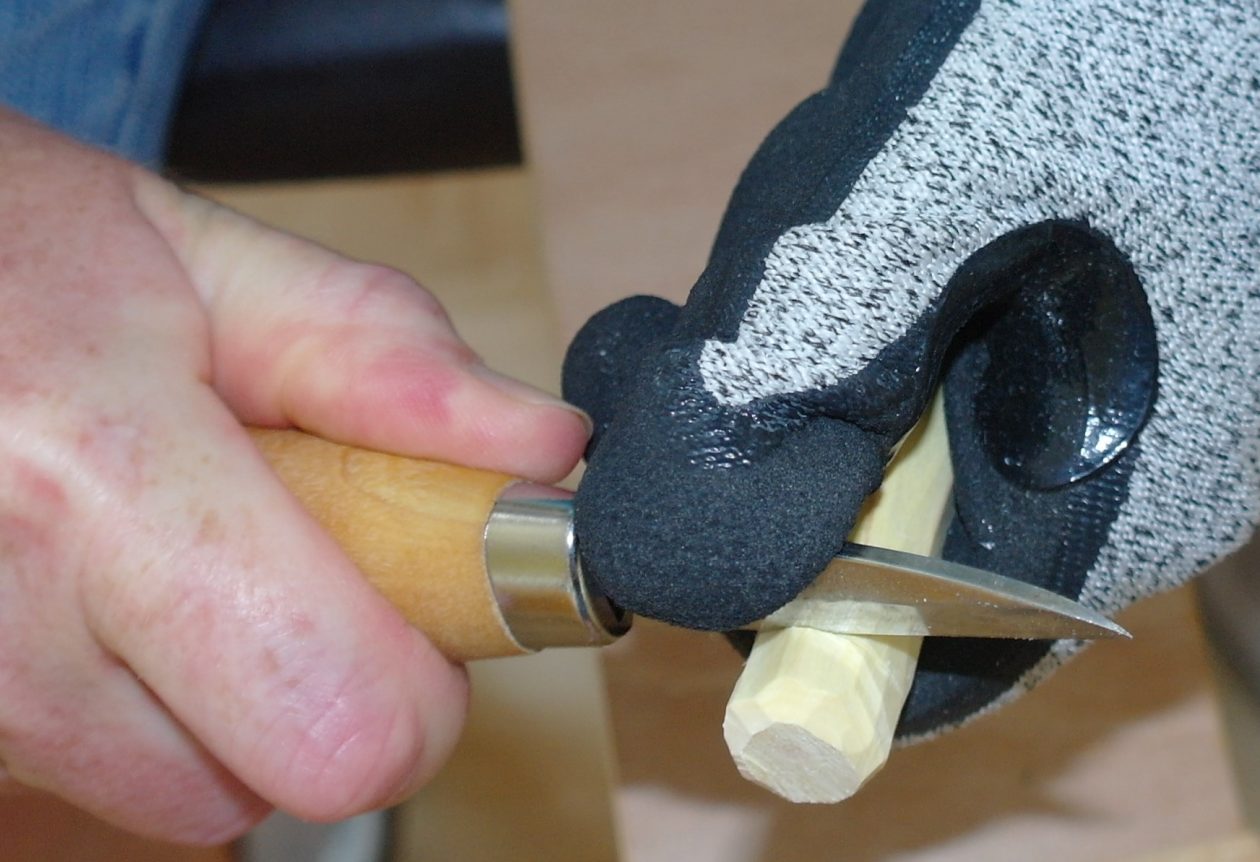
Repeat this a few centimetres down.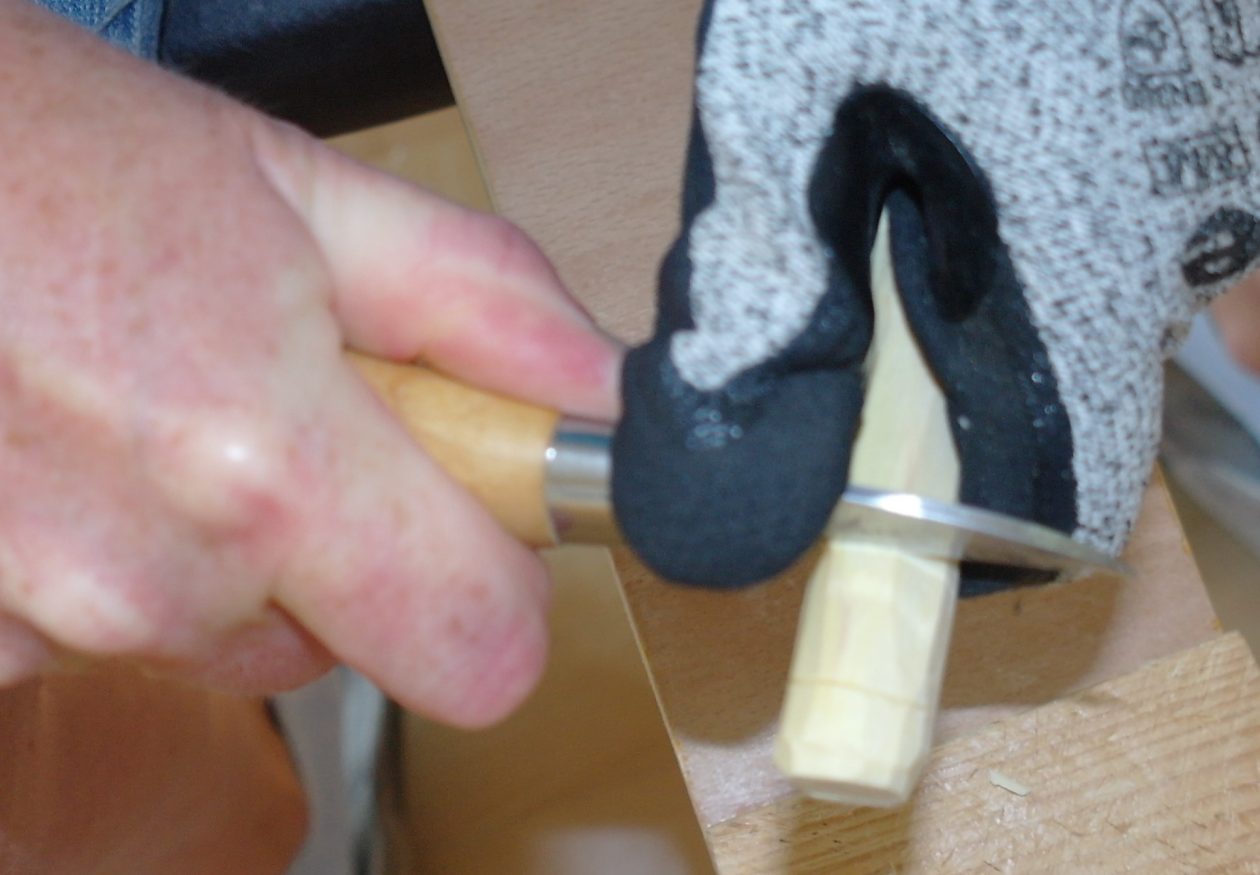
Remove some of the wood, all the way around, to form a shallow notch.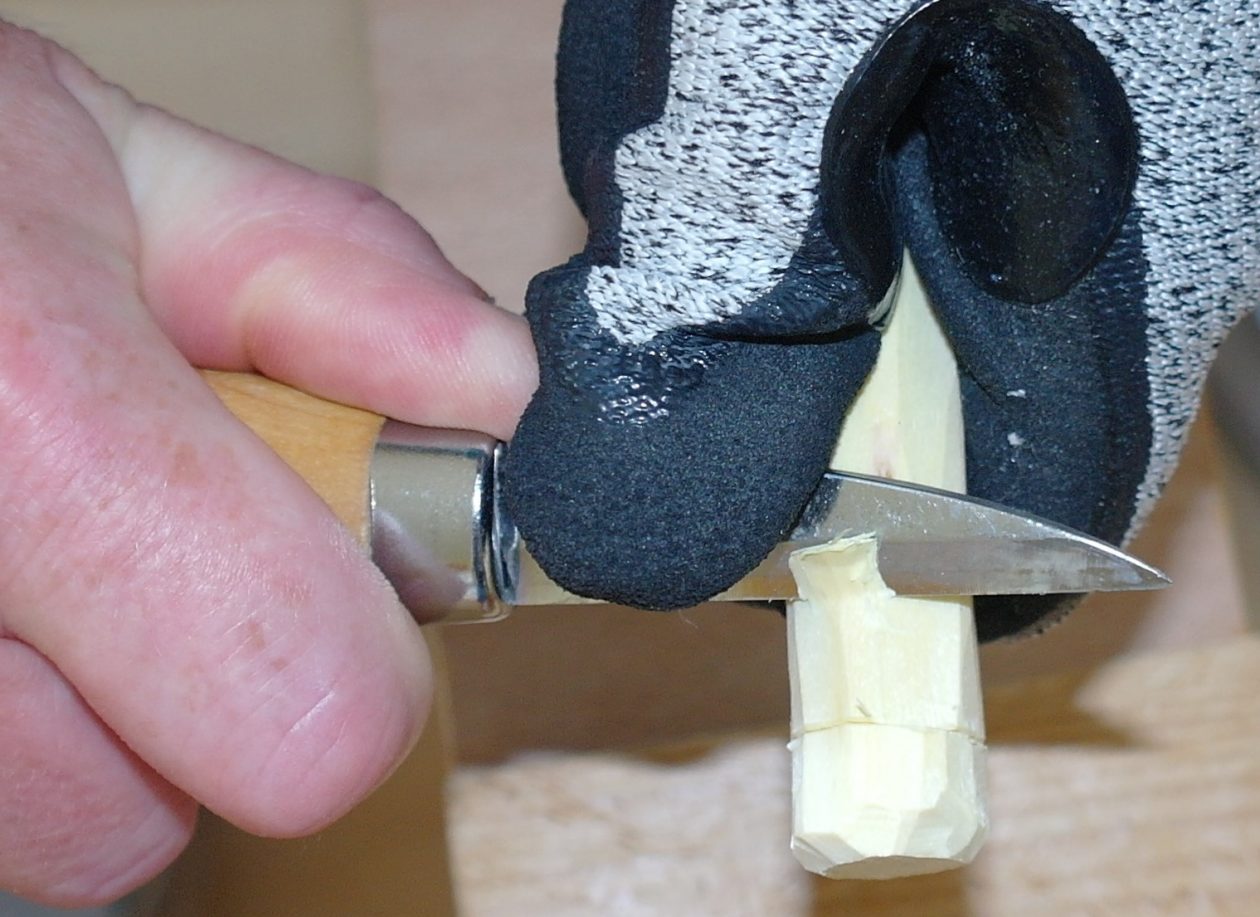
I used an old rubber inter-tube from a bicycle but you could use thick elastic. Cut the length you want, remembering that you need to fold the ends around the notches you have cut in the tops of your ‘Y’ branches. Split the piece of inner-tube in half, length-ways.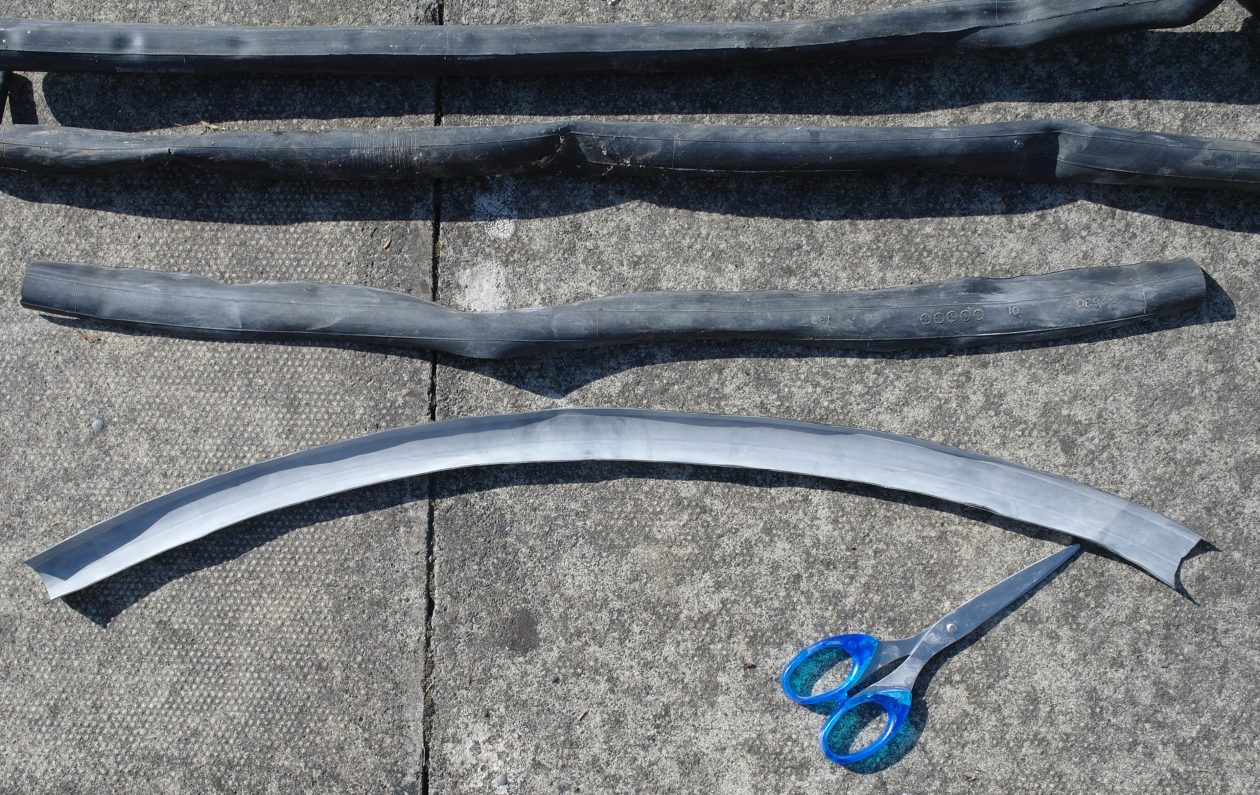
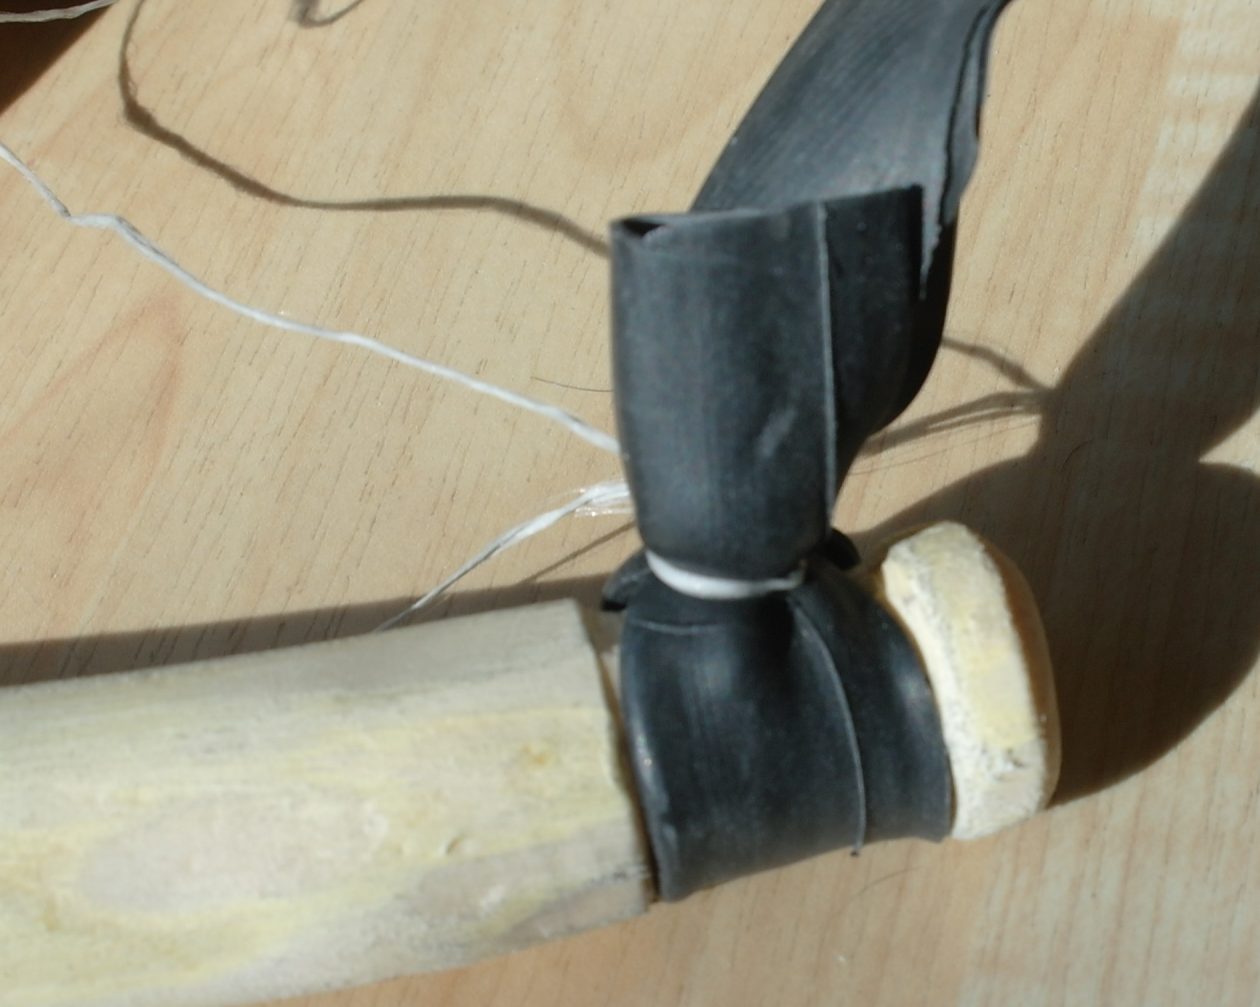
Tie the each end of the inner-tube piece around the notches in the ‘Y’ using dental floss (you may need two people, one to hold the inner-tube tight and one to do the tying). Tie the floss around several times and trim the ends.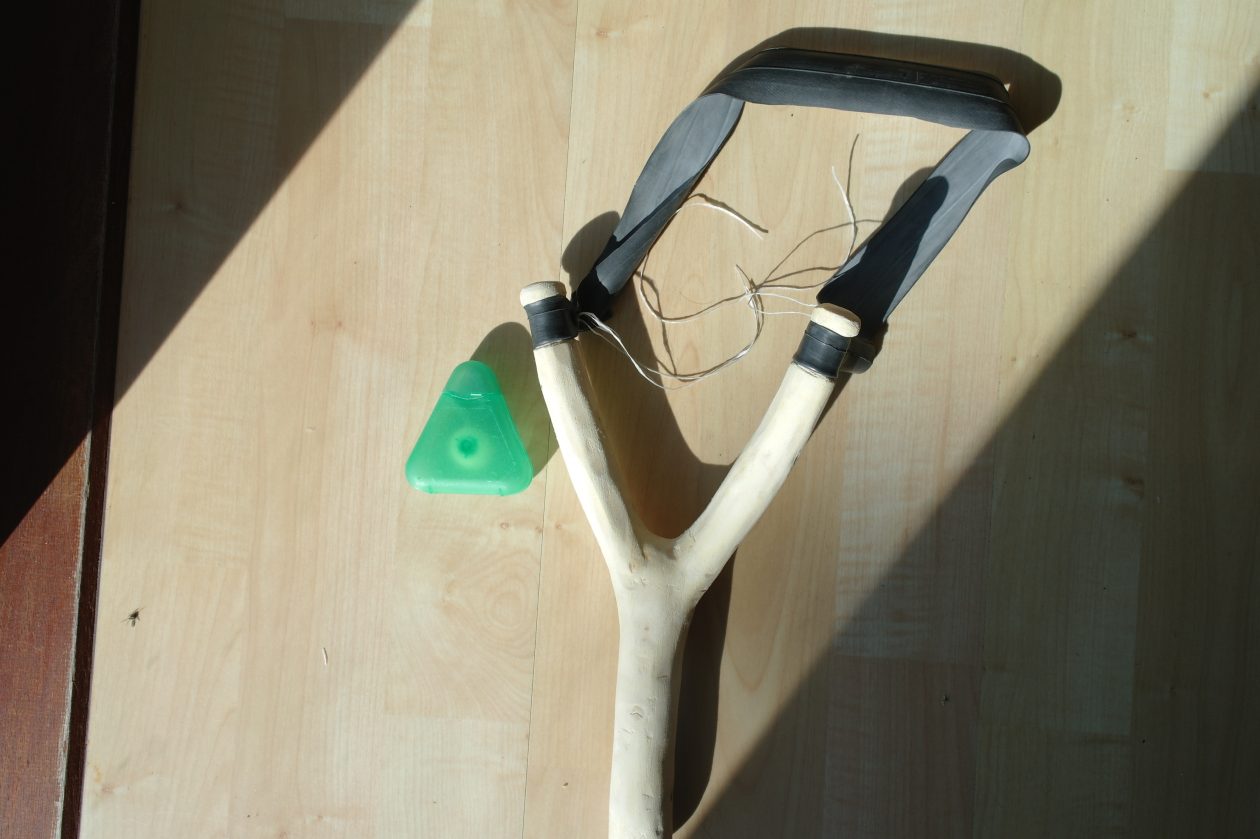
Your slingshot is complete. Now all you have to do is design a target and fire something soft that won’t damage anything.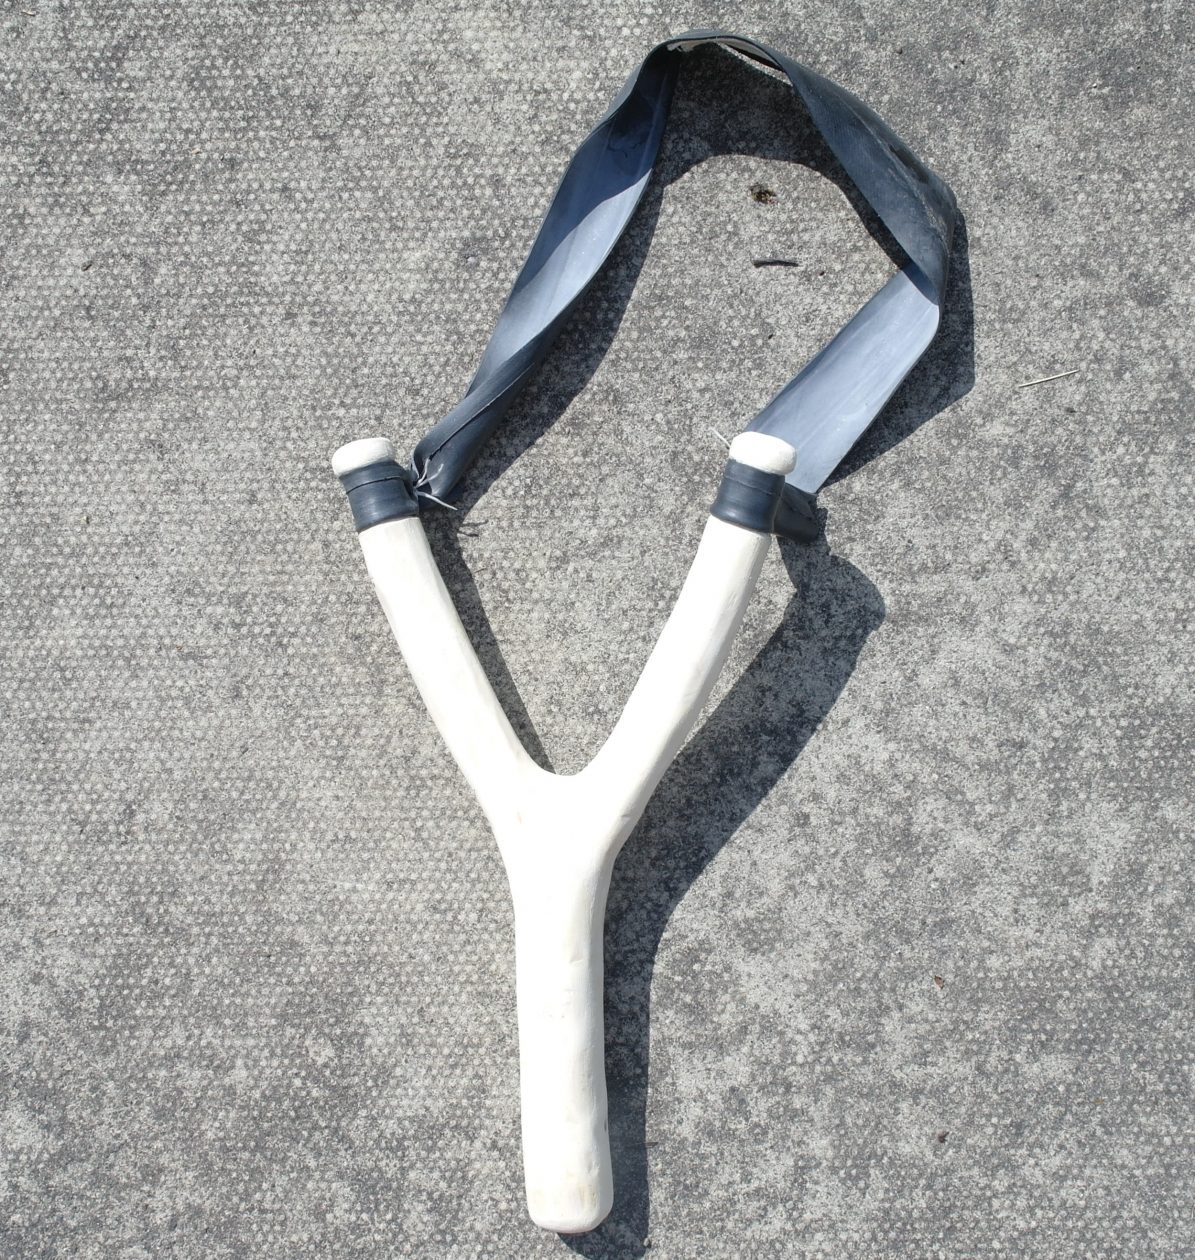
Finishing your Small Bird
Paint your bird using watered down acrylic paint. I used a couple of photos of a Goldcrest as a reference to check that I was getting the colours and its markings correct. When the paint is dry, coat your bird with olive oil and allow to dry.
Saw off a ‘slice’ of branch (I used an apple tree branch) about 2 cm thick and 4 cm in diameter. This will make the base for your bird.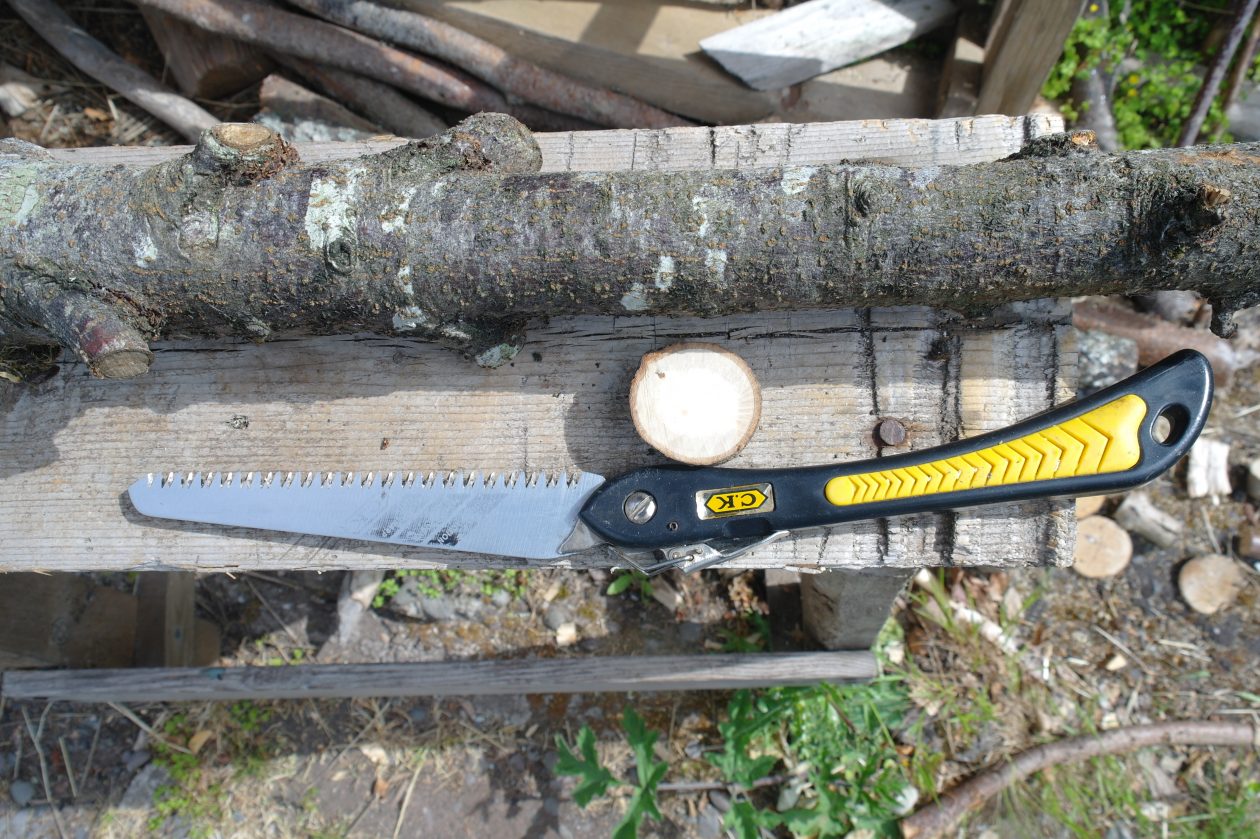
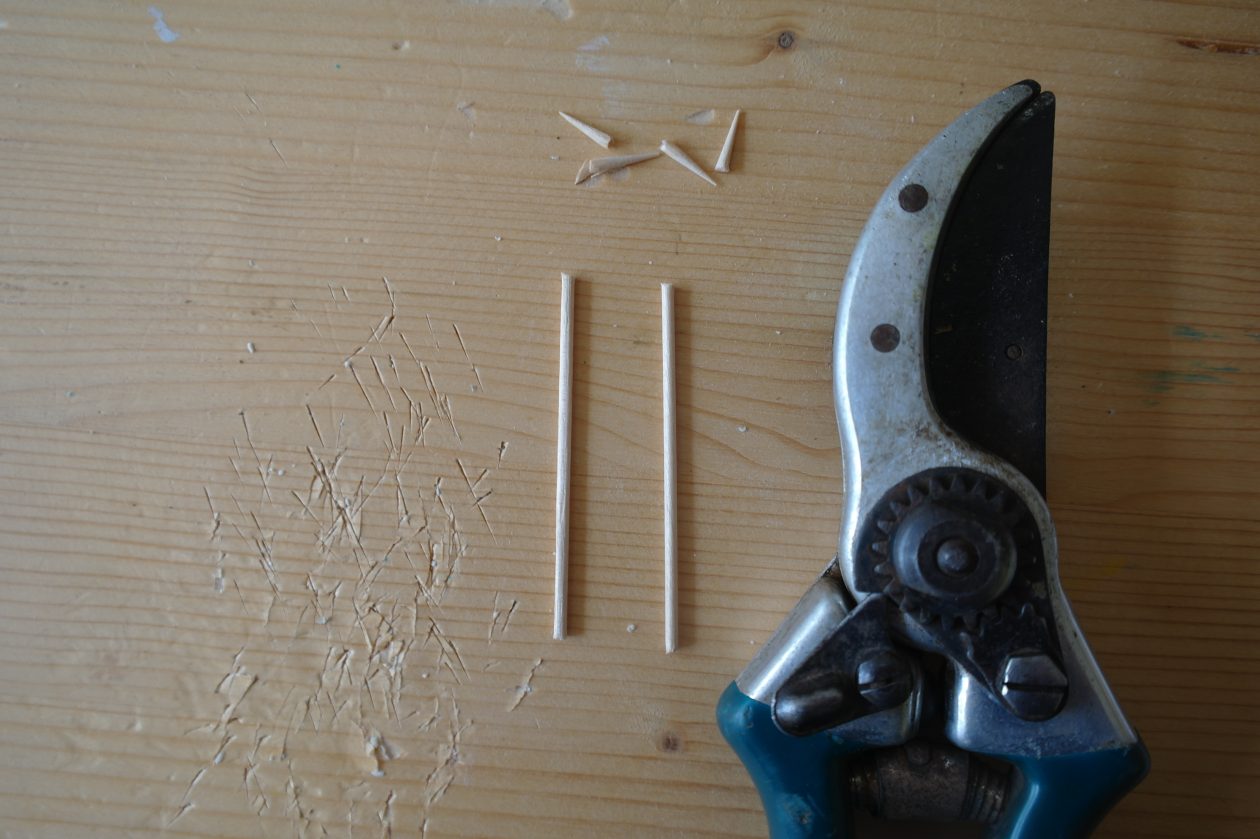
I used a couple of cocktail sticks to make the legs as it was such a small bird (I usually whittle down some sticks). Use secateurs to cut the pointed ends off the cocktail sticks.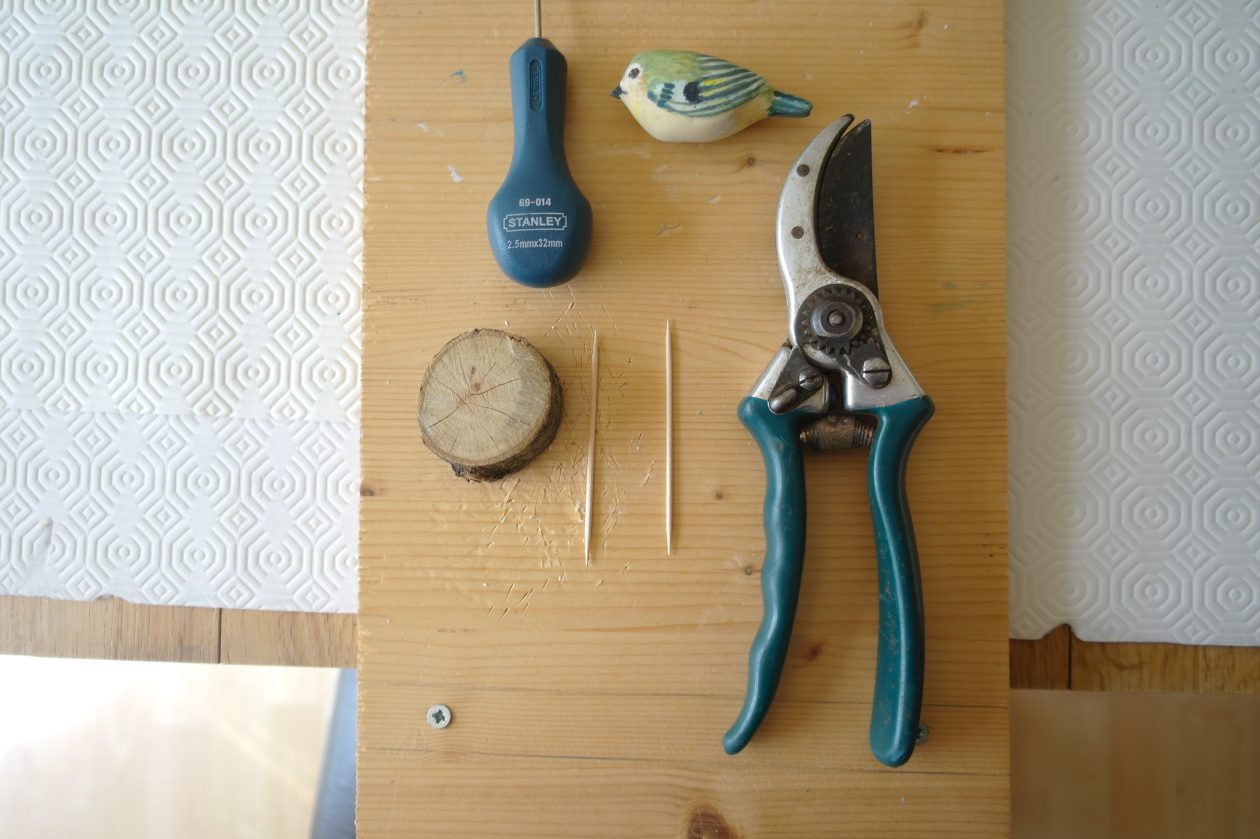
I used a bradawl to make some holes, for the legs, in my bird and in the base. Angle the holes at about 45 degrees so that the legs will be pointing forwards, towards the head of the bird. Insert the legs into the holes and make some corresponding holes in the base (again, at about 45 degrees and use the legs in the bird to determine how far apart to make the holes).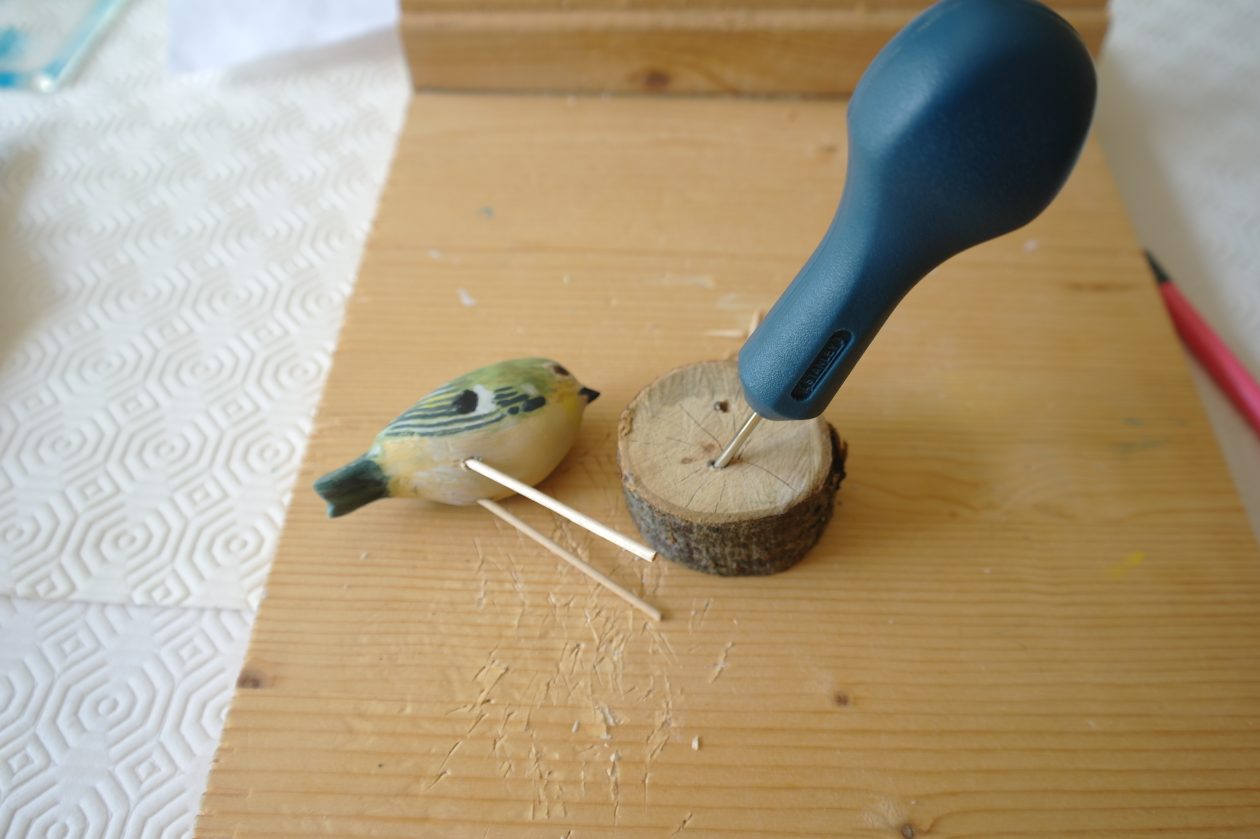
Use the secateurs again to trim the legs to the correct length (I used the photographs of a Goldcrest, again, as a reference).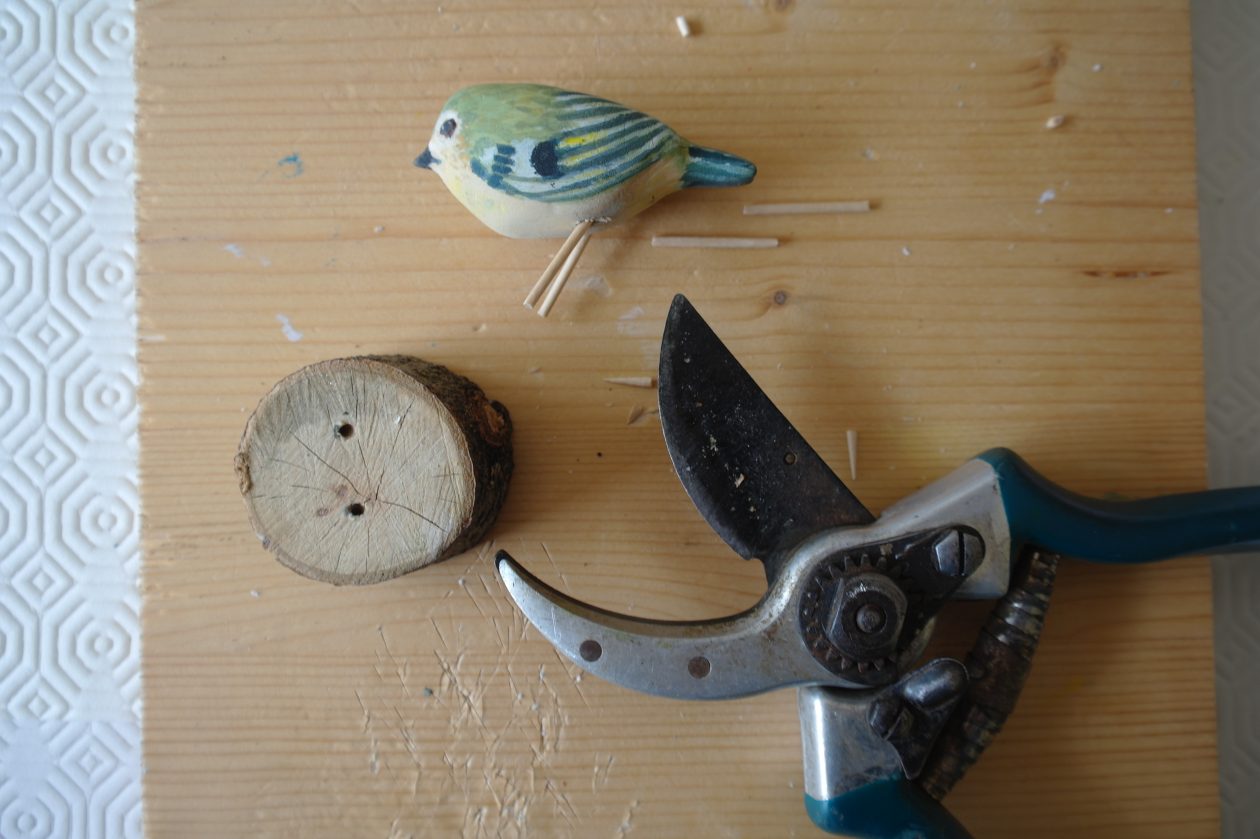
Insert the legs of the bird into the base to check that they fit. Remove the legs again and put a little wood glue into all four holes and re-insert the legs.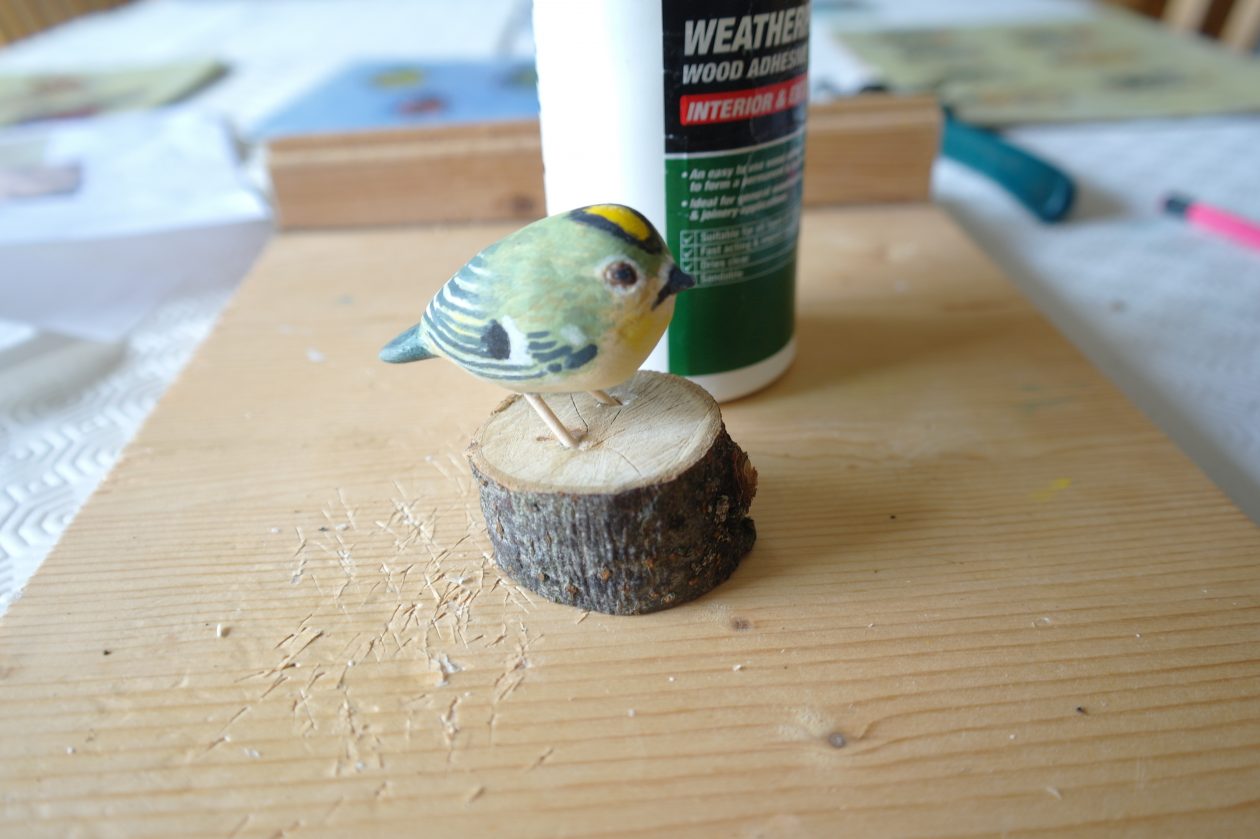
Once the glue is dry, paint the legs and your little bird is complete.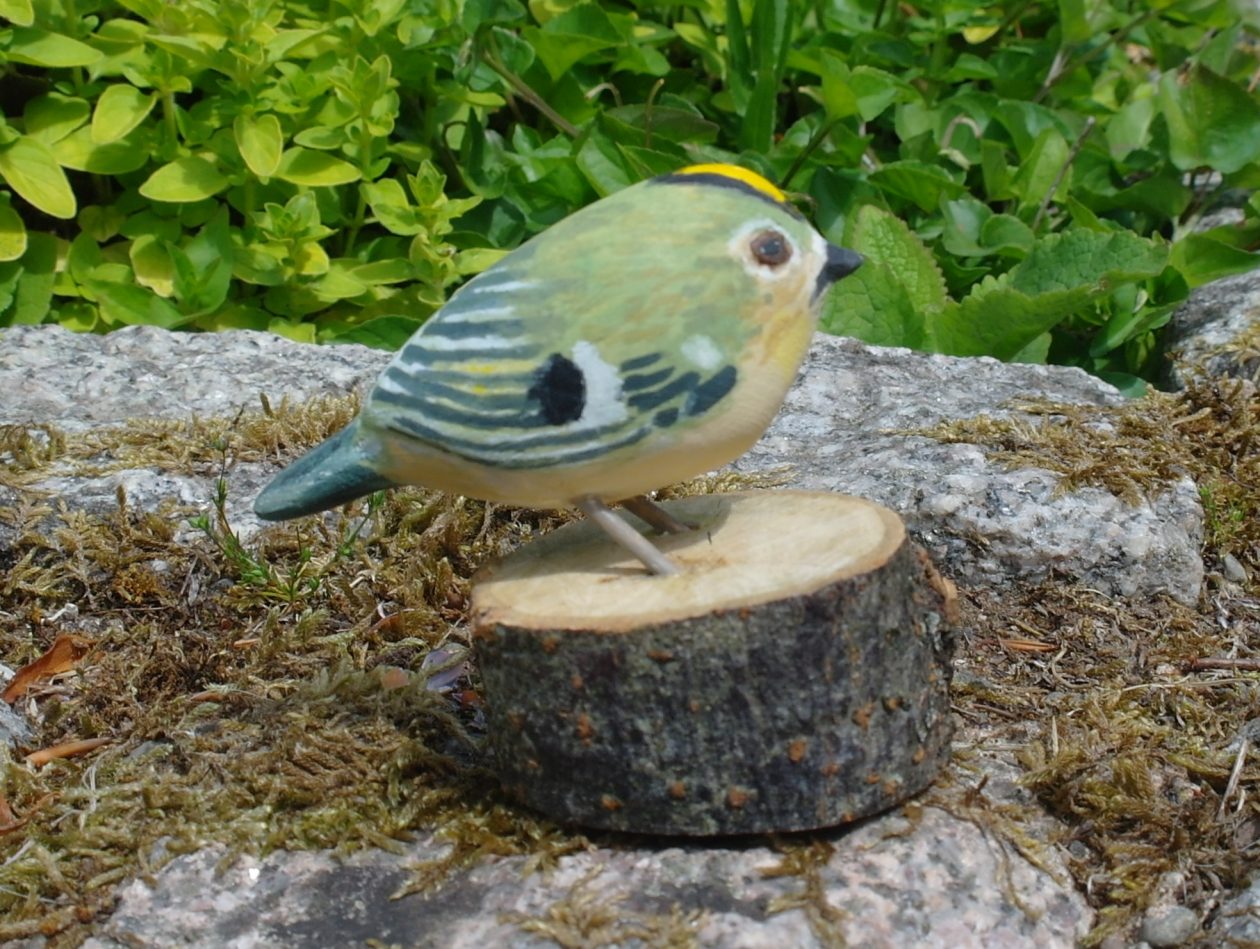
Whittling a Small Bird 2
Sand the small bird, first with coarse sandpaper (P80) to get rid of all the really rough bits and then with a finer sandpaper (P120). It is worth spending some time on this to get your bird nice and smooth.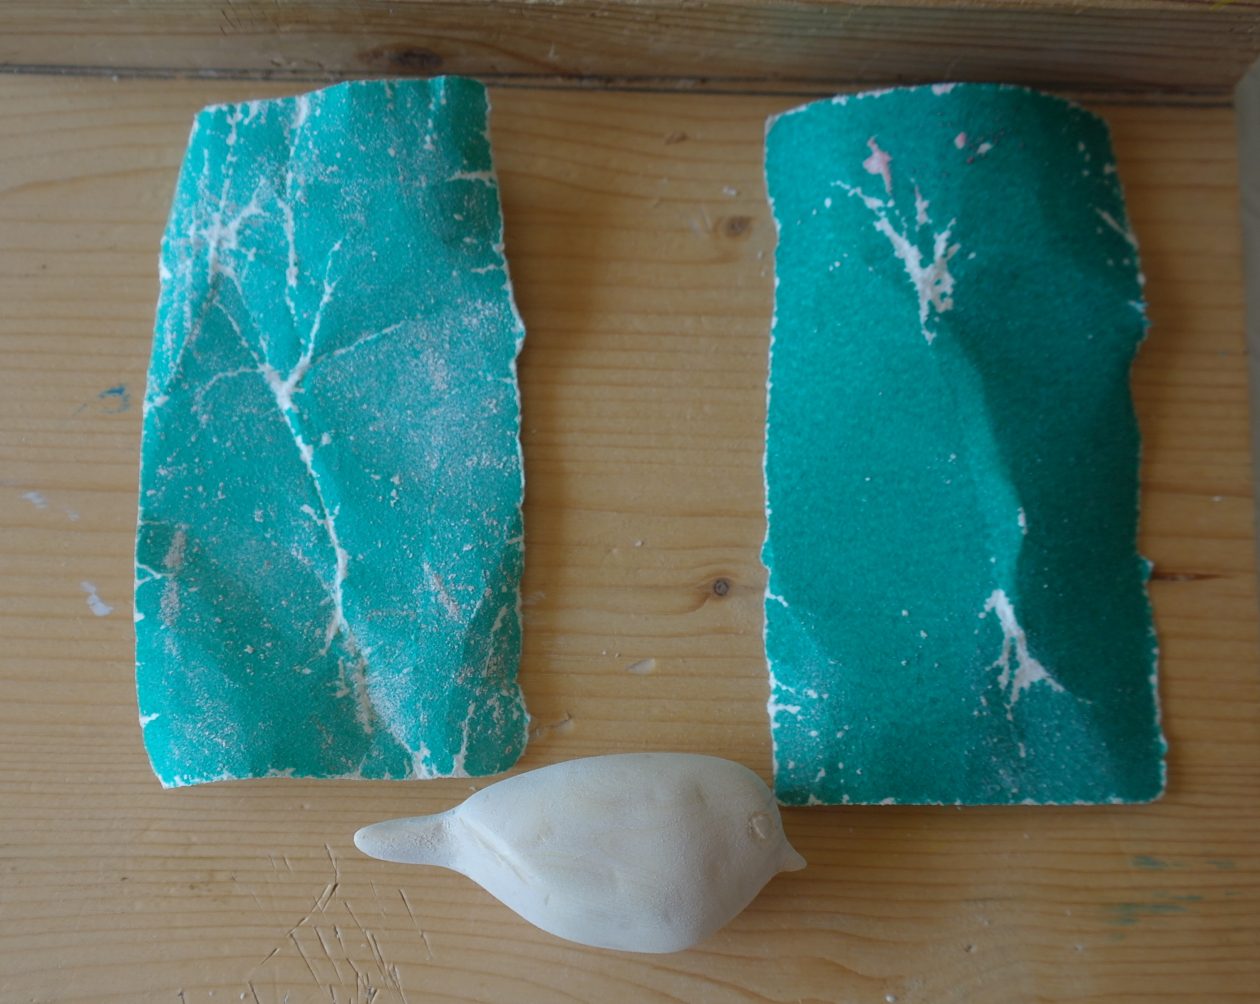
Carefully draw on an outline of the eyes – I tend to draw a central line down the top of the head. I draw an eye at one side and then I draw a line from each side of that eye over to the other side of the head so that I can make sure I make then the same width. I check from the front of the bird to make sure they line up with each other.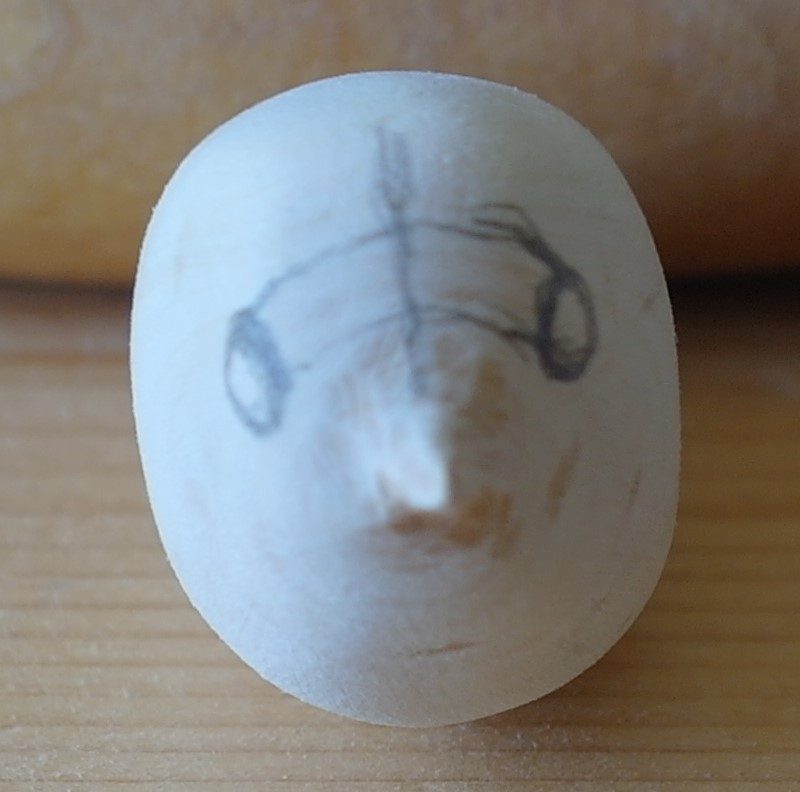
I use a ‘v’ shaped lino cutter to cut around the outlines I have drawn for the eyes.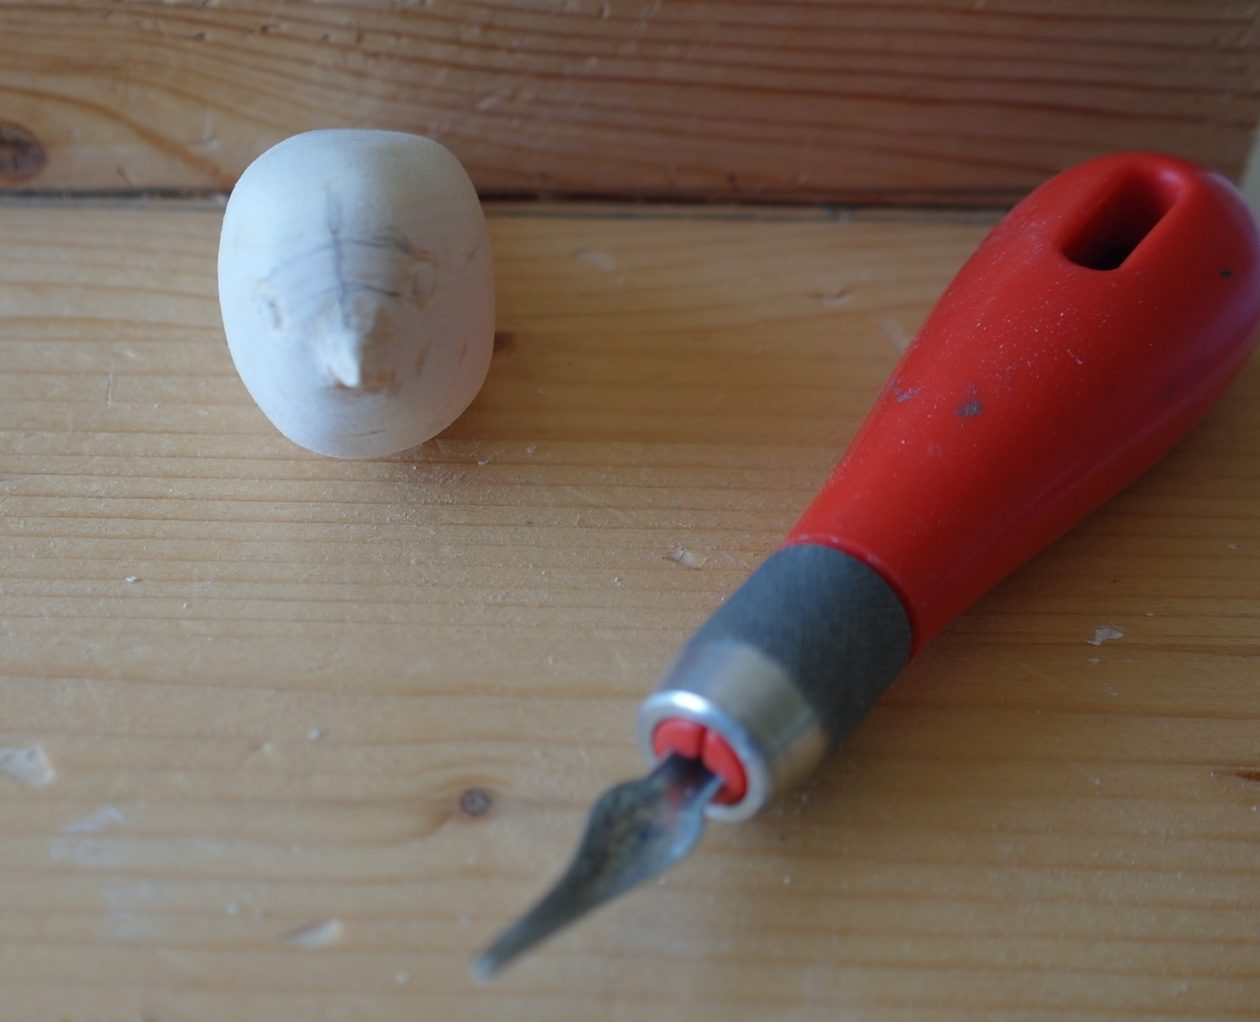
Whittling a Small Bird
Today I’m going to show you how to whittle a small bird. The one I am making is, officially, Britain’s smallest bird, the Goldcrest. I have used a hazel stick. I sawed an 8 cm length off the end of my stick.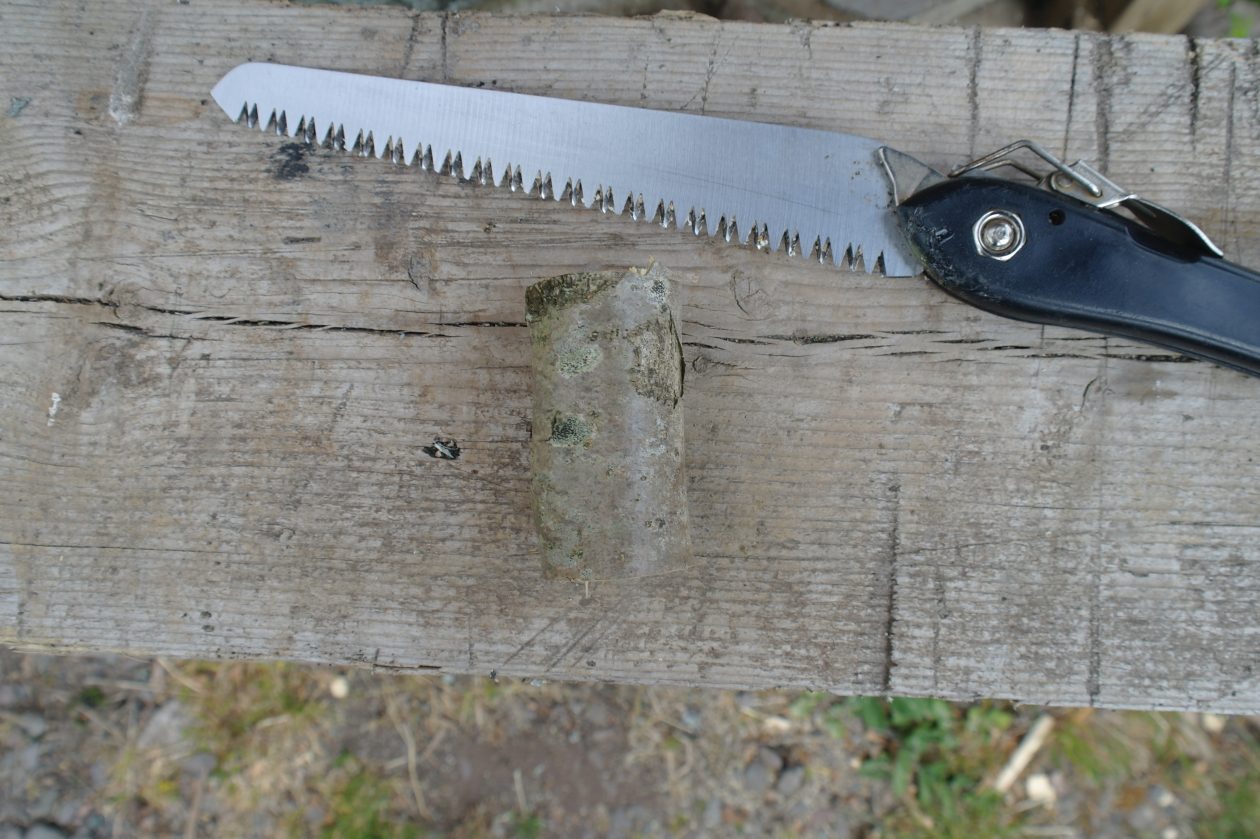
I used my hatchet to take a little wood and bark off the sides of the piece of wood to form fairly flat sides.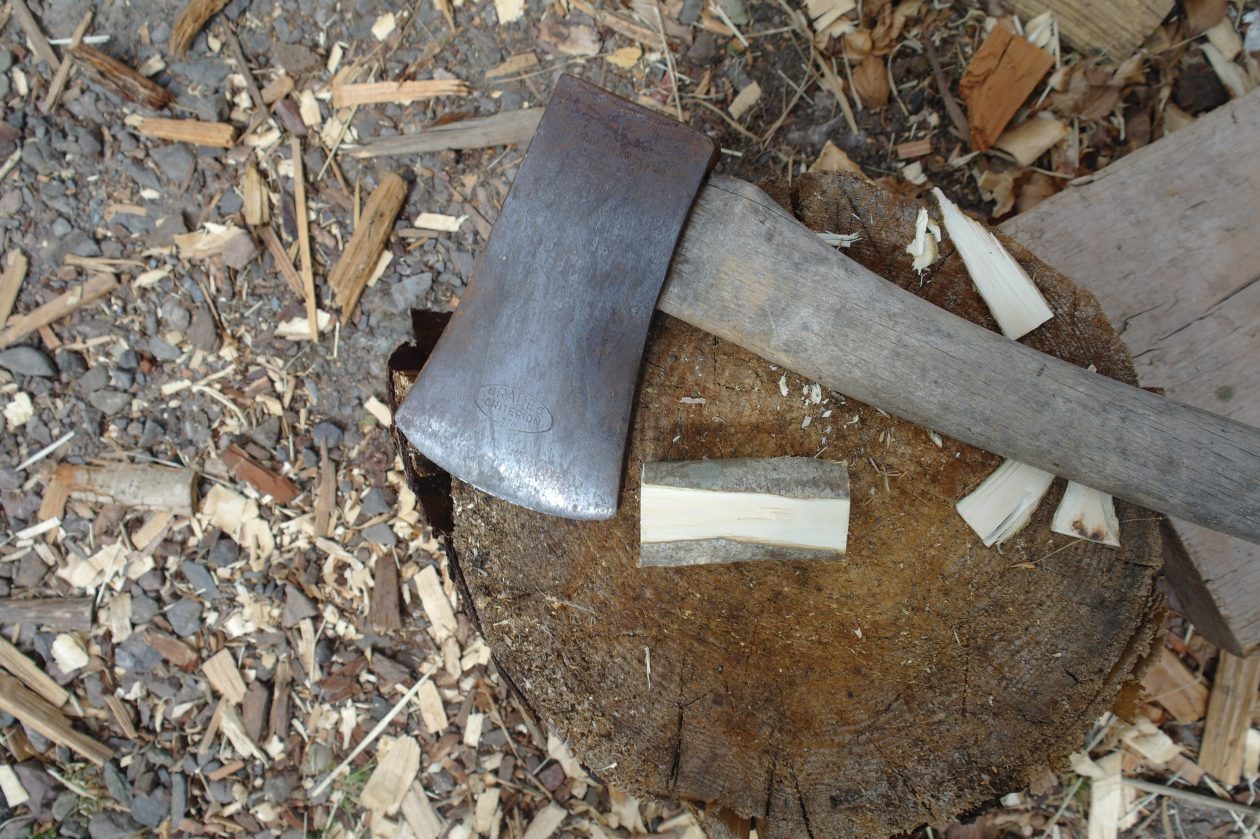
I stripped the rest of the bark off using my whittling knife and drew an outline of the bird I want to make.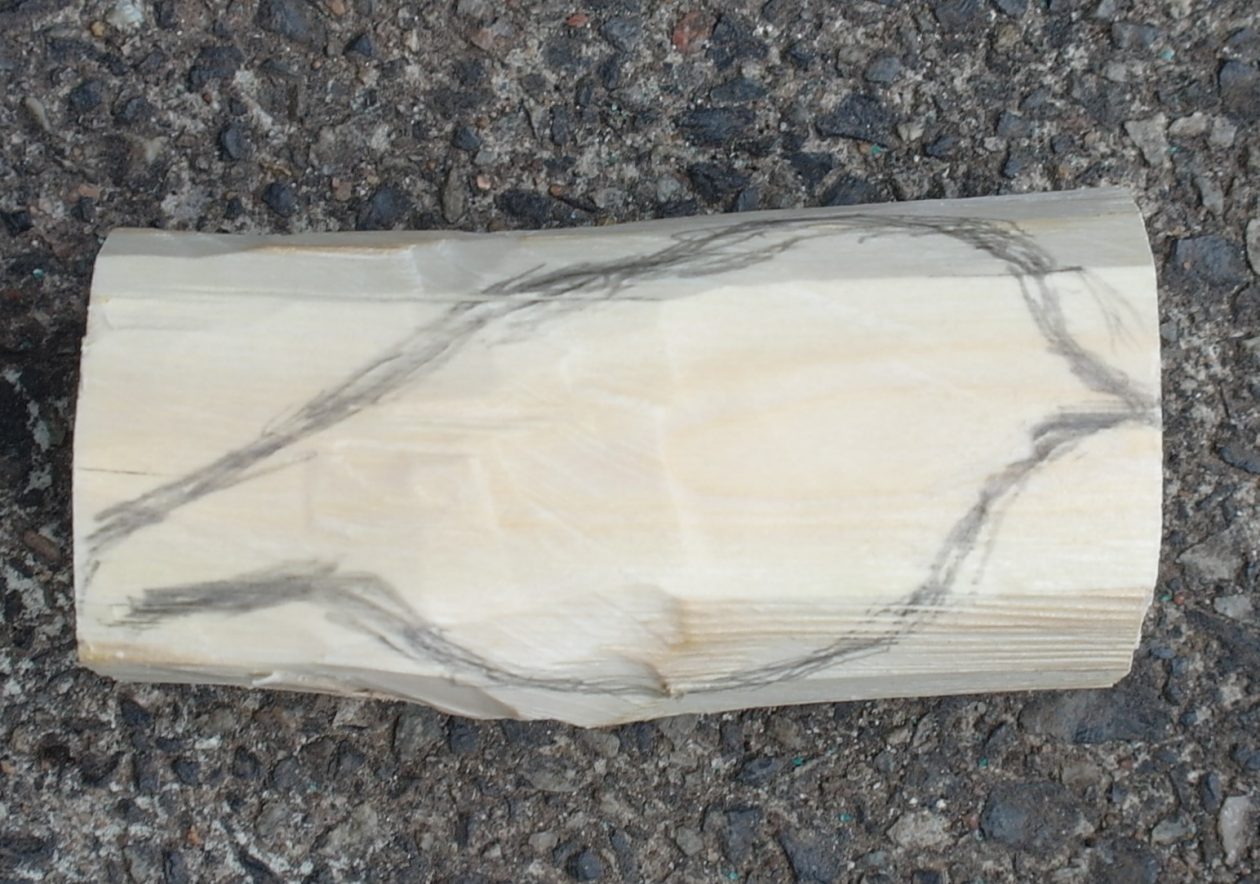
I used my workbench to firmly hold my piece of wood while I cut off the larger areas of wood outside the outline I had drawn.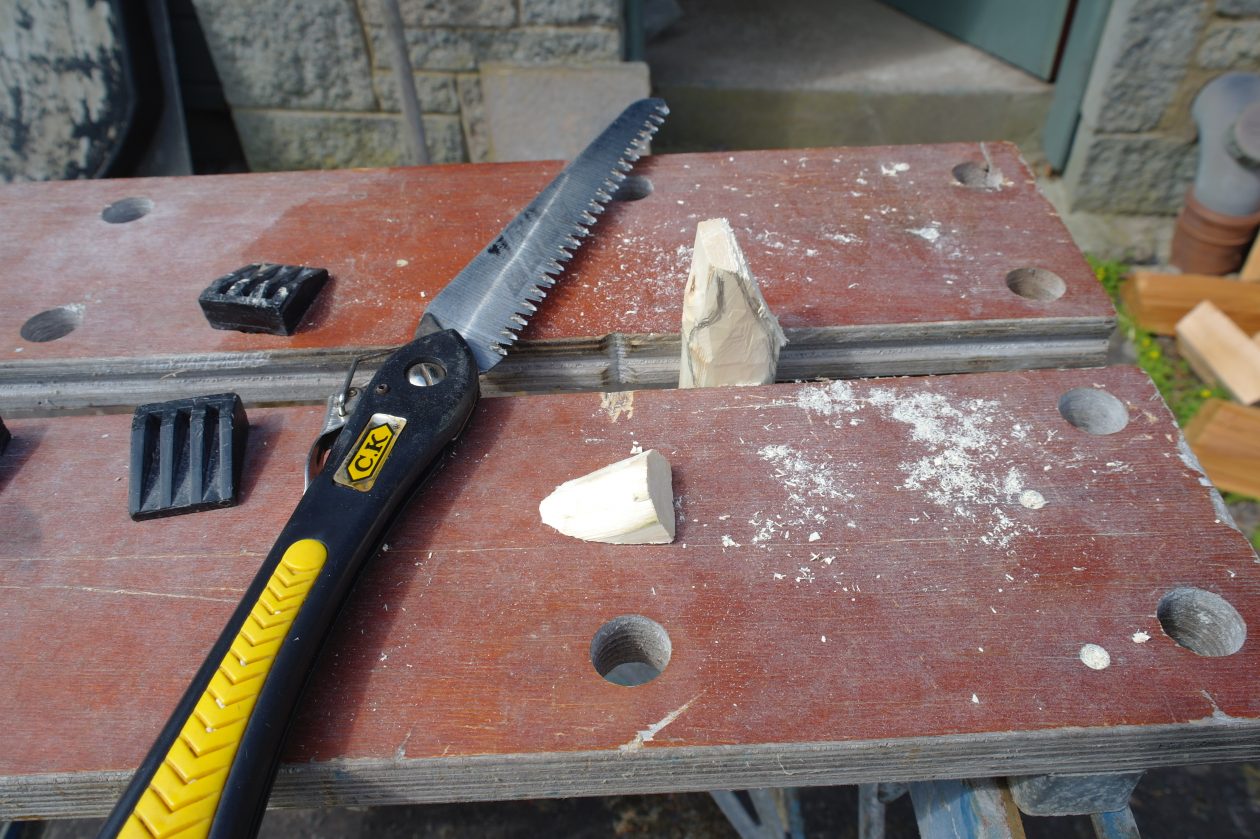
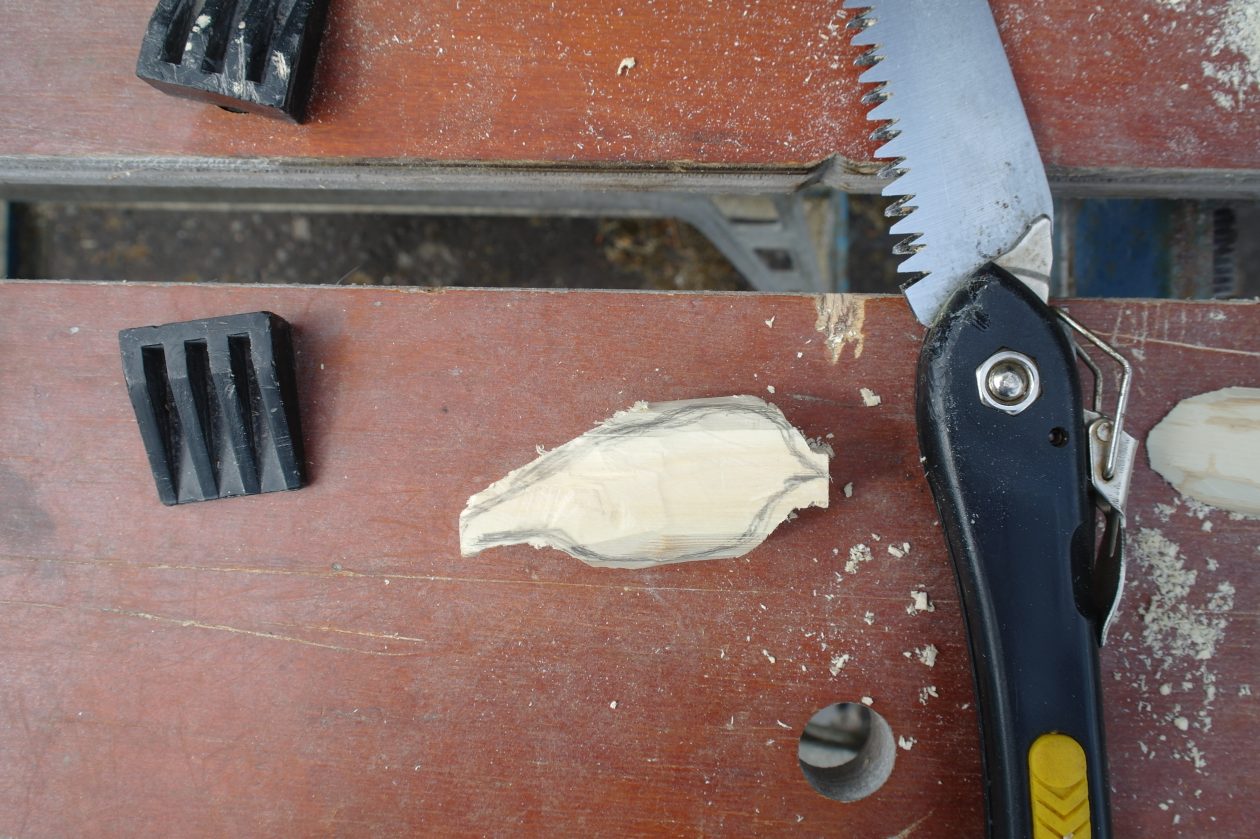
I wore my cut resistant glove and started to make small cuts with my whittling knife to, gradually, shape the little bird. I use a photo of the bird to keep referring to as I whittle.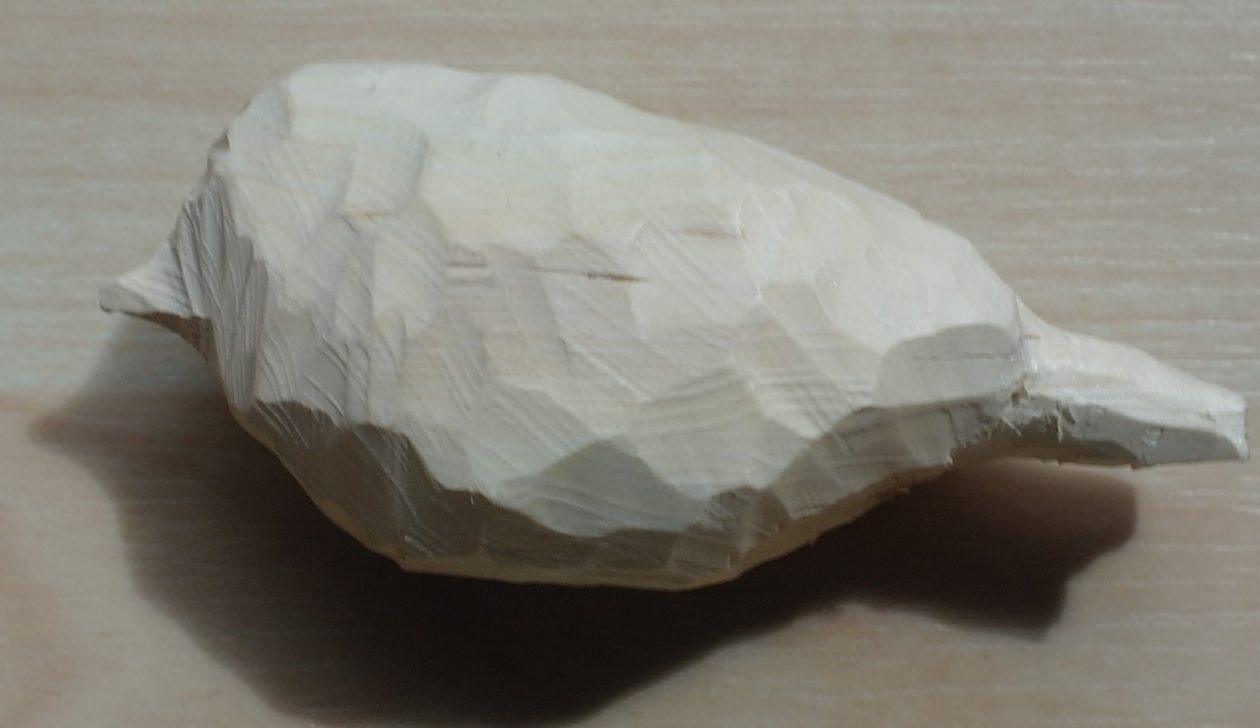
Decorative and Useful Clip
To make this clip you will need a fairly thick branch (this one is sycamore), a pruning saw or something similar, a whittling knife, a cut resistant glove, some sand paper and a sprung wooden peg.
Saw off two discs, about 1 cm thick, from the end of your branch.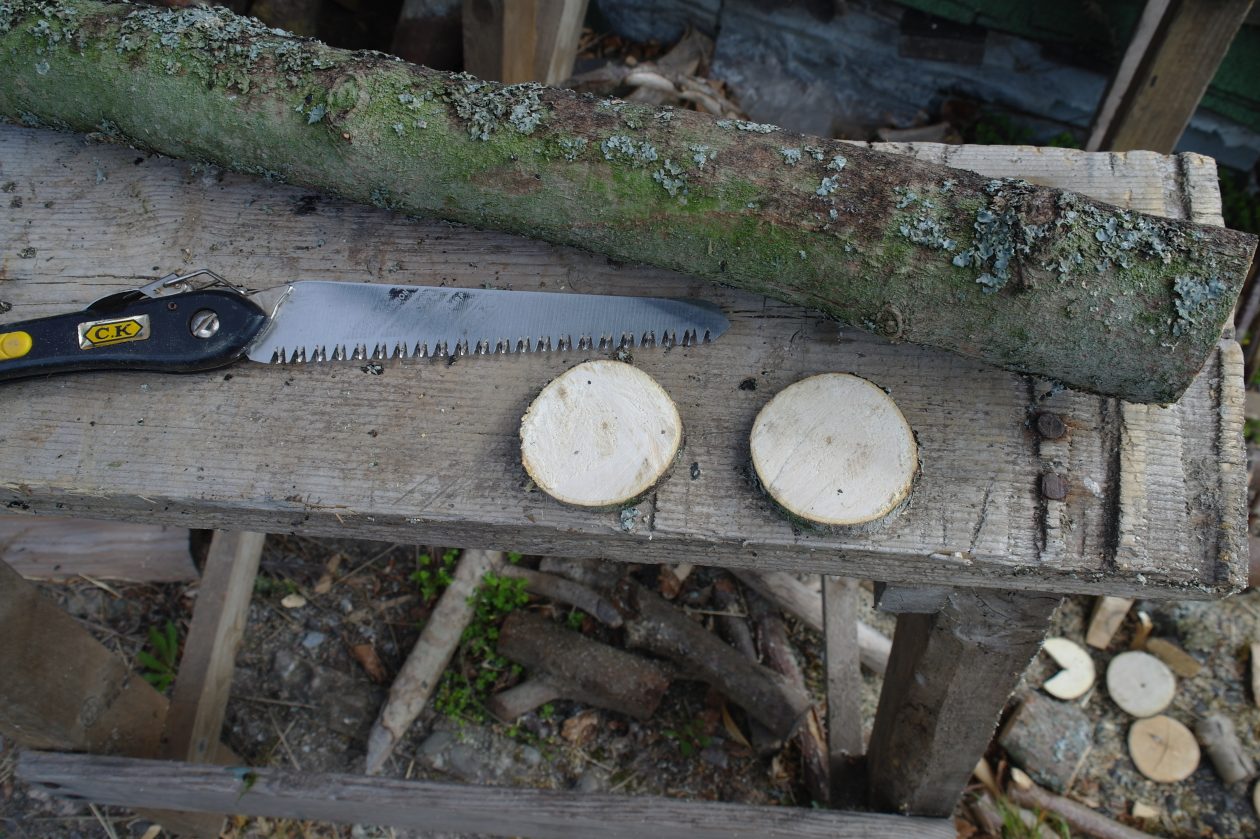
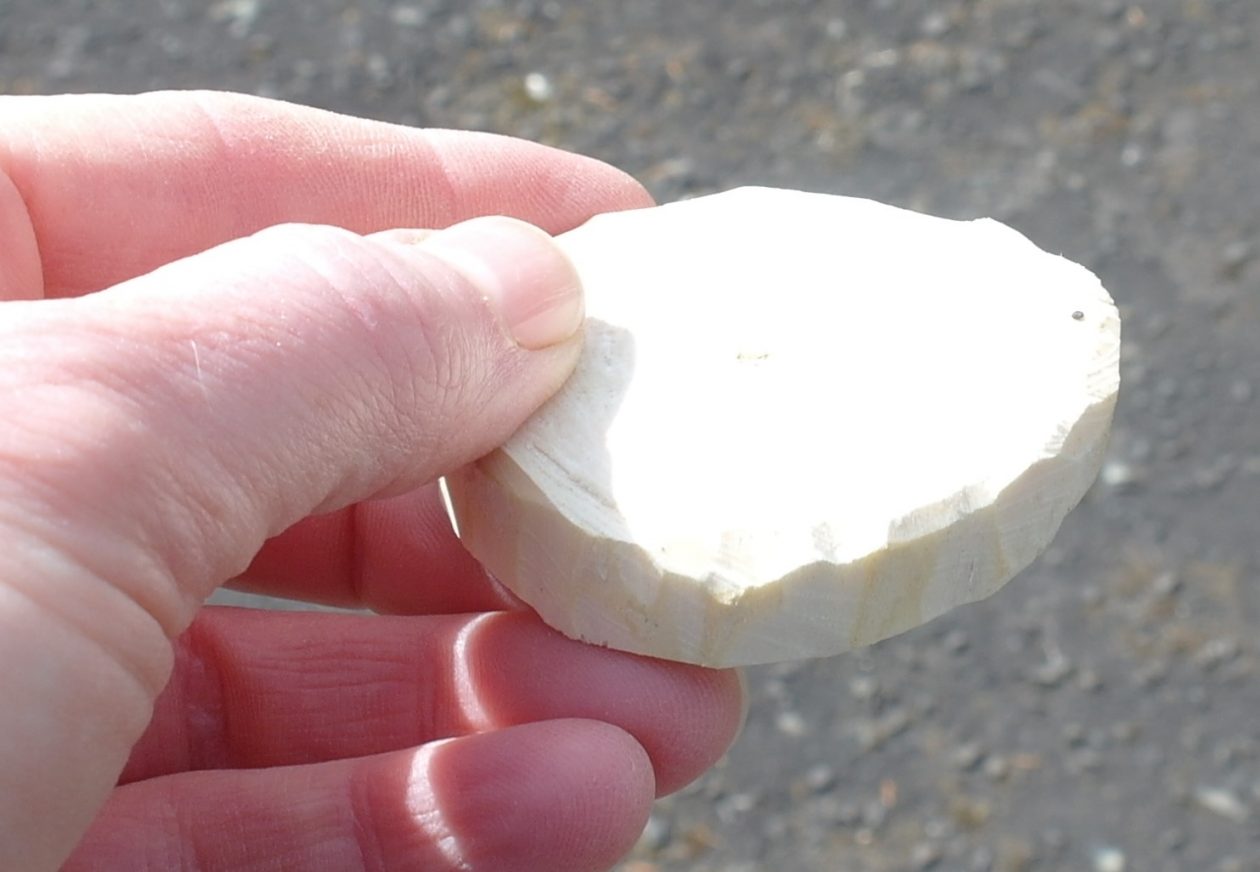
Wear your cut resistant glove and use your whittling knife to remove the bark and to slightly round off the edges of your discs of wood.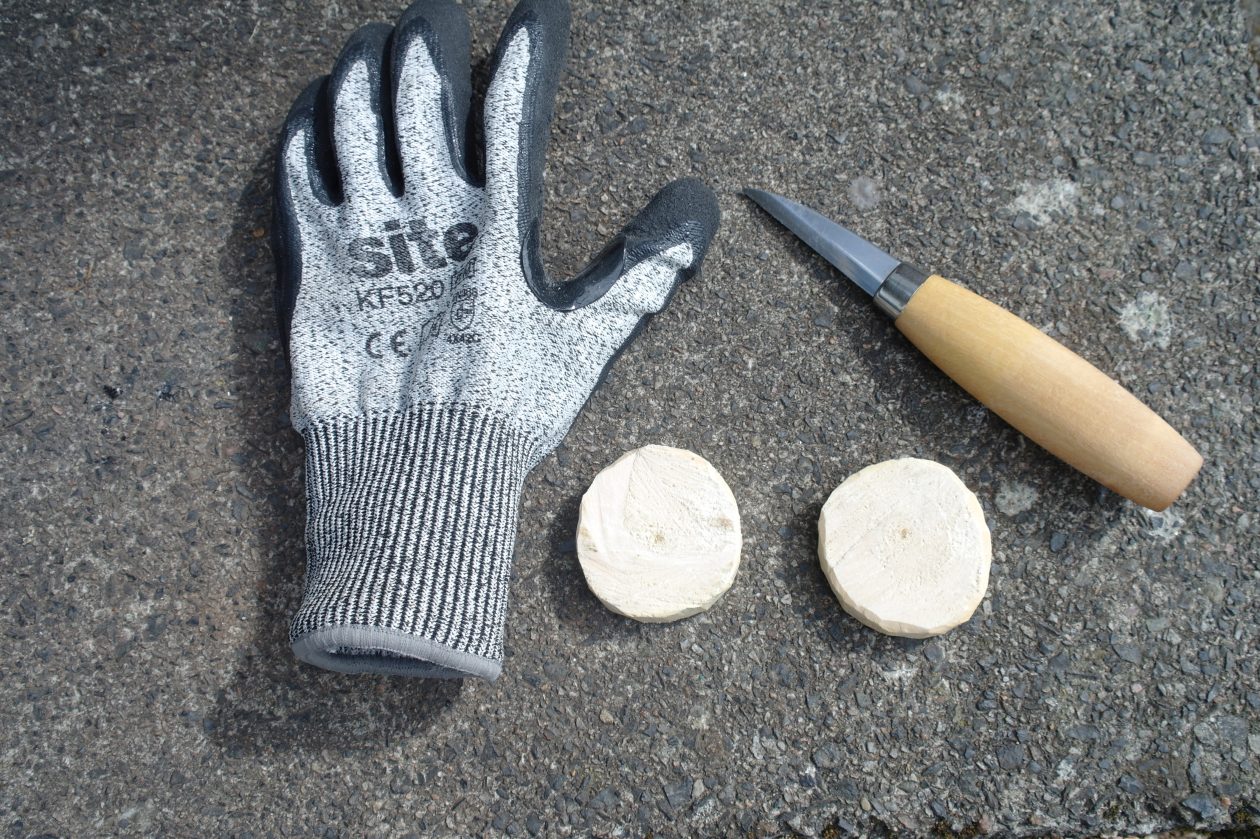
Sand your discs, first with coarse sand paper to remove all the rough bits and then use the finer sand paper to smooth the wooden discs.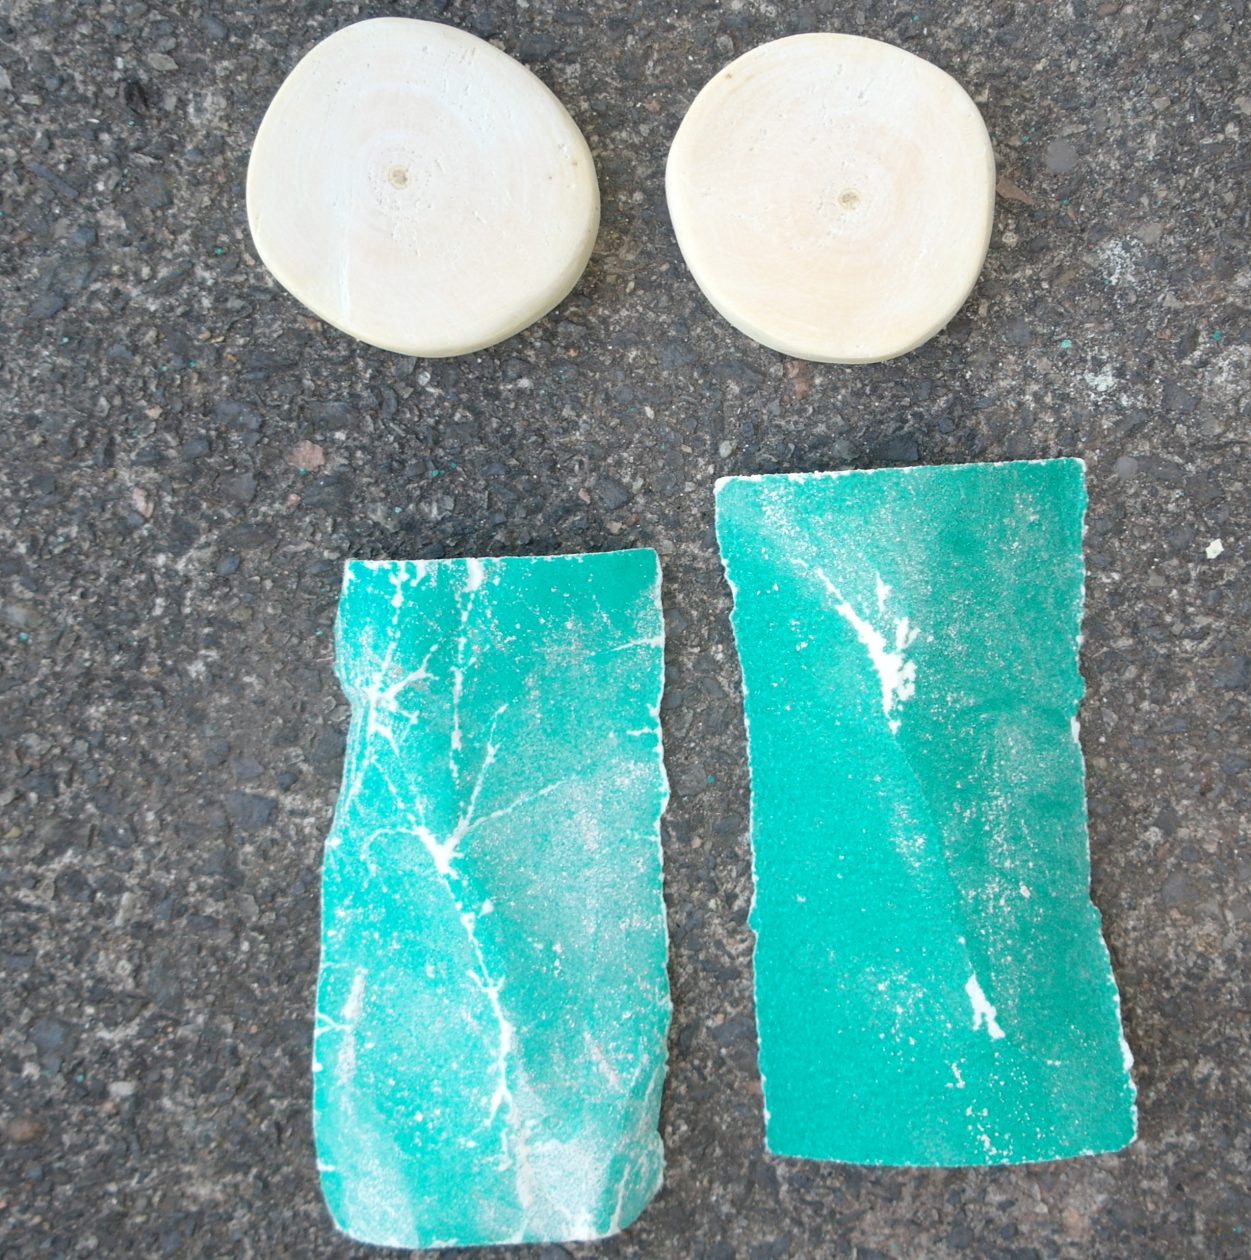
Once you are satisfied that the discs are smooth, you can paint one of them with a design of your choice. I chose a daisy and varnished it once it was dry. Then I glued both discs to either side of a wooden peg, using wood glue and left it to dry.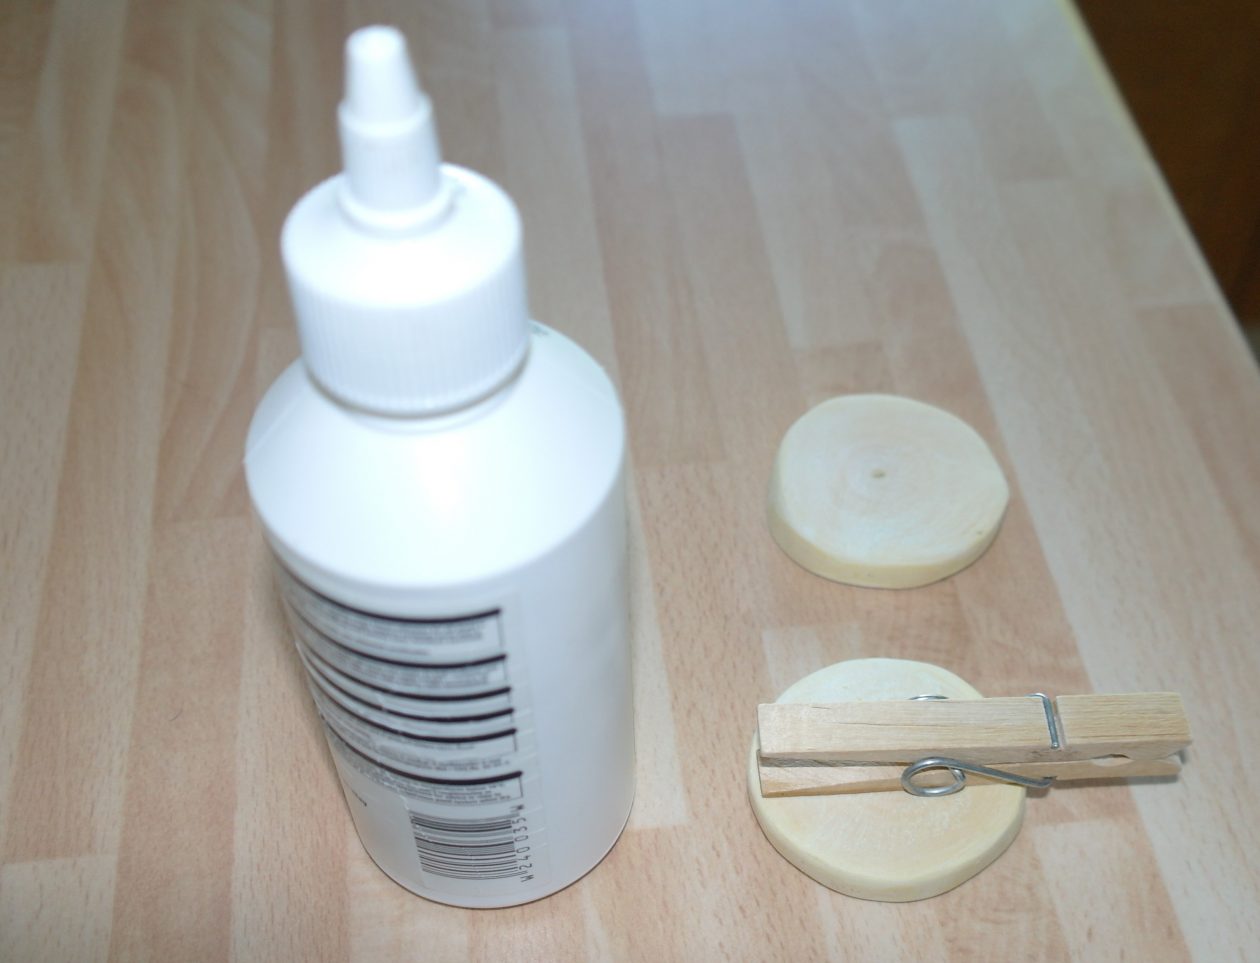
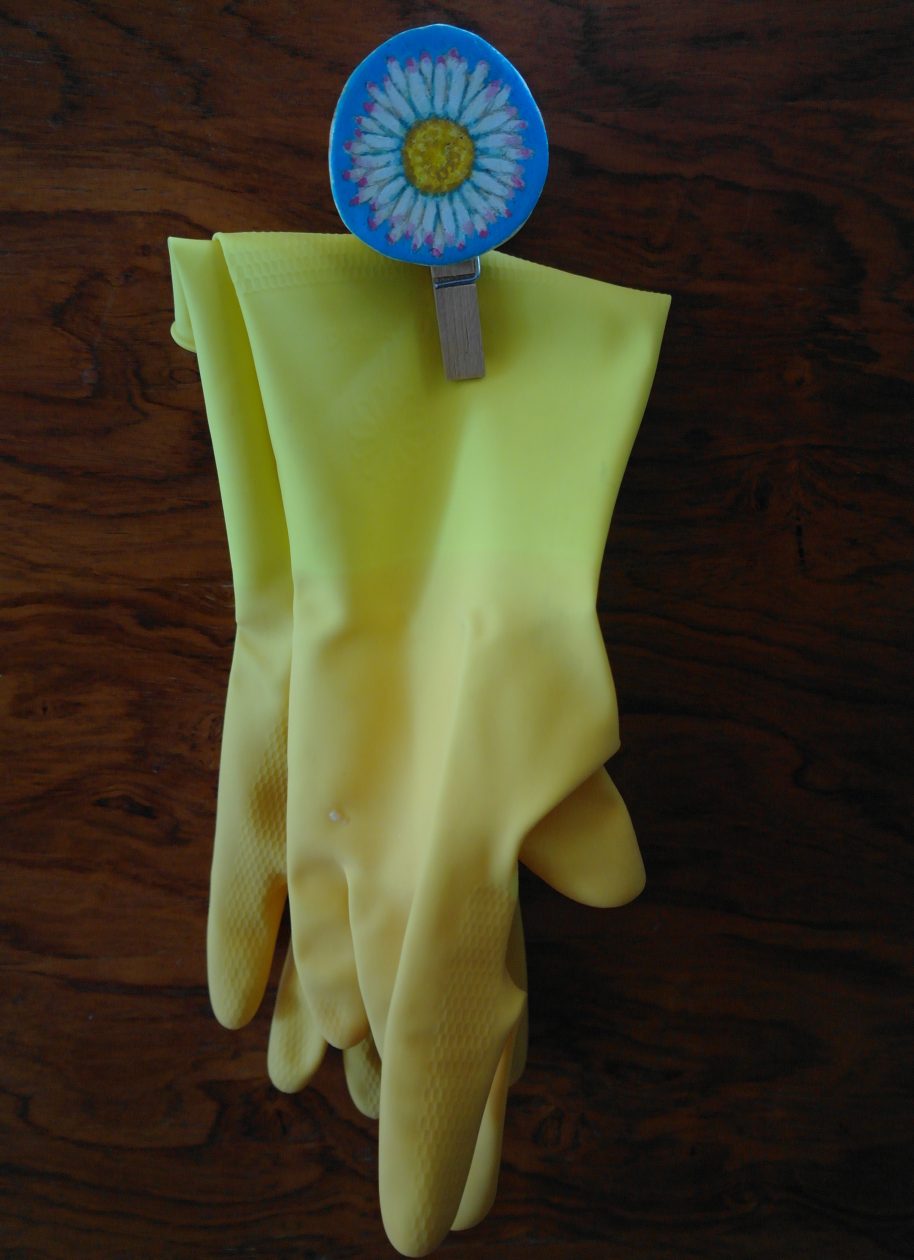
I stuck my clip onto the inside of my kitchen sink cupboard door, using sticky fixers, so that I could hang my rubber gloves up.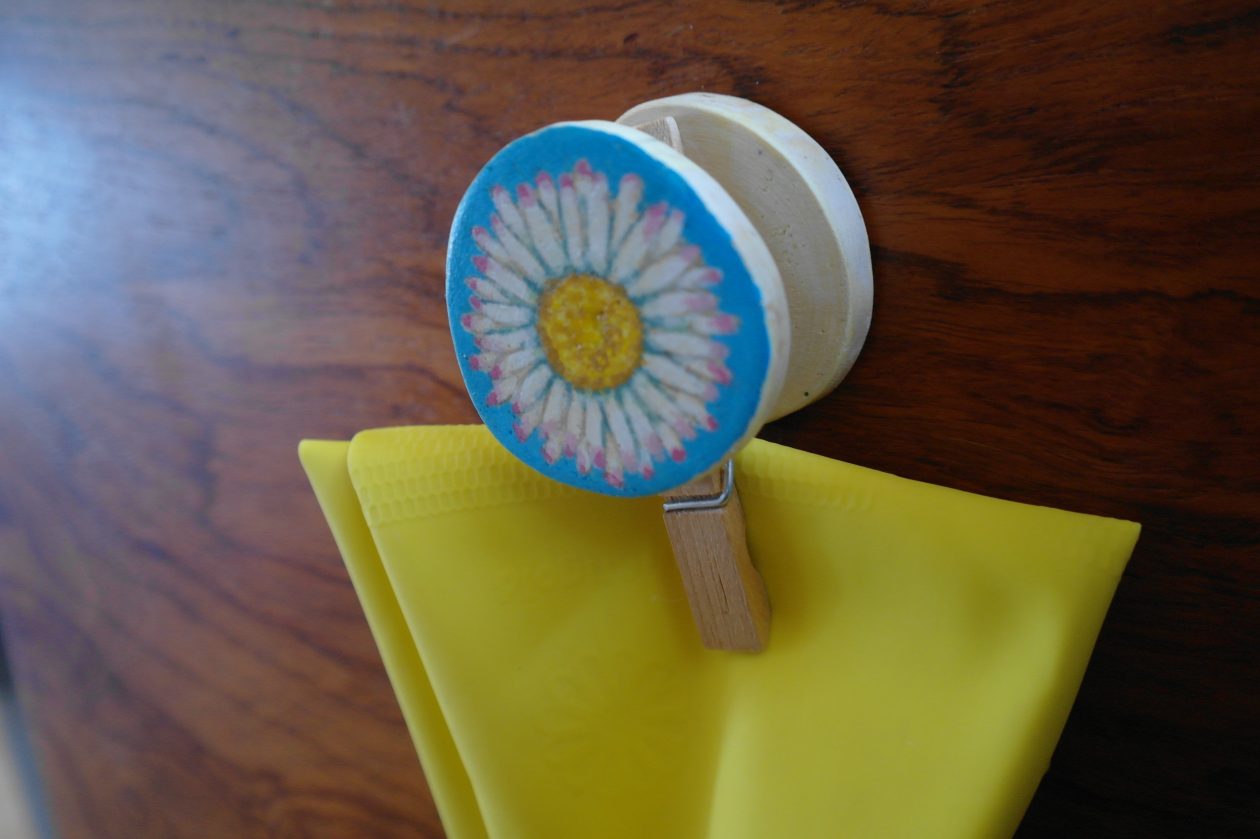
Mrs Madden’s Big Thursday Whittling 2
I have discovered that the branches from my fallen tree are not quite as green as I had thought and the wood is hard and difficult to whittle. As a consequence of this, I have cracked the handle on my pen knife. I have ordered another one but I don’t know when it will arrive.
If you are planning on doing some whittling, please do not be tempted to cut branches from living trees at this time of year. The trees are just waking up from their winter sleep and the sap inside them is rising which means that if you cut them now the sap would keep pouring out of them and they could die. The safe time to cut branches from living trees is winter when they are dormant (sleeping).
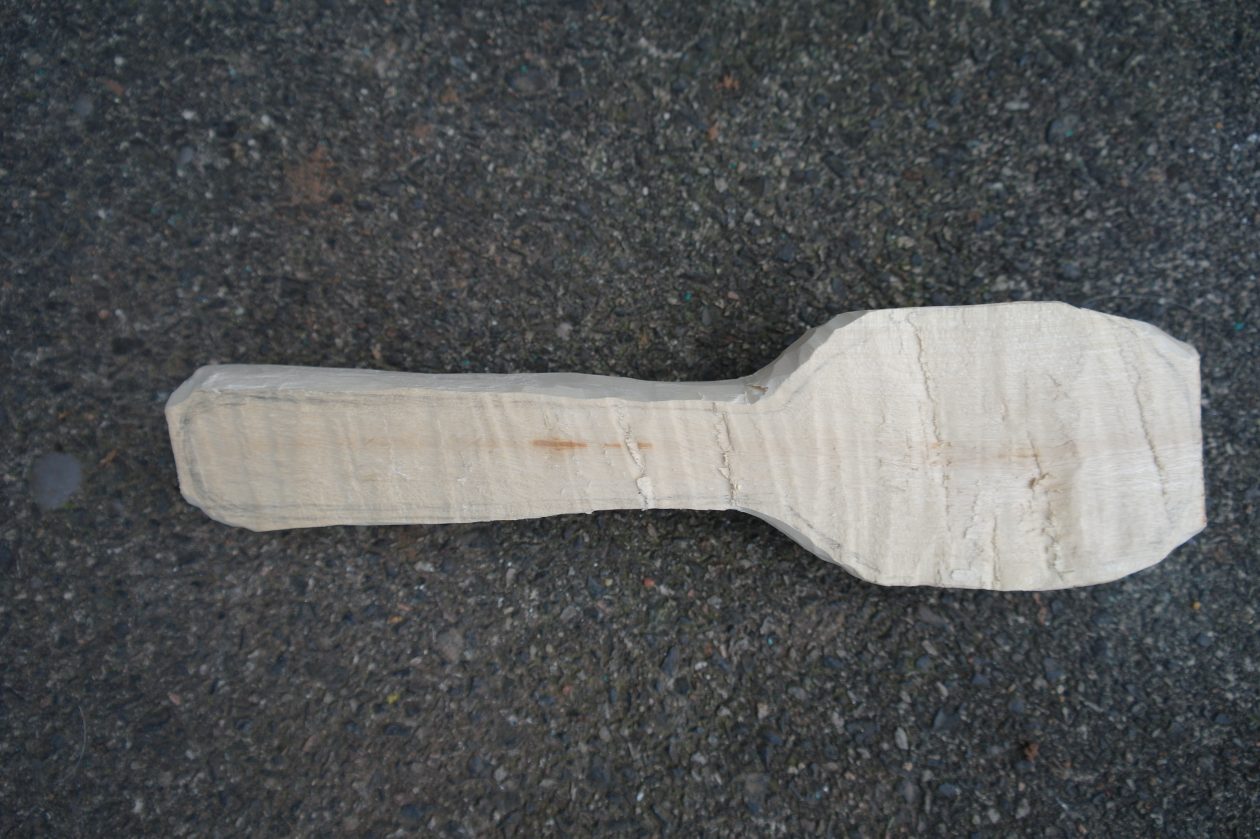
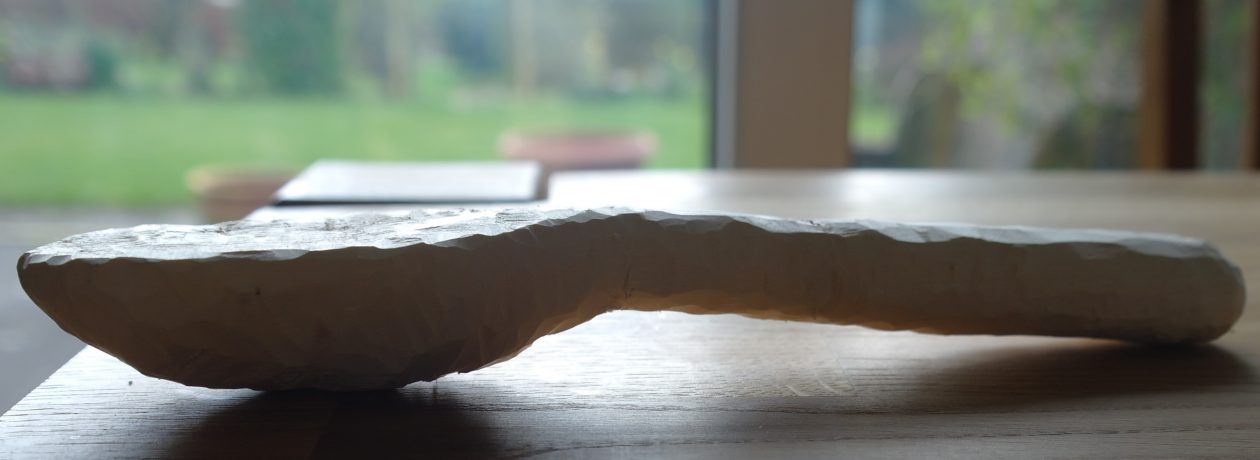
However, I have managed to do a bit of whittling. I drew around my template and started to cut away the wood around my spoon. This is as far as I have got.

Whittling with Mrs. Madden 1
This is the fallen sycamore tree where I’m, currently, getting my wood for whittling. It is much easier to whittle with green (fresh) wood rather than old dried wood because it is much softer. However, you do have to be careful not to bring it into a warm, heated environment (i.e. inside) too soon as it can dry too quickly and crack. 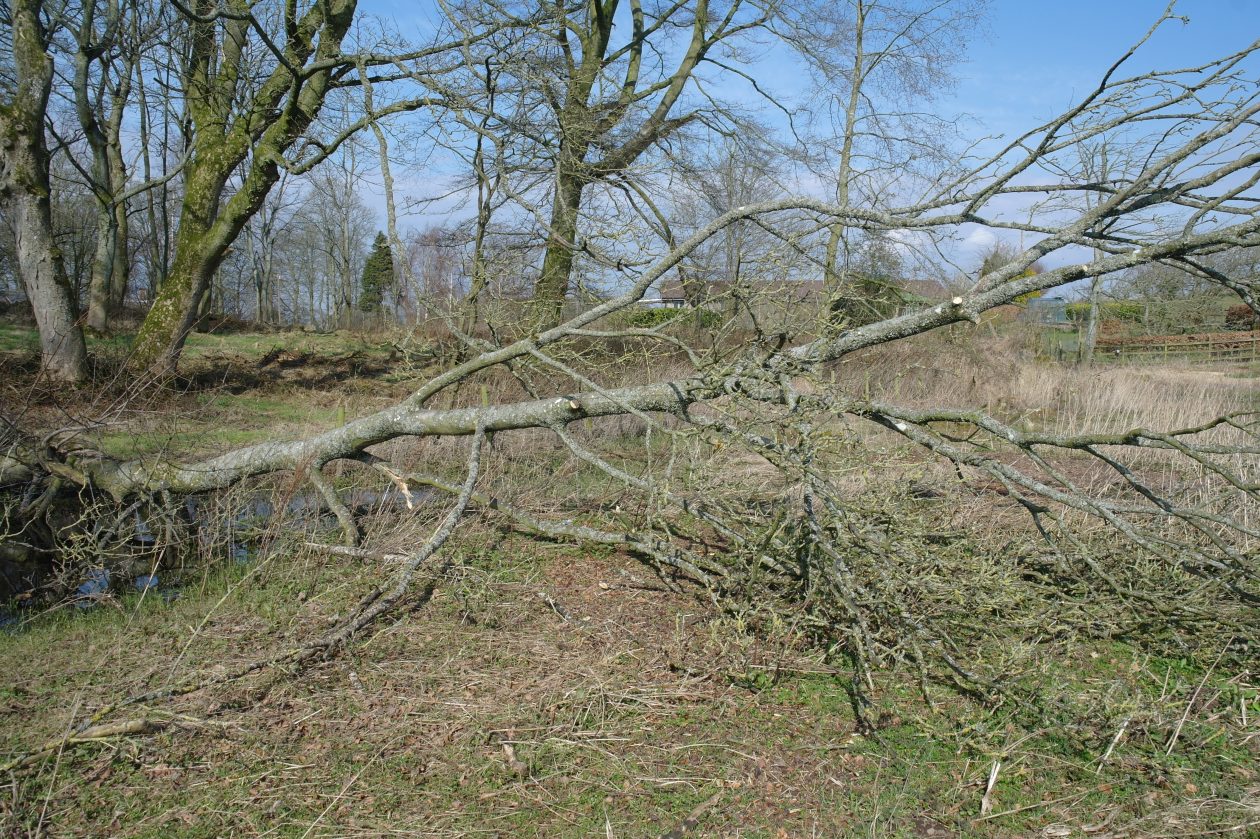
This is the piece of wood I am using to make a spoon. As you can see, I have removed the bark and split the branch in half. There is a soft, pithy core in the middle of sycamore branches and this needs to be removed before you start whittling. 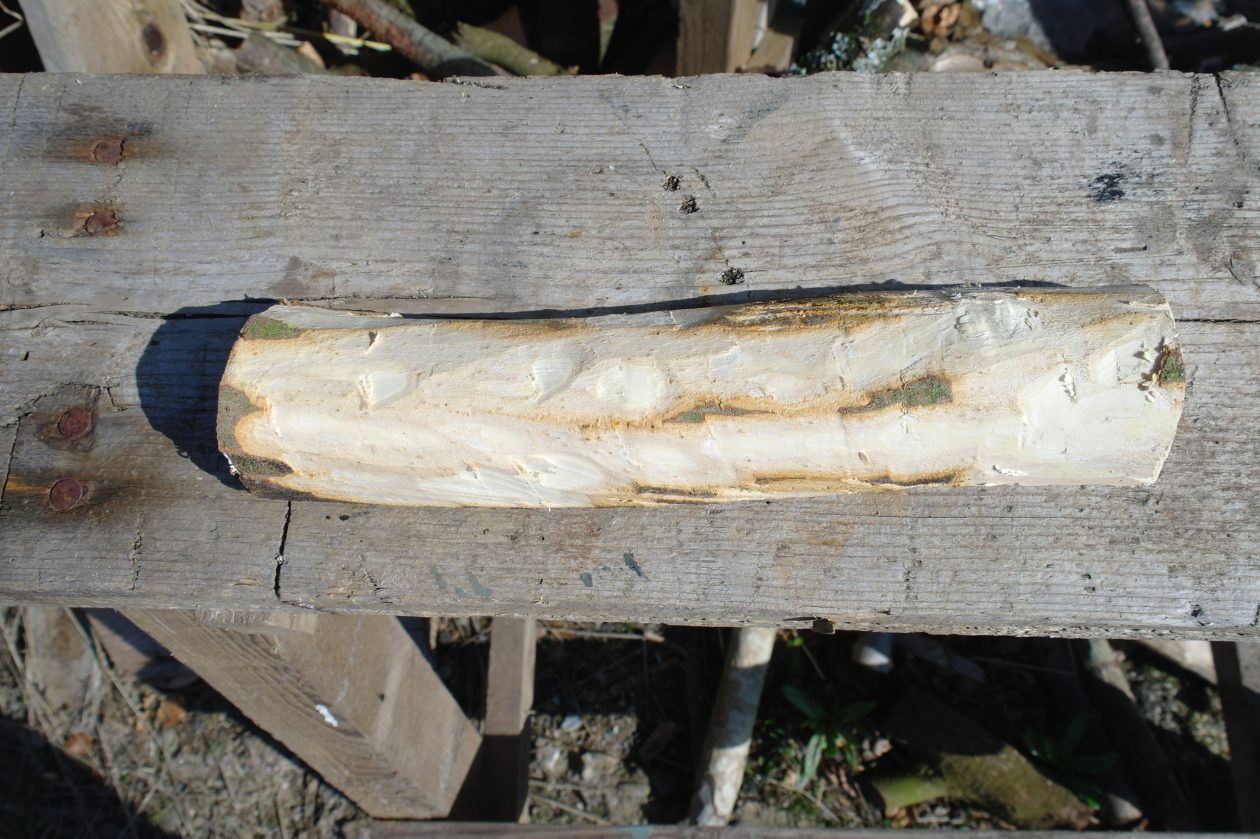
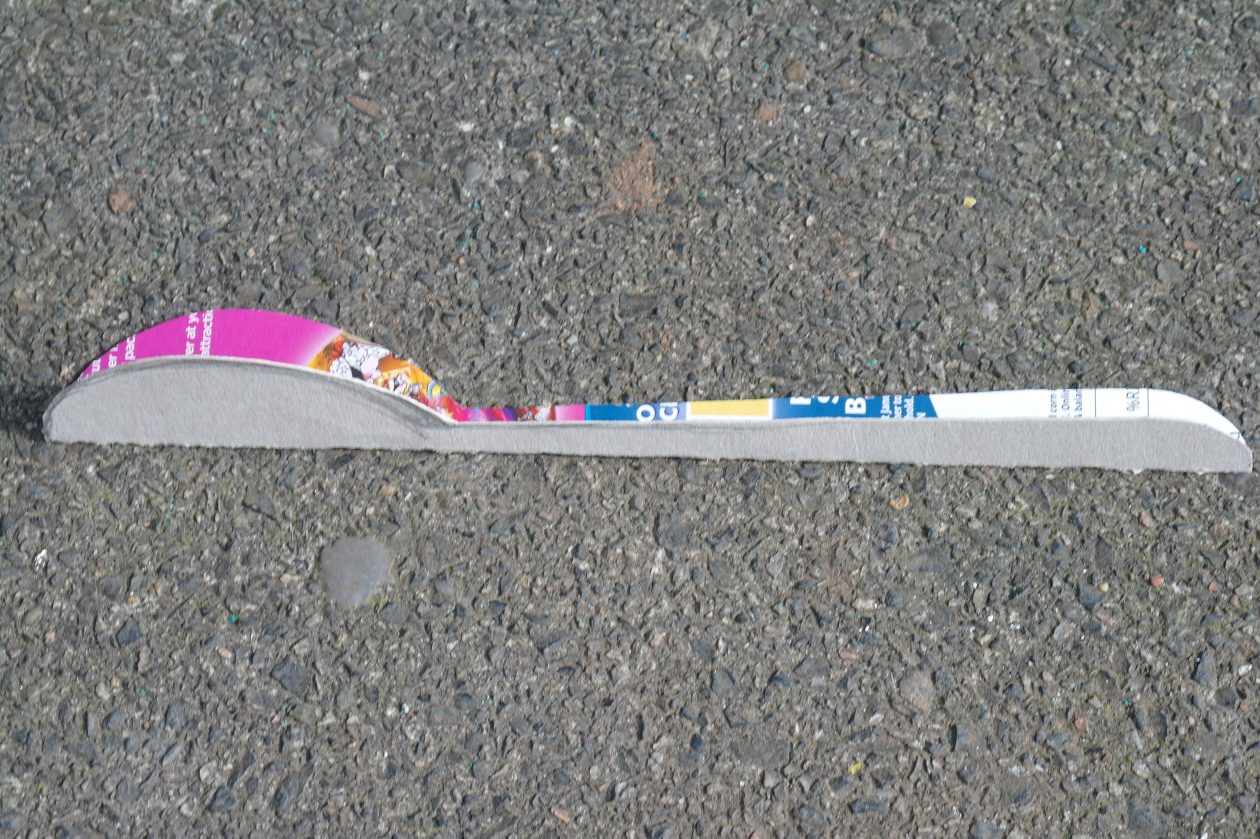
I have made a template from a piece of an old cereal packet. I drew around my branch piece and cut it out then I folded the card and drew half my spoon and cut that out – this is so that the spoon will be symmetrical.
Whittling with Mrs. Madden
Yay, I have a new knife (I ordered it on the internet). I wanted to show you some different cutting techniques so I persuaded my son to help me.
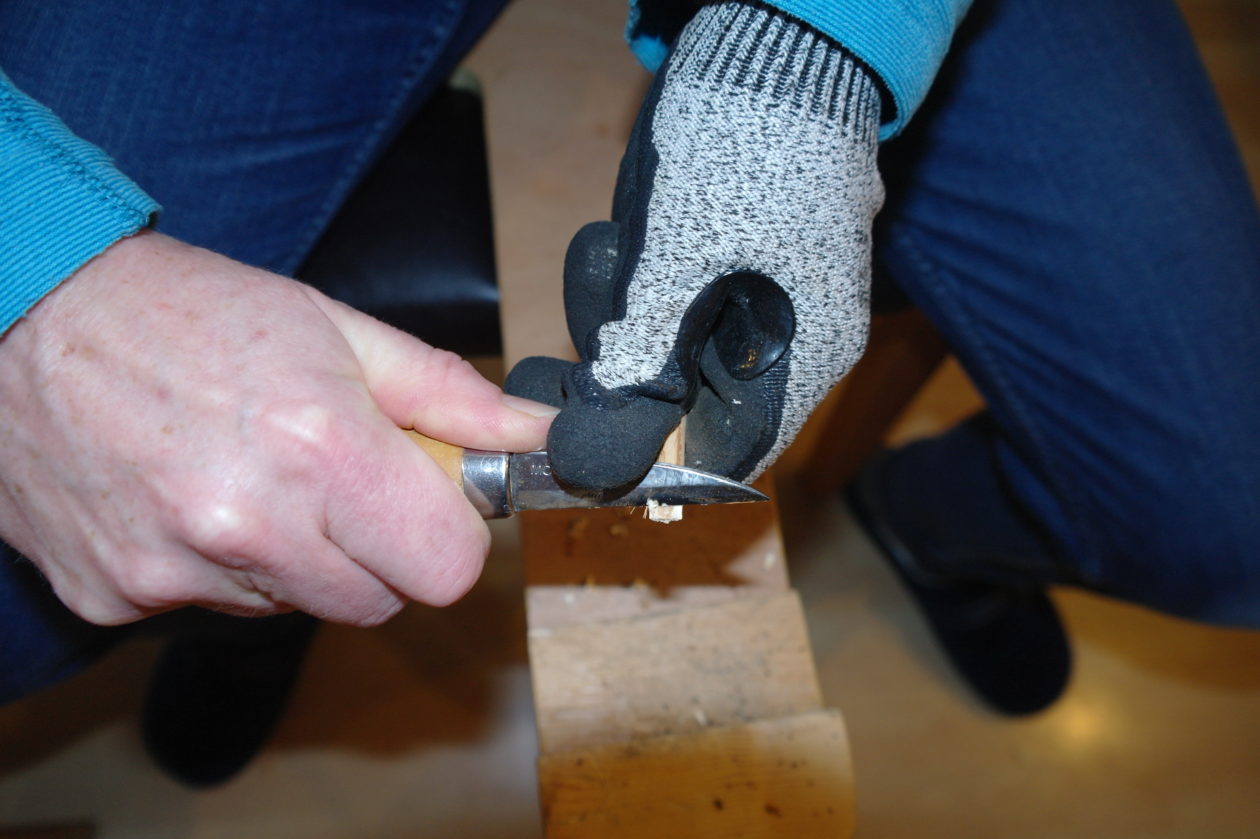
It is better to use a slight slicing action when whittling and making small shallow cuts, not digging too far into the wood. As you can see from these photos, Andrew is left handed, so he wears the right cut resistant glove (I wear the left one because I am right handed). He also wears a thumb protector (made from the horse bandage that I showed you in my first whittling post) on his knife holding hand.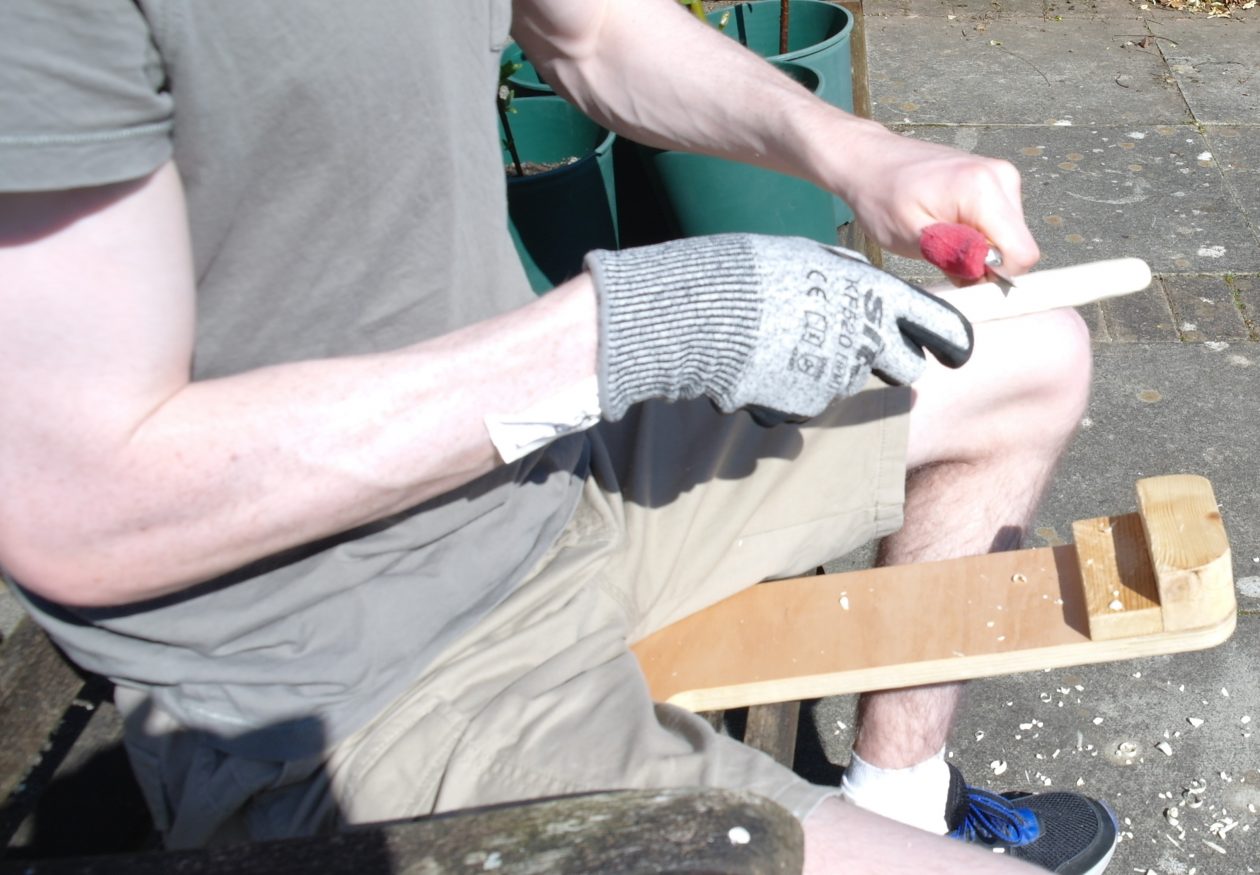
Try to make most of your cuts away from your body and rest your spoon (or whatever you are making) against the blocks on the whittling seat. 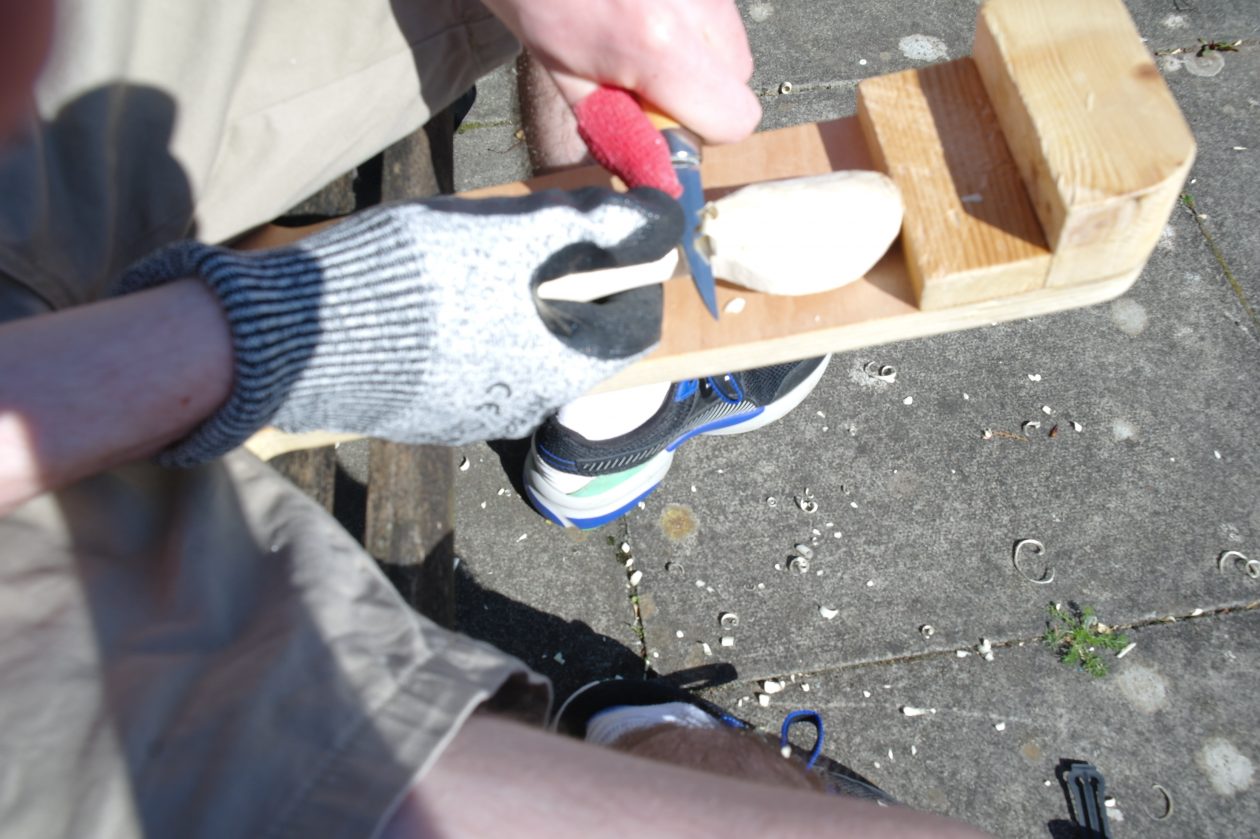
To make small, controlled cuts use both thumbs to push the blade. 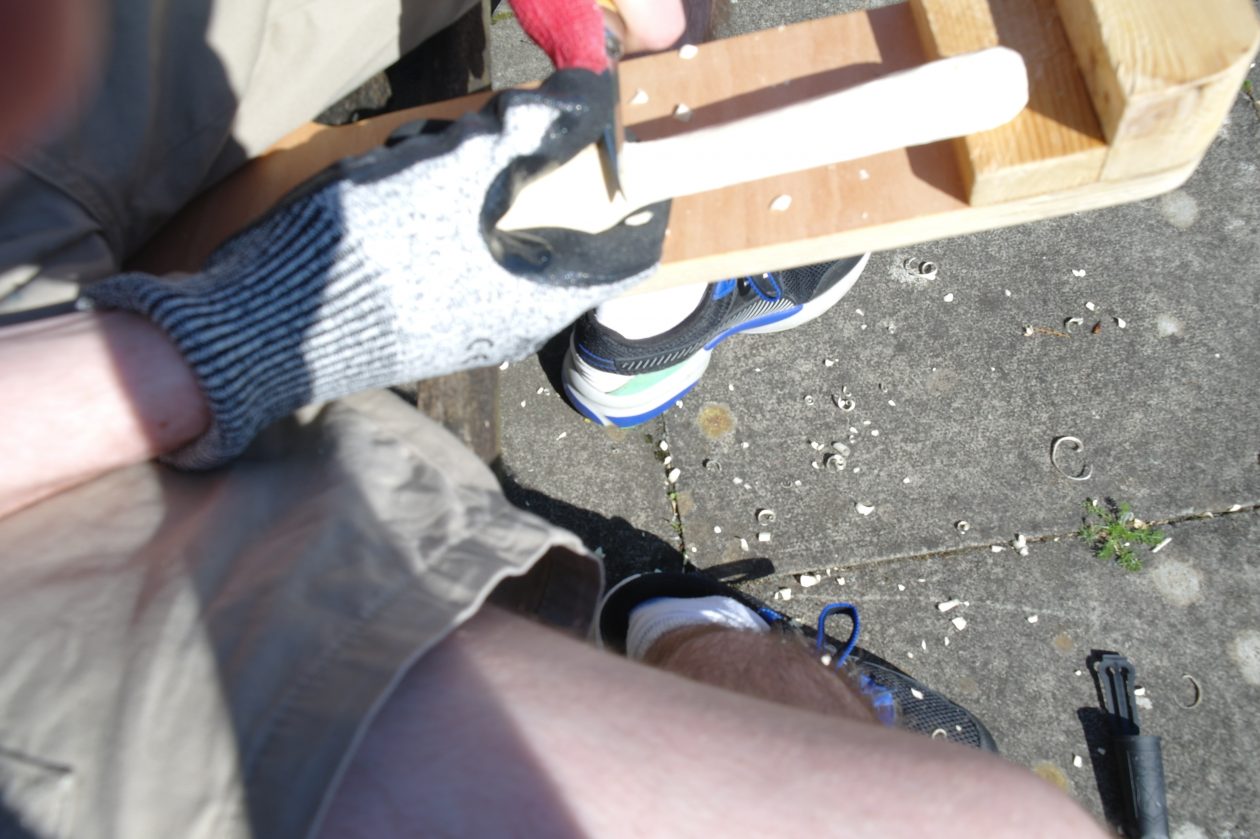
To round off the ends of your spoon, start by resting it against one of the blocks on the whittling seat and make small cuts downwards. 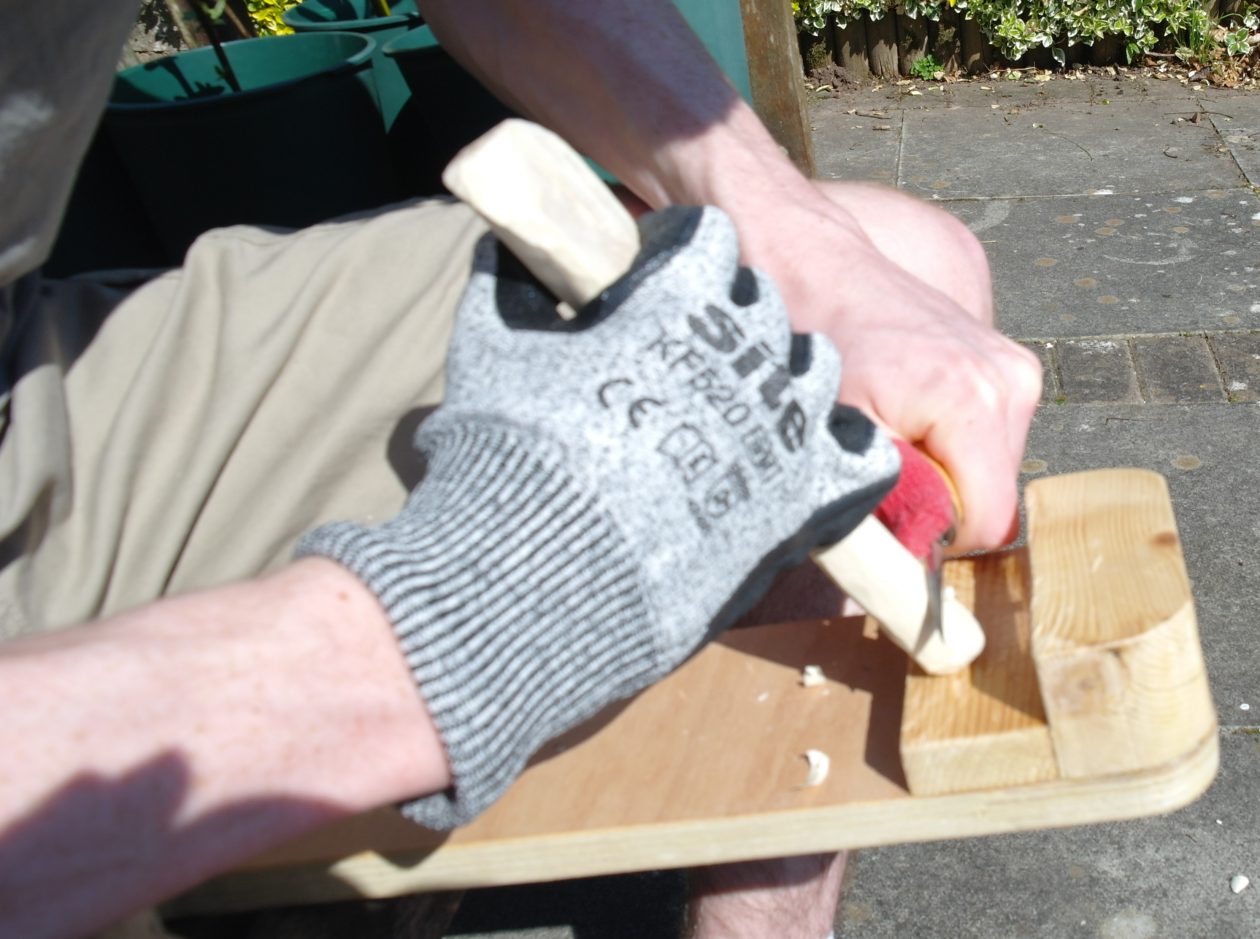
Whittling with Mrs. Madden 4
To create the bowl part of your wooden spoon, you need to gouge out the wood. You can use your knife to do this, by making small ‘v’ shaped cuts but it takes a long time and leaves the ‘bowl’ quite rough and you will have to do quite a lot of sanding to get it smooth. I use a small gouge (a wood carving tool). 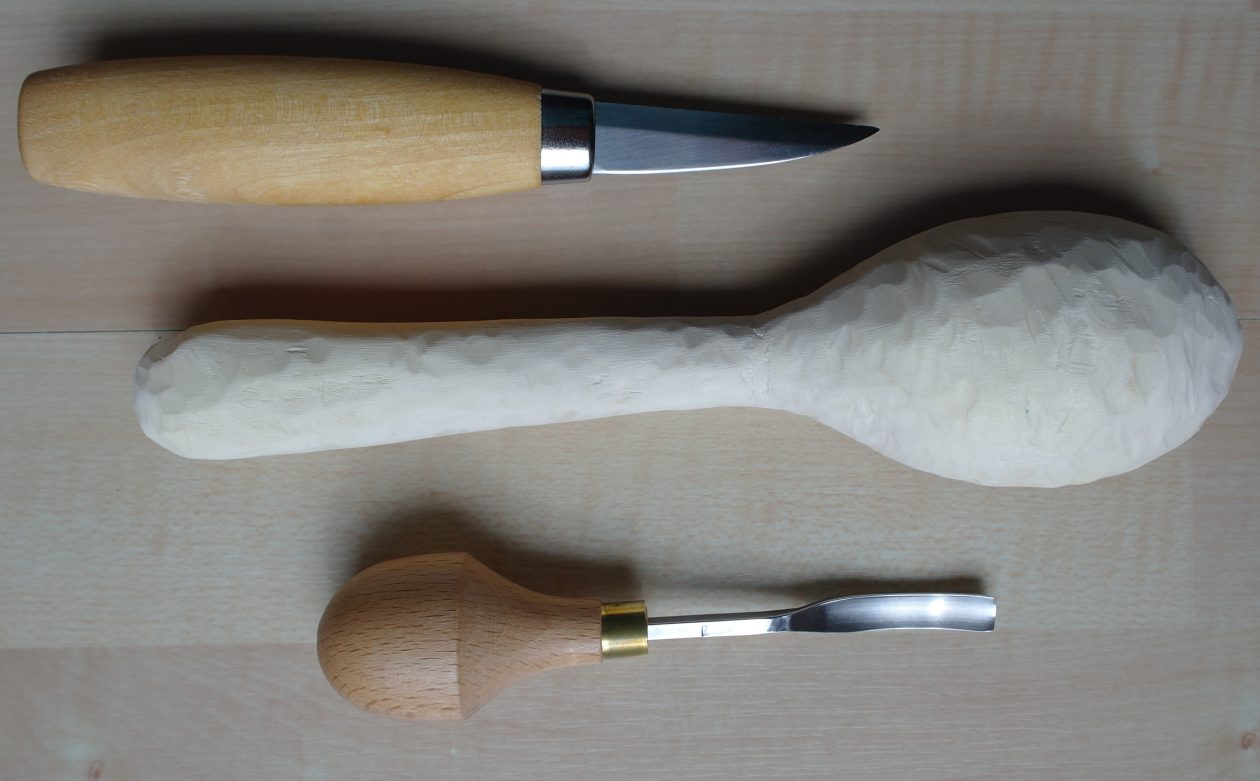
I like to draw a perimeter, with a pencil, around the area I am going to gouge before I start. Rest the spoon against one of the blocks on the whittling seat and start to remove small areas of wood – make sure you do not dig too deeply as that could split and splinter the wood.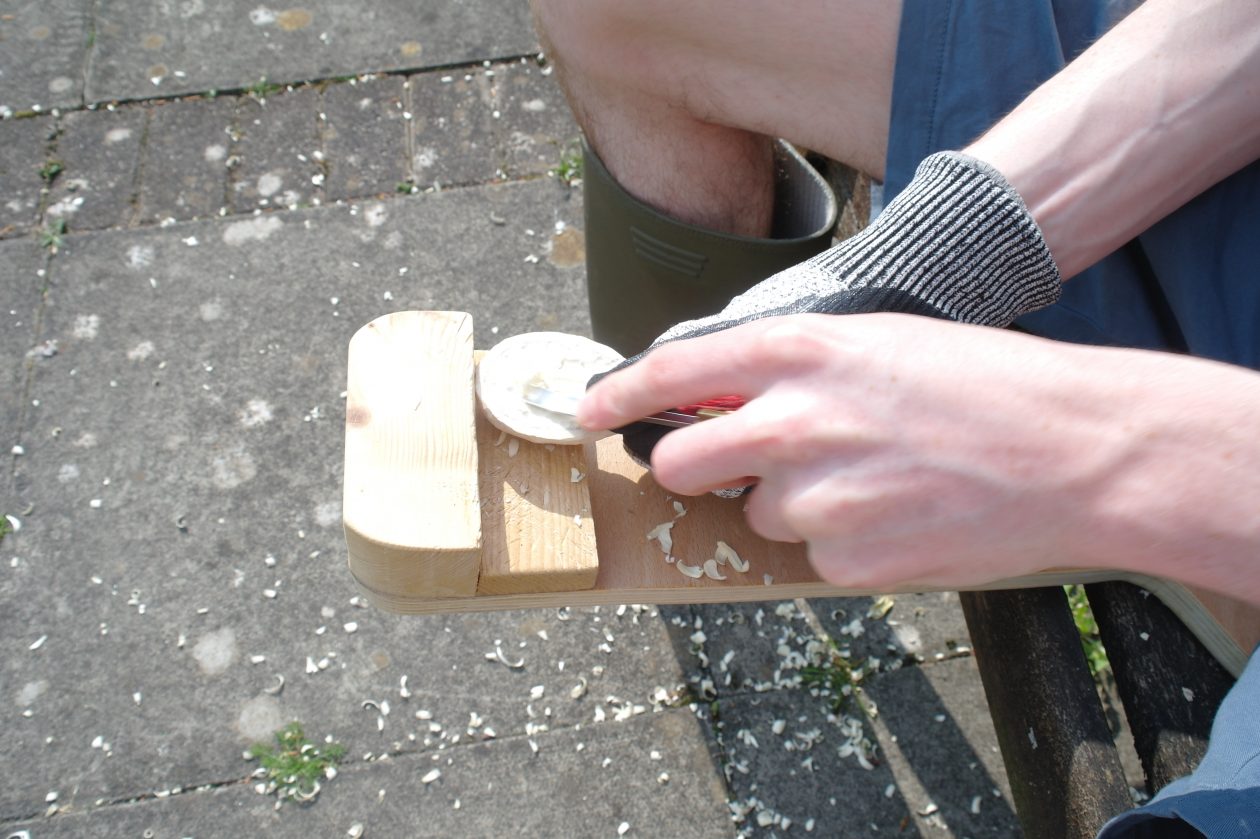
Gouge one way (this will create curls of wood in the centre of the spoon bowl). Turn the spoon around, resting the end of the handle against the blocks on the seat and gouge the other way.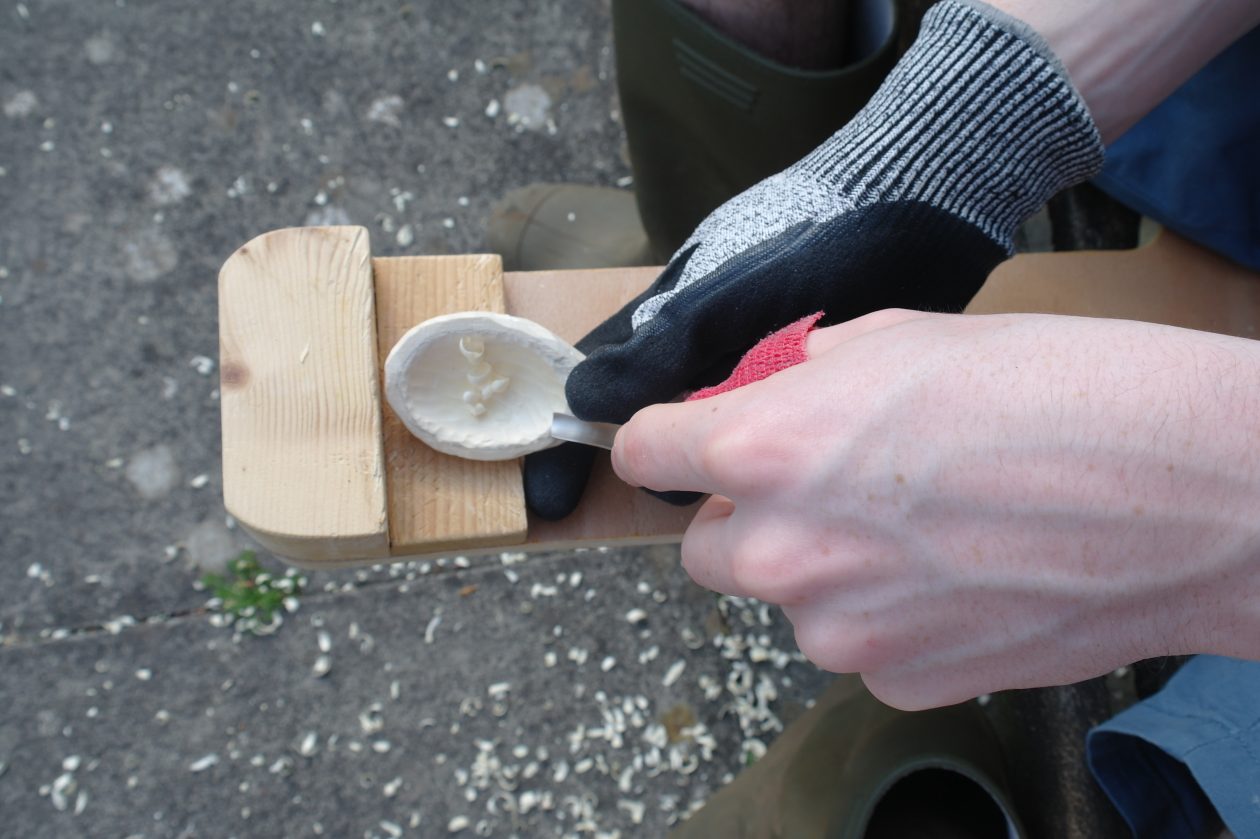
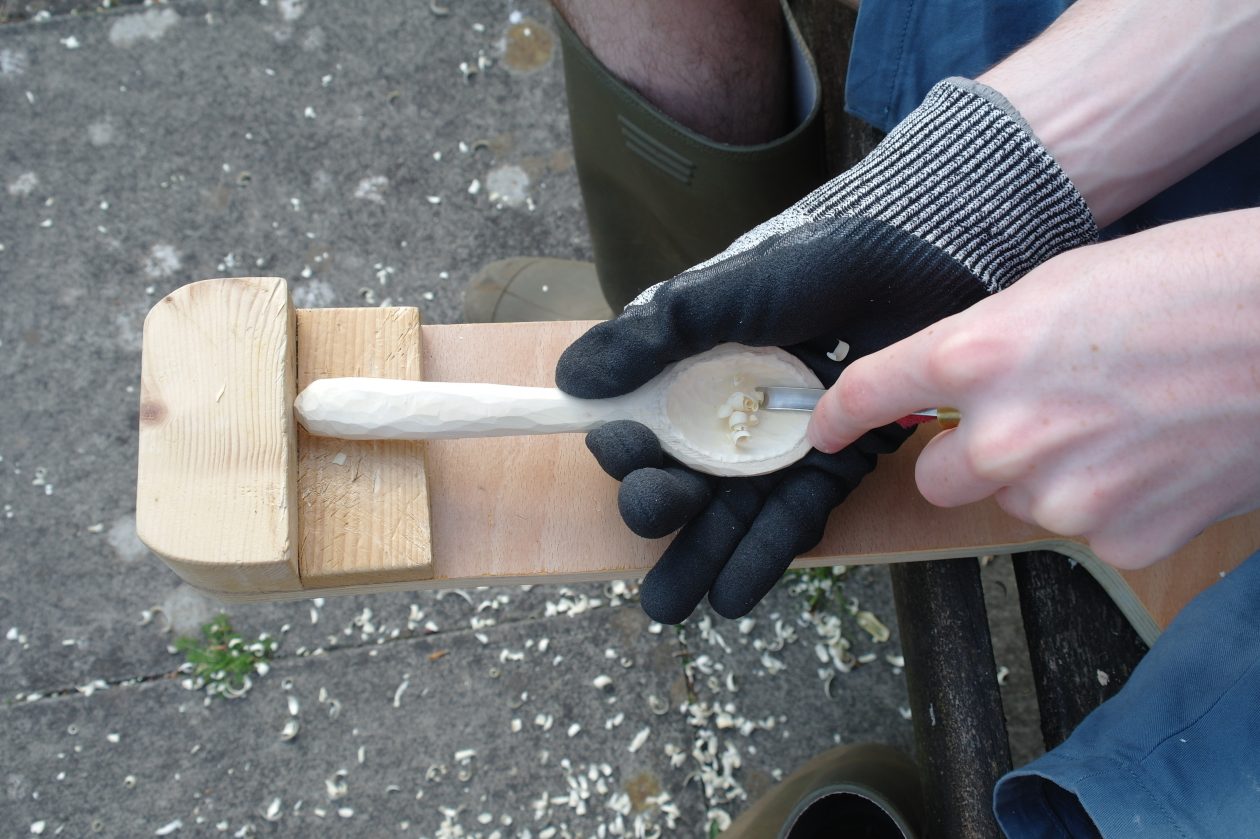
Once you are satisfied that you have removed enough wood from the spoon bowl and you are happy with the shape, you can sand your spoon. I like to use Aluminium Oxide paper. I have a rough P80 paper and a finer P120 paper (the higher the number on the paper, the finer the texture of the paper). You can use whatever you have got though.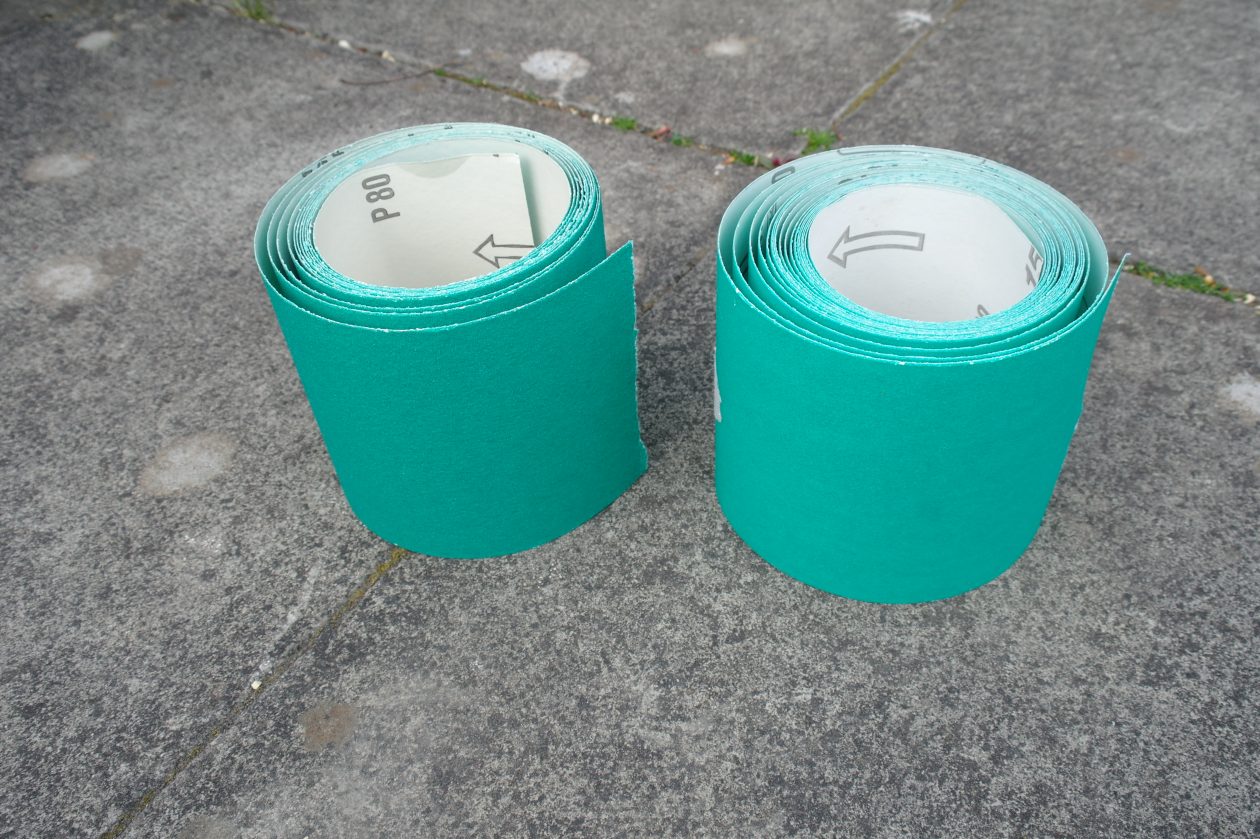
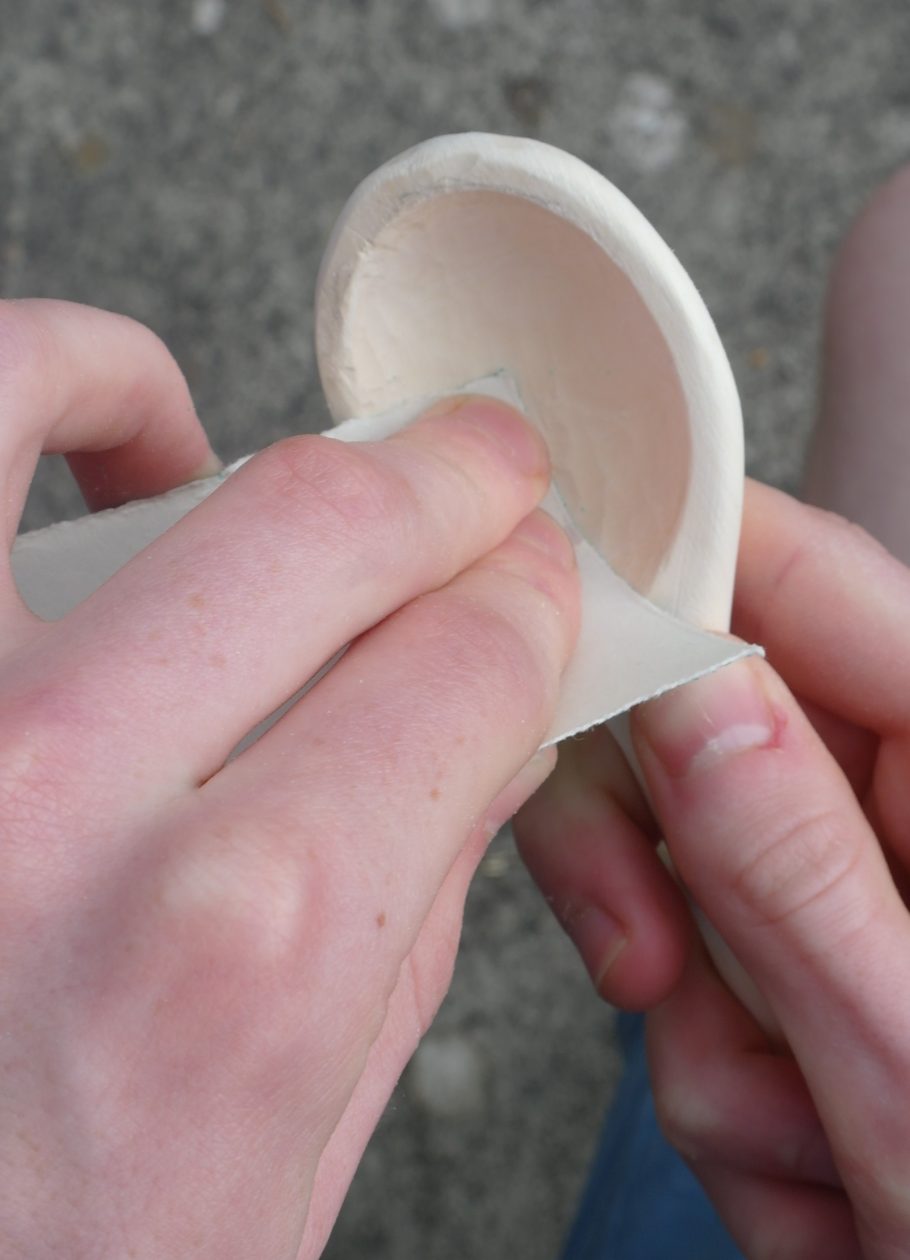
Sanding can be a slow process particularly the inside of the spoon bowl as it is a bit fiddly but it is worth it to get a nice smooth finish. 
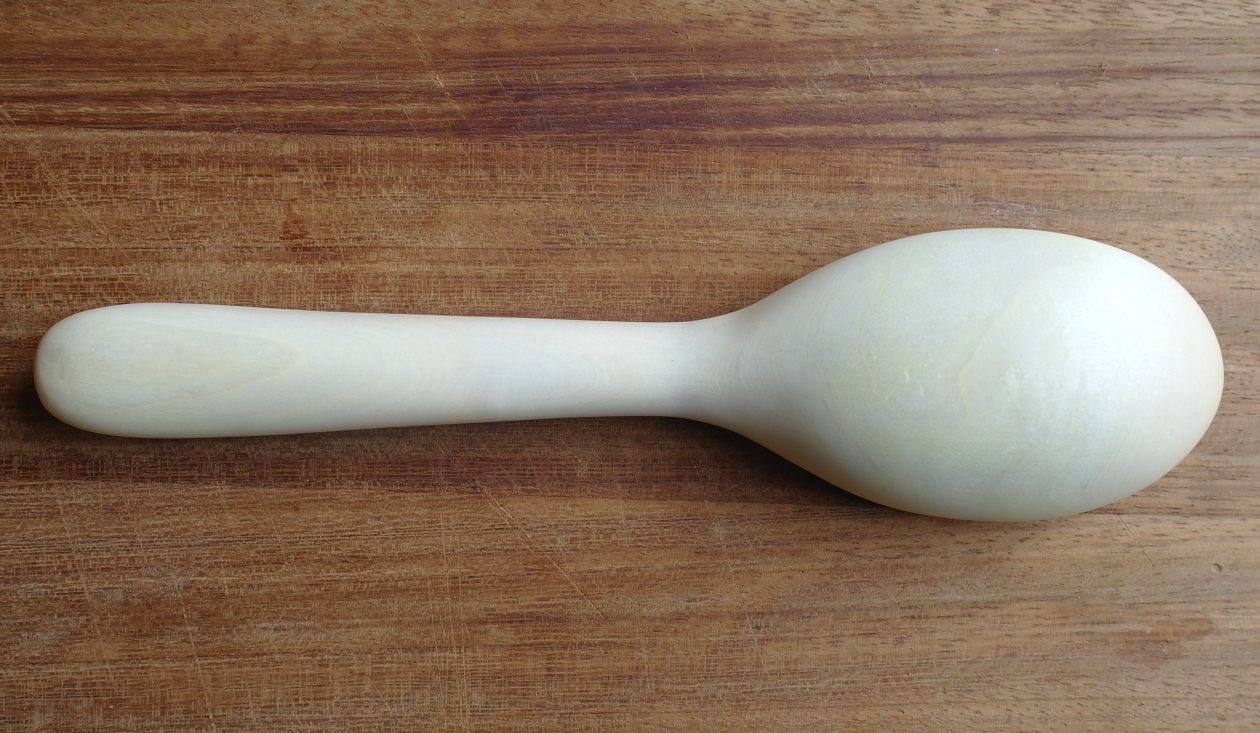
Finally, rub some olive oil all over your spoon. Leave to dry and you are finished (this one is my spoon as my son hasn’t finished sanding yet).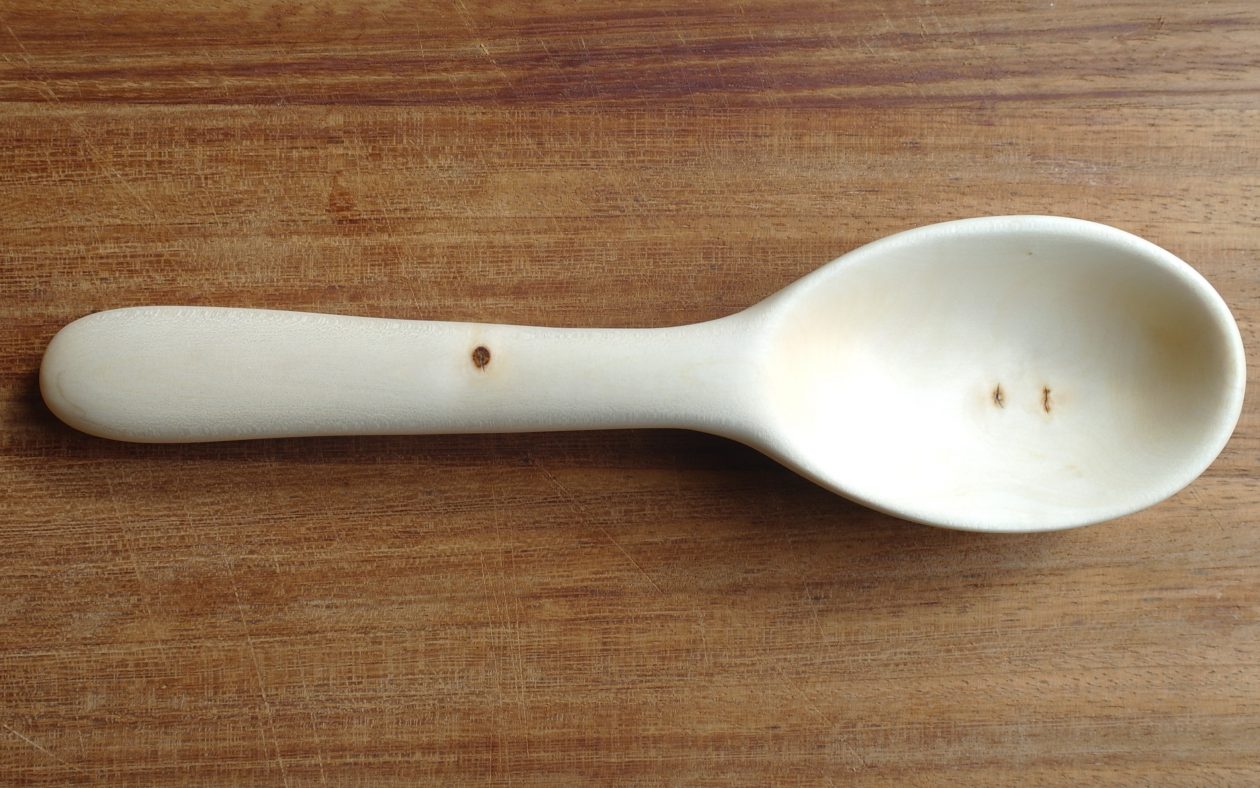
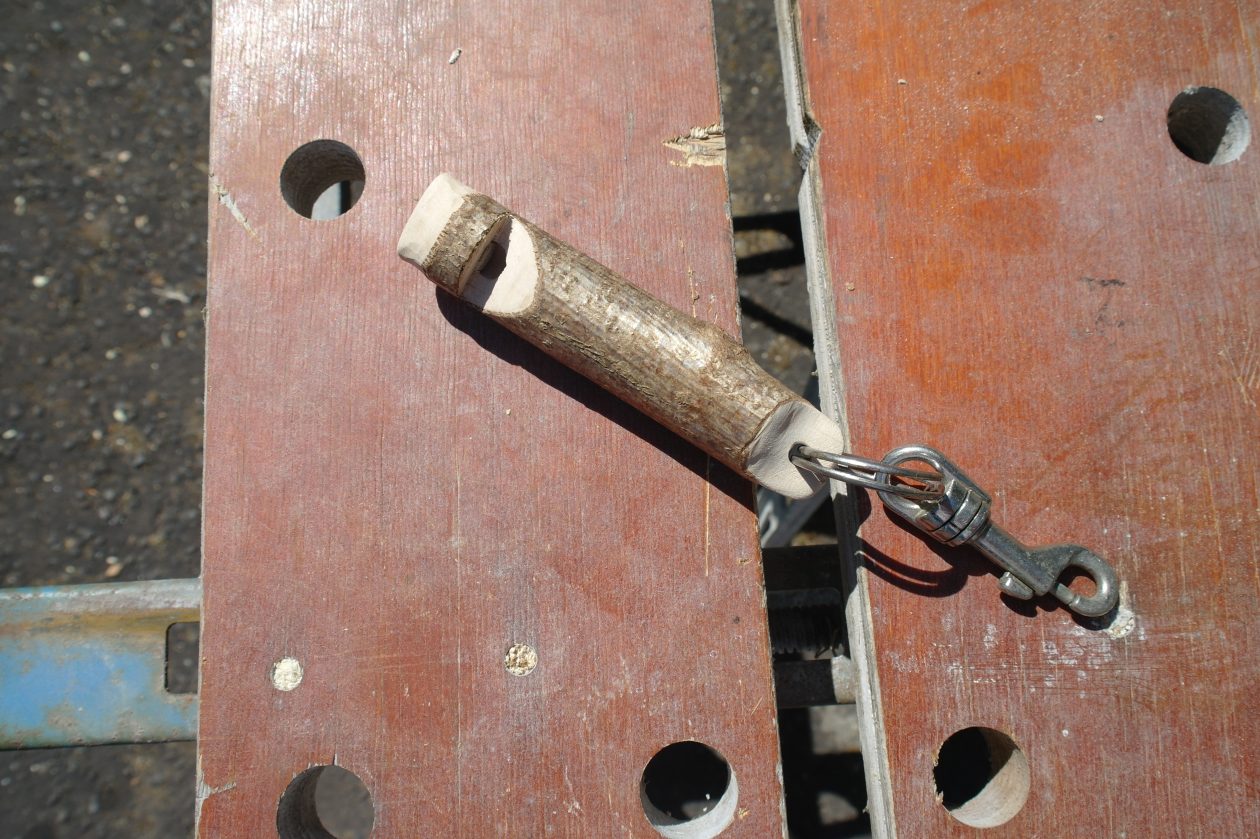
Whittling Whistles
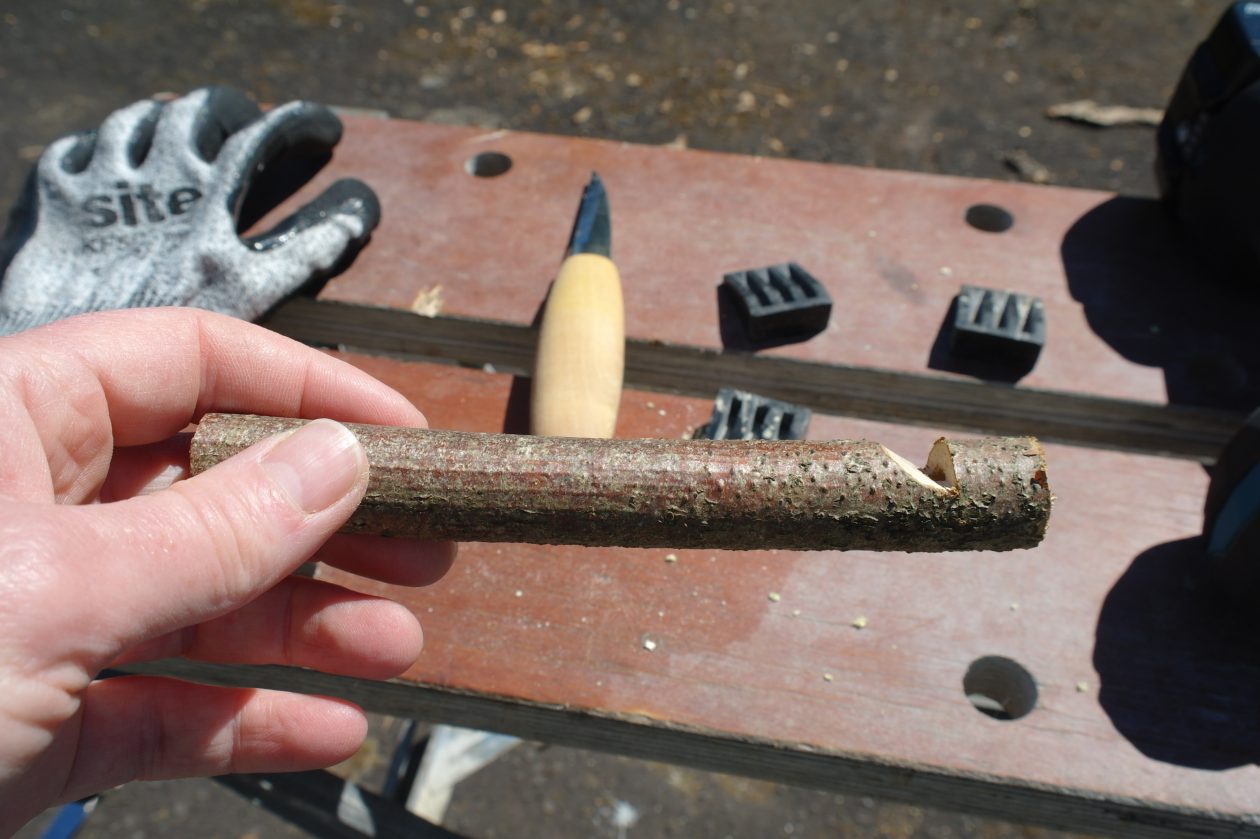
To make a wooden whistle you will need a stick that is seasoned (i.e. completely dry) rather than the green wood that I recommend for other whittling projects. You can use hazel, sycamore, silver birch or any fruit-wood (I used hazel). The stick will need to be 15 – 20 mm in diameter and 100 – 150 mm long.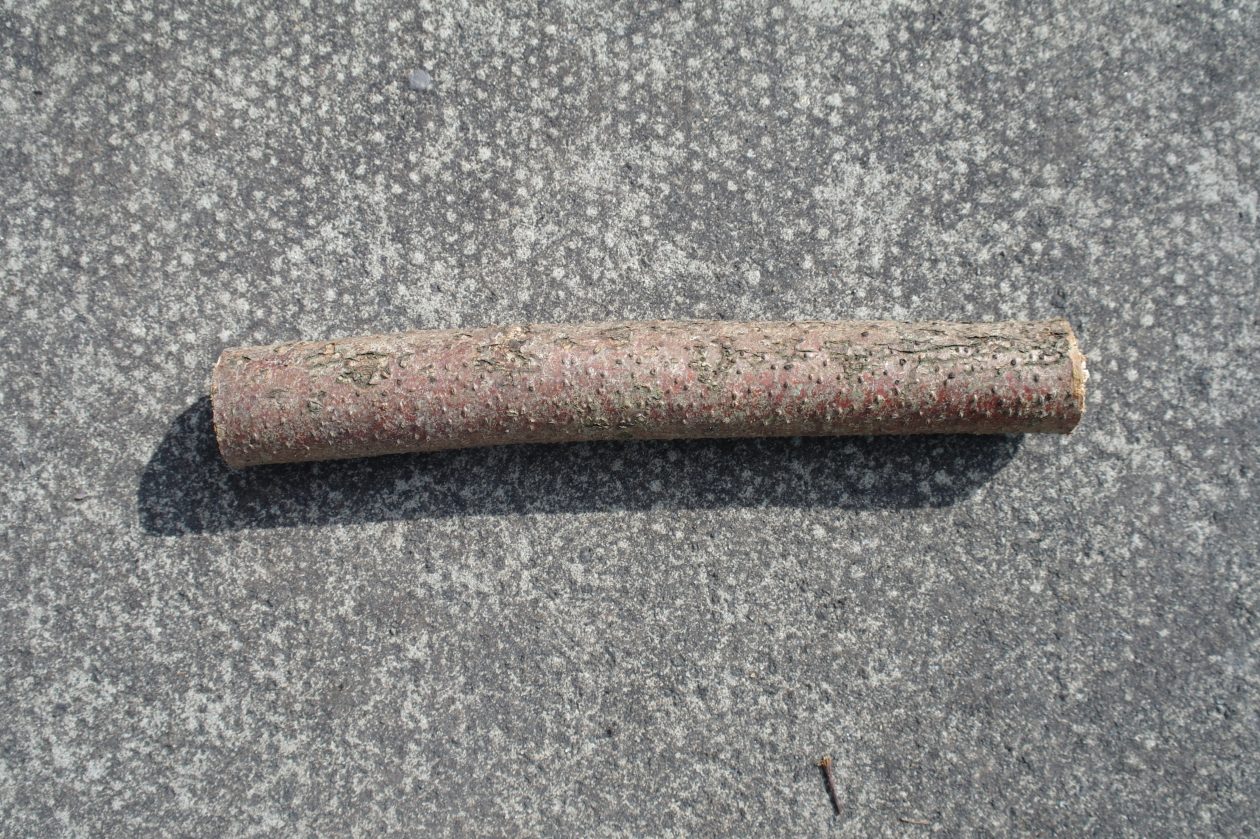
You will also need a work bench or vice and a drill for this project (we have got some hand drills at school but I forgot to bring one home with me so I’m using my electric drill).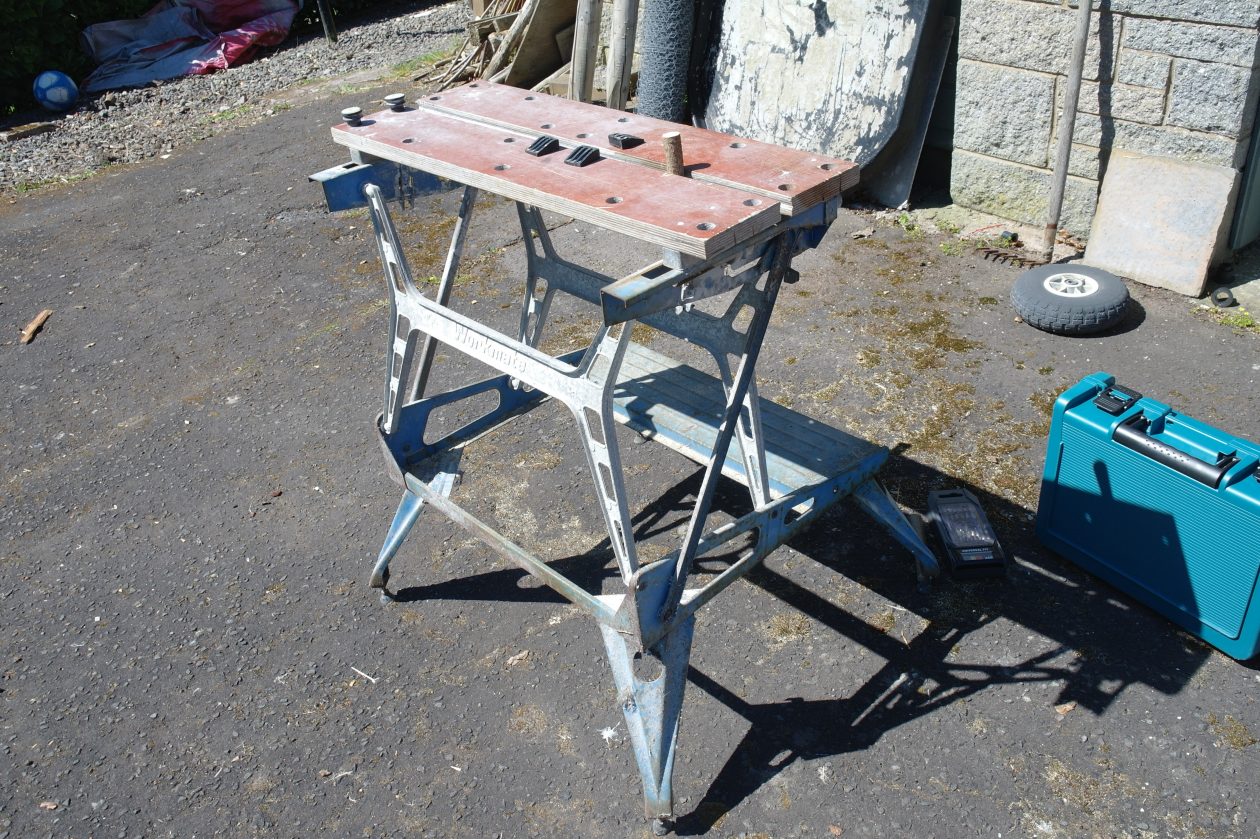
Secure your stick in the work bench or vice and drill a hole at one end using an 8 mm drill bit. Make the hole between 40 and 50 mm deep (I measured this on my drill bit before drilling and used a piece of masking tape to mark how deep I needed to go).
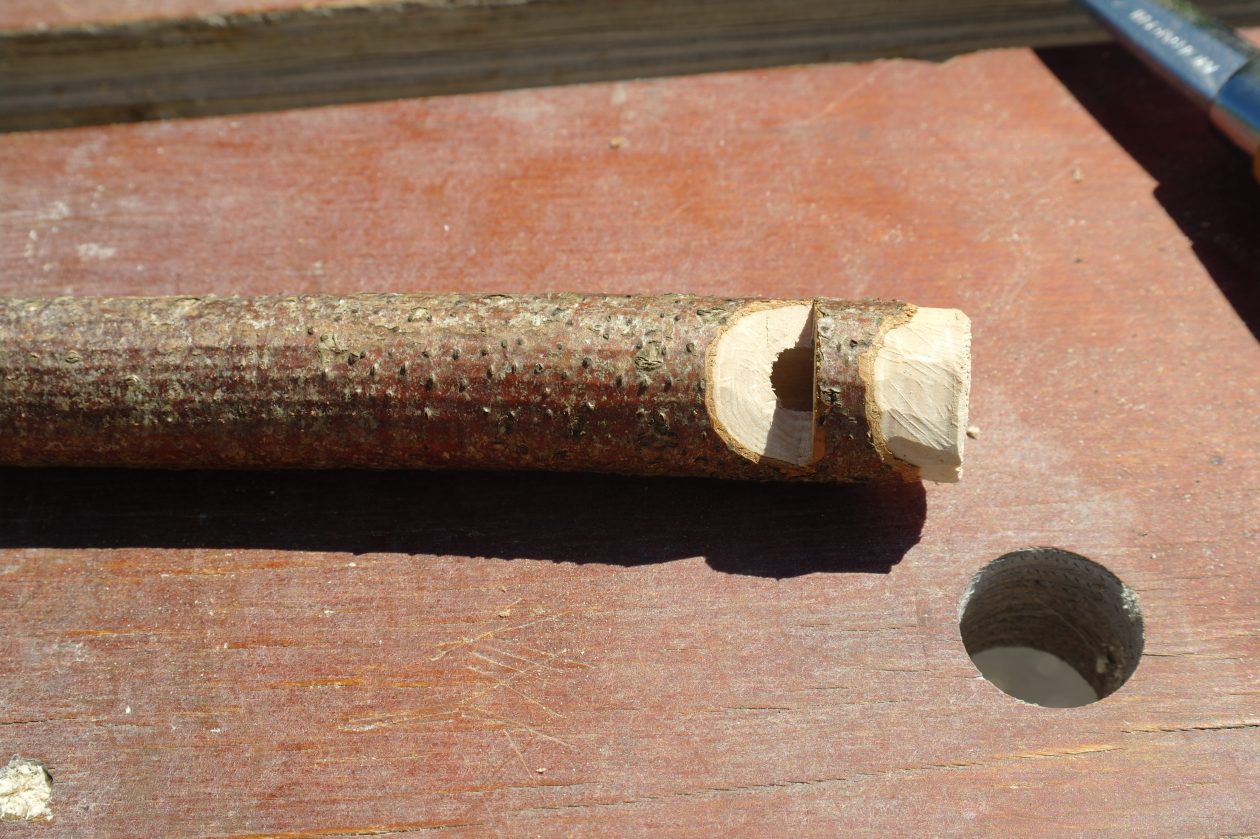
Measure about 15 mm from the drilled end and make a vertical cut across the side of the stick that just cuts into the side of the hole you have drilled. I used a small pruning saw to do this but you can use your knife.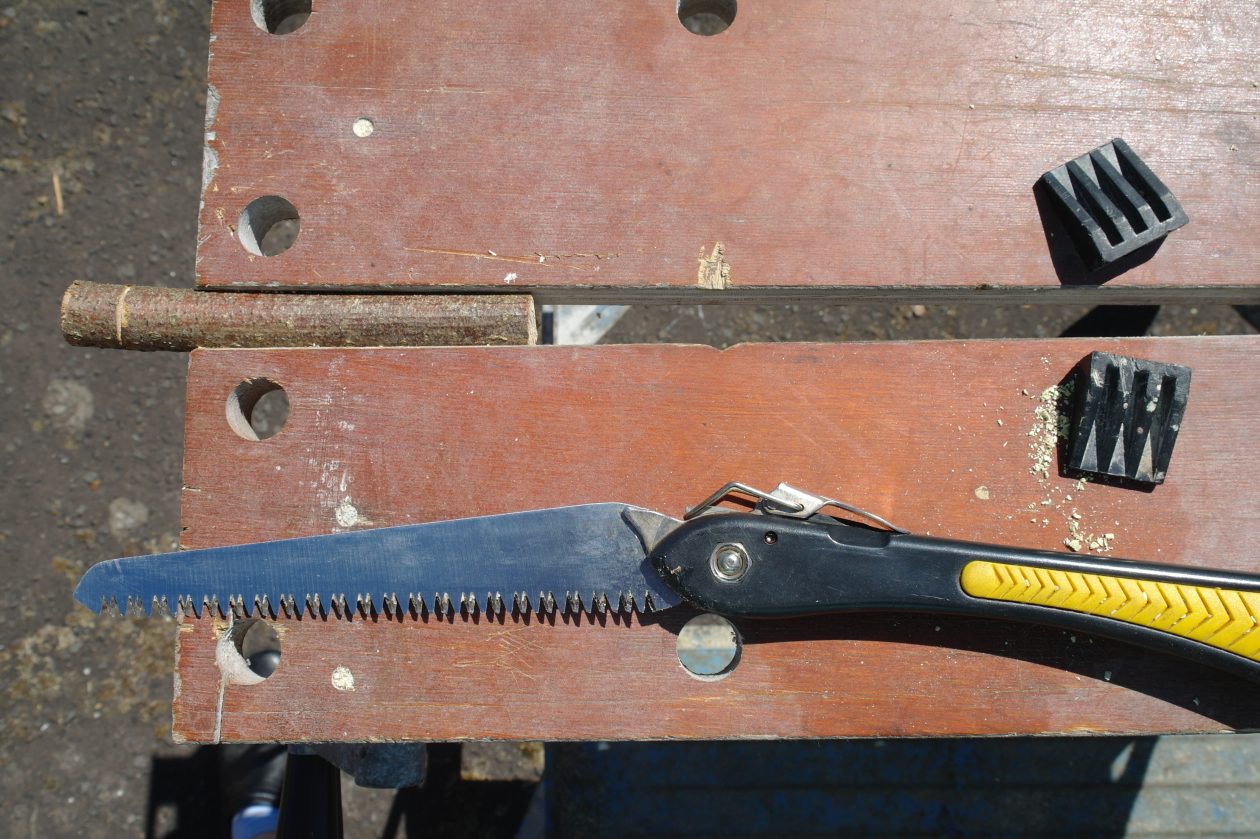
Now make a shallow, sloping wedge cut towards the vertical cut. This second cut should be at around 45 degrees, to create a wedge shape and should break into the hole you drilled. Always wear your cut resistant glove when using the knife.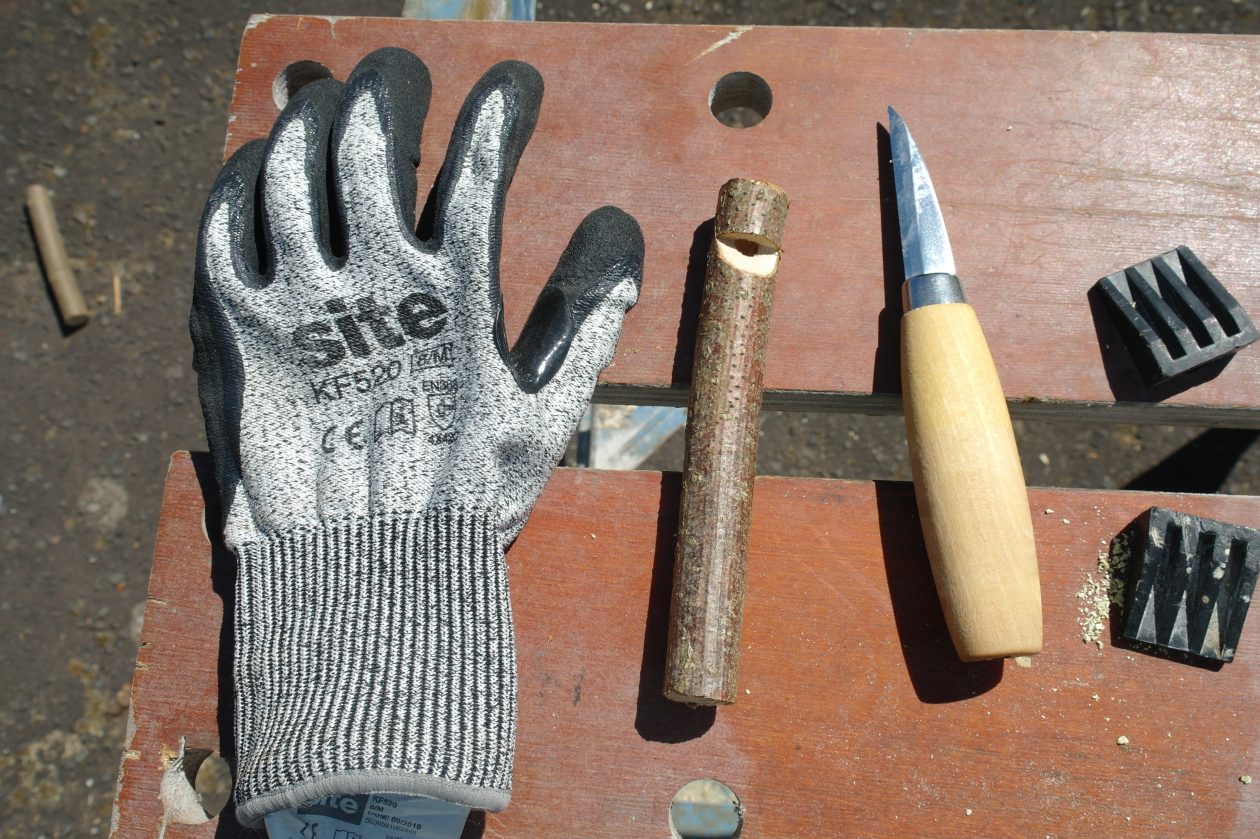
Cut another small stick (I used sycamore this time) and cut it into quarters, down the grain, using a small axe or hatchet (you can use a piece of ready made dowel but I didn’t have any). Use your knife to whittle this sick into a roughly circular rod. Check to see if it is just slightly larger than the hole you have drilled.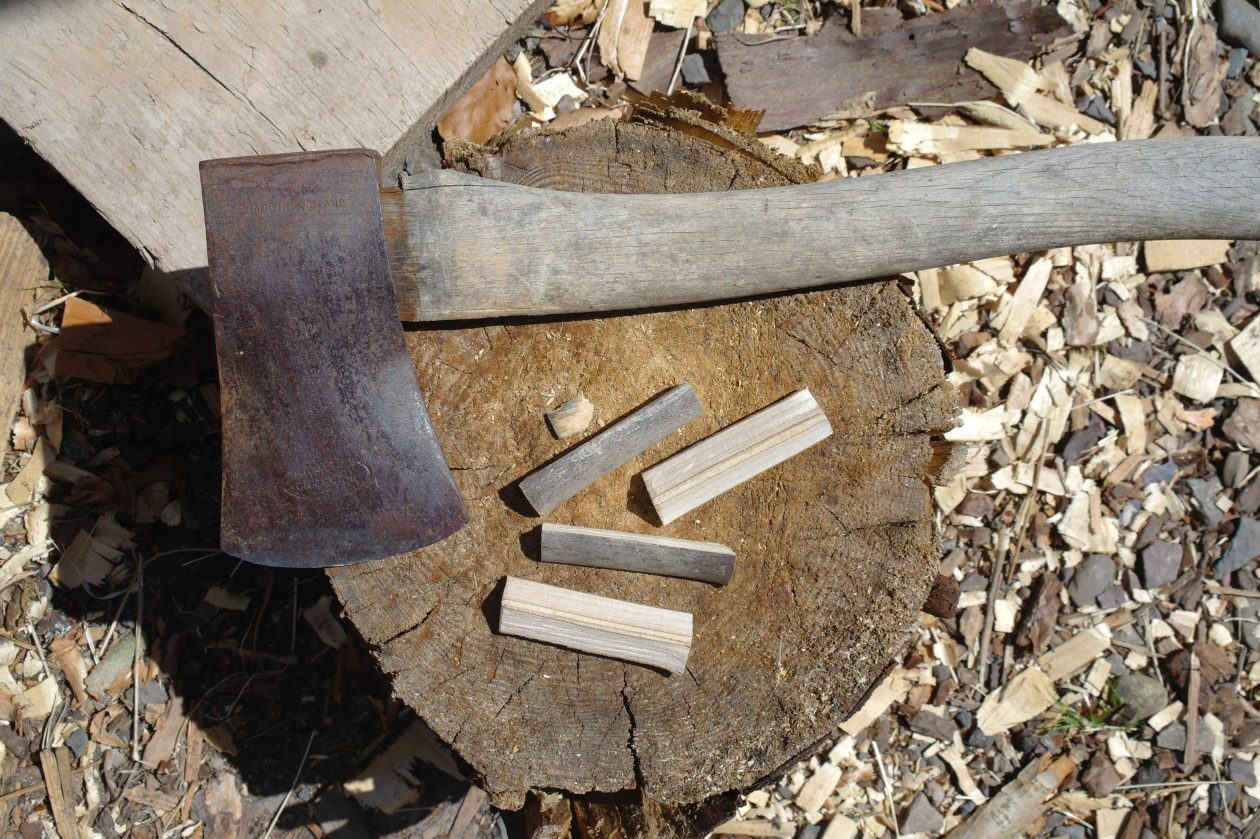

Trim one end of your small rod or dowel to make it square and flatten it off a little at one side. This is called the fipple and determines the tone of your whistle.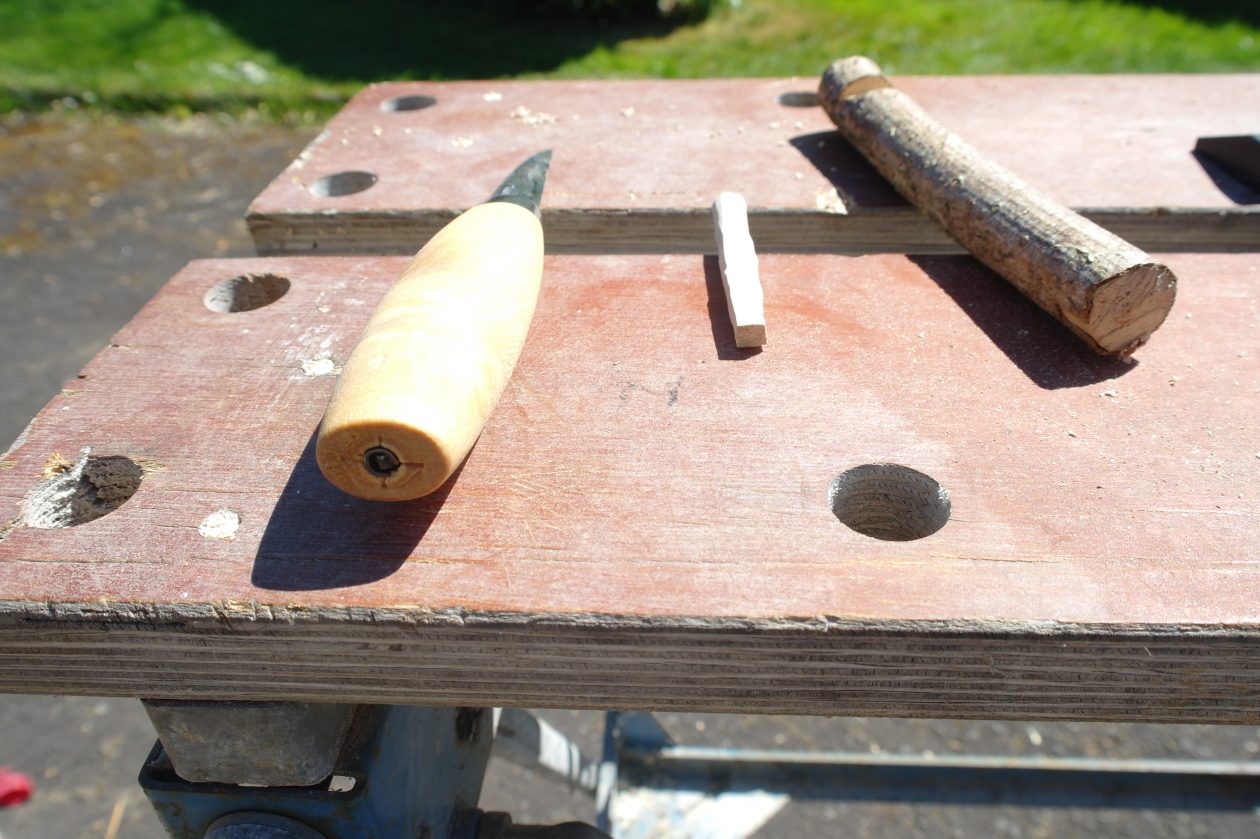
Insert the fipple into the mouthpiece until the square end is level with the vertical cut. It should fit tightly into the hole and there should be a narrow space (the windway) in between the flat side of the fipple and the hole.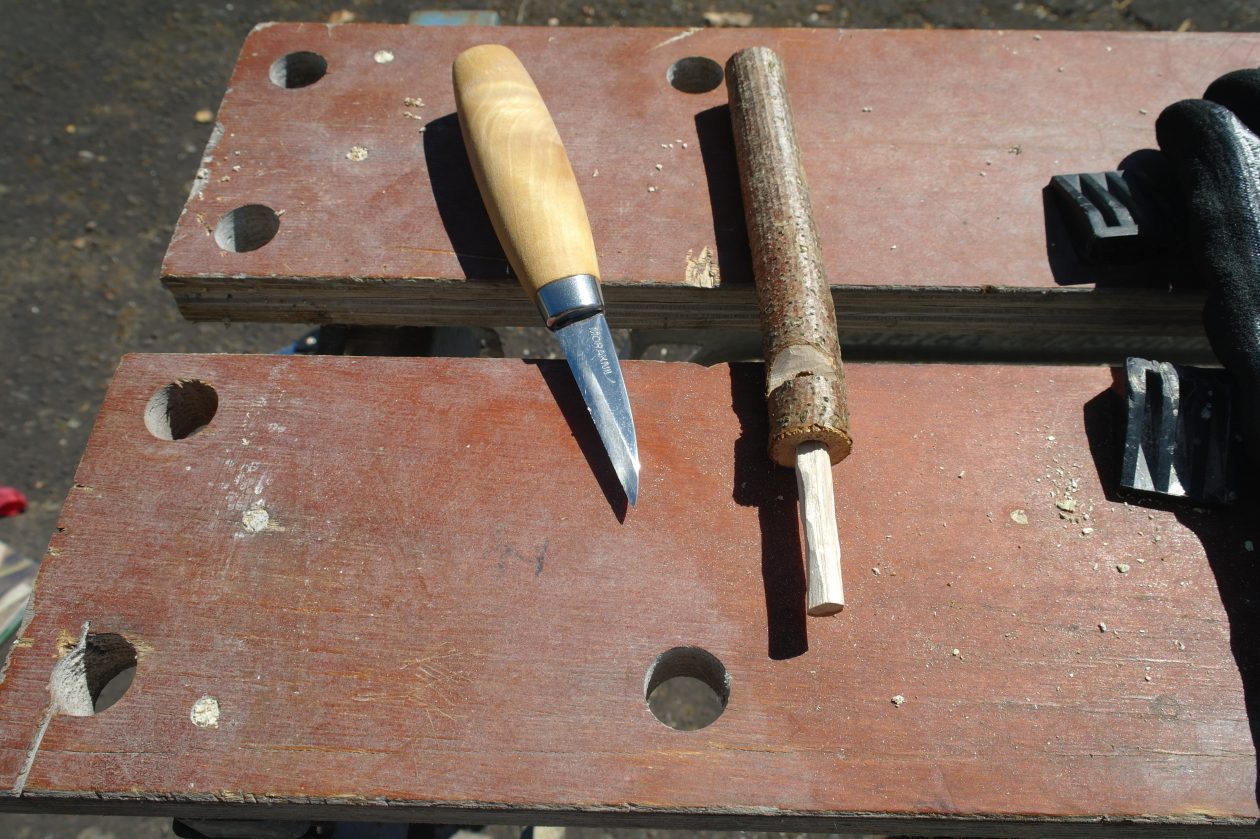
You can now try your whistle, adjusting the fipple until you get the sound you want. You may have to clean up any rough edges around the hole with sandpaper and fiddle about with the fipple before you get it right. Once you are happy with the sound, carefully, trim off the end of the fipple so that it is level with the end of the whistle (I used my saw for this).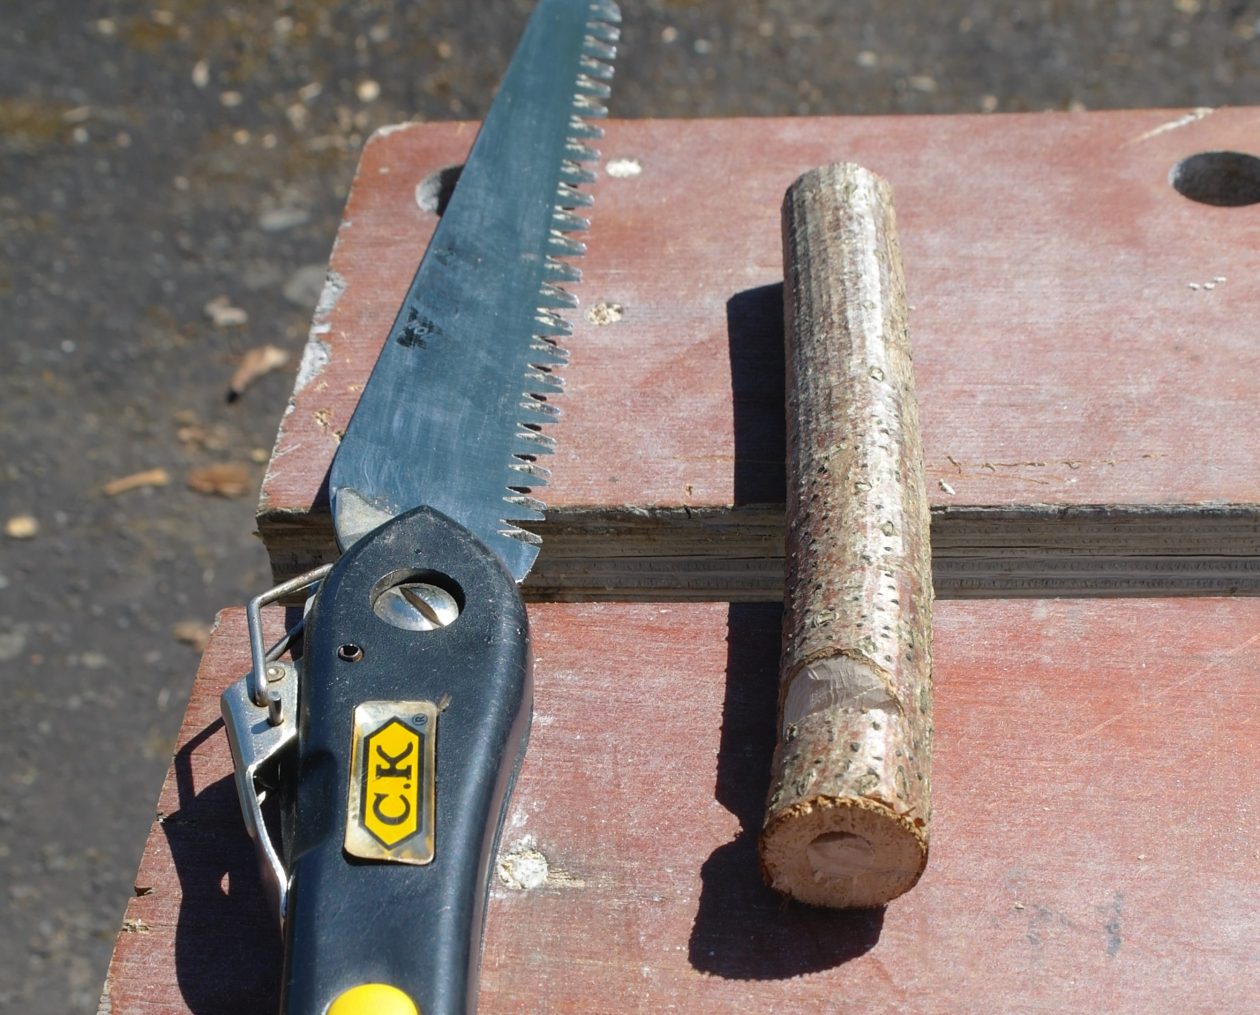
Shape the mouthpiece so that it is comfortable, ensuring that you don’t break into the drilled hole.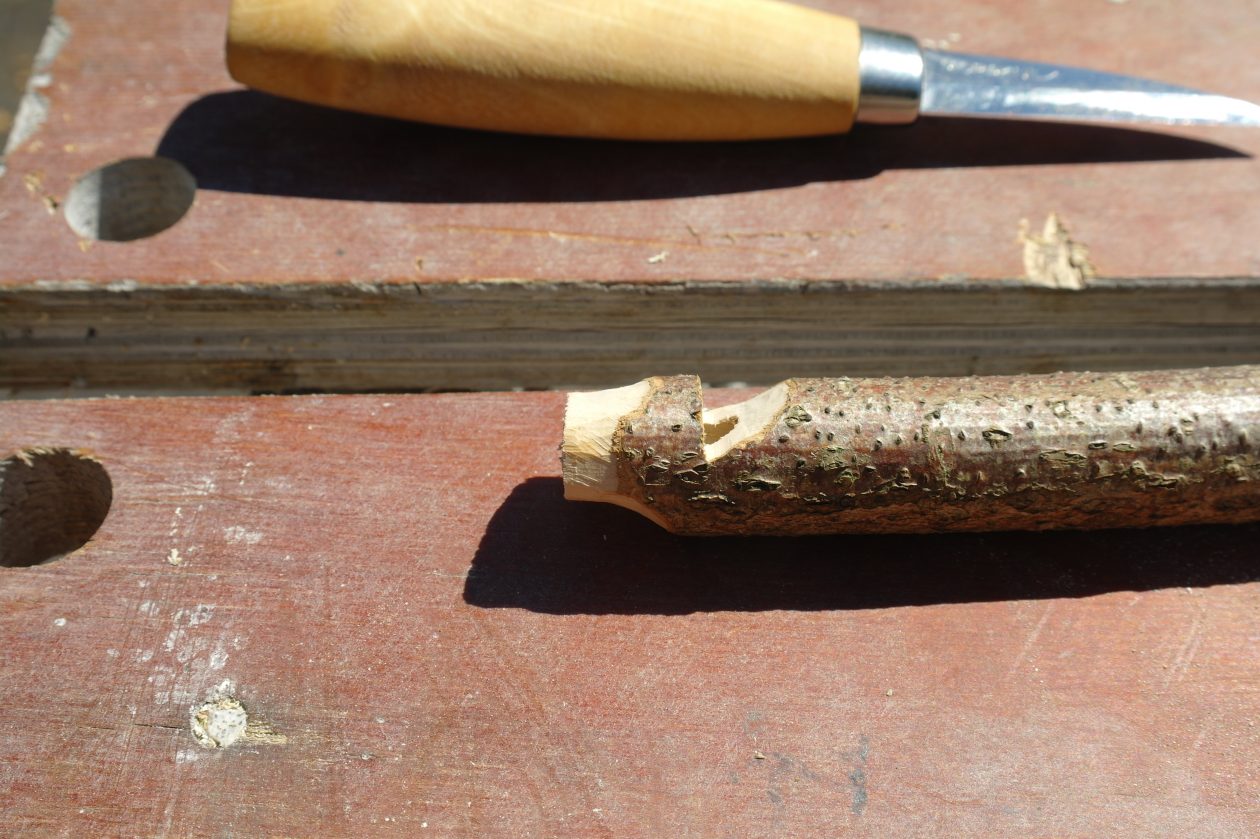
If you like you can cut your whistle to the length you want, trim the end and drill a hole to fit a keyring. Finish with a coat of olive oil or varnish.