
Although this walkthrough is for Windows PCs or laptops, it is similar on other devices.
The best way to access Microsoft Teams on a Windows Laptop or PC is through the app. This can be installed in Windows by clicking on the search bar at the bottom left of the Destop screen and typing Teams into the bar, or on a tablet or phone device by finding it in the App Store for that device.
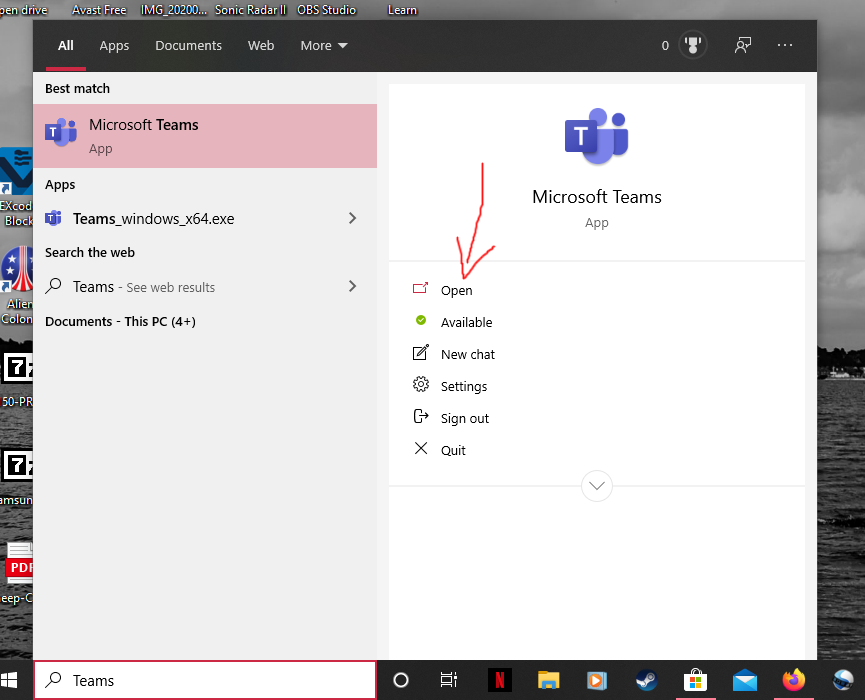
Screenshot 1
Click on search and see if it already installed as an App. If not, open the Microsoft Store (search for this in the same search bar if you are not sure where to find it) and search for Teams from there.
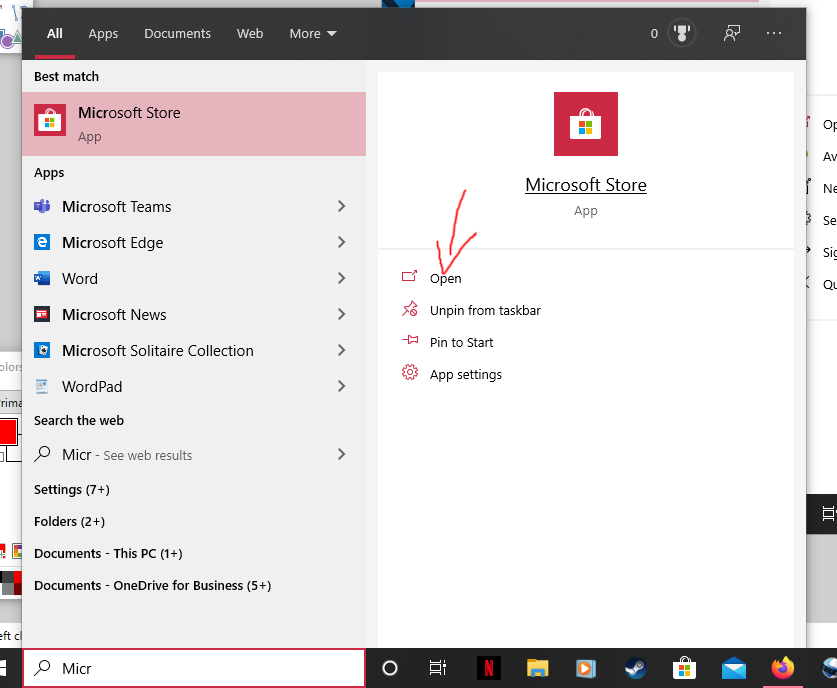
Screenshot 2
If you are accessing it for the first time you will have to log in with the Glow username (with the @glow.sch.uk after it) and password.
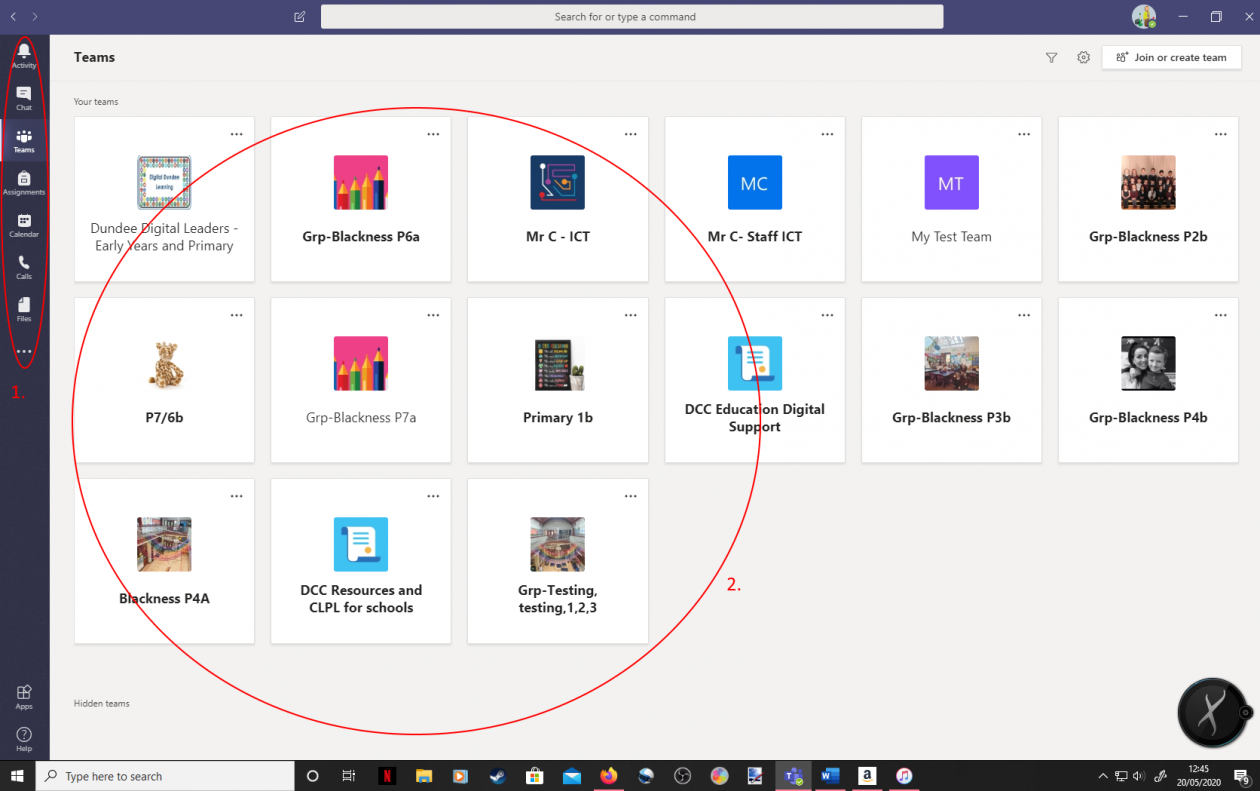
Once open Teams looks like this (Screenshot 3, below) with options down the side. These include:
- Activity – Where you will find any activity relating to the Teams you are in.
- Chat – Any private Chats you are a part of
- Teams – Where you will find any Teams you are a part of
- Assignments – Collates all the Assignments that have been allocated to you
- Calendar – Meeting will be automatically added in here, but you can add you own dates in here, for example family birthdays, assignment deadlines etc. You can set a reminder, so it pops up in your “Activity” section nearer the time to remind you.
- Calls – Adults only
- Files – This gives you access to files that have been uploaded in Teams that you have access to, but also access to your One Drive Cloud Storage in Glow. This allows you to store at least 1 Terabyte of data. This is HUGE, almost unlimited if you are working with Word documents, photos etc
On a Tablet or Phone app these options are lined up along the bottom but have the same functionality.
To access a Team, click on the Team icon on the left -hand side. Sometimes you have to click a couple of times to get back to the main Teams selection. Then click on the Team you want to access.
Screenshot 3
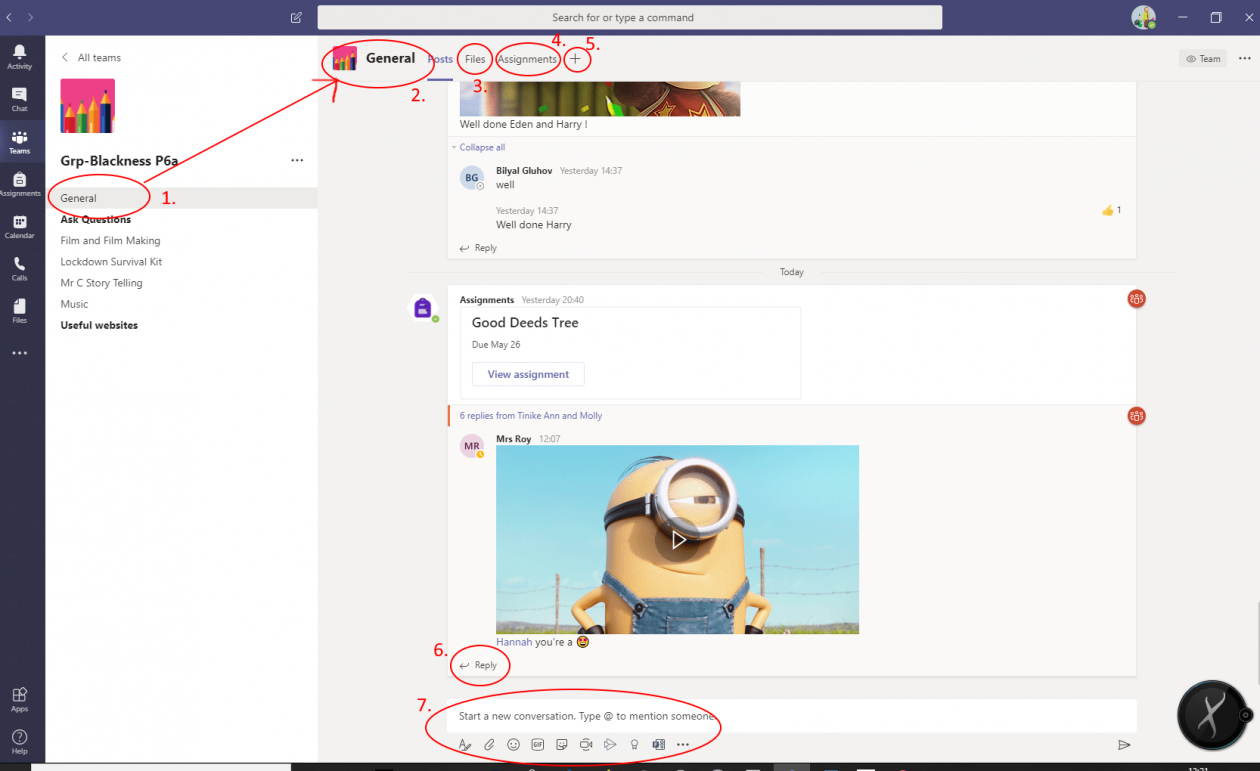
When you are in your Team it will look a bit like this (Screenshot 4, below) with Channels down the left-hand side and Tabs across the top. The Channels are the pages in the Team and each Channel has at least two Tabs.
Screenshot 4
This Team has the General Channel selected (1) and therefore, along the top, we can see the General Channel Tabs (2, 3, 4, 5). The Posts Tab is the Tab you start off with in each Channel. This is where the chat happens, or information about that Channel is shared.
- Files (3) is where any files or documents for the Channel are stored.
- Assignments (5) is where pupils will find Assignments that have been allocated to the Team. This Tab can only be found in the General Channel of a Team.
- Depending on the size of your screen, or if you are zoomed out or not, you may see other Tabs, or you may see a plus symbol (5). Clicking on this can let you see the other Tabs (if there are more) in a drop-down menu.
You can get back to any of the Tabs simply by clicking on the Tab name at the top. Back in the Posts Tab you have two options, reply to a previous conversation (6) or Start a new conversation (7). Only start a new conversation in a Channel if it is something that has not already been said. This keeps the group chatter neat and tidy. Sometimes your teacher will lock the chatter in the General Channel to keep the first page just for important announcements (e.g. Assignments being issued) and allow chatter to happen in the other Channels within the Team.