Author: Miss Abercrombie

Falkirk Digital Learning Leadership Week

Digital Learning Leadership Week (26th to 30th May 2025) is focused on developing and enhancing digital learning leadership across our education establishments in Falkirk. Through a series of events, including digital partners and guest speakers, we’ll explore strategies, approaches and tools to help us meaningfully integrate technology into teaching and learning to improve learning outcomes and experiences for children and young people.

This week is about creating the time and space to collegiately discuss, explore, share and develop the ways in which we can lead the leverage digital tools effectively, to improve educational outcomes for our students and equip them with the confidence, skills and knowledge needed to thrive in an ever-changing, fast-paced digital world. From strategic school leadership level, to classroom based leaders of learning – there are events for everyone over the course of the week.

What’s on?

Google Discovery Day: Leading Digital Learning

Time10am – 3pm • Location: Forth Valley College

Audience: Senior leadership/digital leads in all sectors

Description: Join Canopy and Google for Education to explore how school leaders can effectively lead digital learning in their establishment to improve student outcomes. The session emphasises strategic and pedagogical approaches and innovative uses of technology. Hear inspiring stories from local schools who have successfully implemented digital learning strategies, overcome challenges and are having an impact on learners and learning. Explore how to leverage technology to enhance teaching and learning, and ultimately, drive student success.

Your school does not have to be actively using Google Workspace for Education to attend, the session focuses on leadership of digital learning. Lunch is provided at this event.

Day Overview:

This full day workshop aims to equip school leaders with strategies and frameworks to effectively lead the consistent and meaningful use of digital learning tools in their schools, particularly in relation to Google Workspace use on iPad. Sessions will have a Google focus, but strategies shared could be applied in any school setting. The day will be split into four parts consisting of:

Your Reality – Usage, Impact & Potential: Participants will reflect on their school’s current usage of digital tools, identify barriers to best practice, and potential for improving provision.

Defining Success – Powerful and Effective Workflows: This section focuses on agreeing upon core workflows that support school priorities and balancing consistency with pedagogical freedom. We will introduce Google’s Gemini AI tool in this session. 

Leading the Change – Supporting Staff & Embedding best practice: Practical strategies to support staff in adopting and embedding Google Workspace effectively will be discussed, including the use of Google tools for leadership and planning professional development.

Learning from the Field – Effective Leadership in Practice: Participants will hear real-world examples of leading Google Workspace implementation from local peers in a Q&A panel format.

Sign up here.


Teaching and Learning Using Google on iPad

Time: 10am – 3pm •  Location: Grangemouth Town Hall

Audience: Classroom teachers, faculty heads and SLT in all sectors.

Description: Join Canopy and Google for Education in this professional development day for classroom teachers who lead learning in their classroom every day. Focused on enhancing your teaching and learning using Google Workspace tools. Find solutions to your questions about AI, digital pedagogy and practice. Discover tips and tricks to reduce your workload using Google tools to maximise productivity and lead change in your setting from the ground up.

Your school does not have to be actively using Google Workspace for Education to attend but this session does focus on Google tools, please ensure you have logged into Google Workspace via Glow (including checking you have access to Google Gemini) and accepted the terms and conditions prior to attending this session. This session is perfect for those already using Google Workspace who wish to delve deeper into the tools or those who are interested in using Google Workspace to get hands on and discover what is possible. Lunch is provided at this event.

Day overview

Today is all about maximising impact using Google Workspace and your iPad in the Classroom. Join us for a practical, hands-on workshop focused on getting the most out of Google Workspace and iPads in your classroom. This day is designed for teachers who want to enhance learning, save time, and create inclusive learning environments using technology. Here’s what you can expect:

Session 1: The Connected Classroom – Mastering Google Classroom on iPad:

  • Learn to navigate the Google Classroom app on the iPad efficiently.
  • Discover how to create and manage assignments using the iPad, incorporating photos, videos, and annotations

Session 2: Engaging Learners – Dynamic Formative Assessment & Feedback with Google on iPad:

  • Explore using Google Forms for quick quizzes, exit tickets, and feedback.
  • Learn to provide timely, effective feedback using iPad annotation tools and Google Docs/Slides features.

Session 3: Inclusive Practice – Supporting Every Learner with Google on iPad Accessibility:

  • Learn to leverage Google Workspace and iPad accessibility features to support students with diverse needs.
  • Discover how to adapt assignments and materials for differentiation.
  • Explore tools like Google Keep and Calendar to aid organization for learners.

Prerequisites: Please bring your iPad with the necessary Google apps (Classroom, Drive, Docs, Slides, Forms, Keep) installed and logged into your Glow/Google Workspace account.

Sign up here.

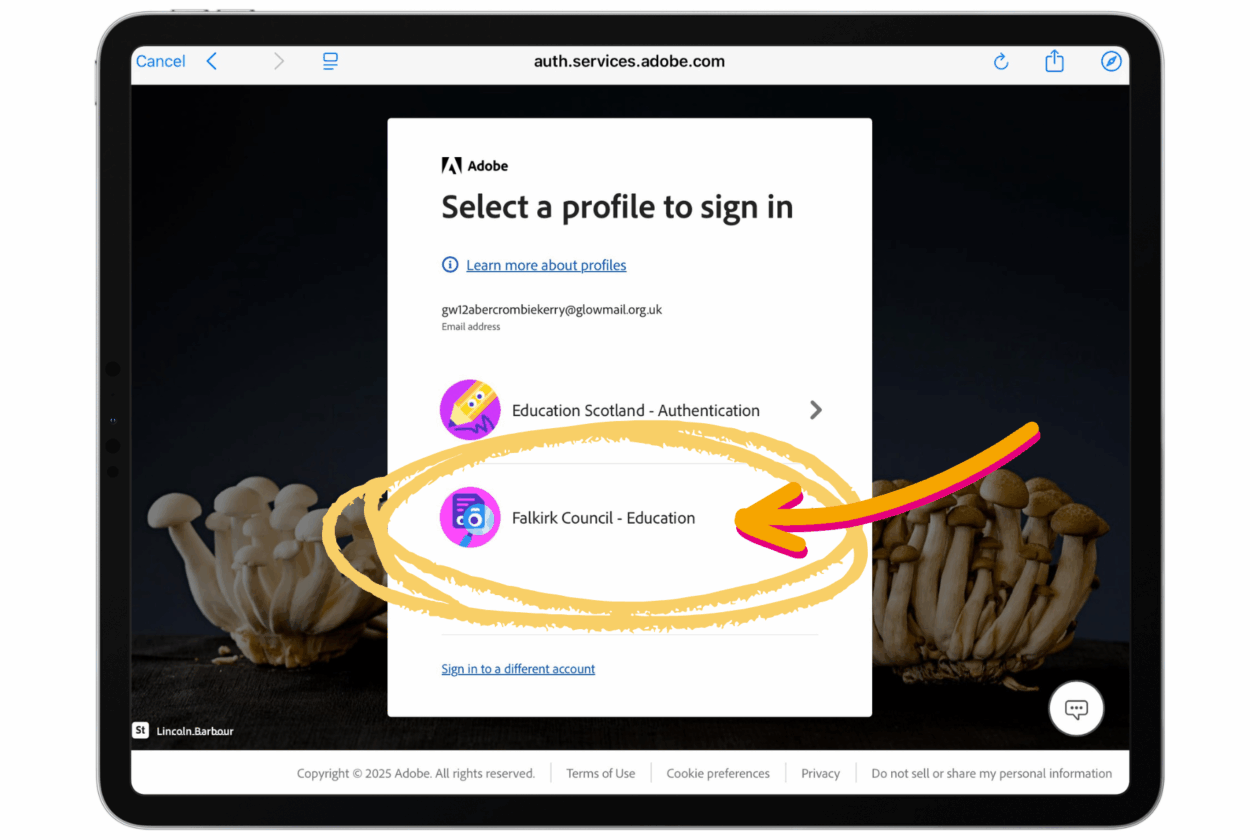
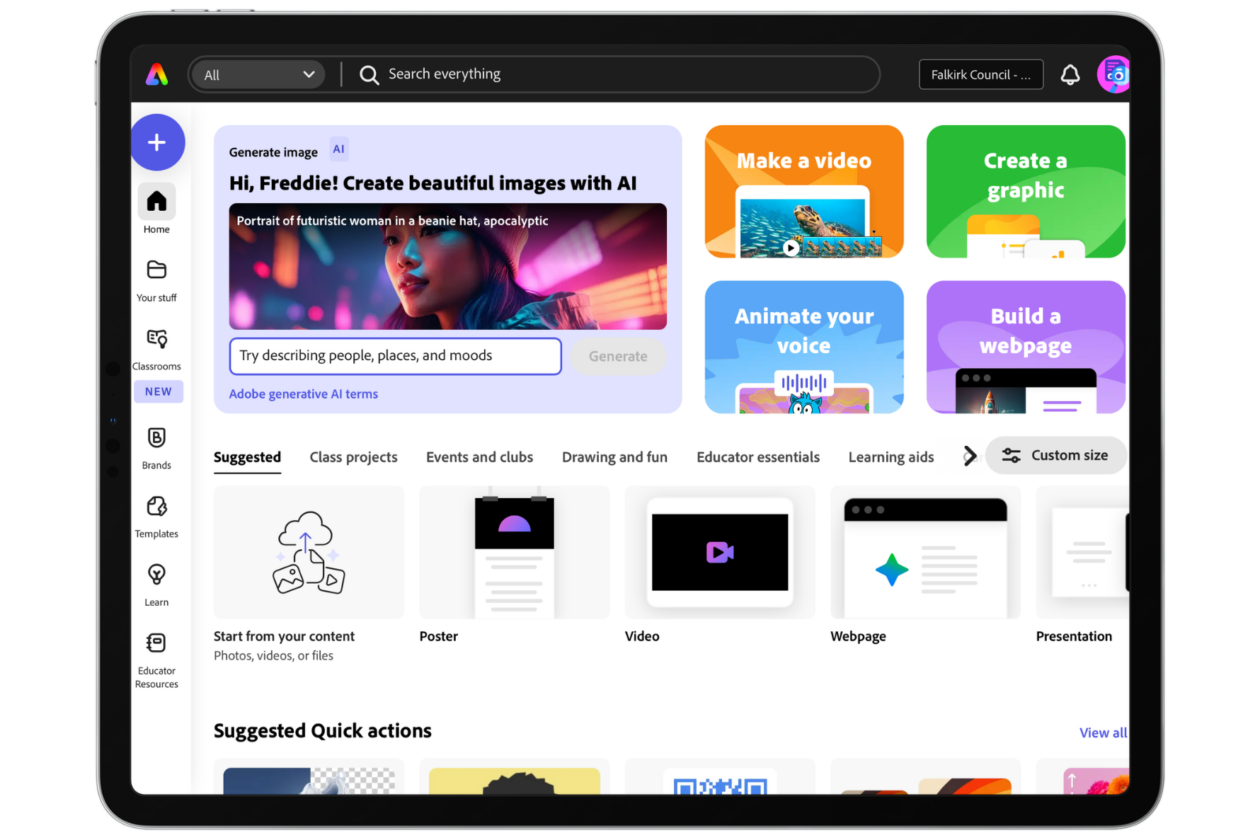
Adobe x Falkirk: Adobe Creative Educator and AI Tools in Express

Time: 4pm – 5.30pm • Location: Online

Audience: Educators in all sectors.

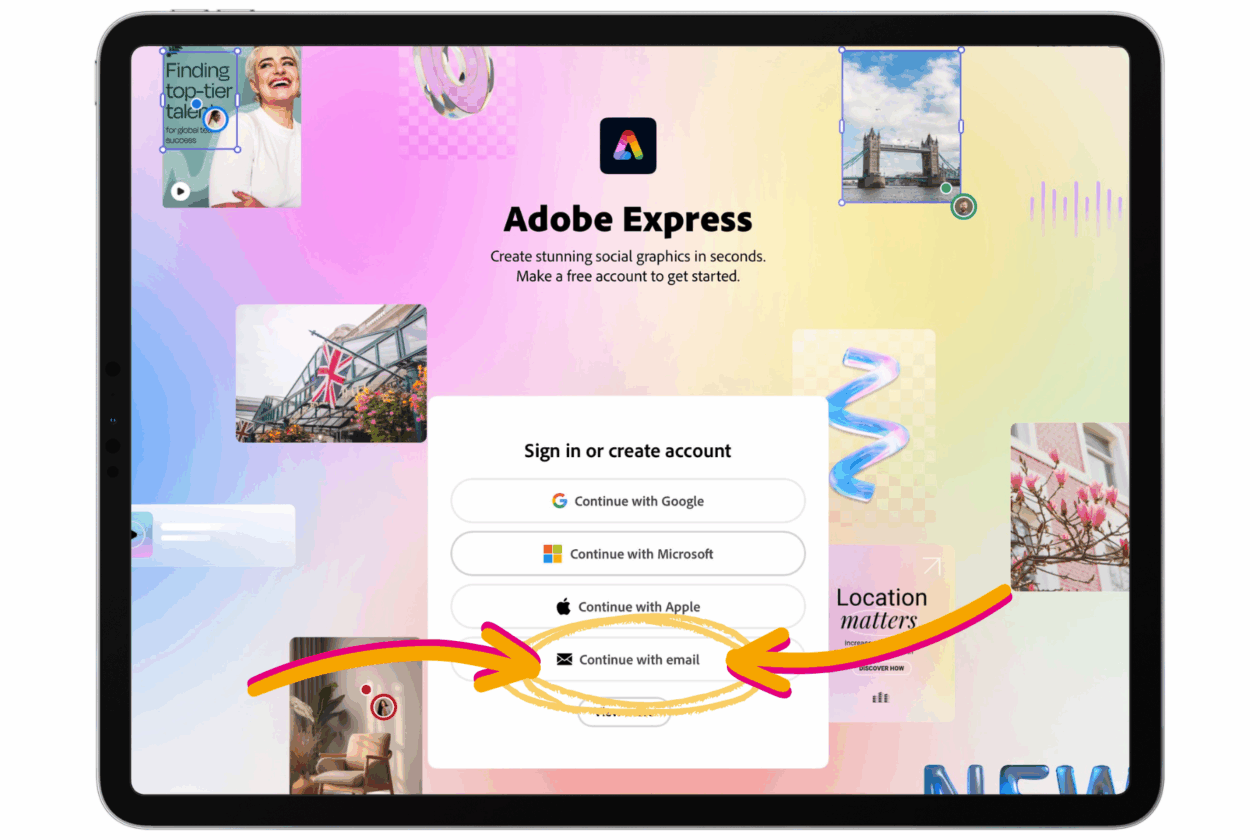
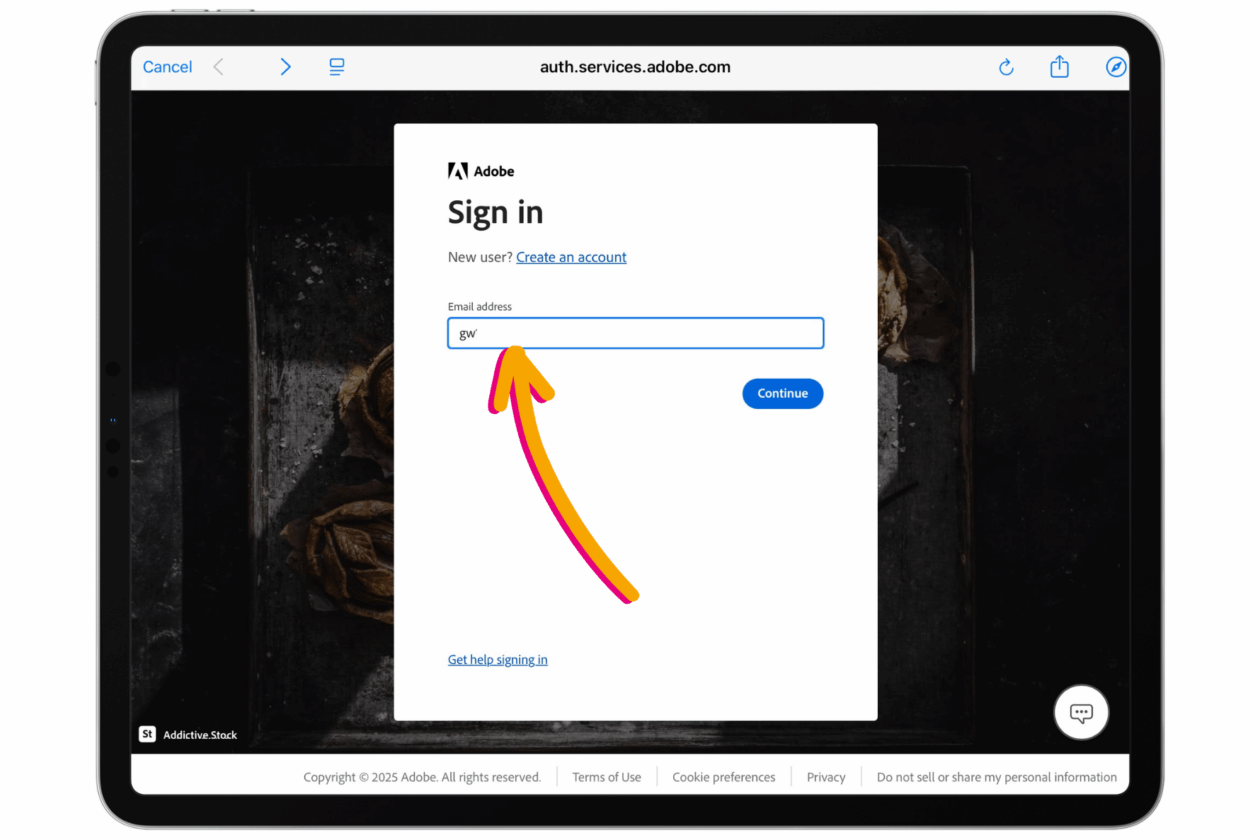
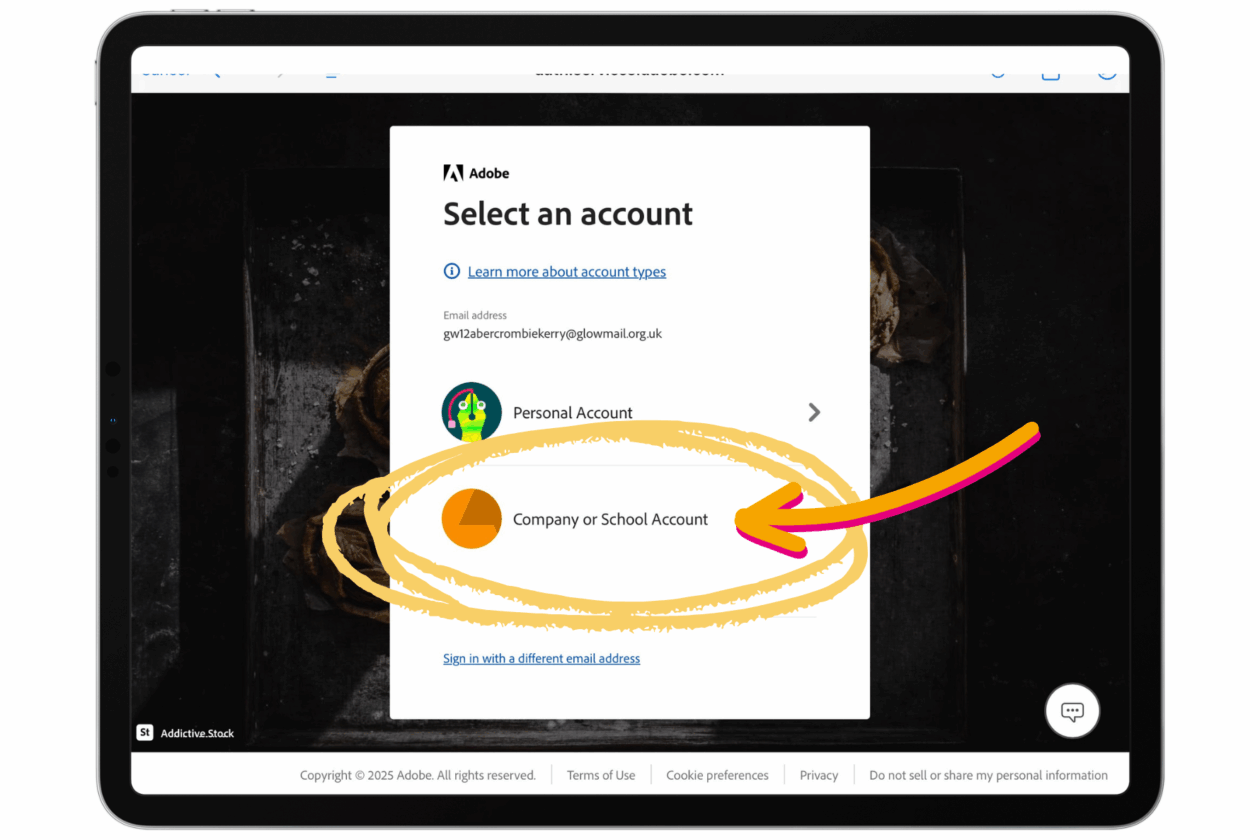
Description: Calling all creative teachers! This session is for our classroom teachers who value creativity, imagination and self expression in the classroom. Explore Adobe Express and find out how it can be used to encourage and inspire creative projects where learners can show what they know, explore ideas and tell their stories. Get to grips with exciting built in AI features including AI image generation. Become a certified Adobe Creative Educator Level 1 and become a creativity leader in your school. All Falkirk teachers have access to Adobe Express via Glow on iPad (app) and desktop (browser) – make sure you have logged in prior to the session.

Sign up.

Heads of Establishment Conference: Digital Leadership

Time: 9.15am – 2.30pm •  Location: Forth Valley College

Audience: Head Teachers and Heads of Centre in ELC, primary and secondary.

Description: The focus of this Heads of Establishment Conference is digital leadership. Join Dan Fitzpatrick – educational strategist, author and international keynote speaker on artificial intelligence in education – for a morning keynote on navigating the changing landscape of education. Learn the “Three Box Solution” to drive innovation and develop future-ready leadership skills.

Participate in hands-on workshops with Dan Fitzpatrick and our local Digital Learning Team focused on AI leadership as well as time to collaborate with colleagues on the Agile Leadership work we are currently exploring with Dr. Simon Breakspear. 

The afternoon culminates in a session with Professor Steve Munby – a world-leading authority on leadership and on system reform focusing on building future-ready schools

No sign up required. Confirm attendance in line with usual practices for HOE Forum.

Prep the machine: writing AI prompts for teachers with Dan Fitzpatrick

Time: 3pm – 4pm • Location: Larbert High School

Audience: Classroom teachers in primary and secondary (limited spaces)

Description: Looking to level up your prompt engineering and truly leverage the power of an AI assistant? Join educational strategist and author of “The AI Classroom,” Dan Fitzpatrick, for this intimate and interactive workshop on crafting powerful AI prompts. Learn the PREP framework to get the most out of AI tools. Discover how to write prompts that generate engaging lesson plans, personalised learning materials, and innovative assessment tasks. This hands-on session will equip you with the skills to effectively integrate AI into your teaching practice. Don’t just use AI, master it and lead the way with prompt engineering in your school. Limited places available.

Sign up here.

The AI Classroom with Dan Fitzpatrick

Time: 4:15pm – 5:15pm • Location: Larbert High School

Audience: Classroom teachers, faculty heads and SLT in all sectors.

Description: Ready to ride the AI wave instead of being wiped out by it? Join educational strategist Dan Fitzpatrick, author of “The AI Classroom,” for an inspiring session on revolutionising learning with artificial intelligence. Discover how AI can free up educators to focus on critical thinking, understand its disruptive potential, and learn practical ways to harness its power today. Explore advanced AI and its implications for education. This isn’t just about tech; it’s about transforming the learning experience. Sign up now and prepare your students for the future.

Sign up here.

Borrowbox

BorrowBox is the digital library for Falkirk schools. Thousands of eBooks and eAudiobooks at your fingertips.

🔍 What does it do?

BorrowBox is a digital reading platform provided by the Falkirk Learning Resource Service. It allows pupils across the Falkirk to borrow and download digital books and audiobooks for free. Just like a physical library, pupils can browse the “shelves,” reserve popular titles, and return books when they are finished – all through the app on their iPad or via a web browser.

🎓 Why is it useful?

  • Instant Access to Choice: Pupils have access to a huge range of titles that might not be available in their physical school library, from the latest bestsellers to classic curriculum texts.

  • Support for Dyslexia and Visual Impairments: The eBook reader allows pupils to change the font (including a dedicated OpenDyslexic font), adjust text size, and change background colors to make reading more comfortable.

  • Audiobooks for Literacy: Audiobooks are a fantastic way to improve vocabulary and listening skills. Pupils can listen to stories while they follow along with a physical book or use them to access complex stories that might be above their current reading level.

  • Offline Reading: Once a book is downloaded, it can be read or listened to without an internet connection – perfect for reading at home or on the bus.

  • No Late Fees: Books are returned automatically at the end of the loan period, so there is never a worry about “overdue” items!

⚙️ How does it work?

1. Launch: Open the BorrowBox app on your iPad or find the Bolinda BorrowBox tile on your Glow Launchpad.

2. Sign In: Users sign in using their Glow credentials, see below for specific login guides:

Logging in on iPad

Open the Borrowbox app. Next to ‘Library’ choose ‘Falkirk Learning Resource Service’ (hint if you start typing a drop down list will appear where you can select it without typing in the whole thing).

Next to ‘username’ type in the first part of your Glow username followed by @glow (i.e. gw22falkirkfreddie@glow). Type your usual Glow password and press ‘Sign in’.

You will be asked to accept the terms and conditions of Borrowbox. Choose ‘Agree’ in the bottom right hand corner.

The first time you log in you’ll be asked to complete your registration. Fill in the ‘Email’ box with your full Glow email. Use your first name as your ‘Display name’. Select ‘Done’ at the bottom of the screen.

You can now use Borrowbox. Next time you log in follow the same process (you will not have to do the complete registration process again).

Logging in on Browser

Log into Glow as normal and select the Borrowbox tile from your school launch pad. Borrowbox should open in a new tab with you logged in. You may be asked to ‘Complete registration’. Add your Glow email, choose a display name and tick the terms and conditions box. Choose ‘Complete Registration’.

You should then be taken to the main Falkirk Learning Resource Borrowbox home page where you can begin using the service.

3. Search & Browse: Use the “Search” tab to find a specific author or the “Explore” tab to see themed collections (e.g., “First Level,” “New Releases,” or “Picture Books”).

4. Borrow: Tap on a cover and select ‘Borrow’. You can have up to 2 eBooks and 2 Audiobooks on loan at any one time.

5. Listen & Read: Your borrowed items appear in the ‘My Loans’ section. Tap a book to start reading or listening instantly.


🚀 Beyond the Basics

  • ERIC Time: Use BorrowBox as a digital alternative during “Everyone Reading In Class” time. It ensures every pupil has something they want to read, even if they forgot their physical book.

  • Customising the Experience: Show pupils how to tap the ‘Aa’ icon in an eBook. They can change the line spacing and font to suit their specific needs, helping to remove barriers to reading for pleasure.

  • Sleep & Relaxation: Audiobooks can be a great tool for “wind-down” time. The app includes a Sleep Timer that automatically stops the audio after a set time (e.g., 15 or 30 minutes).

  • For Modern Languages: Look for the “World Languages” section to find eBooks in different languages, supporting pupils with EAL or those learning a second language.

  • eMagazines: BorrowBox also provides access to digital magazines. Use these for non-fiction reading tasks or to keep up with current events and STEM news.

Adobe Express: Logging In

Adobe Express is available to use for all Falkirk staff and pupils via Glow. This article takes you through how to access Adobe Express on Connected Falkirk iPad and the sign in process. You can share this with learners to support their login. Once you have logged in on your iPad your app will stay logged in unless you delete the app or choose to sign out – for this reason the app can only be used on 1:1 iPads at the moment or in a browser on a desktop computer.

Please note that your iPad must be on iOS17 or above to run the Adobe Express app.

.

Before you start

The Adobe Express app is required on iPad. Although you launch Adobe Express from Glow on a browser (via the tile in Glow) you cannot use Adobe Express in Safari, Chrome or any other mobile browser on a mobile device including tablets. Adobe Express is available via Glow on desktop and laptop computers through the internet browser – there is more on this at the end of the article.

Teachers in Falkirk should request the iPad app for their pupil and staff app portals by emailing connectedfalkirk@falkirk.gov.uk as per the usual process.

.

Logging in

  1. Ensure you have downloaded the Adobe Express app from the Connected Falkirk App Portal. Open your Adobe Express app.

.

2. Choose ‘Continue with email’ to access your education Adobe Express account via Glow email.

.

3. Type in your Glow email address. When you hit ‘Continue’ the Glow login page will launch, type in your Glow username and password.

.

4. When prompted choose ‘Company or School Account’. Do not choose ‘Personal Account’, if you choose personal account you will not have access to the Adobe Express Education benefits and features. 

5. When prompted choose ‘Falkirk Council – Education’. Do not choose Education Scotland, if you choose Education Scotland accidentally you should log out using the profile button in the top right hand corner and begin the log in process again.

.

5. Wait for the loading screen to pass. 

.

6. When you first log in there will be two pop ups to resolve by hitting ‘ok’ and ‘continue’.

.

7. You are now logged into Adobe Express and you can begin creating!

Using Adobe Express on desktop or laptop

Adobe Express is also available on desktop and laptop computer via internet browser. To log in:

  1. Open your web browser
  2. Go to Glow
  3. Log in to Glow using your Glow username and password.
  4. In the Falkirk Council launch pad click on the Adobe Express tile.

Case Study: Improving Writing with Digital Technologies

This case study looks at how class teacher Ciara Hutton at St Francis Xavier’s RC Primary School explored the impact of integrating digital technology into primary school writing lessons. By allowing three students with varying writing challenges to type their work, the Ciara observed significant improvements in confidence, writing quality, and engagement. This successful intervention has led to the wider implementation of digital tools within her classes and has been shared with the wider school supported by Pupil Digital Leaders.

Context

“My main goal was to improve attainment in writing by introducing digital technology. I had a class of 33 pupils in the upper school and I found that they did not feel confident in their writing. I selected three pupils who did not have any specific learning needs but did require some support with writing. One learner found concentrating at a table with others difficult, another found handwriting challenging and one struggled to write quickly for long periods of time. We are not a 1:1 device class so I decided to use a combination of class PCs and our shared Connected Falkirk iPads to give the pupils the opportunity to type their writing. This was to not only build confidence but remove any literacy barriers from their ability to succeed in writing.”

What did you do?

“I had a rota which rotated the devices used by the pupils over the course of four weeks. They would type directly on to Word and then save these on a OneNote, which was shared with myself and someone at home. Pupils did require some training at first on how to edit and save their work but they were confident with this by week 2.

During this time I collected my findings in 3 different ways, though a baseline questionnaire, a Leuven Scale and document analysis. The questionnaire was to uncover learners’ attitudes to writing and their confidence with the subject. The Leuven Scale was to determine if they were more focussed when given the device.

Finally I conducted a document analysis to see if there was improvement in learner work. After the four week period, I decided the whole class would benefit from the opportunity to write on a device and so I created a randomiser wheel in which pupils would be selected and all pupils would be given the chance to type by the end of the year. This allowed me to see the writing ability in the class as a whole and offer the opportunity to engage with digital devices for writing to all learners.”

Learners used Word to write. Word Online is available to all Falkirk Council learners through their Glow account. 

OneNote and OneNote Class Notebook are also available to all learners through Glow.

What was the impact?

“Overall, I saw a large increase in learners’ confidence and understanding of writing. Learners could see the increase in the quality and quantity of their writing, as they could see the progress from week 1 to week 4.

When pupils then returned to writing in their jotters, the skills they had gained had transferred. They were more confident with editing and reading their writing and they were writing similar amounts to week 1.

The questionnaire found that children felt more confident in their work and enjoyed the ability to do further research while writing. The Leuven Scale showed that pupils enjoyed the opportunity to write in a different way and focussed more as a result. The document analysis showed an increase for all 3 children in the length of their writing and the clarity on what they were saying. We did have to discuss the risks of plagiarism and how all ideas must be their own. However this was a useful opportunity to inform all pupils about this.

The findings suggest that the use of digital technology can improve attainment in writing. Although time still needed to be given for handwriting, introducing typing as a form of writing allowed pupils to focus their time on creative writing skills. I also found my ability to mark and give specific writing feedback improved, as I could clearly see their successes and areas of improvement.”

Pupil Voice

My baseline questionnaire had stated that the learners found writing “hard and bad”, whereas the final questionnaire stated that they thought that writing could be “exciting” and they were “able to use imagination more.”

The Leuven Scale which showed an increase in pupil overall, with the only decreases being due to some issues with using the new technology at first. Overall their focus and enjoyment increased through the four week period.

Where next?

“The immediate next steps I took were to offer all pupils one opportunity a year to write using digital technology. This allowed me to assess their writing ability without literacy barriers and for learners to see their progress clearly. I also continued to assess and monitor the three pupils within the focus group to see if they were able to transfer and maintain the skills they had gained during this practitioner enquiry. I found that they were able to transfer back to their writing jotters and had more confidence with their writing.

Since this practitioner enquiry, I have begun teaching another class and I have used this approach straight away. I have used a randomizer wheel so that all pupils have had the opportunity to use these tools, and not just those with specific learning needs. I have also trained the Digital Leaders within the school to be able to support other learners with writing on Word and uploading documents to One Note, so that other teachers may try this approach in their own class.”

Google Classroom

Google Classroom: The central hub to manage, distribute, and grade classwork in one place.

🔍 What does it do?

Google Classroom is a free web-based platform that brings all your teaching materials together. It replaces the traditional “paper trail” by allowing you to post announcements, set assignments, and collect work digitally. It automatically organises your files into folders in Google Drive, making it impossible for students to “lose” their homework. In Falkirk Google Classroom is used as a Virtual Learning Environment which is a digital extension of the physical classroom.

🎓 Why is it useful?

  • Centralised Communication: Use the Stream to post daily agendas, reminders, or discussion prompts. It keeps your class informed without cluttering their inbox.

  • Paperless Workflow: When you create an assignment, you can choose to “Make a copy for each student.” This automatically gives every pupil their own Doc or Slide to work on – no more photocopying!

  • Real-time Feedback: You can see student work as they are doing it. You don’t have to wait for them to “hand it in” to leave a helpful comment or nudge them in the right direction.

  • Streamlined Grading: The Grades tab gives you a birds-eye view of who has submitted work, what is missing, and how the class is performing overall.

⚙️ How does it work?

  1. Launch: Open the Google Classroom app on your iPad or login to Google Classroom on your internet browser.

  2. Sign In: Use your Glow email (e.g., gw15smithjohn@fa.glow.scot) and use your normal Glow password.

  3. Create a Class: Tap the ‘+’ icon and select ‘Create class.’ Give it a name like “P6 2025/2026” or “Mr F – S2 Science.”

  4. Invite Students: Share the unique Class Code with your pupils. They enter this code on their iPads to join instantly.

  5. Create Assignments: Tap the ‘Classwork’ tab and then the ‘+’ icon. Choose between Assignment, Quiz, Question, or Material.


🚀 Beyond the Basics

  • Discussion Forums: Use the ‘Question’ tool to post a debate topic (e.g., “Should school uniforms be banned?”). Students can post their answers and – if you enable the setting – reply to their classmates’ points.

  • Exit Tickets: At the end of a lesson, post a quick Google Form as a ‘Quiz Assignment.’ Classroom will automatically show you which pupils grasped the concept and who needs more help tomorrow.

  • Multimedia Resources: Use the ‘Material’ type to post a “Choice Board.” You can attach a YouTube video, a website link, and a Google Doc, allowing pupils to choose how they want to research the topic.

  • Private Check-ins: When students submit an assignment, they can add a ‘Private Comment.’ This is a safe space for them to tell you if they found the work hard or if they are proud of what they achieved.

  • Individualised Assignments: You don’t have to send every assignment to the whole class. Use the ‘All Students’ dropdown to select specific pupils for differentiated tasks or extension work.


💡 Top Tips for Google Classroom

  • The Comment Bank: Save time when marking! You can create a “Bank” of your most common feedback (e.g., “Great use of adjectives!”) and pull them into any student’s work with just a few taps.

  • Scheduled Posts: You don’t have to post your work in real time. Use the ‘Schedule’ feature to prepare your whole week’s lessons in advance; they will appear for students exactly when you want them to.

  • Reuse Post: Don’t reinvent the wheel. If you have a great lesson from last year, use the ‘Reuse post’ feature to pull it into your new class, including all the attachments and instructions.


🔗 Teacher Quick Links

Get Started with Google Classroom for Students – iPad

Get Started with Google Classroom for Students – Latop/PC

A Guide to Google Classroom on Your Connected Falkirk Device

Google Classroom 101 for Teachers

Google Sites

Google Sites: Pull your classroom resources, school event or project information together into one secure, professional website.


🔍 What does it do?

Google Sites is a drag-and-drop website builder. It allows teachers and pupils to create “internal” websites that can only be seen by people with a Glow login or external facing websites easily. 


🎓 Why is it useful for Glow users?

  • Centralised Learning: Instead of pupils searching through Google Drive or Classroom for five different links, you can give them one “Site” URL that contains everything they need for a specific unit or project.

  • Instant Embedding: You can “embed” a Google Doc or Slide directly onto the page. If you update the Doc in your Drive, it automatically updates on the website – no re-uploading required.

  • Student Ownership: It is an incredible tool for Digital Portfolios. Pupils can create their own sites to showcase their best work across the year, choosing their own themes and layouts.

  • Safe Publishing: By default, sites created in Glow are private. You choose whether to keep it visible only to you, your class, or the whole school community.


⚙️ How does it work?

  1. Launch: Open Safari on your iPad and go to sites.google.com.

  2. Request Desktop View: Tap the ‘AA’ icon in the Safari address bar and select ‘Request Desktop Website’ to unlock the full editor.

  3. Create: Tap the ‘+’ icon to start a new site. Choose a Theme from the right-hand menu to set your colors and fonts.

  4. Add Content: Use the ‘Insert’ menu to drag in text boxes, images, or “Layouts” (which are pre-made grids for photos and text).

  5. Publish: Tap the blue ‘Publish’ button. Give your site a name (e.g., “Room4-Vikings”) and check your privacy settings to check who can see it.


🚀 Beyond the Basics

  • Class News Site: Set up a “Class Newspaper” site. Assign different pupils to be “Editors” for different pages (e.g., Sports, Book Reviews, School News). They can type their articles directly into the site.

  • Maths Help Hub: Create a site filled with “How-to” videos and links to interactive maths games. Embed a Google Form at the bottom of the page where pupils can submit “Question of the Day” answers.

  • Unit Dashboard: For a topic like “Space,” create a page for each planet. Embed your class Slides presentation on the first page and a Shared Drive folder on the last page for pupils to download experiment templates.

  • Virtual Classroom: Create a “Calm Zone” site. Embed a Spotify or YouTube playlist of relaxing music, a Google Doc with mindful colouring templates, and a “Check-in” Form for pupils to share their feelings.

  • Visual Choice Boards: Use large, clear images as “Buttons.” Link each image to a different activity or website. This helps pupils who struggle with heavy text to navigate their learning independently.


💡 Top Tips for Google Sites

  • Data Protection: Remember you should not use any personal sensitive information or non-public data in Glow, including in Google Sites! 
  • Layouts are your friend: Don’t struggle with moving text boxes manually. Use the pre-set ‘Content Blocks’ in the Insert menu to keep your site looking neat and professional on both iPads and phones.

  • Version History: If a pupil accidentally deletes a whole page of work, don’t panic! Tap the ‘three dots’ menu at the top and select ‘Version History’ to restore the site to how it looked yesterday.

  • Preview Mode: Before you publish, tap the ‘Preview’ icon (it looks like a laptop and phone). This lets you see exactly how the site will look to a pupil using a mobile phone versus a tablet.


🔗 Teacher Quick Links

How to Use Google Sites

Google Drive

Google Drive, your digital filing cabinet: store, organise, and share your learning from any device.

🔍 What does it do?

Google Drive is a cloud-based storage service. It is where all your Google Docs, Slides, and Sheets are automatically saved. It also allows you to upload photos, videos, and PDFs. Because it is part of Glow, everything is saved “in the cloud,” meaning you can start a project on a school iPad and finish it on any other device.

🎓 Why is it useful?

  • Automatic Backup: There is no “Save” button in Google apps. Everything you do is instantly backed up to Google Drive. You never have to worry about losing work if an iPad runs out of battery or your computer shuts down unexpectedly.

  • Paperless Scanning: Use the iPad camera to scan physical worksheets or hand-drawn posters directly into Drive as high-quality PDFs.

  • Search Mastery: Drive has a powerful search bar. You can search for a keyword (like “Vikings”) and it will find that word even if it’s buried inside a PDF or a handwritten note you scanned.

⚙️ How does it work?

  1. Launch: Open the Google Drive app on your iPad or login to Google Drive on your internet browser.

  2. Sign In: Use your Glow email (e.g., gw15smithjohn@fa.glow.scot) and use your normal Glow password.

  3. The ‘+’ Button: Tap the colorful ‘+’ icon to create new folders, upload photos from your library, or start a new Google Doc/Slide.

  4. Organising: Tap and hold a file to move it into a folder. Use the ‘Star’ icon for files you need to find quickly every day.

  5. Sharing: Tap the ‘three dots’ next to a file and select ‘Share.’ to share files and folders with other Glow Google Workspace users


🚀 Beyond the Basics

  • Digital Portfolios: Create a folder named “Writing Portfolio.” At the end of every unit, upload your best piece of work. By the end of the year, you have a visual record of how much your writing has improved.

  • Observation Logs: If you are doing an experiment, take a photo or short video each day. Save them in a specific Drive folder to create a “Time-lapse” record of your results. Once you have all the images, you can use Slides, Docs or Sheets to create a report.

  • Scanning Sketches: Use the ‘Scan’ feature (tap + in the bottom right hand corner of the iPad add then choose Scan document) to digitise your physical drawings. This makes it easy to put your artwork into a Google Slide later.

  • Offline Mode: If you don’t have Wi-Fi at home, tap the ‘three dots’ on your important files and select ‘Available offline.’ You can keep working on the bus or at home, and it will sync when you get back to an internet connection.


💡 Top Tips for Google Drive

  • Shared with me: This tab can get messy! If someone shares a file with you, don’t just leave it there. Tap the ‘three dots’ and select ‘Add shortcut to Drive’ to put it in one of your own organised folders.

  • Naming Files: Always name your files clearly (e.g., “Maths_Fractions_Jan19”). If you leave them as “Untitled,” you may have trouble finding them again.

  • Trash: If you delete a file by mistake, it stays in the ‘Trash’ for 30 days. Tap the menu (three lines) in the top left to find it and restore your work.


🔗 Teacher Quick Links

How to Use Google Drive – iPad

How to User Google Drive – Laptop/PC

Google Forms

Google Forms: Create surveys, self-marking quizzes, and exit tickets in minutes.


🔍 What does it do?

Google Forms is a web-based tool used to create digital forms. Whether you need to collect evidence of learning, create a quick “Exit Ticket” at the end of a lesson, or build a complex end-of-topic test, Forms handles the collection and organisation of that data automatically.


🎓 Why is it useful?

  • Instant Data Visualisation: As soon as a pupil submits a form, their response is added to a “Summary” tab. Forms automatically creates bar charts and pie charts, allowing you to see class-wide trends at a glance.

  • Self-Marking Quizzes: You can set “Correct Answers” and “Point Values.” Once a pupil finishes, they can see their score immediately, and you get a pre-marked gradebook.

  • Seamless Integration with Sheets: With one tap, you can export every single response into a Google Sheet for more detailed analysis or to use as a class register.

  • Secure and Controlled: You can restrict your form so that only users with a Glow account can respond, ensuring the data you collect stays within your school community.


⚙️ How does it work?

  1. Launch: Open Safari on your iPad and go to forms.google.com.

  2. Sign In: Use your Glow email (e.g., gw15smithjohn@fa.glow.scot) and use your normal Glow password.

  3. Create: Tap the ‘Blank form’ icon or use the ‘+’ button. Give your form a title and description.

  4. Add Questions: Tap the ‘+’ icon in the floating sidebar to add a question. Use the dropdown to choose from Multiple Choice, Short Answer, Checkboxes, or Linear Scales. Add other types of content to your Google Form using the floating sidebar, including video – pssst, if you use a video from YouTube there will be no adverts!

  5. Classroom: If using Forms with Google Classroom you can directly create an assignment that is based in Forms by going to ‘classwork’ > ‘+create’ >  ‘quiz assignment’. From there a blank form will be added, click on the Form within the post to add to/change your Form. You can use an existing Form by deleting the blank Form and using the ‘upload’ button to upload a pre-made Form instead. 


🚀 Beyond the Basics

  • Reading Comprehension: Create a quiz based on a class novel. Use ‘Section Breaks’ to separate different chapters, and add an image of a specific page for pupils to analyse.

  • Daily Mental Maths: Build a 10-question multiple-choice quiz. Enable the ‘Shuffle question order’ setting in the ‘Settings’ tab so that pupils sitting next to each other have their questions in a different order.

  • Observation Logs: If pupils are doing a long-term experiment (like growing a plant), they can use a Form as a daily log. They can enter the date, height, and a brief observation, creating a perfect data set for Google Sheets later.

  • Mood Check-ins: Start the day with a 1-question “How are you feeling?” form. Use the ‘Linear Scale’ (1-5) to let pupils discreetly share their wellbeing with you.

  • Adding Media: Use the ‘Add Video’ icon to embed a YouTube clip (e.g., a short historical documentary). Pupils watch the video and then answer questions below it, supporting those who find heavy text challenging.


💡 Top Tips for the Google Forms

  • Make it a Quiz: Go to the ‘Settings’ tab and toggle on ‘Make this a quiz.’ This unlocks the “Answer Key” feature where you can assign points and provide instant feedback for correct/incorrect answers.

  • Required Questions: Use the ‘Required’ toggle at the bottom of a question to ensure pupils don’t accidentally skip a task before submitting.

  • Response Validation: For “Short Answer” questions, you can set rules (e.g., “The answer must be a number”). This prevents pupils from typing text where you need a numeric value for your data.


🔗 Teacher Quick Links

How to Use Google Forms