Author: Miss Abercrombie

Explore escape rooms in OneNote

So what is a Digital Breakout or Escape Room or Cracking the Code activity anyway?

Cracking the Code to break out and escape in a classroom story scenario by solving the puzzles in a classroom activity – where learners have to solve puzzles in order to get a code for each step to reveal the next puzzle. Read more

MathsBot: online teaching resources

What is it?

MathsBot.com – a series of free online tools, created by Maths teacher Jonathan Hall, which can be used to support teaching mathematics. There are tools to support mathematics teaching at all stages whether primary school or high school. These are designed to be used in a teaching situation where a teacher is using the tools directly with learners to help explain concepts, or to provide interactive activities with a class, a group or individual learners.

Read more

ClassroomScreen

With the free version of Classroomscreen teachers can create instant teacher dashboards. Manage your classroom environment with the tools you need to help the flow of learning.

🔍 What does it do?

Classroomscreen is a web-based tool that puts all your essential classroom management widgets into one browser window. In the free version, you get access to the full library of 25 widgets to project on your whiteboard. While the free plan doesn’t save your screens for the next day, it is the perfect “launch and go” tool for daily routines.

🎓 Why is it useful?

  • Instant Classroom Cues: Use visual symbols (like ‘Silence’ or ‘Work Together’) to set the tone for an activity instantly.

  • Fair Participation: The Random Name Picker and Dice tools ensure every pupil has a fair chance to contribute, supporting the ‘no hands up’ approach to classroom questioning. 

  • Visual Time Tracking: The free Timer and Stopwatch help pupils build independence by managing their own time during tasks.

  • Quick Checks: Use the Poll widget for a quick “fists to five” or “smiley face” check-in at the end of a lesson to gauge pupil confidence using a join code.

⚙️ How does it work?

1. Launch: Open the web browser on your device and go to Classroomscreen.com. You can start immediately without even logging in.

2. Add Widgets: Tap the icons on the bar at the bottom to add tools. You can have multiple widgets on screen at once, just drag them with your finger to reposition.

3. Name Lists: In the free version, you can preload and save up to 3 different name lists (e.g., your three main classes). This saves you from re-typing names every lesson.

4. Annotation: Tap the Draw widget to turn part of your screen into a mini-whiteboard for quick scribbles or diagrams using your finger.

5. Refresh Warning: Be careful in the free version, if you refresh the page or close the tab, your widgets and layout will disappear. Keep the tab open throughout the lesson!


🚀 Beyond the Basics

  • Daily Focus: Use the Text Box widget to display the “Learning Intention” or “Success Criteria.” Since you can’t save screens, keep a document with your prompts ready to copy and paste in quickly.

  • Maths Starters: Open the Dice and Timer widgets. Challenge pupils to solve a mental maths problem based on the dice roll before the timer runs out.

  • Noise Monitoring: Use the Sound Level widget. It uses the iPad’s microphone to show a live bar graph of the volume in the room – perfect for keeping group work at a “whisper” level. Please note, this feature requires a microphone.

  • Visual Timetables: Use the Work Symbols alongside the Clock. Seeing the time next to a visual instruction helps pupils who struggle with transitions understand exactly what is happening and for how long.

  • Quick QR Codes: If you find a great stimulus or video, use the QR Code widget. Paste the link, and a code appears instantly on the board for pupils to scan with their own iPads.


Get Going with Green Screen film-making in the classroom

So what is green-screen?

Essentially it’s using software or an app to combine different images or video so that one appears as if part of the other. The green screen part makes use of chroma-key feature of the app so that anyone standing in front of a green screen will appear in the video with the green screen not seen at all, but replaced by another chosen background image or video. Wikipedia gives a much fuller explanation here: https://en.wikipedia.org/wiki/Chroma_key.

But how do I create a film in the classroom with green screen?

With an iPad, and a green screen app (such as the Doink green screen iPad app) and with anything in the background which is green (whether frieze paper on the wall or green sheeting, or specially made green screen fabric on a frame) you are ready to go.
Have a look at the Sway below for examples of videos created by pupils using the DoInk green screen iPad app, along with how-to guides to starting to use it yourself. And then it’s creativity on the part of your learners in the classroom – for further inspiration have a look at the DoInk green screen app blog  to see how others have shared about using green screen film-making in the classroom.

Chrome Music Lab

Google wanted to help make learning about music a bit more accessible to everyone by using technology that’s open to everyone: the web. They built a set of experiments that let anyone explore how music works.


What does it do?

Chrome Music Lab is a free online music creation webtool from Google. It is described as “a website that makes learning music more accessible through fun, hands-on experiments” and can be used on any web-connected device through most Internet browsers, so it will work on desktop computer, laptop, tablet, or smartphone (just note that it does not work on Internet Explorer).

The YouTube video below gives an overview of what Chrome Music Lab is.

.

Why is it useful?

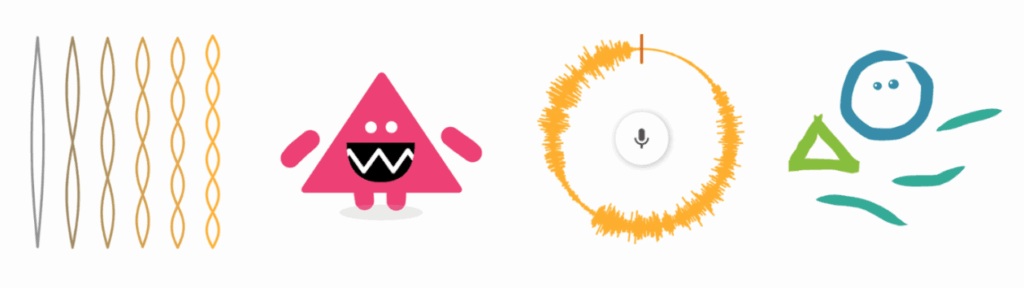
You can exploring different features of music and link these other areas of the curriculum. The tools can be used in open-ended ways but direct links can be made to the science and mathematics of sound/music through practical activities looking at sound waves, vibrations, oscillations, or to artists like Kandinsky and relationship to shape. Explore the different tools to see the possibilities.

.

How does it work?

You don’t need to sign up for any account, you can just start creating right away by going to Chrome Music Lab on your browser of choice.

There are a range different tools: Song Maker, Rhythm, Spectrogram, Chords, Sound Waves, Arpeggios, Kandinsky, Melody Maker, Voice Spinner, Harmonics, Piano Roll, Oscillators, and Strings. Open any of these tools from the launchpad and simply click on the “About” link on each one to find out the straightforward guide to using each tool. Or just play about and have fun with each one – and then have a look at the “About” link to see what you’ve just been learning!

Each tool is visually very user-friendly and younger users could simply explore by trial and error and still gain a lot from experimenting. For those who wish to explore further they will find each tool has a wide range of permutations to be adaptable for different ages, stages and learning outcome desired.

.

Where can you learn more about Chrome Music Lab?

You can find out more about Chrome Music Lab on their about page but the easiest (and most fun) way to get to know the experiments is to try them out for yourself!

This YouTube video from Google gives a quick start guide on creating your own songs with Song Maker.

A quick YouTube search will also throw up loads of tutorials for replicating famous/popular songs in Song Maker.
.

Educator Voice

Chrome Music Lab, a hands-on music playground. Explore the science of sound through interactive experiments.

🔍 What does it do?

Chrome Music Lab is a website based collection of 14 web-based “experiments” that make learning music tactile and visual. It covers everything from basic rhythm and melody to the complex physics of sound waves and harmonics. It is designed to be played with – there are no “wrong” notes, and every interaction provides immediate visual and auditory feedback.

🎓 Why is it useful?

Instant Creativity: There is no “learning curve.” A pupil can open the Kandinsky experiment, draw a circle with their finger, and hear it turn into a sound immediately.

Visualising the Invisible: It turns abstract concepts like “frequency” and “pitch” into colourful animations. The Spectrogram allows pupils to literally “see” their own voice or the sound of a flute.

Cross-Curricular Links: It is as much a Science and Maths tool as a Music tool. It uses grids to teach patterns (Maths) and oscillators to show how air molecules move (Science).

Easy Sharing: In Song Maker, pupils can save their work as a simple web link. They don’t need to export files; they just copy the link and paste it into a Teams or Google Classroom assignment.

⚙️ How does it work?

1. Access: Open Safari and go to musiclab.chromeexperiments.com. No login required.

2. Pick an Experiment: Tap on one of the colorful cards to open the experiment. There are a range different options: Song Maker, Rhythm, Spectrogram, Chords, Sound Waves, Arpeggios, Kandinsky, Melody Maker, Voice Spinner, Harmonics, Piano Roll, Oscillators, and Strings

3. Interact: Use your finger to tap the grid, draw shapes, or drag sliders.

🚀 Beyond the Basics

  • Sound Waves in Science: Use the Oscillators experiment. Pupils can drag their finger up and down to change the pitch and see how the character’s shape changes—stretching for high sounds and squashing for low sounds.
  • Syllable Beats: Use the Rhythm experiment in Literacy. Pupils can use the different characters to “tap out” the rhythm of their name or a line of poetry, helping them understand meter and syllables.
  • Pattern Recognition: Use Song Maker. Challenge pupils to create a repeating “pattern” of colors on the grid. They can see and hear the mathematical symmetry in their music.
  • Voice Spinner: Pupils can use the microphone to record a short sound (like a “Hello” or a clap). They can then use their finger to spin the sound fast, slow, or backwards, exploring how speed affects audio.
  • Hear Art with Kandinsky: Based on the artist Wassily Kandinsky, this experiment turns drawings into music. Draw your picture, hit play and hear your image!

Getting Going with iPads in the classroom

So you’ve got iPads in your classroom? Where to start? Have a look at the Sway presentation below for a guide to some help to getting going with using an iPad in the classroom to support learning and teaching.

And if you’re wondering how iPads are being used in classrooms then have a look at the Sway presentation which collates some of the Tweets shared by Falkirk schools about how iPads are being used to support learning and teaching across the curriculum at all stages.

Apple Education 30 Time-Saving Tips for Teachers

Apple Education has provided a quick guide to “30 Time-Saving Tips for Teachers” – an at-a-glance list of tips which may be helpful to teachers in using iPads in learning and teaching. Each tip on the infographic has a link to a fuller description and how-to guide, so if one of the tips resonates with you, then just click on the link for a step-by-step guide to how to use the iPad feature.

PowerPoint Online

Microsoft PowerPoint Online presentations and digital storytelling, optimised for the web and accessibly any time, any where.


🔍 What does it do?

PowerPoint Online is the web-based version of Microsoft’s presentation software. It allows you to create, edit, and share slideshows directly in your browser. While it is simpler than the desktop app, it is built for the modern classroom offering real-time collaboration, automatic cloud saving to OneDrive, and unique web-only features like “Presenter Coach.”


🎓 Why is it useful?

  • Collaborative Creativity: Multiple pupils can work on a single deck at once, making it ideal for group projects or a “Whole Class Book” where every child gets one slide to showcase their work.

  • Auto-Design: The built-in Designer tool under the ‘Design’ tab on iPad uses smart technology to suggest professional layouts, icons, and themes based on your text.

  • Rehearse with Coach: Use Rehearse with Coach under the ‘Slide Show’ tab to practice your presentation and get instant feedback.

  • Always Saved: “AutoSave” is always on. If a device loses power or a browser tab is closed, the work is safe in the cloud.


⚙️ How does it work?

  1. Launch: Access via the PowerPoint tile on your Glow Launchpad, through your OneDrive or via the iPad app or directly at powerpoint.office.com using your Glow credentials.

  2. Choose a Theme: Start with a template or a blank slate.

  3. Insert Content: Use the Insert tab to add images, videos, or “Online Pictures” which are automatically filtered for Creative Commons (copyright-safe) use. On iPad you can also draw directly onto slides using the ‘Draw’ tab. Don’t forget ‘Animations’ and ‘Transitions’!

  4. Collaborate: Click the Share button (top right) to invite others using their Glow username. You can see their cursor moving and see exactly what they are adding in real-time.

  5. Present: Click Present to show your work or deliver your lesson (via Apple TV). You can use the pencil icon when presenting to make annotations which can be saved upon exiting the presentation.


🚀 Beyond the Basics

  • Presenter Coach: This is a game-changer for public speaking. Pupils can tap Rehearse with Coach. The iPad listens to them speak and gives private, real-time feedback on their pace, “filler words” (like um and ah), and even their body language.

  • Designer: Instead of searching for clip-art, just type your bullet points. Tap the Designer button, and PowerPoint will suggest high-end, visual layouts that match your topic.

  • For Quick Videos: Use the Export feature to turn your slideshow into an MP4 video. This is great for creating simple “Instructional Videos” or digital stories.


Word Online

Microsoft Word Online for document creation and real-time collaboration.

🔍 What does it do?

Microsoft Word Online is the browser-based version of the popular word processor. Word Online is optimised for speed, accessibility, and collaboration. It allows multiple people to work on the same report simultaneously, with all changes saved automatically to your OneDrive. Word Online is available anytime, anywhere with online access at home or at school.

🎓 Why is it useful?

  • Real-Time Co-authoring: Learners can work together on a single poem, story, or project at the same time, seeing each other’s changes instantly.
  • Built-in Accessibility: Every Word Online document includes Immersive Reader, providing instant support for students with dyslexia or EAL needs.
  • Zero Risk of Data Loss: “AutoSave” is always on. If a device loses power or a browser tab is closed, the work is safe in the cloud.
  • Simple Feedback Loop: Teachers can leave “Comments” to provide guidance directly on the page without needing to print a single sheet.


⚙️ How does it work?

1. Access: Access via the Word tile on your Glow Launchpad, through your OneDrive or via the iPad app or directly at word.office.com using your Glow credentials.

2. Create: Start a new blank document or use one of the education templates.

3. Share: Click the Share button (top right) to invite others to edit. You can control who can view vs. edit. Remember, you can also use the Teams assignment function which will allow you to see learner work in real time.

4. Edit vs. View: Easily switch between Editing mode (writing), Reviewing mode (suggesting changes), or Viewing mode (to see the final look).

5. Export: If you need a static copy, go to File > Save As > Download as PDF.


🚀 Beyond the Basics

  • Dictate: Students who struggle with typing can use the Dictate button to turn their speech into text. It even supports “Auto-punctuation” to help with sentence structure.
  • Writing Quality Editor: On PC the Microsoft Editor pane goes beyond simple spellcheck. It provides a “Readability Score” and suggests improvements for clarity, conciseness, and formal tone.
  • Immersive Reader: Go to View > Immersive Reader to change background colors, increase line spacing, or have the text read aloud. This is a game-changer for independent learning.
  • Comments & Stickers: Instead of red pen, use the Comments feature to leave feedback. You can even insert Emojis to provide quick, visual encouragement that resonates with younger learners.