Looking to create a teaching video?
If you wish to create a teaching video to share with your class then where do you start? Read more
 Looking to create a teaching video?
If you wish to create a teaching video to share with your class then where do you start? Read more


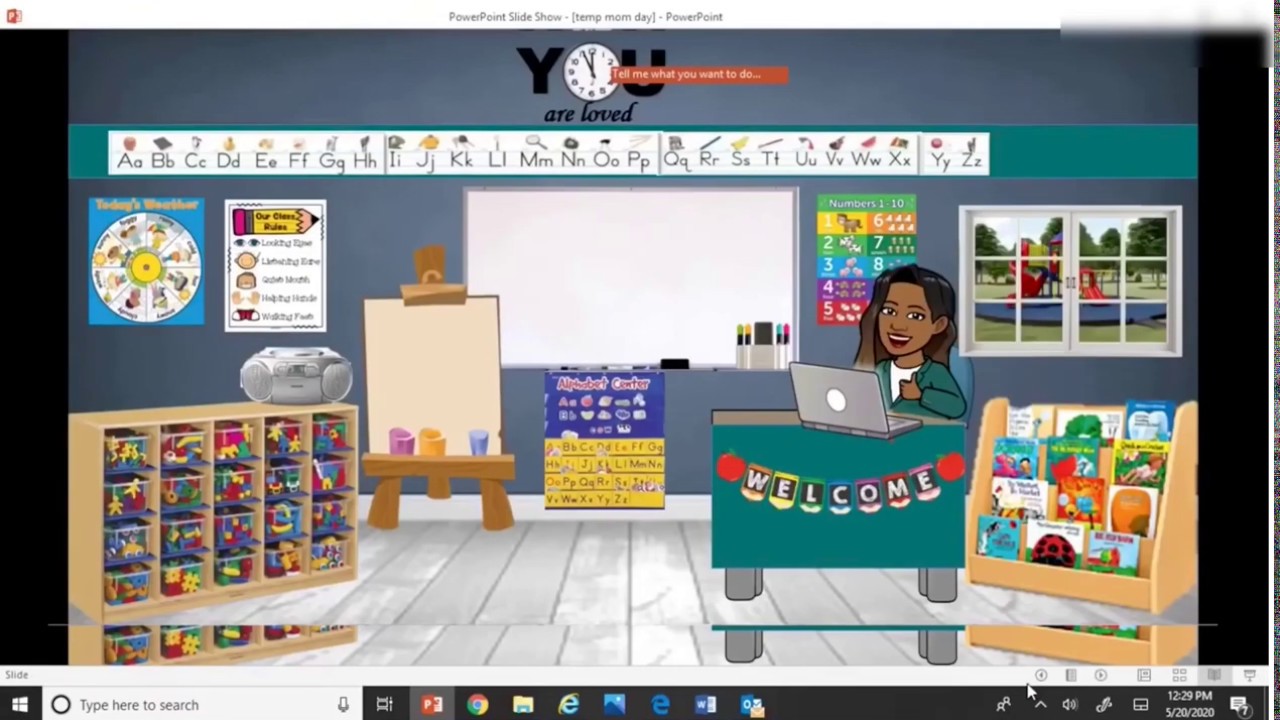
You’ve no doubt seen lots of teachers sharing their interactive virtual classroom images – a visually-friendly way to connect with your learners via an online platform where they can click on elements in the picture to view details of learning activities, or view videos, or read books chosen for the class, or click on a link to online resources to support their learning.
Click on this link to see the image above as an interactive virtual classroom shared as a PowerPoint show
Click on this link to see the image above as an interactive virtual classroom shared as a PDF
You can set up an interactive virtual classroom image in several online platforms and using a variety of digital tools. This blogpost is specifically looking at how to do so if your school uses Microsoft Teams.
 What you need to set this up in Microsoft Teams
You will need the following to set up your interactive virtual classroom image:
 How to set up you virtual classroom image in PowerPoint
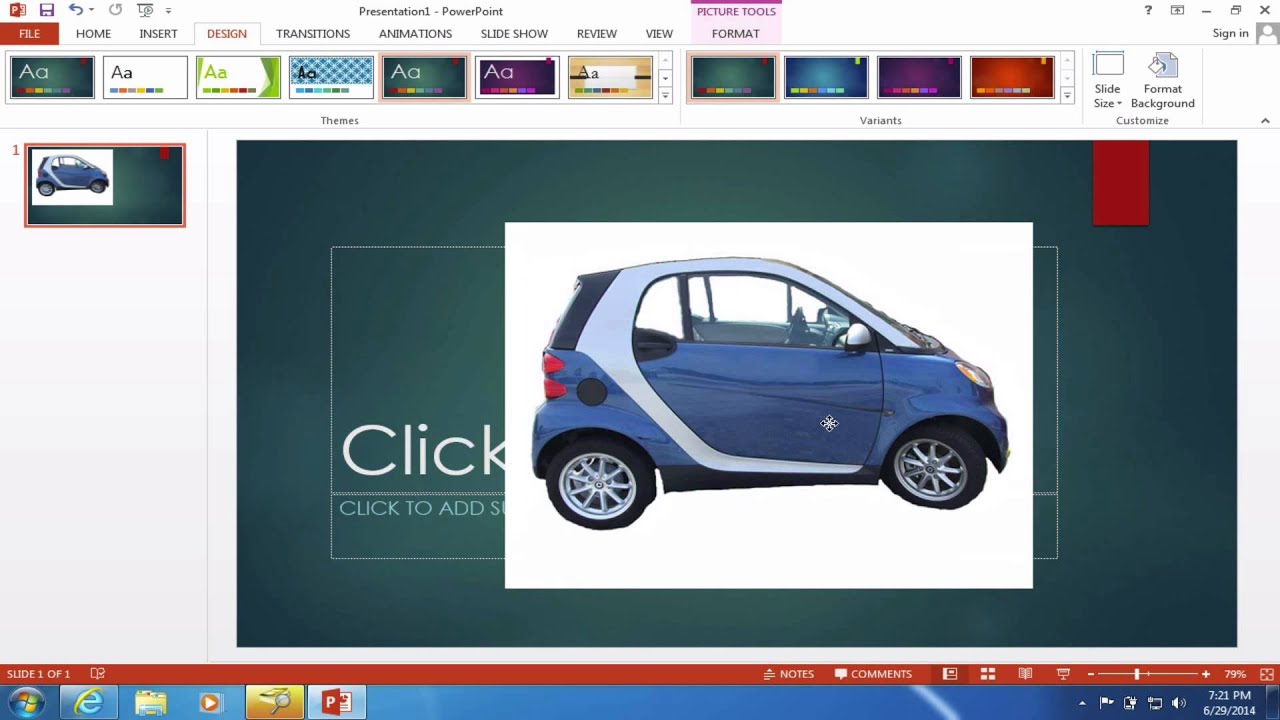
View this super detailed step-by-step video by Brian White showing how to create the virtual classroom slide in PowerPoint online – this includes how to use the Bitmoji plugin in the Chrome browser, how to search within PowerPoint online for transparent backgrounds, how to add items for the class scene, how to add a video from YouTube as an embedded video, and how to create the link from a shared PowerPoint link which makes it a play-only view for pupils to interact with it – by adding &=&action=embedview to the end of the weblink from your shared PowerPoint link.
This how-to video by Patricia Foley guides you through how to create a virtual classroom using PowerPoint
This video on the Mrs M Shares YouTube channel gives a step by step guide to creating your virtual classroom in PowerPoint, with lots of advice about adding items to your classroom scene.

This video (on the Mrs M Shares YouTube channel) shows how to add interactive elements to your PowerPoint image for your virtual classroom
Interactive elements will be the links you attach to the individual items so when clicked on by your learners they will automatically be taken to what you have added. This might include websites, online resources, YouTube videos, or login to platforms your class uses.
Here’s a Bitmoji Virtual Classroom Tutorial Step by Step using PowerPoint video on Mrs Sekhon YouTube channel

 How to remove the background from an image
There are different ways you can remove the background from any image so that when you place it on your background image it does not show anything from the background of the image you wish to place on the classroom background.
 This how-to guide from Microsoft shows how to remove the background from any image – this also includes a guide to how you can choose which elements of an image to keep and which parts to remove. This guide includes a video but also illustrated text step-by-step guide.
![]() You can also use the free online tool RemoveBG to remove the background from any image (this also works from mobile devices)
You can also use the free online tool RemoveBG to remove the background from any image (this also works from mobile devices)
![]() There is a very helpful guide to “How to create Bitmoji classroom” on Shana Ramin’s “Hello Teacher Lady” site
There is a very helpful guide to “How to create Bitmoji classroom” on Shana Ramin’s “Hello Teacher Lady” site
 How to share your Interactive Virtual Classroom in Microsoft Teams
You can choose whether to share your interactive virtual classroom as a simple image (which will have no interactivity) or PDF (which will retain any interactive links you added) or PowerPoint
To create an image from PowerPoint click on File > Save as > choose location on your device > from dropdown “Save as type” choose “PNG Portable Network Graphics” format
To create a PDF from PowerPoint click on File > Save as > choose location on your device > click on “Options” and specify single slide you wish to use
When uploading to Microsoft Teams you can choose to share in the Posts/Conversations by clicking on the paperclip attachments icon – you will then be asked where you wish to share the uploaded item so choose to save in the “Class Materials” folder as this is read-only for your learners.
You can alternatively choose to upload the PowerPoint into your OneDrive and when choosing the share link ensure the permissions are set to “anyone with the link” (and ensure edit rights are disabled). To ensure the PowerPoint link opens as a play-only view for your learners to interact with it you can add &=&action=embedview to the end of the weblink from your shared PowerPoint link from OneDrive before you share it in the Microsoft Teams Posts/Conversations (this method also permits sharing outwith Microsoft Teams, such as on website or social media).
This video by Patti Duncan shows how you can save your interactive virtual classroom created in PowerPoint as a PowerPoint show and upload to Microsoft Teams so that anyone viewing it in your class will go straight to “present” mode and not have the option to do anything other than view the PowerPoint and click on the links you’ve added.
 Want to find out how others are using interactive virtual classrooms in Microsoft Teams?
 There is a Facebook group (called Bitmoji Classrooms for Teams) just for teachers sharing about their use of interactive Bitmoji virtual classrooms in Microsoft Teams.
https://twitter.com/MisssRosssBusEd/status/1266108291710672896?s=20
 Want to add even more interactivity?
You can also upload the image from your PowerPoint slide to ThingLink to add hotspots which, when clicked by your learners, give you the option to add the links as popout windows so that the learners don’t leave your virtual classroom space. ThingLink also gives the option to have text read aloud using Immersive Reader, and also to let you add audio recordings of your voice if you choose.
Creating Visual Learning Materials with ThingLink – a free online course on the Microsoft Educator Centre guiding you through learning how to use ThingLink to bring images, video and 360-degree virtual tours to life with added popup links, voice and text notes, and more. ThingLink creations can be shared via Microsoft Teams anywhere a link can be added.

If you are looking for a way to support learners (or indeed, yourself!) to be clear, expressive and confident when communicating & presenting to others using digital tools, then Microsoft PowerPoint Presenter Coach is a handy feature of Microsoft PowerPoint. Read more


Microsoft Excel Online is more than just numbers, it is a powerful tool for data handling, visualisation, and problem-solving.
Microsoft Excel is a spreadsheet application. While often seen as a tool for accountants, in the classroom it is a powerful canvas for organising information, performing calculations, and turning raw data into visual charts and graphs. As part of Glow, it is available online, allowing pupils to collaborate on the same spreadsheet in real-time.
Visualising Data: Instantly turn a table of survey results (like traffic surveys or favorite foods) into colorful bar charts or pie graphs to help pupils spot trends.
Real-Time Collaboration: Multiple pupils can enter data into a single shared spreadsheet simultaneously – perfect for whole-class experiments.
Maths in Action: It brings numeracy to life by using formulas to solve real-world problems, from managing a budget to tracking fitness results in PE.
Anywhere Access: Works on iPads, PCs, and through any web browser via Glow, so learning can continue at home.
Log In: Access Excel via the OneDrive or Teams tile on your Glow Launchpad.
Create a Table: Enter your labels in the top row and your data in the cells below.
Insert Chart: Highlight your data, go to the Insert tab, and choose a chart type (e.g., Column or Pie).
Collaborate: Use the Share button (top right) to invite others to edit the document with you.
Check out this handy Sway with detailed instructions on how to set up and use an Excel document online:
Automatic Graphs: After a class survey, have pupils use Excel to generate different types of graphs to see which one displays their data most clearly.
Data Types: Type a list of countries or cities, then use the “Geography” Data Type (under the Data tab) to automatically pull in facts like population, area, and capital cities.
Fitness Tracking: Record heart rates before and after exercise directly into a spreadsheet and use the “AutoSum” or “Average” formulas to analyse the class results instantly.
Budgeting: Give pupils a “Virtual Budget” for a class trip. They can use Excel to track costs and see how changing one item (like the bus price) affects their total spend.
Microsoft Excel support webpage
Microsoft Basic Tasks in Excel

iPad Camera is the window to your classroom. Capture evidence, scan documents, and support accessibility.
The Camera app is the primary way pupils capture their learning. It can take high-quality photos, record video, capture slow-motion clips, and even read text directly from a book or whiteboard. In a “1:1 iPad” classroom, it becomes a digital bridge between physical work in a jotter and digital work in the cloud.
Evidence of Learning: Not all work is digital. Pupils can take a photo of their physical models, posters, or written work and upload them instantly to Teams or Google Classroom.
Live Text: One of the most powerful features – if the camera sees text (on a whiteboard or in a book), a small icon appears that allows the pupil to copy and paste that text directly into a document or note or have it read aloud.
Scan QR Codes: No more typing in long web addresses. Pupils simply point the camera at a QR code to be taken directly to a website, a Form, or a video.
Magnifier: For pupils with visual impairments, the camera can act as a high-powered magnifying glass, allowing them to zoom in on small text or distant displays.
Launch: Tap the Camera icon (Gray icon with a black lens) or swipe left on the Lock Screen.
Switch Modes: Swipe your finger up or down on the right side of the screen to switch between Photo, Video, Time-Lapse (great for long science experiments), and Slo-Mo.
Focus and Exposure: Tap a specific part of the screen to tell the camera where to focus. If the image is too dark, tap the screen and slide your finger up or down next to the “Sun” icon to adjust the brightness.
Zoom: Use two fingers to “pinch” or “spread” on the screen to zoom in or out.
Review: Tap the small thumbnail in the corner to view your most recent photo and use the ‘Edit’ button to crop or rotate it.
Time-Lapse & Slo-Mo: Use Time-Lapse to record a plant growing over a day or a chemical reaction. Use Slo-Mo to capture fast-moving events, like a ball being dropped, to analyse the physics of the movement.
Shape Hunts: Send pupils on a “Shape Hunt” around the school. They can use the Markup tool in the Photos app to draw over their photos with their fingers, highlighting the 2D and 3D shapes they find in the real world.
Visual Timetables: Use the camera to take photos of the equipment needed for a lesson. Display these on the board or in a shared Note or Keynote to provide a clear, visual checklist for pupils who struggle with multi-step instructions.
POV Storytelling: Have pupils film “Point of View” videos where they act as a character in a story, speaking directly into the camera to explain their feelings or motives.

Get pupils exploring the numbers that make up their life story so far using the website You’re Getting Old! and Keynote.

Doorway Online Interactive and Accessible Learning has an array of free online teaching resources which can be used by early learners independently or as classroom activities led by a teacher on an interactive whiteboard.

Drones can be a fabulous addition to STEM learning, find out how to get started with drones in the classroom here.