
On this page you will find a programme of Clicker skills tutorials and learning opportunities in using Clicker 8 at First and Second Level. In each section, you will find an ![]() Over to you… activity. You may wish to look at them all before you choose which activities to complete. Some of the skills are applicable beyond First and Second Level.
Over to you… activity. You may wish to look at them all before you choose which activities to complete. Some of the skills are applicable beyond First and Second Level.
If you would like accreditation for completion of the Professional Learning, please complete and submit the tasks found in the ![]() Over To You… sections. These can be completed and sent to your ATSS contact individually as you complete them or in a bundle at the end.
Over To You… sections. These can be completed and sent to your ATSS contact individually as you complete them or in a bundle at the end.
![]()
The content of the tutorial may not exactly match the level of the children you work with, but the Clicker skills you will learn will be transferrable. Whatever the activity, try to think, ‘How could I use this tomorrow..?’
You can, of course, choose to simply watch and learn without completing any tasks , but it is really worthwhile completing the tasks to give you some practice.
Before we begin- Saving Clicker Documents and Sets
How do we save our work in Clicker? What’s the difference between a Clicker Document and a Clicker Set? It’s a good idea to try to wrap your head around the difference from the get go…
There are 2 types of file in Clicker.
- Documents– that the children create that they can save and open later
- Sets– that the teacher creates to support the children’s writing
To make things easier, in Fife we use the Room Folder system to save and access files. You can change the default Home location to a Room Folder, or any location you wish.
Section 1: Planning Boards
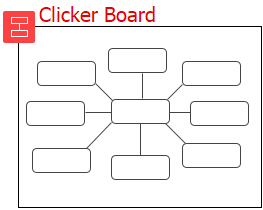 Planning Boards are a quick and easy way to construct a mind map. They can include images, sounds and text that can be moved around the board. They could also be used for choice boards, such as gathering pupil voice, or for a whole class KWL topic web.
Aim: to create a mind map on Clicker board to show information, plan a story or report with your class and to support a pupil to show their learning.
Use Clicker Board to create mind maps and capture ideas and pictures on a topic. You can add in images in cells and on the board to add interest. Sound buttons allow you to record your own voice as well as using the predictor feature to help with spelling. Link boards together if you want to write about different aspects of a topic.
 Over to you:
- add a cell and add picture and text to the cell
- use the spelling supports
- add more cells and links
- change size of cell
- add different type of cell including a record cell
- rename board
- add picture in the background
- label picture changing cell background and colour
- add a web image or photo you or the children have taken
- make a Wordbank from your board
Section 2: Word Banks
Aim: to create an alphabetic and a tabbed word bank to support topic work.
Word banks work with the predictor to make writing easier whether writing a story or a topic related report.
Type words in or copy and paste text which can be tabbed to categorise words or organise words alphabetically. Word banks can help with structure, spelling , vocabulary and can prompt memory.
- Tip -when copying text from the web check through to see if there are any bits that you don’t want to use- I sometimes paste them in to a word document to do this.
Over to you:
- Create an alphabetic word bank relating to your class topic
- Encourage a pupil to use the predictor for writing with the word bank minimised making the predictor more topic friendly
- Created a tabbed word bank for those needing more support with your class topic
- Save your clicker word banks so you can use them again (if you have forgotten how to please look back at the beginning video)
Section 3: Using Supports within a document
Aim: You will be able to create an activity relating to your class topic with supports built in for learners who need support with reading and writing.
Over to you:
(remember all the supports within a document)
- select suitable information with video from the web
- Open a document in clicker
- Insert a date and add text (remember clicker can read it to them)
- Embed a hyperlink to a video to support learning
- Add voice notes to support learning
- Add sound buttons so a pupil could record their answers
Section 4: Making a Cloze Passage
Aim: to copy and paste text then using the tools within Clicker make a cloze passage which will be differentiated by the supports the children can use.
Over to you:
- Create a Cloze Passage for a group within your class
- remove words, trying all the options
- add pictures if needed
- save the activity with and without words removed displayed
- print a sheet for some children to use
- save work to a child’s room folder (remember video at the beginning)
Section 5: Clicker Books
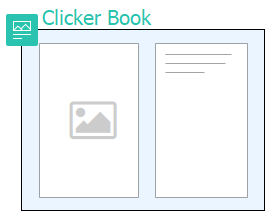 LearningGrids has over 700 Clicker Books ready to download and use. Clicker Books can be read, using the Clicker voices, or you can record your own voice. Lots of the books in LearningGrids have follow up activities. You can create your own Clicker Books as an interactive record of class trips or events, capturing the voices of your learners.
Aim: to create a book for a child to read or listen to and to teach children how to make a Clicker book to present their work or a story
Over to you:
- Create a new Clicker Book from a template
- add text and pictures
- a photograph or a video from webcam or attached camera
- resize, change background colour, text colour
- add pages and choose or make your own layout and sort pages
- add read and record buttons
- save your work
Section 6: About Learning Grids
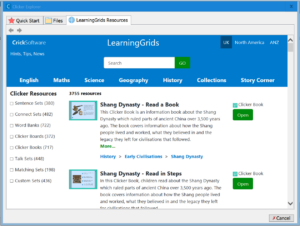 The LearningGrids tab can be found when you first open Clicker or by clicking on the yellow Explorer folder icon. LearningGrids contains nearly 4,000 pre-prepared Clicker Sets and resources.
Going to Learning Grids is a great way of finding different sets to use.
Opening/downloading a set from here and then going into Edit can also help you to see how the set was made. It is a good idea to check here if there is a set that you can use as it is or with a few tweaks make it more what you were looking for.
Have a look through Learning Grids .
If you look under the headings : – English, Maths, Science, Geography, History, Collections and Story Corner you will find a lot of very useful resources, including the Find Out and Write about series under Collections.