You have access to four different Launch Pads when you log in to Glow. When you look down the left hand side of your screen you will see 4 icons which you can click on to get to each of these different launch pads:
 On each of these launch pads there will be a number of squares. These are called Tiles and clicking on each tile links to another site.
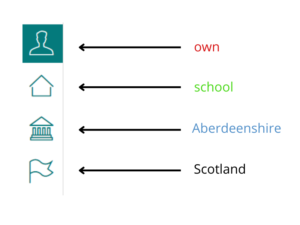
When you first go into Glow and look at your own launch pad you will see that there is only one tile which says “add”. This is because your launch pad belongs to you alone and you can customise it however you want. It’s a good idea to add sites which you use most regularly. So for example you could add a tile for your Glow email, OneDrive, Teams and G-Suite. You could even add a tile which would take you directly to this CLPL site! To find out how to add tiles, click on the picture below and we will talk you through the process.
There’s a wealth of resources on Glow and it really is worth taking a little bit of time to explore what is there – you never know what you might find!