All posts by Lborrowman

SESSION 6: MUSEUM VISIT

During this week, I was unable to attend the visit to Kelvingrove. However, I had previously visited the museum several times before and had discussed with peers that attended the session what was included.

I love the idea behind museums, and feel that any child would benefit from a visit to such a wonderful place. It is not just the artwork (which in itself is amazing) that the children may be able to experience. They get to see so many different art forms in one place. There are sculptures, paintings, period clothing and even a Drama dress up station. Even the building itself is a work of art.
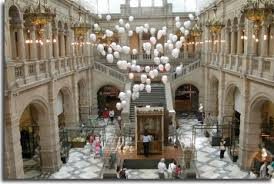
Having access to these resources enables children to experience different times throughout history, while still having fun! They are able to understand how people lived in different time periods and can understand their situations much better than if they had read it from a book.

Museums are a great way for pupils to engage in history. Many children naturally question things in life. Allowing them the experience of seeing and touching objects from history first-hand can aid pupils in having a deeper connection to the people of the past. This can create an empathetic bond for pupils, as they will be able to put themselves in other shoes – sometimes literally! This is also a good way to introduce the concept of teaching about evocative objects, which students have been working on throughout this module.

“Art gives us an experience like nothing else can, a chance to connect, understand, and explore perceptions, feelings, and innovative thoughts. Museums provide a space for reflection, experimentation, inspiration, creativity, enjoyment and allow for authentic learning experiences and play. Bringing children to the museum reveals children and adults as being equally active in learning, putting them on equal standing as they create a shared understanding. It’s a democratic process.” —Jamee Yung, Education Coordinator, Weisman Art Museum

I feel really strongly about allowing pupils the opportunity to experience these free resources such as museums and galleries. It is a fun and stimulating way of helping children to get in touch with history and unlock emotions.

References: 

Gross, R. (2014). The Importance of Taking Children to Museums | NEA. [online] Arts.gov. Available at: https://www.arts.gov/art-works/2014/importance-taking-children-museums. [Accessed: 6th April 2017]

SESSION 5: OUTDOOR EDUCATION AND THE EXPRESSIVE ARTS

Unfortunately, I was unable to attend the workshop on outdoor learning. However, I have done some reading into the importance of teaching outdoor learning and the expressive arts. Through this reading, I have developed a better understanding of how outdoor learning can impact children’s learning and enhance their creativity.

“Education that focuses on the built environment and public art can contribute to young people’s intellectual, emotional and social development as well as their moral and cultural well-being.” (Adams, 2008)

Through outdoor learning, children and young people have the opportunity to get involved in the community they live in. They can become part of the decision-making process and enhance their communication skills. It will also give children something to be proud of to be able to say they helped make something that will be displayed for all to see. Below are some examples of this.

Outdoor learning in relation to the expressive arts can heighten children’s self-confidence. They may also experience language development through persuasive talks and communication with peers.

“Learning does not take place only in the classroom, nor are teachers the only people who have responsibility for educating the young.” (Adams, 2008).

It is important to reiterate that art is not about getting it right, that there is no wrong way of doing something. Outdoor art can be used in many ways. It could be trying to alter people’s views of a certain place, or have an evocative impact on individuals. It does not necessarily need to be the object itself that has this impact, but the idea behind the object may hold a greater meaning for individuals.

“Art is not about objects; it is about ideas” (Adams, 2008)

Learning outside the classroom does not necessarily mean that we should take pupils out to the playground to learn. Places like museums and galleries offer numerous potential learning opportunities for children and young people.

Adams, E (2008) Art and design Education and the Built Environment. In Coutts, G. and Jokela, T. (Eds) Art, Community and Environment: Educational Perspectives. Bristol: Intellect.

SESSION 4: STEM TO STEAM

This week, we were introduced to the topic of STEM and STEAM.

STEM relates to the science, technology, engineering and maths within the school curriculum. It is an integrated approach to learning that relates topic to real life situations. Through STEM, children have the opportunity to solve problems and make connections. It also enables them to question why things are a certain way and think outside of the box.

STEAM stands for science, technology, engineering, ART and maths. Art is an integral part of the curriculum and should be encouraged in all aspects of learning. Involving art in the STEM approach enables pupils to understand things in a clearer way. It can help to make pupils feel safe at estimating answers, as there are no wrong answers in art.

Including art into this approach engages both sides of the brain.

The left hemisphere of the brain engages with the analysis of information and processing ideas. This is the side of the brain which focuses on STEM. The right hemisphere of the brain focuses more on the personal aspects such as imagination and creativity.

This is where the art comes into STEAM. Through STEAM, pupils will engage both sides of the brain, therefore making more connections. This is what sets us apart from all being the same. Although STEM is an essential part of learning, art allows us to show imagination and creativity.

I feel that while work is being done to introduce STEAM into the primary schools in America, there needs to be a push to implement it into the UK.

I believe that STEAM should be implemented into our classrooms, as art can allow children to have different experiences in relation to education that may aid them in making decisions in the future, therefore having a positive impact on their lives (Jolly, 2014)

References: 

https://www.youtube.com/watch?v=gbJXeHe3y9A

Jolly, A. (2014) STEM vs. STEAM: Do the Arts Belong? [Online] Available: http://www.edweek.org/tm/articles/2014/11/18/ctq-jolly-stem-vs-steam.html [Accessed: 8th April 2017]

EVOCATIVE OBJECT PROGRESSION AND FINISHED PIECE

Throughout the module, I have been concentrating on creating my evocative art piece. I have achieved this through a progression of sessions. I started thinking about why the object I had chosen was important to me and what feelings were brought up. I used this inspiration to plan a sketch which was used for my print making.

Starting the piece was tricky. I had to decide on how big I wanted to make it and the placing on the paper. I decided not to make it A4 or A3, as most other students were focusing on those sizes. I wanted to try and be ambiguous in my art, as I aspire to be ambiguous in my own classroom.

I started by sketching out my design lightly on my paper, which I taped to the wall to give me a flat surface to work on. I feel that art does not have to be made by sitting behind a desk. In fact, I believe that art is created better when there are no barriers. Allowing pupils to position themselves in a way that is comfortable may result in better production of their work as they are more relaxed. Having my art displayed on the wall allowed me to take a step back and examine my work when I needed to.

Once I had the basic outline of my design, I then went and added details in pencil. This showed me how much space I had at my disposal for my 62 words.

Next, I decided the best way to write my 62 words. I had chosen to write 62 words that summed up the book and reflected the story inside. Those words in themselves were evocative to me, as I can link them to specific memories. I placed these words strategically around my design, melding them to the shape of my drawing. This created a flowing motion which I found worked.

Once I was happy with the layout, I then went over the words in a black felt pen. This made sure the words stood out from the background that would be included at the end. I next drew the outline of my design, in this case the dragons body.

Following this, I added detail such as the eye, scales and wings. Once this step had been completed using black felt tip, I then started to think of how I was going to decorate my background. I wanted to make this piece of art unique and imaginative. I used the resources available in the university to come up with a creative background for my evocative piece.

I used chalk to create a merging effect using different colours. I first tested out the colours on a spare bit of paper to check and see how the colours would fit together.

This completed my at piece. I finally added audio over it. I chose the song “I See Fire” by Ed Sheeran as this was a song used in the Hobbit movie. The song itself was evocative.

I enjoyed creating my own unique piece of art and facing the challenges that came with this module. It has increased my confidence when teaching art in the primary school. I have now learned some of the ways that art can be implemented into the curriculum. Through making a piece of artwork evolving around an evocative object, I have understood that isn’t simply a one hour lesson. Time needs to be taken to achieve the desired outcome. This will be implemented in my classroom in future, where I will strive to have a tolerance for ambiguity.

SESSION 3: PRINT MAKING

During this session, I have learned the process of printmaking. This process was a lot more extensive than I first thought. While I carried out this process, I thought about how I could make this a progressive lesson for pupils.

It is impossible for children to produce their best work when the threat of a deadline hangs over them. We cannot ask pupils to create great pieces of artwork in a limited space of time and expect each pupil to have a finished piece by the end of the allotted time. They worry about finishing work on time rather than the actual work they are creating. I hope to enforce the “quality over quantity” way of working in my classroom.

The process of printmaking allows children to develop fine motor skills (Yorkshire Sculpture Park, n.d.) which is essential to their development.  As a student teacher, I will ensure that i include printmaking in my expressive arts, as it is essential that pupils develop these skills.  The act of holding a tool improves basic motor functions and can improve hand eye coordination due to the concentration needed. This can also be a risk, as children are working with potentially dangerous tools to create prints. This type of expression may only be suitable to those in upper primary school.

Through printmaking, children can see their own creative processes and have time to reflect on their next steps.

During this weeks workshop, we were taught how to use lino tiles to create prints. We first started by drawing out our design on a piece of paper. This enabled us to have a guide as to where we would cut out the lino from the tile.

We then rubbed charcoal over the back of our paper and placed it onto the lino. Once we went over our drawing, we were able to see an outline to follow which had been imprinted onto the lino.

We used this as a guide to then use gouging tools to carefully remove the lino. This allowed us to see the outline more clearly.

The next step to the process was to use paint to print our design onto paper. Unfortunately, I did not get to reach this part of the process.

References: 

Yorkshire Sculpture Park. (n.d.) Learning at YSP Teaching Resource: Exploring Printmaking. [Online] Available: http://moodle.uws.ac.uk/pluginfile.php/872850/mod_resource/content/1/ignite-teacher-resource-printmaking.pdf [Accessed: 7th April 2017]

SESSION 2: LEARNING THROUGH ANIMATION

Workshop

We were introduced to the art of animation this week. This was done through a video clip of shadow puppets. This showed the importance of a second aspect of art. In this case, it was audio.  Through adding audio, a stronger mood was created for the animation.

Throughout the workshop, we were able to engage with several forms of animation.

We first started off by looking at sand animation as a class. This was done by using sand and light boxes along with a camera to create a stop motion animation.

One student started off by drawing a line in the sand. Once this had been done, pictures would be taken of the process.

Then the student would add another line in the sand. Again, a picture would be taken.

This was continued until there was somewhere between 25 and 30 pictures showing the process of making the “picture.” This was then made into an animation for the whole class to see.

We then split into groups to create our own animations.  My group decided to draw a picture on the blackboard with chalk. Unfortunately, we were unable to create an animation. However, we had the intention of creating a flipbook with the pictures we had drawn.

https://www.youtube.com/watch?v=pFx-kpYxY64

We also learned about the different types of animation there was available. These included:

  • Computer animation
  • Flipbooks
  • Stop motion – drawing, clay, playdough, paper etc.
  • Thaumatrope
  • Phenakistoscope
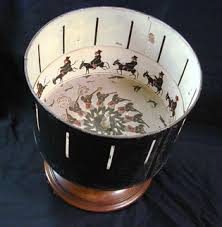
  • Zoetrope

Teaching Animation in the Primary Setting

“The first purpose of animation in academics is to fulfil a cognitive function. Secondly, as an affective learning tool that attracts attention, engages the learner, and sustains motivation aspect.”(Amjad Desai, 2012).

When thinking about how I could teach animation in the classroom, I first had to consider the resources available. I feel that having a theme for animation would be a good way to engage pupils.

For example, they could perhaps pick their favourite TV show and create characters from that. Maybe the whole class could choose a theme and then each pupil make a character. Once they have made their characters, they could work together as a class to create an animation. this would be effective as a shadow puppet show that pupils could perform.

References:

Desai, A. (2012) Animation in education [Online]. Animation. Available: http://www.cgpundit.com/animation-in-education/ [Accessed 7 Mar 2016].

SESSION 1: EXPRESSIVE ARTS AND CULTURE – INTRODUCTION

For the first week, we were instructed to bring an object that held a deep meaning to us. This object was the focus for discussion during this first workshop. Through discussions with peers, it was evident that we had all brought something that held a lot of meaning behind it. This included items such as jewellery, old pennies and pictures.

I chose to bring in my copy of The Hobbit by J R R Tolkien, as it held personal significance to me. I discussed why it was important to me and explained that it was my great Aunts copy of the book which was passed down towards my mum.

This book brings back memories of when I was younger and my mum would read to me. I later learned to read this book independently. Through this book, my love of fantasy evolved and I became an avid reader from a young age.

Using an evocative object to focus on will allow me to engage with the arts and express feeling and creativity in a unique way. This is important for children to engage in during their time at school as it can create communication without the use of words. Pupils will be able to show how they are feeling in their own individual way. It will also enable them to explore their own thought and feelings in a way that is not limiting them.

“The arts enable us to have experiences we can have from no other source and through such experiences to discover the range and variety of what we are capable of feeling.” Eisner (2002)

We were told that by the end of the module we would be making a complete artpiece revolving around our evocative object with one or more elements added to it. After discussing idea of how we could achieve this, we then began to plan our drawing aspect of our finished product. This included picking a section/portion of our evocative object to concentrate on.

REFERENCES

Eisner, E. (2002) The Arts and the Creation of Mind, In Chapter 4, What the Arts Teach. London: Yale University Press.

Week 12 – Music

The last session of music was spent looking at figure notes. Figure notes are essentially another form of notation. These are constructed of shapes and colours rather than notes, which can be beneficial to a lot of children who struggle with “normal” notation. This can include children on the Autistic Spectrum. These shapes and colours have a corresponding shape or colour on the instrument they are playing, e.g. a ‘C’ note may be a red circle on a keyboard. Therefore, every time this child sees a red circle, they will be able to play a ‘C’ note.

img_4820

As I play a few different instruments, I am able to read sheet music to an extent. I prefer tablature for my guitar, as I can understand that better and process it faster. However, for pupils who have no prior experience, this would help drastically. It would avoid some confusion and enable them to learn songs faster.

img_4821img_4822

During the workshop, we were given a choice of instruments to practise the figure notes on. I started off on a keyboard, which I shared with a couple of my peers. As we all had a turn at playing, I realised that it was easier to read the sheet music and was able to play a simple tune.


As I was already quite familiar with the guitar, I chose this next to come to grips with the new concept. While my peers were using the keyboard, I was able to accompany them while they were playing the piece of music.

img_4823

I think this would be an ideal opportunity to integrate music into the classroom, as it can allow children to gain confidence on instruments before moving on to “normal” sheet music. I also think that it can benefit teachers who have little/ no knowledge of performing or reading sheet music.

Week 11 – Drama

The last week of drama was used to complete the micro-teaching from the other input. Due to the time constrictions, we were unable to get round everyone on the same day. This gave me another opportunity to view other groups approaches and ideas to this task, and gave me inspiration if I taught these techniques in my class in the future.

As we had all learned these techniques previously, we were all able to identify which techniques were used and allowed everyone to grow their confidence in drama. As this was student taught rather than by a lecturer, this allowed everyone to experience teaching a large class. It really helped with planning and organisation skills, which can definitely be applied to the classroom. I feel that micro-teaching is incredibly beneficial to student teachers, as it gives them ample opportunity to practice speaking to large groups and how to approach tasks that are suitable for the age group. It has definitely helped me be more at ease with drama.

Week 8 – Drama

This week, we were asked to prepare a talk about a children’s book in small groups. We were to apply what we had learned in the previous weeks and have a short micro-teaching session with the rest of the section. Me and a fellow student decided to do Georges Marvellous Medicine. This was chosen, as I had already previously engaged in drama with this book through my placement school.

gmm-book

First, we gave a brief outline of the plot to the rest of the class, which allowed them to understand the story line without wasting a lot of time reading the entire book. We then selected an excerpt near the end, and read this out to the class.

Once this had happened, we asked the rest of the class to split into groups and use a freeze-frame technique. This gave a visual example of the chapter for everyone to see. We then asked them to explain their chosen scene, giving the rest of the class more detail and explaining the thought processes behind it.

Another technique we asked the groups to use was a thought tunnel. This involves standing in two lines so that the “teacher” can walk down the middle. Each person takes it in turn as the teacher walk to say who they are in the story and how they feel. However, if they feel uncomfortable or do not know what to say, they have the choice to pass. For example, they could say “I’m Grandma and I’m really annoyed at George.” This is another useful technique to get children to understand the characters in more depth.

As a teacher, this could come in useful. It can allow children to open up and explain how they feel. It also allows others to hear what each pupil is feeling. After implementing these tasks within my own age range, I now feel very comfortable about taking a drama lesson in my school. Due to the previous engagement in this book, I could perhaps spend more time on the activities, with only a brief overview at the start of the lesson.