The above video is slightly out of date, it does not show the Classic/Blocks radio button. See Below.
Before you start
You need to be aware of several things factors you create a blog. The settings involved can be changed at a later date.
Any glow user can create a blog.
A blog can be public, private or glow only. A public blog can be viewed by anyone with an internet connection. A private blog can only be viewed by users with a WordPress role on the blog. A Glow only blog can only be viewed by a glow user who is logged onto glow.
Only a glow user who has a teacher or non-teaching staff glow account can make a blog public. A pupil can create a blog and make it either private or glow only. If a pupil wants to have a public blog they need to give a member of staff an administrator role on their blog, that staff member can then make the blog public.
Users should conside the consequences publishing to a public blog. Publishing publicly can give pupils a real audience for their work, make tasks more authentic but they need to be aware internet safety and data protection issues.
Users can have different roles on a blog, these will come with different affordances you can read more about the role on the Adding Users, Setting Roles page.
The roles of Administrator and Author are the most commonly used roles.
Where to create a blog
Glow Blogs consists of 33 instances, one for each Local Authority and one Central one. You should see 2 tiles on your RMunify home page, one for your LA and one for the central instance. Typically you will create a blog on your LA instance. If you need to collaborate with Glow users from other LAs you can create a blog on the ventral Glow Blogs instance.
Create a Blog

To create a blog you log onto glow and click on the blog’s tile. You will go to the blog home page for your Local Authority.
Click on Create a Blog
Name your blog
After clicking Create a Blog you will be taken to a page that lists the blogs you are already a member of and has fields to create a new blog.
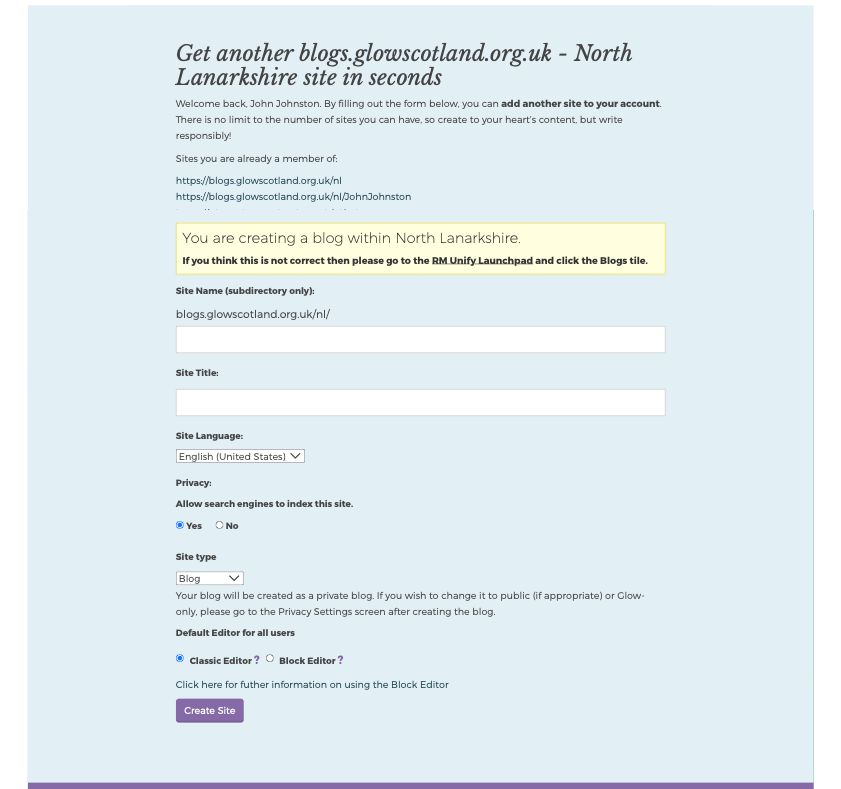
Be aware that the field for this are firstly the blog name as part of the url and secondly the Title of the blog. You can change the Title in the dashboard of your blog at any time. You cannot change the name (last part of the url).
So this blog will have the url:
http://blogs.glowscotland.org.uk/LA/mybigblog
and will have the title My Big Blog
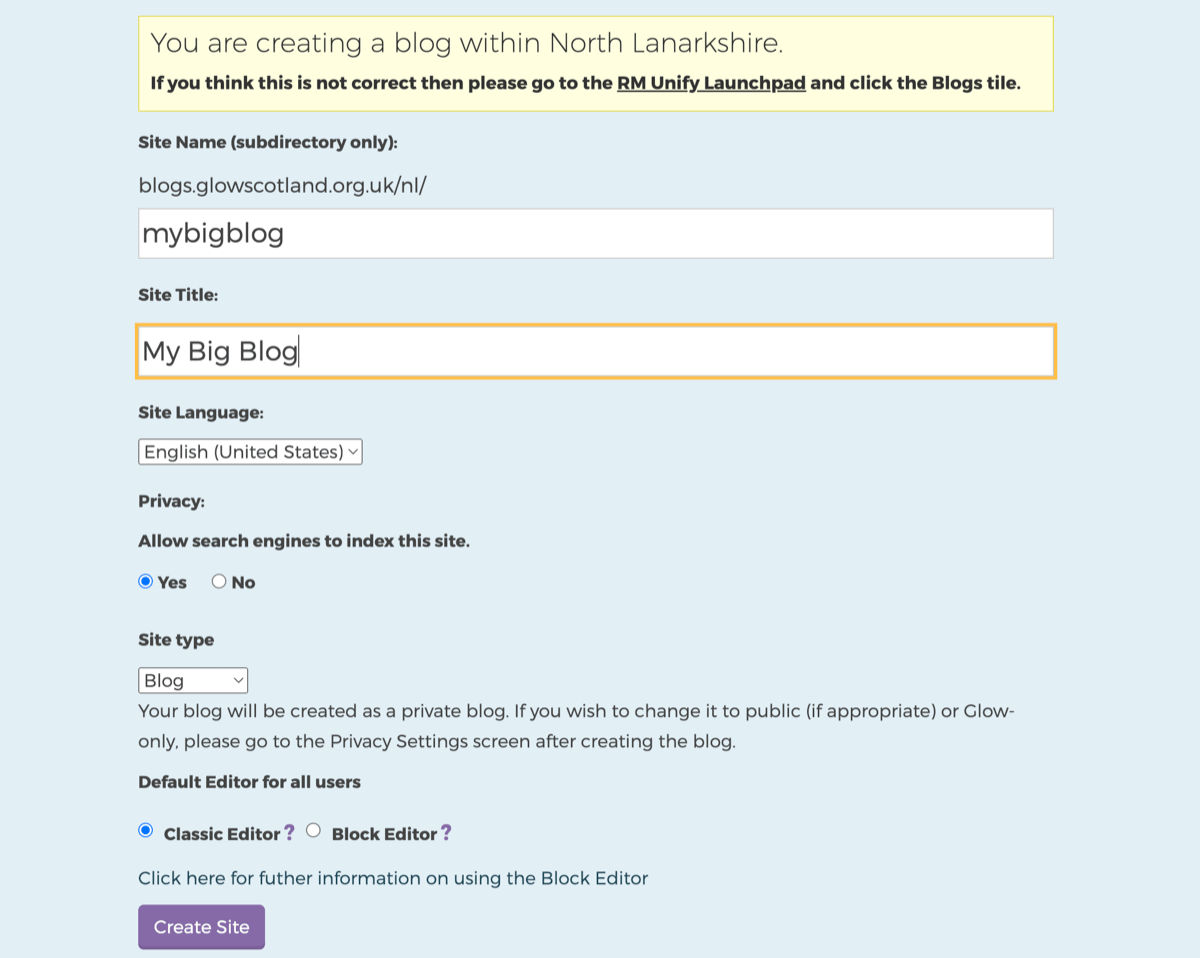
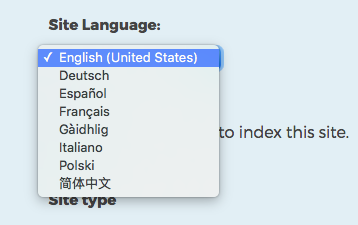
You can choose the site language, this will affect the backend of the blog and can be changed later.
Editor Choice
You can now choose if you want the blog to use the classic editor or the newer blocks editor. This setting can be changed at a later date. The Block editor has a modular design for flexible content creation. You can read more about the editor on our blocks page. A site created with the classic editor set, the default, will have the Twenty Fourteen theme. One created with the block editor set will have the Twenty Twenty-three theme. Themes can be easily changed at any time.
You can choose ifyou want a blog or an e-portfolio. setting the blog to be an e-portfolio just activates the e-Portfolio plugin automatically and adds the Profile widget to the sidebar of the blog. It will automatically set the classic editor and the Twenty Fourteen theme. This can be changed later.
When you are happy click Create Site.
If a site with that name already exists, you will be alerted:
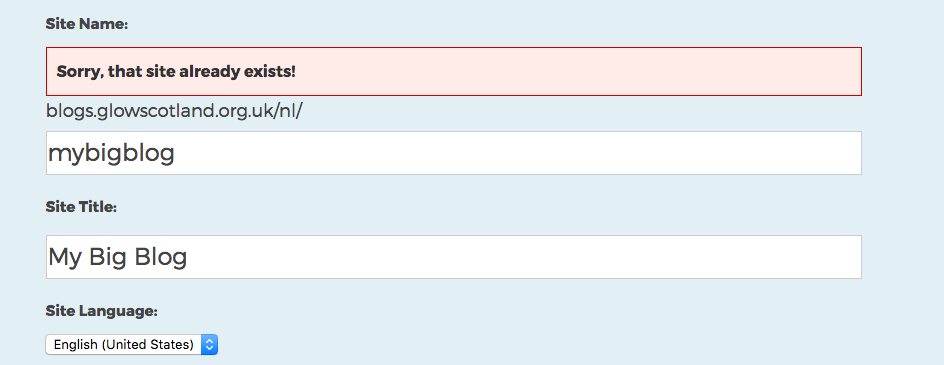
you can change the url (Site Name) and keep the title:
and click Create again.
Your blog will be created
The next page will let you know the blog has been created and give you links to the blog itself and the dashboard.
Remember that your newly created blog will be private and the only person that will be able to view it will be yourself unless you change the privacy settings.