Review

Welcome to the final post in my Digital Technologies reflection blog. What a journey it has been, I hope you have stuck around for it all. If you have made it to this final point, then I commend you. These past 10 weeks have been filled with joy, laughter and frustration but most importantly I have learned from it all. 

This post will recap everything I have learned across the Digital Technologies module. Everything that has gone well and everything that I have struggled with. This post will show the progress I have made using certain resources and how I have learned to use most applications for the first time. 

So, what have I learned? What went well and not so well for me? How can I develop my new skills to use them in a classroom? And what valuable knowledge have I gained from studying this module? As ever all questions and more shall be answered throughout the post. 
In the modern world digital technologies are becoming an ever-increasing part of life and therefor an ever-increasing part of education. As technologies develop so too does the digital learning requirements of children. Almost all children in the western world can be regarded as digital natives as they are all being born into a world of technology. These technologies are in constant development becoming more sophisticated and more complex in the process.  
As educators it can be seen as out duty to lay the foundations for young learners to understand the technological world we live in. However, there are educators who are digital immigrants and don’t fully understand how some technology can be used and it is therefore not used to its full potential. Is it anybody’s fault that not all educators are able to use modern digital technologies to their full potential? Not necessarily, we must educate our educators to also understand the everdeveloping digital world around them. It would be common sense to state that in order to teach a subject successfully, an educator must first have an understanding of said subject themselves. 

Throughout the digital technologies module, I have been educated to have an understanding of a variety of modern digital technologies and how these technologies can be used to enhance the learning within the classroom. The technologies I have learned about have been, programmable toys, e-books, qr codes, multimodal texts, movie making, animation, coding and gamesbased learning. All of the skills I have learned can be developed into useful classroom activities, and the skills I pass on to learners can set them on a path to a future in developing modern technology further. 

This module has come with its joys, successes and frustrations. I have experienced anxieties in using some technologies due to my personal lack of access to these platforms outwith the university. I can also respect that in a classroom situation there are likely to be learners who have the same anxieties as I did because maybe they don’t own an iPad or don’t know ow to use a mac because they have only ever used a windows computer. As an educator I must ensure that these learners are supported properly and ensure that they don’t feel any shame or embarrassment towards their situation, encouraging them to keep going. 
Once again, as the development of technology develops, so too does the curriculum and so must the educators. I thank you for your continued following this blog, I sincerely hope you have enjoyed reading and learning from my personal experiences. 

Signing off for the final time. 

Week 10, QR Codes

Welcome to the penultimate post in my Digital Technologies reflective blog. This is the last week of learning on this module. The time has flown past. I hope you have been enjoying reading every week and learning from my personal experiences and reflections.

This week we were working with QR (Quick Response) codes. The task was to develop an activity that could be used in the classroom centred around the use of QR codes. These are a good resource to promote active learning and outdoor learning.

So, how can QR codes aid in learning? What tasks can be done using QR codes? And do QR codes add any value to learning? All shall be answered in the very near future. Happy reading.

QR codes are similar to bar codes used in supermarkets, they are codes which can be scanned to provide information. In the supermarket bar codes are scanned in order to tell the computer the price of a product, whereas QR codes can be used in the place of hyperlinks. These codes can be displayed on posters to provide a quick link to a website. This is more efficient as the viewer of the poster does not have to make a general internet search for the website they are looking for as the QR code takes them straight to the website. Moreover, QR codes can be used to offer more information about something. Again, this could be present on a poster, the QR code could be scanned to give clarification on a term or to give more advanced information than what can be displayed on a poster. QR codes can be scanned by an app available on most modern mobile devices.

Since QR codes are usually found on posters we found it quite difficult to come up with an activity that incorporated these QR codes. Our main issue was developing an activity that didn’t appear to be adding the codes just for the sake of adding them, it was difficult to find a way to make the QR codes add to the learning experience and further develop the learning taking place.

Eventually we came up with an activity, after much googling and brainstorming for inspiration, we found online that the codes can be used to create a more realistic class shop. This gave us the idea to use the book creator app, which we used a number of weeks ago, to develop a shop puzzle book. Our book followed a story about a character who was throwing a party and had to go to the shop to buy the items on a shopping list. The list had different items on it, some more specific than others, which the learner, acting as the shopper, had to collect as they went through the shop. Each page had one item that was on the list and items which were similar. The learner would have to select the correct item that matched the item described on the shopping list, then they would have to scan the QR code to see how much that item cost. The shopper is expected to keep a running total of how much their shopping is going to cost. At the end of the book there are various totals and hopefully the learner has added their prices up correctly and they can scan to see which total is correct.

This task was designed around a classroom play shop but in the format of an activity booklet, this task would be good for any learner who has completed the main class learning activities with time to spare. This activity s primarily centred around mathematics and reinforces the learning of addition and the addition of money. This task also puts the learning into a realistic context, the format of a shop and spending money within a set budget.

As a team we found it was difficult to develop an activity that focused on a different curricular area other that mathematics. It appears that the team tends to default to a literacy or mathematics activity. However, despite our efforts to develop an activity centred around a different curricular area we still ended up doing a maths activity. This was because this was the best idea we had come up with, that didn’t seem to add the QR codes for the sake of adding them. We were getting concerned about time, so we made the decision to run with this idea in order to have a presentable activity at the end of the class. If we had more time, we may have been able to develop an idea that was centred around a different curricular area.

As a team we found it quite hard to fathom a practical use for the QR codes in the classroom. Most of the uses we came up with just appeared to add the QR codes just so they are there, we seriously struggled to understand how QR codes can be used to meaningfully develop learning.

Signing off for the second-last time.

Week 9, Games-Based learning

Welcome back yet again to my Digital Technologies reflection blog. First things first, Happy pancake day! We are so close to the end now, I hope this has been a fulfilling read for you.

Today we were using the very popular game Minecraft to discover how games-based learning can be used in the classroom. I was excited to be using Minecraft today as I used it a bit when I was younger, and it was fun to discover how it could be used in learning.

So, what place does games-based learning have in education? How is Minecraft a good game to fulfil this function? How simple would it be to regulate pupils use of the game in the classroom? And can games really be used to aid in learning and teaching? As ever all shall be answered in the course of this post. Happy reading.

Minecraft is a highly popular game which involves mining blocks and building. Everything in Minecraft is made out of cubes called blocks, there are no round objects within the game. Minecraft was a popular game when I was in primary school, so it surprised me to learn that its popularity has not dwindled in the time since. In my experience the game Minecraft was excellent at teaching its players about different elements of the earth and gemstones, as well as how products such as metals and fossil fuels are extracted from the earth and turned into useable products.

The task this week was to come up with a task that could be uses in the classroom centred around using games as a teaching platform. Using Minecraft was enjoyable as it took me back to my primary school days and it reminded me how much I used to enjoy playing it. We discovered that there is an education version of Minecraft designed to be used within a learning environment. So, this was encouraging as the game had been adapted to be classroom suitable. One of my initial concerns was how can a game such as Minecraft be used successful in learning when young learners could get very easily distracted with playing the game and not focus on the learning aspect.

Since our own learning was based around the use of Minecraft in the classroom, we had to create a list of ideas where Minecraft could be used in teaching and learning. These ideas were then to be presented to the rest of the class by each group, including the task, how it would be carried out and the learning involved. Each idea had to be focused on a different curricular area and be cross curricular where possible. We were given a planning grid document to write out our ideas and clearly link the learning.

The group I was working with came up with an idea centred around the creation of the learners dream house, or the recreation of a famous house, for example Buckingham palace or Burns Cottage. We devised that this task fits into the creative arts by allowing them to imagine and design their own dream house, within the capabilities of the game of course.

Furthermore, this task could possibly link into social studies by allowing the learners to take inspiration from their local area if they so wish. This project could be further adapted to the recreation of local landmarks, which could lead into further learning of the landmarks significance in their area and develop the learner’s knowledge of their local history.

Tho task would be appropriate for social studies and learning about local history.

SOC 1-03a

“I can use evidence to recreate the story of a place or individual of local historical interest”.

Providing learners have explicitly clear boundaries on the usage of the game within the learning environment then I see no reason how games such as Minecraft cannot be used to aid in learning. Furthermore, if a set structure can be created to highlight the development of learning, then it can be possible to make games a more significant part of education.

Signing off.

References:

Education Scotland. (2019) Curriculum for excellence Experiences and Outcomes [Online] Available: https://education.gov.scot/scottish-education-system/policy-for-scottish-education/policy-drivers/cfe-(building-from-the-statement-appendix-incl-btc1-5)/Experiences%20and%20outcomes [Accessed: 6th April 2019].

Week 8, Animation 2

Welcome back once again to my Digital Technologies reflective blog. Well done for powering through and making it this far. Hopefully you are enjoying reading my blog as much as I enjoy writing it. This week’s post will be a little bit shorter than the rest due to circumstances I shall explain shortly.

This week we were doing stop-motion animation part 2, a continuation from last week. The task was to produce a longer stop-motion animation which depicted a short story, a natural disaster or a mathematical problem. However as this was not an assessment task, so I took this opportunity to create my previously missed iMovie project on internet safety.

This blog post will talk further about how iMovie was used to create and edit my short internet safety film. So, what did I do? How easy was it to create? And is it something that could be done in a class? Don’t worry all shall be discovered, with a slight recap on my week 6 blog on the value movie making to young learners. Do enjoy.

The briefing for this task instructed to use iMovie as the editing software, however I don’t personally own any apple devices, which meant that I didn’t have any access to the iMovie software outside the university. Instead I used the “Windows movie maker” software as I have windows pc’s and I still came out with a very good result. I wasn’t sure at first if this would go against me, but I was informed that the lesson was to use an editing software to produce a short film. The iMovie software was recommended as that is available in the university’s facilities, however any other equivalent software was still suitable providing the task was completed to suit the outcomes.

As I was the only person who missed this input, I was somewhat at an immediate disadvantage I felt. I only had myself to work with so I couldn’t really film a live action film if the only cast and crew member was me. Without a team I only had my own ideas, I didn’t have someone to offer a counter proposal or develop my ideas. I had no crew to help share the work of editing meaning that all of the editing fell onto my shoulders, as well as the filming, directing and producing.

These issues made the task immediately more difficult, but I did not give in. Instead of a live action film I brought out the bendy people again and reused some of my previously learned stop motion animation skills. I was able to process and adapt my own ideas successfully to produce, in my opinion, a decent short film by constantly questioning my ideas and asking myself “is there a different way I can show this?”. Some of my ideas I had from the beginning and kept them as I first imagined all the way through the process. Whereas some ideas I came up with in the process of carrying out other ideas. Throughout the process I had a clear visual of where I wanted to take my film and how I wanted to tell the story to make a clear teaching and learning point.

Editing the film took a long time, partially due to the afore mentioned fact that it was just myself doing the editing, but since there was no physically filmed footage to put together, the film was primarily images. This meant that almost the entire film making process for me was just editing. It took me a full two weeks to edit the film, twice as long as the other teams, however it was not a competition and I still managed to complete the task to a high standard.

The film follows the story of one bendy person who shared all his personal information online on social media platforms. This led him to get into some problems with some unwanted interest from someone pretending to be someone who they are not. After telling the story of the character named Ryan, the film then moves onto the story of another bendy person who is very internet smart and keeps all her personal information a secret, I named this character Cassy. Cassy too gets some unwanted attention from the same person who spoke to Ryan, except Cassy handles the issue very differently from Ryan.

Throughout the film there are comments made which highlight what each character is doing right and wrong, these are to keep the audience informed of what is happening in each story and to plant the proverbial seed of how to conduct oneself on the internet. There are also some very clear key messages throughout the film which make explicitly clear to the viewer what not to do on the internet.

From the beginning of the task I knew that I wanted my film set to a piece of music. I knew exactly which piece I wanted and decided that the pictures would run in time to the music. The piece of music I used was “Nuvole Bianche” by Ludovico Einaudi. This is a favourite piece of piano music for me and I adapted the story to fit with the cadences of the music. This timing was a precise art which added to the time it took me to edit the film. This did result in the editing to become rather tedious at times however, the final result made this frustration worth it as the film has the visually and emotionally artistic effects I was aiming for.

I was intending for the music to enhance the story, starting light hearted and easy going. As drama unfolds in the story the music intensifies adding a sense of suspense and strong emotion. Then when things in the story return to calm, so too does the music become once again light hearted. The ending features some clear internet rules and the music fades out with a peaceful cadence to give the rules their dramatic stance and leave the audience feeling a sense of being on a journey.

Short films can be good at engaging young learners with their favourite characters, this can allow them to relate to their stories and learn from their experiences. Furthermore, a class project on making a short film can expand the learner’s knowledge in multiple areas as well as develop their skills and learn brand new skills in the process.

Please accept my apologies reader, I anticipated this post to be much shorter than this, do enjoy my internet safety short film.

[Click Here] to watch my short film on YouTube.

Signing off.

Week 7, Animation 1

Welcome back once again to my Digital Technologies reflection blog. How are you enjoying my reflections so far? If you have come this far then I’m proud, you don’t have much further to go. 

This week we were looking at stop-motion animation. This was part 1 of 2 on the animation lessons. We used the iPads and the iStop-Motion application to complete this task.  The task was to “play around” and “Tinker” with the stop-motion app and get a feel for how it works, producing a short stop-motion animation. The purpose of this task was to prepare us for next week’s task using the same application. 

So, what is stop-motion animation? How does it work? Is it feasible to use it in the classroom? Can stop-motion enhance the learning experience for children? As always, the answers are up ahead. Happy reading. 

Stop motion animation is a series of pictures played in a short time in order to give the appearance of movement. Object are placed and photographed, the objects are then moved ever so slightly and photographed again. This process is repeated many, many times until there are enough photographs to play and give the appearance of motion. Each picture is called a frame, there is a specific number of frames played in every second in order to give the appearance of motion. However, the difference in the picture taken for each frame has to be very small or the end result will turn out jumpy and not smooth. This means that creating a good stop-motion animation film takes a very long time, a lot of patience and a lot of “footering about”. 

This task once again was carried out on the iPads, by this time I’m starting to get less apprehensive about using the iPads since the apps we have been using have been fairly user friendly, the actual device for other functions still bewilders me. However, I was very proud at how my stop motion animation turned out.  

We were presented with a box with different coloured bendy people and my first idea was to have one of these people walking up to the camera and waving. I then encountered my first hurdle, the bendy people can’t stand up themselves without the aid of blue tack or being physically held, to overcome this I adapted my idea to have a bendy person sitting on the edge of the table and waving out to the audience (camera). This idea worked well and I decided to develop my film and add in another character. I got another bendy person and made them appear to slide along the desk to join the first character. They started off as friends and held hands, they then had their arms around each other and suddenly my idea escalated and took a darker turn. This turn or plot twist got a good laugh from classmates as it was quite unexpected. I will leave the video below for you to enjoy and I won’t spoil the ending. 

The process of making the stop motion animation was fun, frustrating and eventually it was tedious. It took a good 3 hours to make my short animation film. Granted at the beginning I had to learn how to use the app in the first place but after three hours of working on the project it became a chore. It was tedious as it was such a slow process moving the bendy people such a small amount.  

Another challenge I encountered was keeping the camera in the same position for every frame. Without this positioning, the pictures jump about as they’re not being taken from the same angle every time, thus adding another challenge in quality stop motion animation. However, all of the challenges and frustrations were worth it once I saw the final product, I was very proud at what I had created and achieved. 

Although I was proud and happy with my end result, I cannot ignore the length of time it took to create this work. This call into question the practicality of using such animation software in the classroom. Initially it would be an exciting project for young learners to undertake but they would very quickly get bored by the slow progress.  

To use stop-motion animation in the classroom t tach also does not appear practical to e, as it too has to be created and take the same long time. Teachers do not have time to spend days on end creating a short stop-motion animation that will only last in a 5-minute task. The work and the effort would not be beneficial in my opinion. 

Signing off.

Week 6, Movie Making

Welcome back once again to my Digital technologies reflective blog. I hope this blog has been enjoyable for you so far and I hope you have learned something from my reflections and also taken some value from them.

This we have been working on movie making using the iMovie editing software. The task was to create a short film to promote internet safety and how to properly conduct yourself on the internet as well as how to keep your information safe. However, due to a short illness I was unable to attend this input, so this task was completed at a later date.

So, how can short films be used to convey important information to children? Can short films be used to enhance the education of young learners? How can software such as iMovie be used in the classroom? Do short films have less learning value than a physical teacher? All of these will be answered before you know it.

Short films can be used to provide an alternative platform to learning in the classroom. Short movies can convey information in a way that teachers cannot. Short films incorporate multimodality of text. By the use of music and animation films can reach the subconscious mind of the audience which can allow them to get more value from the messages being conveyed. Furthermore, short films can add a cinematic effect to the classroom which engages the learners.

Like all films, short films can come in many formats, whether it is live-action, animation, stop-motion or any other form. Furthermore, learners favourite characters from television or games can be used to relay important information to them. These are characters that the learners already engage with so will take value in what they are saying and will be more likely to retain the information than if it was being taught by the class teacher.

Finding different ways to convey important information to young learners is essential as they need to be kept safe and taught how to live in a safe way. By using short film to support the teaching and learning of health and wellbeing learners can acquire the necessary knowledge to live happily and securely.

Health and wellbeing is an importand part of the curriculum with the following CfE E’s & O’s: HWB 0-05a / HWB 1-05a / HWB 2-05a / HWB 3-05a / HWB 4-05a

“I know that friendship, caring, sharing, fairness, equality and love are important in building positive relationships. As I develop and value relationships, I care and show respect for myself and others”.

All of the themes and topics in that experience and outcome could be taught through the means of short film. By using favoured characters and a realistic, relatable context the young learners will be able to connect with and learn from their situations. Connecting with characters is something short film can achieve that is much more difficult for a teacher. Therefore, using short film in the classroom has a valuable place when teaching young learners about certain values and behaviours.

However, all this being said, short films can only convey the messages stated within them. They cannot answer any questions the audience may have since there is nobody there to hear them and respond. Film also cannot give examples directly related to the young learners, which can cause the information to be generalised and non-specific. Moreover, concerns could be raised about exposing young learners to excessive screen time which could cause issues with their health.

The making of a short film could be a valuable task to do within a classroom. This would encourage the learners to gain new skills and have a small insight to what the film making process can be like. Furthermore, learners could be given a topic to make their film about resulting in them having to seek out new information about a subject. This would allow for learning to develop over multiple areas.

In conclusion short films have their place in the modern classroom for teaching some off the essential skills required to live safely. However, the input from a real person can be invaluable as experience is shared. There are potential risks in allowing young learners to have too much screen time watching film and not having enough active earning as well as not fully engaging in the material. Ultimately there has to be a balance between physical and virtual learning.

signing off.

References:

Education Scotland. (2019) Curriculum for excellence Experiences and Outcomes [Online] Available: https://education.gov.scot/scottish-education-system/policy-for-scottish-education/policy-drivers/cfe-(building-from-the-statement-appendix-incl-btc1-5)/Experiences%20and%20outcomes [Accessed: 6th April 2019].

Week 5, E-Books

Welcome back to my digital Technologies reflective blog. Here we are at week number 5 already, halfway through the module where does the time go? I hope You are still following alright and not yet bored.

This week we have been learning about E-books. Naturally my first thoughts went to my Kindle, then I feared I would have to write a novel and adapt the format to make it E-book reader compatible, how wrong was I. We used the Book creator app for this task, and it was a lot easier than I first anticipated and somewhat linked into the multimodal texts lesson.

So, what exactly is Book Creator and how does it work? How can E-books be used in the classroom? How does Book creator link with multimodal texts? What would a class of children gain by developing their own E-book? All my dear reader shall be revealed in due course.

This week’s task was to create an e-book by developing a readymade children’s book, featuring at least one hyperlink, one audio file and a video if possible. The book I chose to develop into an e-book was the Gruffalo in scots. This task was once again carried out using the iPads so again at first this made me apprehensive as they are not my strong point, however each app I have used on the iPads in this module has been simple to use, granted that’s the apps that are simple to use and not the iPad itself.


We were using the book creator application to carry out this task. The first thing I had to do was to read through the physical book, so I could remind myself of how the story goes and to familiarise myself with the scot’s version of the story. Once I had done this it was a case of selecting the key parts of the story to adapt into my interactive e-book version.

Following the story, I selected the key parts of the story and fond images online which illustrated them clearly. I recorded some animal sounds which I found online and imbedded these audio files into the book. After looking on the internet I found the official Gruffalo website so I thought this was the perfect website to link, using the link to directly go to the interactive activities section, thinking this would be a good addition at the end of the book after a child has read the whole e-book. Throughout the book there were questions asking about what was happening in the story and how the plot was developing as well as asking what the reader thought was going to happen next. By doing this the book has a more personal feel to it and the reader becomes more engaged with the text.

E-books can be useful in the classroom as they can encourage children to read more since the books are more interactive and provides something other than just sitting with a physical book and quietly reading it alone. By using e-books in the classroom children are encouraged to think more about what they are reading as well as make them more likely to enjoy reading which will in turn make them more inclined to engage with and enjoy books. Moreover, with the availability of the Book-Creator app it could potentially make a good classroom project to create an E-book of their own. This project would further actively engage children in reading to collect inspiration as well as allow them to be more creative.

Reading is an important part of life and developing reading skills can be a challenge, especially when books are becoming less popular. However, by using applications such as Book creator reading can become more appealing to children and they will be found to voluntarily pick up a book. This coincides with the CfE E’s & O’s for literacy: LIT 1-11a / LIT 2-11a

“I regularly select and read, listen to or watch texts which I enjoy and find interesting, and I can explain why I prefer certain texts and authors”.

Signing off.

References:

Education Scotland. (2019) Curriculum for excellence Experiences and Outcomes [Online] Available: https://education.gov.scot/scottish-education-system/policy-for-scottish-education/policy-drivers/cfe-(building-from-the-statement-appendix-incl-btc1-5)/Experiences%20and%20outcomes [Accessed: 6th April 2019].

Week 4, Coding

Welcome to week number 4 of my digital technologies reflective blog. Are you enjoying yourself learning along with me? I hope it hasn’t been too much of a drag for you.

This week we were learning about coding. At first this sounds scary if you are like me and started thinking about binary and complicated algorithms. However, some wonderful people invented Scratch and Scratch Junior, which makes coding a breeze.

So, how can you make coding easy to understand? What exactly is scratch Junior? What makes Scratch Junior so good? And why should we be teaching primary school children how to code in the first place? All of which will be answered throughout the blog. Do enjoy.

Today we were working on coding using Scratch junior. I was apprehensive at first for a couple of reasons. First of all, we were using iPads, I personally do not own an iPad and any experience I have had in using one has not been particularly positive, as I get frustrated easily with them. Second of all I was apprehensive of using scratch junior as I have used the full version of Scratch in secondary school and I experienced a level of difficulty in using it so I wasn’t sure how well I would handle using this junior version, however I was pleasantly surprised.

Scratch and Scratch Junior are programs which make it easy to learn basic coding for games. Each command it broken up into easy to understand chunks which can be connected together like a jigsaw.

The layout of scratch junior is fairly simple and easy to navigate. Thankfully we were directed to the online guide with instructions on how to work the app and featured demonstrations of how to operate certain functions. This made using the application much easier and meant that I didn’t waste time trying to figure out how to do a simple task.

The task we were assigned was to design a game, which was focused around the development of literacy. My game was aimed at the early level and was primarily focused on putting words into alphabetical order. The character also spelled out each word as it was presented which added an extra layer as the game could be adapted to use the children’s weekly spelling words, which can enhance their learning of them.

I found relevant Curriculum for Excellence Experiences and Outcomes that fit for both the technologies aspect and the literacy aspect of my scratch development. For technologies I found TCH 0-14a

“I understand that sequences of instructions are used to control computing technology.”

I also found for technologies TCH 0-15a

“I can develop a sequence of instructions and run them using programmable devices or equivalent.”

For the literacy aspect I found ENG 0-12a/LIT 0-13a/LIT 0-21a

“I explore sounds, literacy and words, discovering how they work together, and I can use what I learn to help me as I read and write.”

One of my highlights of using the iPads today was the discovery of a Bee-Bot app, which I did enjoy a good 10 minutes or so playing with. This I found was a very good app as it was a continuation of the previous learning involving the physical Bee-Bot robot and the bee-bot emulator.

Digital technologies are becoming an ever-increasing part of the modern world and therefore an increasingly important part of the modern curriculum. This means that it is essential that digital technologies are taught in schools. Furthermore, coding is an essential part of digital technology meaning that it is essential that children have some understanding of how to code as this will set them in good stead for the future. As technologies develop so too will the curriculum for teaching digital natives.

Signing off.

References:

Education Scotland. (2019) Curriculum for excellence Experiences and Outcomes [Online] Available: https://education.gov.scot/scottish-education-system/policy-for-scottish-education/policy-drivers/cfe-(building-from-the-statement-appendix-incl-btc1-5)/Experiences%20and%20outcomes [Accessed: 6th April 2019].

Week 3, Multimodality

Welcome back once again to my Digital Technologies reflection blog. I hope you are enjoying my weekly updates and are learning something new every week with me.

This week we were learning about multimodality and multimodal texts. This concept was not new to us as we have done work on this subject within another module, but this time looking at it from a different perspective. The program we used this week was Activinspires Activprimary, found in most classrooms in both primary and secondary schools.

So, what does multimodal texts mean? What do they do? How can they be used in the classroom? And what makes Activprimary a valuable platform for teaching using multimodal texts? As always all shall be answered very soon, so sit back and enjoy the read.

Multimodality and multimodal texts in my understanding are different digital formats in which information can be presented. This can be done in the format of a PowerPoint presentation, short film or audio clip etc.

Today’s task was to practice using the Activprimary software to create a small interactive lesson which could potentially be used in a classroom. This activity was done by using 2011 apple MacBook’s, I was not very sure about this as I struggle to use the desktop macs let alone the laptop macs. I feel that Apple has tried to make their devices as opposite to Windows devices as much as physically possible. This is frustrating as I have only ever used Windows devices and I have to go against all of my computing instincts; however, I managed to persevere and make a success of the task. The short lesson I created took inspiration from last week’s Beebot activity, with the learning centred around shape, position and movement, specifically movement and directional language.

My first few slides discussed positional language, whether this be a recap on prior learning or an introduction to the topic would be at the discretion of the teacher. There are questions throughout which display an arrow, under this arrow there are option boxes with different directions in them. The participant then has to select the correct direction which matches which way the arrow is pointing. Upon selecting the correct answer a chime sounds.

After this section, the slides or flipchart goes on to discuss co-ordinates. Unfortunately, I did not have time to complete this section as I had to spend most of my time figuring out how to work the MacBook. Although, I do still have a vision for the next section of the learning. There will be a grid on the screen with letters and numbers marked on the relevant axis and the user is asked to place different objects in specific places given in the form of co-ordinates. Again, this task would be suitable for the introduction to co-ordinates or to reinforce new learning.

Activprimary allows for lessons to be more interactive in the classroom. Instead of sitting in front of a PowerPoint being projected onto a screen, the children can use the smart board to complete activities that are directly related to the current learning, enhancing the learning through an activity that will be remembered more easily by learners.

However, we discovered that in developing a flipchart presentation for use in the classroom it takes a lot of work and a long time to develop something substantial. We found that it took us almost 3 hours to develop tasks that were completed by our peers in under 5 minutes, which calls into question, is all the time and effort that goes into making these interactive resources worth it for only 5 minutes classroom time?

I think Activprimary will be a very useful tool in the classroom as it has many fantastic functions that can make learning interesting and more interactive for children. However, there is a lot of work that has to go into creating interactive resources on this program which can take sometimes hours. These many hours of effort going into creating resources and engaging tasks just for them to be through in a matter of minutes, it doesn’t deem worth the volume of effort.

By using multimodal texts learners will have their digital learning enhanced. According to the Scottish Government Digital Learning is:

“learning which is supported and enhanced by a range of digital technologies and approaches. It can focus on one or more particular technologies. It may focus on classroom use or anywhere-anytime access. It may include features and approaches that are used to develop independent learners”.

Throughout this input I questioned why we had to use the MacBook laptops? I was unsure if the big desktop macs do not have Activprimary on them or whether they are incapable of running the application, I felt that I should find this out. After emailing to ask this very question, I have learned that the Activprimary application used to be available on the desktop macs but is no longer installed. I believe discussions are now going to take place in order to find a way to move forward with this issue as I believe that it would be much easier to not have to wheel through the trolley with the old MacBook’s in it when there are perfectly capable machines already there.

*Please note the flipchart was not able to be uploaded, the file type is not permitted for upload by this platform*

Signing off.

References:

Scottish Government (2016) Enhancing Teaching and Learning through the use of Digital Technology: A Digital Learning and Teaching Strategy for Scotland. [Online] Available: https://www.gov.scot/publications/enhancing-learning-teaching-through-use-digital-technology/ [Accessed 9th April 2019]

Week 2, Programmable Toys

Welcome to week number 2 of my Digital technologies blog. I do hope that you enjoyed last week’s blog and have come back for more.

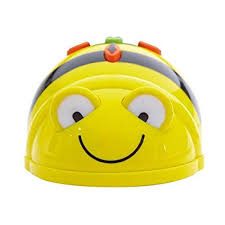
This week we were learning about how programmable toys can be used in the classroom and how they can be used across multiple curricular areas. The specific programmable toy we were using was the Beebot. (see picture below).

So, what exactly is a programmable toy? What does it do? How can it be used to aid in the learning of children? And what is a Beebot? Well, all shall be answered in the very near future, so I’d keep reading if I were you.

A programmable toy is exactly what it sounds like, it is a toy which can be easily programmed to follow a set of instructions. For example, the Beebot programmable toy is a robot that looks like a bee which can be programmed to follow directions. The beebot has arrow buttons on the top (forwards, backwards, left and right) which can be pressed in a sequence to give the robot its instructions. Once the user presses the go button the robot follows the sequence as programmed into it. The Beebot can hold up to 40 commands at a single time.

Today’s task was to create a Map for the Beebot to run on. This map had to contain squares 15cm x 15cm, since that is how far the Beebot travels for each instruction. Furthermore, the map had to have a theme linking into at least two or more curricular areas, as to show a degree of learning from using the Beebot and to highlight that it is more than a toy.

The map I created had a very simple design in the form that it was a simple blank 5×4 grid. With this grid I made up some instruction cards with different co-ordinates on them and printed out some pictures which were all bee-related. My map was centred around using co-ordinates and developing problem solving skills therefore my map weas centred around mathematics, as well as fitting with technologies and early programming. For the use of my Beebot map to be successful then some prior learning is required. Pupils must have a basic understanding of co-ordinates and how to reference/identify them on a grid.


My Beebot map fits into the Curriculum for Excellence (CfE) experiences and outcomes (E’s & O’s) for mathematics and technologies. I discovered that there are no E’s & O’s for problem solving in CfE. This surprised me until I was informed that problem solving is no longer a separate curricular area and is integrated across the curriculum hence why there are no specific E’s & O’s for problem-solving.

The E’s & O’s I found which relate to my Beebot map are from first level and are as follows:

Position and movement: (MTH 1-17a)

“I can describe, follow and record routes and journeys using signs, words and angles associated with direction and turning.”

Programming: (TCH 1-15a)

“I can demonstrate a range of basic problem-solving skills by building simple programs to carry out a given task, using an appropriate language.”

The way in which my map is used is, the “player” selects a card from the pile. They place the Beebot on the starting square and place the objects on the squares as indicated on the card, there could be between 1 and 6 objects on the map at any one time depending on the difficulty of the card. Beebot is then programmed to pass over every square on the map which does not have an object on it, each square can only be passed over once. This is the problem-solving challenge in my map, however, I accidentally discovered that the path the Beebot must follow to cover all free squares is much more obvious when there are more objects on the map. This seems obvious when it is thought about however it was a revelation when I first noticed it as I was concentrating more on the co-ordinates.

My map didn’t take particularly long to create as it was just a simple grid, the objects were created easily as they were pictures printed from the computer the difficulty came when trying to come up with different bee-related objects. The instruction cards took the longest time to create as I had to figure out different paths for the Beebot to follow which fitted the brief of how my map is used. After much trial and error mixes with plenty of scribbling I developed a decent number of instruction cards.

The Beebot can be used to introduce the concept direction and directional language or to support the learning of directions. However, the Beebot can be used for so much more based on the map that is used. My map supports the learning of directions and the learning of co-ordinates as well as developing the child’s problem-solving skills. Each programmable toy has a different function and can support learning in different ways and developing different skills. Programmable toys provide a simple platform for introducing learners into programming which can lead on to more advanced programming such as coding and potentially a future in software development.

Signing off.

References:

Education Scotland. (2019) Curriculum for excellence Experiences and Outcomes [Online] Available: https://education.gov.scot/scottish-education-system/policy-for-scottish-education/policy-drivers/cfe-(building-from-the-statement-appendix-incl-btc1-5)/Experiences%20and%20outcomes [Accessed: 6th April 2019].