
An aspect of mathematics that I love teaching is coordinates. There are incredible resources available that really engage the children – most notably the ‘plot and draw’ type activities in which the children are given a series of coordinates to plot and then join up in a dot-to-dot type exercise. The resulting image gives great satisfaction to the children as it provides a very instant visual self-assessment for the children to reflect on how well they did: additionally, they often love colouring it in!
Recently, though, in teaching coordinates I have not started as I normally would using sheets and paper, I have started with the below PowerPoint and Scratch coding. The Scratch interface uses coordinates as a means of locating/moving sprites. By far, the simplest way to teach children to code sprites to move is for them to understand what it means to alter a sprite’s ‘x’ or ‘y’ position.
One of the first lessons that I do with children, and indeed the lesson that I have started P4 and P5 with this week has been to learn about a sprite’s position and alter it using coordinates. This PowerPoint serves as my introduction to the lesson and then we learn to code our own sprites to move using what we have learned. I find that teaching coordinates after doing this lesson is much easier, as children have a much deeper understanding of how the ‘x-axis’ and ‘y-axis’ function.
Let’s quickly look at the brand-new Scratch 3.0 interface so that you too can get your children coding sprites to move ‘when’ buttons are pressed. I will be leading a CPD session in February in using Scratch 3.0 as part of the upcoming GameJam training – more info to come soon!
***
Below is an image of the scratch interface as soon as you press the ‘create’ button. On the left hand side you have three tabs:
- ‘code’, where you can locate all of the blocks with which you code your sprite. You can drag these blocks into the blank space to the right of the blocks menu and link them together to create scripts.
- ‘costumes’, where you can edit the look of your sprite/backdrop depending on which you have selected.
- ‘sounds’ where you can add and edit sounds.
For this lesson, we will only be working with the code tab.
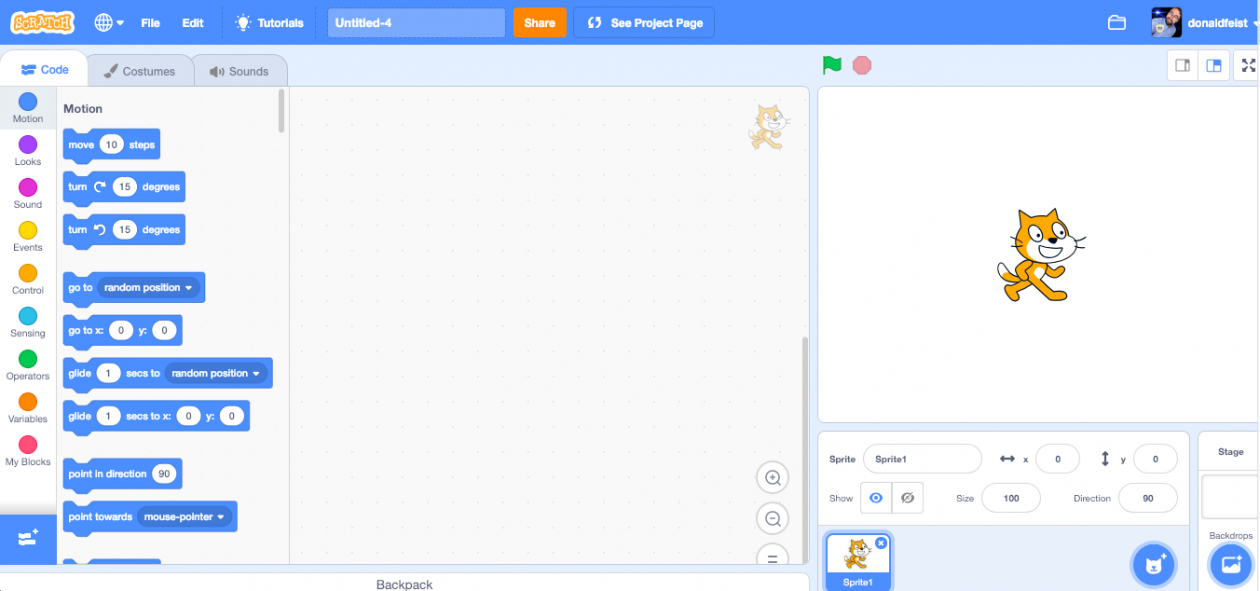

Left: Your children can change the size of their sprite and view its position on the x and y axis with the sprite editor section. They can also select a sprite (by clicking on its icon), delete a sprite (by clicking on the (x) within the sprite icon box, or select a new sprite in the sprite selection menu.
***
Hopefully this mini-IDL link will come in handy over the coming weeks/terms.
As always, if you have any questions or suggestions for future blogs, do not hesitate to get in touch via twitter: @mrfeistsclass
Have a great week,
Donald